Table of Contents
Advertisement
Advertisement
Table of Contents

Related Manuals for Panasonic DMR-E100H


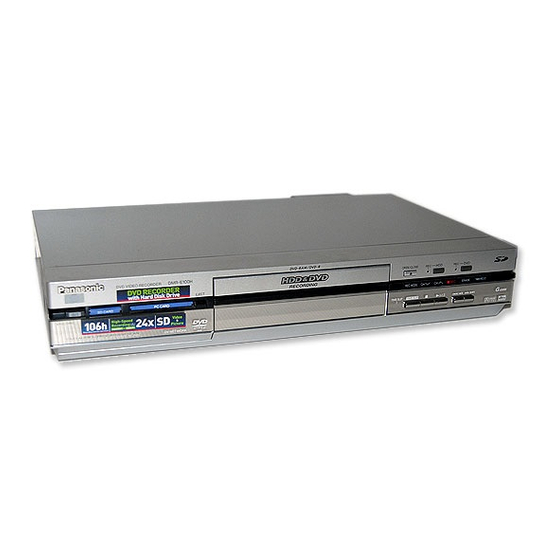
Summary of Contents for Panasonic DMR-E100H
-
Page 1: Operating Instructions
DVD Video Recorder Operating Instructions DMR-E100H Model No. (L2) Before connecting, operating or adjusting this product, please read these instructions completely. Please keep this manual for future reference. HARD DISK DRIVE Web Site: http://www.panasonic-europe.com RQT7103-B... -
Page 2: Table Of Contents
∫ Before Use Contents •Top Menu ..................... 38 Before Use •Auto-Play Select................... 38 •Finalize....................38 Contents ......................2 Using the DIRECT NAVIGATOR ............... 39 Warning and Important Information .............3 •Selecting programmes to play.............. 39 Dear Customer ....................4 •About the programme list ..............39 Checking the Accessories ................4 DIRECT NAVIGATOR ................ -
Page 3: Before Use
∫ Before Use ª Notes on these instructions Warning and Important Information ≥Company names, product names and all other names in these instructions are the trademarks or registered trademarks of their respective corporations. CAUTION! ≥These operating instructions describe operations mainly using THIS PRODUCT UTILIZES A LASER. -
Page 4: Dear Customer
A 5-ampere fuse is fitted in this plug. Should the fuse need to be replaced please ensure that the Direct Sales at Panasonic UK replacement fuse has a rating of 5-amperes and it is approved ≥Order accessory and consumable items for your product with by ASTA or BSI to BS 1362. -
Page 5: Control Reference Guide
∫ Before Use Control reference guide Remote control Page (1) DVD on/off button (DVD, Í) ..... . 16 ≥To switch the unit from on to standby mode or vice versa. In the standby mode, the unit is still connected to the mains. -
Page 6: Batteries
∫ Before Use Batteries ≥Do not use rechargeable type batteries. Opening the rear cover Closing the rear cover Do not; ≥mix old and new batteries. Slide it with your finger. ≥use different types at the same time. Slide into place. ≥heat or expose to flame. -
Page 7: The Unit's Display
∫ Before Use The unit’s display Rotating (REC): recording Rotating (REC, PLAY): Rotating (PLAY): playing Stopped (REC): recording paused Chasing play, Simultaneously recording Stopped (PLAY): play paused and play Stopped: Stopped: Play stopped without the resume Play stopped with the resume function function (10) -
Page 8: Tv Operation
C (for the remote control code No.01) Panasonic TV 1) Switch [DVD, TV] to “TV”. Your Panasonic TV uses one of 3 different methods for switching 2) Press [AV]. between TV reception and the AV input(s). Follow the steps on the... -
Page 9: Discs
∫ Before Use Discs Discs you can use ≥On DVD-Audio, DVD-Video and Video CD, the producer of the material can control how these discs are played. This means that you may not be able to control play of a disc with some operations described in these operating instructions. Read the disc’s information for details. The features you can use with the different types of discs are as follows. -
Page 10: Features
Dolby Digital (pages 56, 66) incompatible players. This unit can play Dolby Digital in stereo ≥We recommend using Panasonic’s DVD-RAM, which is (2 channels). Connect an amplifier with a confirmed the compatibility with this unit. built-in Dolby Digital decoder to enjoy ≥The aspect ratio of the recorded images will be the same as that... -
Page 11: Hdd (Hard Disk Drive)
≥You can also dub SD VIDEO (MPEG2) recorded by other extreme change in a air conditioning or cooled air directly equipment such as Panasonic video cameras of the future impacts the unit). model. (page 34) #In the above situation, with the power off, let the unit adjust to °... -
Page 12: Still Pictures/Sd Video (Mpeg4)
∫ Before Use Still pictures/SD VIDEO (MPEG4) ª Still pictures that can be displayed/saved ª About SD VIDEO (MPEG4) ≥This unit can play DCF° ≥Compatible formats: SD-Video format conforming (ASF) compliant JPEG and TIFF files taken on Video: MPEG4 conforming/Audio: G.726 conforming (Monaural) a digital camera. -
Page 13: Connections (With Scart Leads)
≥This is necessary for Download from TV with Q Link function. into your unit’s memory if you connect the unit to your TV with a ≥If you use Panasonic TV with RGB output capability and want to fully wired 21-pin Scart cable (not supplied). Features similar to Q receive RGB signals, connect this unit to the AV1 socket on the TV. -
Page 14: Connections (Without Scart Leads)
∫ Before Use Connections (without Scart leads) If you do not have any scart leads and your TV is not Q Link type, you can connect your DVD Recorder to a TV and Satellite Receiver using RF leads. Using this connection method may however be difficult to obtain a clear picture from the Satellite Receiver. For this reason it is not recommended for inexperienced users. -
Page 15: Connections (With S-Video Cable)
∫ Before Use Connections (with S-Video cable) Connections and preparations for a TV with S-Video socket. The conventional video sockets of DVD Recorder’s output (input) a combination of the luminance signal (Y) and colour signal (C) which are recorded on the disc. The S (Separate)-Video socket allows separate transmission of signals in order to obtain clearer pictures. The connection with S-Video Cable can also be used for playback of any disc. -
Page 16: Auto Setup (With Q Link Functions)
Hint: Download in progress, please wait. switched on, and ≥If you use a Panasonic Q Link TV and perform the operation step RETURN : to abort the downloading of 1 above, starting the downloading of the setup data will the setup data automatically display the “Download”... -
Page 17: Auto Setup (Without Q Link Functions)
∫ Before Use Auto Setup (without Q Link Functions) ≥Auto Setup starts. This takes about 5 minutes. Auto Setup automatically tunes all available stations and sets the ≥(If connected to your TV using the RF lead only) DVD Recorder’s clock to the current date and time. Select an unused channel pre-set on your TV and tune it to [1] Switch the TV on. -
Page 18: Video Plus+ Codes For Satellite Receivers/Cable Tv
∫ Before Use Video Plus+ Codes for Satellite Receivers/Cable TV [5] Use [3, 4, 2, 1] to select the channel This unit is not designed to control (switch on or change channel) your satellite receiver or Cable TV box, however, it can be taught or AV input that is to be used for recording to recognise Video Plus+ Codes for Satellite stations. -
Page 19: Selecting Between Hdd And Dvd Drives
∫ Before Use Selecting between HDD and DVD Inserting discs drives [1] Press [<, OPEN/CLOSE] on the main unit to open the tray. This unit incorporates an HDD and a DVD drive. Select the drive (HDD/DVD) you intend to use—you may carry out You can insert a cartridge or non-cartridge disc. -
Page 20: Playback
∫ Playback When a menu screen appears on the TV [DVD-A] [DVD-V] [VCD] Í, DVD [VCD] ShowView DIRECT TV REC INPUT SELECT ShowView DIRECT TV REC INPUT SELECT Press the numeric buttons to select an item. [0] )[5]. e.g.: “5”: [1] )[5]. -
Page 21: Quick View (Play T1.3)
∫ Playback ≥You can turn this sound off if you want to (page 60, “Sound”— Quick View (Play t1.3) “PLAY t1.3 & Audio during Search”). [HDD] [RAM] (Only with Dolby Digital) Slow-motion play You can increase the speed of play DVD-RAM DVD-RAM [HDD] [RAM] [DVD-R] [DVD-A] (Motion picture parts only) [DVD-V]... -
Page 22: Selecting An Amount Of Time To Skip-Time Slip
∫ Playback Changing audio [HDD] [RAM] [DVD-A] [DVD-V] [VCD] You can change the audio being played. During play VIDEO Plus+ DIRECT TV REC INPUT SELECT Press [AUDIO] to select the audio type. [HDD] [RAM] [VCD] (page 65) DVD-RAM Numeric LR#L#R PLAY Buttons VOLUME... -
Page 23: Marking Places To Play Again-Marker
∫ Playback Marking positions Marking places to play again — [1] Use [2, 1] to select an asterisk (¢) MARKER and press [ENTER]. [HDD] [RAM] [DVD-R] ≥One marker is added. You can mark up to 999 points on a disc to return to later. When marking positions 11 and above [DVD-A] [DVD-V] [CD] [VCD] [MP3] [HDD] [RAM] [DVD-R]... -
Page 24: Using Menus To Play Mp3 Discs
∫ Playback Note ≥Sometimes the counter may not display correctly during fast forward/rewind of VBR recorded MP3. ≥If you play a MP3 track that includes still picture data, it will take some time before the music itself starts playing and the elapsed VIDEO Plus+ DIRECT TV REC INPUT SELECT time will not be displayed during this time. -
Page 25: Recording
∫ Recording Playing while you are recording TIME SLIP [HDD] [RAM] You can play the programme being recorded to check that it is being recorded correctly. You can also check parts that were Hint ≥Sound is not output while fast-forwarding. recorded previously. -
Page 26: Recording Tv Programmes
∫ Recording ªTo enjoy SD VIDEO (MPEG4) programmes [HDD] ≥If you set “MPEG4 Rec Mode” (page 59) to “SF”, “F”, “N” or “E” in DVD, TV advance, you can record SD VIDEO (MPEG4) on HDD simultaneously with the recording of the programme. The Í, DVD recorded SD VIDEO (MPEG4) programmes can be dubbed when dubbing them on SD Memory Card in “High Speed”... -
Page 27: Flexible Recording Mode (Fr)
∫ Recording ≥You can record up to 250 programmes on HDD, 99 on a disc. ≥When recording bilingual audio with connecting to a (1 programme may be recorded continuously for 6 hours at its decoder or a digital receiver maximum.) Select the audio type either “M1”... -
Page 28: One Touch Recording
∫ Recording Direct TV Recording This function allows you to immediately start recording the same programme that you are viewing on the TV. The programme position selected on the unit automatically VIDEO Plus+ DIRECT TV REC INPUT SELECT changes to that of the TV programme that you are viewing on the SKIP SLOW/SEARCH DIRECT TV REC... -
Page 29: Using The Functions Window
∫ Recording PLAY Using the FUNCTIONS window Disc play: (page 20) Preparation PLAY Switch [DVD, TV] to “DVD”. RESUME PLAY Start play from the point you (page 21) About the FUNCTIONS window stopped play: RESUME PLAY Most of the features and functions of this unit can also be TOP PLAY controlled with icons. -
Page 30: Timer Recording
∫ Timer Recording If the programme TIMER 35:39 LP 4:00 LP Remain RECORDING is correct 12:57:00 15. 7. TUE Disc Name Date Start Stop Mode PDC space Press BBC 1 20:00 21:00 Í, DVD New Timer Programme [ENTER]. [5] Press VIDEO Plus+ DIRECT TV REC INPUT SELECT VIDEO Plus+... -
Page 31: Relief Recording
∫ Timer Recording ªPDC Function ªRelief Recording If a TV programme starts earlier or later from original schedule, In relief recording: recording start and stop can synchronize with the actual When the recording drive is set to “DVD” for timer recording, the broadcasting. -
Page 32: Auto Renewal Recording
∫ Timer Recording Note ≥If a programme set for Auto Renewal Recording is write protected (page 40), the programme will not be overwritten. Instead, the programme set for recording will be saved as a separate programme, and then will be overwritten in the next VIDEO Plus+ DIRECT TV REC INPUT SELECT Auto Renewal Recording. -
Page 33: Advanced Operations
≥When playing back programmes and play lists on HDD, they can be dubbed to DVD-RAM or DVD-R. ([HDD] # [RAM] [DVD-R]) Panasonic SD Memory Card ≥When playing back SD VIDEO (MPEG4) on HDD or DVD-RAM, ≥Not all of the capacity is available for recording or dubbing they can be dubbed to SD Memory Card. -
Page 34: Dubbing Programmes, Play List Or Sd Video
≥Dubbing a play list will create a programme. ≥When you dub SD VIDEO (MPEG2) recorded by the equipment [ENTER]. [5] Select items such as the future Panasonic video cameras with “High Speed Dubbing List (MPEG2)” on this unit, the SD VIDEO (MPEG2) is converted to for dubbing. - Page 35 ∫ Advanced Operations ªTo add or remove from the dubbing list While the screen in step 2 is displayed While the Dubbing List (step 5-(1)) is displayed Use [3, 4] to select “Start Dubbing” 1) Use [3, 4] to select the dubbing list and press [1]. and press [ENTER].
-
Page 36: Entering Titles
∫ Advanced Operations After the titling screen appears Use [3, 4, 2, 1] to select the character you want to enter and press [ENTER]. VIDEO Plus+ DIRECT TV REC INPUT SELECT ≥You can enter the following characters. Enter Title Numeric Enter Title DVD-R_ Buttons... -
Page 37: Disc Information
∫ Advanced Operations DISC INFORMATION [HDD] [RAM] [DVD-R] e.g., DVD-RAM e.g., DVD-R [1] Press [HDD] or [DVD] to select the Prog No. Free 0 : 42 (SP) Prog No. Free 0 : 42 (SP) DISC DISC Used 0 : 58 Markers Used 0 : 58... -
Page 38: Format
RETURN RETURN ≥If DVD-R recorded by other Panasonic recorder is finalized by this unit, the background may not be changed to the picture selected on “Top Menu”. ≥You can change the picture displayed on the Top Menu. (“Change thumbnail”, page 41) -
Page 39: Using The Direct Navigator
∫ Advanced Operations Using the DIRECT NAVIGATOR Selecting programmes to play [1] Press [HDD] or [DVD] to select the playback drive. (page 19) [2] Press [DIRECT NAVIGATOR]. VIDEO Plus+ DIRECT TV REC INPUT SELECT DIRECT NAVIGATOR Numeric Name Date Time Title Edit 13/ 8 WED... -
Page 40: Direct Navigator
∫ Advanced Operations DIRECT NAVIGATOR ≥When the programme is protected (page 40), you can only access “Properties” and “Protection”. Release the protection to access other items. [HDD] [RAM] [1] Press [HDD] or [DVD] to select the -/-- SKIP SLOW/SEARCH playback drive. (page 19) ShowView DIRECT TV REC INPUT SELECT... -
Page 41: Partial Erase
∫ Advanced Operations 1 Partial Erase [8] Select “Exit” with [3, 4] and press [HDD] [RAM] The specified parts of the programme are erased irretrievably [ENTER]. when you use this procedure. [9] Select Check the programme carefully before erasing. Partial erase “Erase”... -
Page 42: Creating Play Lists
∫ Advanced Operations Creating play lists To find the desired points You can take the following operation. ≥Playback – Press [PLAY/k1.3]. ≥Cue/review – Press [6, SLOW/SEARCH], [5, SLOW/ ShowView DIRECT TV REC INPUT SELECT ShowView DIRECT TV REC INPUT SELECT SEARCH] while playing. -
Page 43: Using Play List
∫ Advanced Operations Using PLAY LIST [HDD] [RAM] PLAY LIST Preparation Create play lists first (page 42). [1] Press [HDD] or [DVD] to select the playback drive. (page 19) - - - - - - No. Date Total Scene Title Edit [2] Press [PLAY LIST]. -
Page 44: Using Play List To Edit Programmes
∫ Advanced Operations Using PLAY LIST to edit programmes [1] Press [HDD] or [DVD] to select the playback drive. (page 19) [2] Press [PLAY LIST]. STOP PAUSE PLAY/x1.3 [3] Use [3, 4] to select the Play Scenes ShowView DIRECT TV REC INPUT SELECT play list you want to edit DIRECT NAVIGATOR... -
Page 45: Pl Copy
∫ Advanced Operations [8] Press 1 Re-edit PLAY LIST No.3 PLAY LIST [ENTER] at Scene No. Re-edit [5] Select “Re- the end 3 13/ 8 0:02 004 Dinosaur Back PLAY LIST edit” with Edit Start Move Re-edit Erase point of the [2, 1] and Next 001 00:00.19... -
Page 46: Using Display Menus
∫ Advanced Operations Using DISPLAY menus Common procedures [1] Press [DISPLAY]. Disc Soundtrack Î Digital 2/0ch Play VIDEO Plus+ DIRECT TV REC INPUT SELECT Subtitle Picture Audio channel Sound Numeric Menu Item Setting Buttons VOLUME [2] Select the menu with [3, 4] and press CANCEL [1]. -
Page 47: Play Menu
∫ Advanced Operations 1 Play menu [HDD] [RAM] [DVD-R] [DVD-A] [DVD-V] [CD] [VCD] [MP3] Repeat play (See below) You can play a programme, play list, chapter, title, or track Disc Repeat Play repeatedly. Play †††††††††† Marker 1s10 Picture Marker (page 23) Sound You can mark points on a disc to return to later. -
Page 48: Playing Still Pictures
∫ Advanced Operations Playing still pictures Inserting/Removing the SD/PC Card [SD] [CARD] ªPC card slot Only insert or remove the SD/PC card after turning the Inserting the card Hold the edge of the card and insert until it fits into place. unit off. -
Page 49: Displaying Still Pictures (Album)
∫ Advanced Operations 1 Displaying still pictures (Album) [SD] [CARD] [HDD] [RAM] ªTo display still pictures one by one You can display a list of the still pictures or display pictures one by Use [3, 4, 2, 1] to select a still picture and press [ENTER]. one from any folder existing on the card, HDD or DVD-RAM. -
Page 50: Editing Still Pictures
∫ Advanced Operations Editing still pictures Common procedures [1] Select the still picture folder for edit (step 1–6 of “Selecting the folder DIRECT NAVIGATOR PLAY LIST (Input)”, page 48). TOP MENU MENU [2] Use [3, 4] to select desired item and 3, 4, 2, 1 ENTER press [ENTER]. -
Page 51: Copy All Of Card
∫ Advanced Operations 1 Copy all of card [SD] [CARD] ≥All still pictures are copied, and the screen shown in step 4 JPEG Copy all of card You can copy the all reappears. Copy all contents of the card to Copy from PC CARD For your reference... -
Page 52: Others
∫ Advanced Operations Others While stopped Press [FUNCTIONS]. (page 29) [2] Select “JPEG” with [3, 4, 2, 1] and press [ENTER]. ShowView DIRECT TV REC INPUT SELECT ShowView DIRECT TV REC INPUT SELECT [3] Select JPEG PC CARD 100CDPFP “Others” Numeric Buttons with [4] and... -
Page 53: Editing Sd Video (Mpeg4) Programmes
∫ Advanced Operations Editing SD VIDEO (MPEG4) programmes You can organize the recorded programme by erasing or other Preparation ≥Release protection (disc # page 37, cartridge # page 69, operation. card # page 11). ≥Check available cards (page 11). ≥Inset a disc or card (pages 19, 48) [3] Check if “Input”... -
Page 54: Using Play To Edit Programmes
∫ Advanced Operations Using Play to edit programmes [1] Select the desired Erase programme for edit (step Enter Title 1–6 of “Play”, page 53). Properties [2] Press [1] so the submenu Protection VIDEO Plus+ DIRECT TV REC INPUT SELECT appears. INPUT SELECT [3] Use [3, 4] to select desired item and CH, W, X... -
Page 55: Recording From An External Device
∫ Advanced Operations Recording from an external device Preparation For your reference ≥Press [HDD] or [DVD] to select the recording drive. (page 19) ≥Select the “TV System” (PAL/NTSC) of the programme you wish ≥Release protection (disc # page 37, cartridge # page 69). [RAM] to record (page 61). -
Page 56: Connecting External Equipments
∫ Advanced Operations Connecting external equipments First of all, please disconnect AC mains leads of all units which you are going to connect with before connecting and disconnecting cables. ª Enjoying more powerful sound Refer to the relevant pages for details. Enjoying 5.1-channel surround Digital connection SET UP—... -
Page 57: Connecting A Decoder, Satellite Receiver Or Digital Receiver
∫ Advanced Operations Connecting a decoder, satellite receiver or digital receiver Connect the mains lead of decoder, satellite receiver or digital receiver to an AC mains socket. ≥If you connect an other equipment with RGB output capability to the AV2 socket on this unit, the output signal of the equipment must be set to RGB when you have set “AV2 Input”... -
Page 58: Various Setting
∫ Various Setting Entering a password (Ratings) You can limit play of DVDs unsuitable for some audiences, children, for example. Play and changes to the settings are not possible unless you enter a password. (page 59) VIDEO Plus+ DIRECT TV REC INPUT SELECT When setting ratings The password screen is shown when you select levels 0 to 7. -
Page 59: Summary Of Settings
∫ Various Setting Ratings (page 58) Summary of settings You can set a limit on DVDs unsuitable for some audiences (e.g. children). You cannot change the settings and play the limited This description shows the initial settings for this unit. See DVDs unless you enter a password. - Page 60 ∫ Various Setting Underlined items are the factory presets. Bilingual Audio Selection Select the type of audio in bilingual broadcasting. (page 27) ª Picture ≥When recording/dubbing to DVD-R Rec Resolution ≥When recording/dubbing in LPCM or MPEG4 Select the picture sharpness when recording. [M1] [M2] [Fine] [Normal] ≥The bilingual audio cannot be switched in this unit in the following...
-
Page 61: Tv Aspect
∫ Various Setting Underlined items are the factory presets. Norm (4:3) TV Settings (DVD-Video) You can select how to reflect the image on the TV, when you ª Display watch 16:9 images (DVD-Video) on 4:3 TV. On-Screen Messages [Pan & Scan] [Letterbox] Choose whether to show on-screen messages automatically or Pan &... -
Page 62: To Manually Adjust The Audio Recording Level
∫ Various Setting Remote Setting Panasonic DVD players and recorders use the same remote control system so they may respond unintentionally to a command from this remote control. Change the code on this unit and its VIDEO Plus+ DIRECT TV REC... -
Page 63: Clock Settings
∫ Various Setting Clock Settings [3] Select Usually, the units Auto Setup or Download function automatically SETUP adjusts the clock to correct time. Remote DVD 1 “Settings” Under some reception conditions, however, the clock cannot be Clock tab with [3, Owner ID set automatically. -
Page 64: Channel Settings
∫ Various Setting Channel Settings While stopped Press [FUNCTIONS]. (page 29) ShowView DIRECT TV REC INPUT SELECT [2] Select “SETUP” with [3, 4, 2, 1] and press [ENTER]. [3] Select “Tuning” tab with [3, 4] and Numeric Buttons press [2, 1]. VOLUME CANCEL SETUP... -
Page 65: Auto-Setup Restart, Download
∫ Various Setting 1 Auto-Setup Restart, Download [5] Select “Yes” with [2] and press You can use the SETUP menus to start Auto Channel setting. [4] Select “Auto-Setup Restart” or [ENTER]. “Download” with [3, 4] and press 1 Auto-Setup Restart - Auto Setup restarts. -
Page 66: Maintenance And Handling
If the disc is dirty, wipe with a damp cloth and then wipe dry. ≥Do not use discs printed with label printers except the product by Moisture may condense on discs after they are brought inside from Panasonic. the cold. ≥Do not use discs that are badly warped or cracked. -
Page 67: Hard Disk (Hdd)
∫ Helpful Hints Frame and field MPEG2/MPEG4 (Moving Picture Experts Group) Frames are the still pictures that go together to make a moving They are standards for colour motion pictures to be effectively picture. A frame consists of 2 fields. compressed or expanded. -
Page 68: Error Messages
∫ Helpful Hints The unit detects whether a station is transmitting PDC only during the tuning process. PDC (Programme Delivery Control) If PDC is introduced or discontinued by a station you will need to Programme Delivery Control adjusts the start and stop time of a re-tune the unit before it becomes aware of this. - Page 69 ∫ Helpful Hints On the TV Error messages Causes and solutions Page ≥You haven’t inserted a disc. Correctly insert a disc that this unit can play. No disc. ≥The disc is upside down. If it is a single-sided disc, insert it so the label is facing ≥The unit cannot record on the disc you inserted.
-
Page 70: Troubleshooting Guide
∫ Helpful Hints Troubleshooting guide Before requesting service, check the below items. If you have doubt about the check points, or if the remedies indicated in the chart do not solve the problem, consult your dealer. Power ≥Insert the AC mains lead securely into the household AC outlet. No power ≥The unit is hot (“U14”... - Page 71 ∫ Helpful Hints Displays Page ≥Go to Display in the SETUP menus and change the display’s brightness with “FL The display is dim. Display”. ≥The time on the unit’s display and the remaining recording time on the screen may be The recording time display, the –...
- Page 72 ∫ Helpful Hints Recording, timer recording and dubbing Page ≥You haven’t inserted a disc or the inserted disc is not compatible. Insert a disc the unit Cannot record. can record onto. ≥The disc is unformatted. Format the disc so this unit can record on it. ≥The write protect tab on the cartridge is set to “PROTECT”.
-
Page 73: Specifications
∫ Helpful Hints Specifications Compatible Media Power supply: AC 220– 240 V, 50 Hz (PC Card Slot): A PC Card adaptor conforming to PC Card Power consumption: 48 W Standards, ATA Flash PC Card, PC Card Adaptor (SD Memory Card, xD-Picture Card, Recording System: DVD Video Recording Standards (DVD-RAM) Microdrive, MultiMediaCard, CompactFlash,... -
Page 74: Index
∫ Helpful Hints Index ª A ª M Audio ..................22 Manual tuning ............... 64 Auto Renewal Recording ............. 32 Marker .................. 23 Auto Setup ............. 16 MENU ................... 20 ª C MP3 ..................24 MPEG ................... 60 Chasing play ................ 25 MPEG2 ................. - Page 76 RQT7103-B Matsushita Electric Industrial Co., Ltd. F0703Fa1083 Web Site: http://www.panasonic.co.jp/global/...