Table of Contents
Advertisement
Quick Links
o o o o o o o o o o o o o o o o o o o o o o o o o o o o o o o o o o o o o o o o o o o o o o o o o o o o o o o o o o o o o o o o o o o o o o o o o
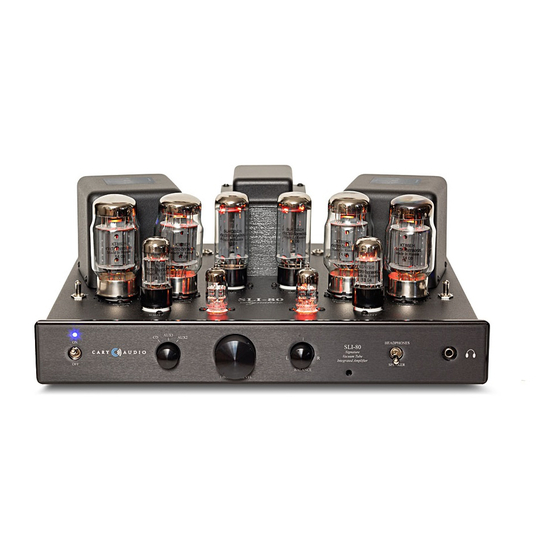
SLI 80
Integrated Stereo Amplifi er
NOTE: Before installing your new component, please read this manual carefully
as it will inform you of the product specifi cations, proper installation and correct
operating procedures for your unit. Also included in this manual are guidelines
on how to service and care for your new Cary Audio Design product.
Advertisement
Table of Contents

Related Manuals for Cary Audio Design SLI 80


Summary of Contents for Cary Audio Design SLI 80
- Page 1 NOTE: Before installing your new component, please read this manual carefully as it will inform you of the product specifi cations, proper installation and correct operating procedures for your unit. Also included in this manual are guidelines on how to service and care for your new Cary Audio Design product.
-
Page 3: Table Of Contents
CONTENTS _________________________________________________________ Introduction........................3-4 Specifications ........................4-5 Features..........................6 Installation ..........................7 Operation ..........................8 Service and Care ......................... 9 Troubleshooting Guide ....................10 Charts & Drawings ....................11-12 Warranty ........................13-14... -
Page 4: Introduction
For the technically minded, a review of the circuit in your new SLI 80 is in order. Your new SLI 80 integrated stereo amplifier operates in a class A/B-1 mode utilizing a negative fixed bias supply. The KT- 88/6550 output tubes are configured in push-pull. -
Page 5: Specifications
This is the result of circuit techniques, which eliminate any discernible crossover notch at low levels, and also contributes to the freedom from listening fatigue. The SLI 80 will draw you in even further as you realize how lucid and utterly uncolored neutrality reveals delicate nuances in the sound stage. - Page 6 POWER TRANSFORMERS 1 - EI laminated, 200% duty cycle ............................................OUTPUT TRANSFORMERS 2 - EI laminated, Silicon Impregnated ............................................RESISTORS 1% metal film ............................................CAPACITORS Polypropylene ............................................POWER SUPPLY CAPACITORS 2 - 1200 μF @ 450 VDC 6 - 10 μFD @ 400 VDC film & foil ............................................
-
Page 7: Features
NEVER REMOVE / INSERT AC LINE CORD WHEN THE UNIT IS ON. WARNING MAKE NO ATTEMPT TO PUT THE SLI 80 AMPLIFIER IN SERVICE WITHOUT THE BOTTOM PLATE ATTACHED - CONTACT WITH VOLTAGE IN THE SLI 80 CAN BE FATAL. -
Page 8: Installation
SLI 80 clear of books, paper or other equipment to protect against overheating! DO NOT place your SLI 80 in a closed bookcase - overheating will damage the amplifier! Allow 8 to 10 inches above the unit for proper ventilation. -
Page 9: Operation
OPERATION ________________________________________________________ Signal input connection is made via the input jacks on the rear of the SLI 80 located on the rear panel. The interconnect cables from the output of the CD player, tuner, etc. can be any convenient length your set-up requires. -
Page 10: Service And Care
Tube Replacement If it becomes necessary to replace the tubes in the SLI 80 amplifier, a matched quartet set of output tubes of the same brand should be used. A new tube kit is available from Cary Audio Design. You should get a few years or more from the output tubes with everyday usage and many, many years of use from the 6922 &... -
Page 11: Troubleshooting Guide
TROUBLESHOOTING GUIDE ________________________________________ SYMPTOM CAUSE REMEDY Hum or "Buzzing" through Ground Loop Install 2-pin adapter on speakers A.C. cord to float the Ground Intermittent or poor connection of Replace interconnect interconnect ground "Popping or Spitting" noise Noisy tube If noise is in one channel, through the speaker swap one section of tubes at a time until the noise swaps channels. -
Page 12: Charts & Drawings
Insert meter plug into bias jack. • Adjust for 75mA reading on DC current meter. • Re-adjust to 75mA after SLI 80 is warmed up for 10 minutes. • Remove plug and enjoy the music! • Note: Bias is factory preset; Bias should be reset when installing replacement KT-88 / 6550 tubes. - Page 13 Tube Placement Chart...
-
Page 14: Warranty
UNITED STATES LIMITED WARRANTY ______________________________ Cary Audio Design warrants to the original United States purchaser for use in the United States, that Cary Audio Design vacuum tube or solid state power amplifiers, surround sound processors or preamplifiers shall be free from defects in parts or workmanship for three (3) years from the date of the original purchase. -
Page 15: Warranty
Cary Audio Design. Under no circumstances is Cary Audio Design liable for incidental or consequential damages. Any implied warranties imposed by law terminate one (1) year from the date of purchase. - Page 16 CARY AUDIO DESIGN 1020 Goodworth Drive, Apex, NC 27539 phone 919-355-0010 fax 919-355-0013 www.caryaudio.com o o o o o o o o o o o o o o o o o o o o o o o o o o o o o o o o o o o o o o o o o o o o o o o o o o o o o o o o o o o o o o o o o o o o o o o o o...