GoVideo VR3845 User Manual
Dvd recorder+vcr
Hide thumbs
Also See for VR3845:
- User manual (66 pages) ,
- Specifications (2 pages) ,
- Quick start (2 pages)
Table of Contents
Advertisement
Quick Links
Advertisement
Table of Contents
Troubleshooting

Related Manuals for GoVideo VR3845


Summary of Contents for GoVideo VR3845
- Page 1 ������ ������ ����� ��� �������� � ���...
- Page 2 �������� �� ������ ��� ���� �� �������� ����� �� ��� ������ ������ �� ����� ����������� ����� ������� ����� ��������� �� ��������� ������� ��������� ���� ������ �� �������� �� ����� ��� ���� �� ��� �������� �� ����������� ��������� ������� ������ ��� ��������� ��������� ���� ���...
-
Page 3: Important Safety Instructions
Congratulations! Congratulations on your purchase of this VR3845 DVD Recorder+VCR. We know you will enjoy this product for many years to come. In case service is required, please take a moment to write down... -
Page 4: Table Of Contents
Table of Contents 1 - Welcome Unpacking / 7 Compatible Media / 7 • Playback and recording / 7 • Playback only / 7 Front Panel / 8 Front Panel Display / 9 Rear Panel / 10 Remote Control / 11 2 - Connections Antenna/Basic Cable Connections / 13... - Page 5 Other Reference Information / 61 • Restrictions on Video Recording / 61 • What is ‘CPRM’? / 61 • Copyright Information / 61 • Progressive Scan Notice / 61 Warranty / 62 • GoVideo Limited Warranty / 62 Index / 63...
-
Page 6: Welcome
Welcome This Chapter provides a basic introduction to the DVD Recorder+VCR, including an overview of the front panel, rear panel, and remote control. DVD Recorder+VCR User’s Guide... -
Page 7: Unpacking
Unpacking Check to make sure the following items are included with your DVD Recorder+VCR: ������ ������� ��� ��������� �� ����� ����� ��������� ����� Compatible Media The following media can be used in your DVD Recorder+VCR: Playback and recording • DVD-RW (VR and Video mode) •... -
Page 8: Front Panel
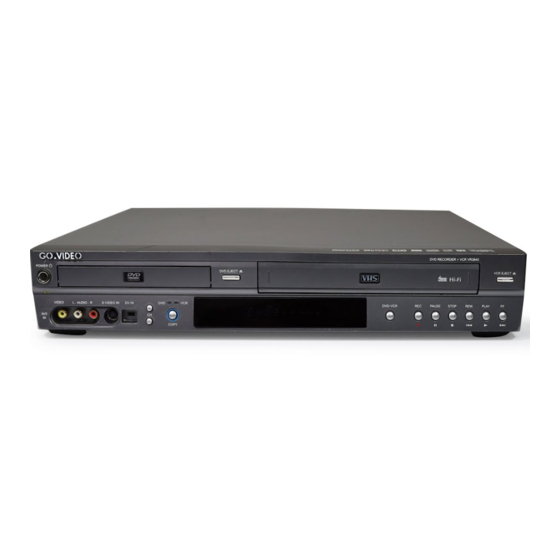
Front Panel Front panel overview: � � � � � � �� 1 POWER button 2 DVD deck 3 DVD EJECT button 4 VCR deck 5 VCR EJECT button 6 AUDIO/VIDEO 2 IN jacks 7 S-VIDEO IN jack 8 DV IN jack 9 CHANNEL /... -
Page 9: Front Panel Display
Front Panel Display Front panel display overview: � � � � � � � � � �� �� �� �� �� �� SVCD �� When lit, indicates: 1 Current disc type 2 Timer recording in progress 3 Recording in progress 4 Program playback enabled 5 Current title number 6 Disc loaded... -
Page 10: Rear Panel
Rear Panel Rear panel overview: � � � 1 ANTENNA IN jack 2 AC Power cord 3 OPTICAL DIGITAL AUDIO OUT jack 4 S-VIDEO OUT jack 5 AUDIO/VIDEO 1 IN jacks 6 AUDIO/VIDEO OUT jacks DVD Recorder+VCR User’s Guide � � � � � � ��... -
Page 11: Remote Control
Remote Control Remote control overview: � � � � � � � � � �� �� �� �� 1 POWER button �� EJECT button 2 DVD button VCR button INPUT button 3 0-9 buttons 4 TITLE button COPY button 5 REW/FF buttons PREV/NEXT... -
Page 12: Connections
Connections This Chapter shows you how to connect the DVD Recorder+VCR to your TV and other home theater components. • • DVD Recorder+VCR User’s Guide For basic connections, see pages 13-15. For advanced connections, see pages 16-19. -
Page 13: Antenna/Basic Cable Connections
Antenna/Basic Cable Connections If you are using an antenna or basic cable TV service: Connect the RF coaxial cable from your antenna or cable wall jack to the rear panel of the DVD Recorder+VCR as shown. Connect the DVD Recorder+VCR to your TV; see page 15. ��... -
Page 14: Cable Box/Satellite Receiver Connections
Cable Box/Satellite Receiver Connections If you are using a cable box or satellite receiver: Connect an RF cable from the wall jack to the cable box/receiver. Connect an RF cable from the cable box/receiver to the DVD Recorder+VCR. Connect the DVD Recorder+VCR to your TV; see page 15. �����... -
Page 15: Basic Tv Connections
Basic TV Connections If your TV has standard RF or AV inputs: Connect the supplied RF cable from the DVD Recorder+VCR to your TV as shown. Connect the supplied audio/video cables from the DVD Recorder+VCR to your TV as shown. Press POWER to turn on the DVD Recorder+VCR. -
Page 16: Enhanced Video Options
Enhanced Video Options If your TV has S-Video or Component/Progressive Scan Video inputs, you can enjoy superior picture quality (DVD playback only): Connect an S-Video cable OR set of Component Video cables from the DVD Recorder+VCR to your TV as shown. Select the S-Video or Component Video input on your TV to view the DVD Recorder+VCR. -
Page 17: Enhanced Audio Options
Enhanced Audio Options If you have a stereo system or amplifier/receiver, you can enjoy superior sound quality: Connect left/right audio cables from the DVD Recorder+VCR to your stereo system or analog receiver as shown. Connect a digital coaxial or optical cable from the DVD Recorder+VCR to your digital audio receiver as shown. -
Page 18: Rear Av Connections
Rear AV Connections To view and record from an external device, such as a VCR, connected to the rear AV 1 inputs: Connect standard audio/video cables from the outputs of the external device to the inputs of the DVD Recorder+VCR as shown. Press INPUT until AV1 appears on the screen. -
Page 19: Front Av Connections
Front AV Connections To view and record from an external device, such as a camcorder or video game, connected to the front panel AV 2 or DV inputs: Connect audio+video cables or S-Video+audio cables from the outputs of the ex- ternal device to the inputs of the DVD Recorder+VCR as shown. -
Page 20: Setup
Setup This Chapter allows you to customize the DVD Recorder+VCR to meet your system requirements and personal preferences. DVD Recorder+VCR User’s Guide... -
Page 21: Setup Menu Overview
Setup Menu Overview The Setup menu allows you to customize your DVD Recorder+VCR. Choose from these categories: • General Settings – see page 22 • Language Settings – see page 25 • Audio Settings – see page 26 • Parental Lock Settings – see page 27 •... -
Page 22: General Settings
General Settings Tuning Band Specifies whether the DVD Recorder+VCR is connected to an antenna or cable TV source. Press SETUP. Select “GENERAL” > “Tuning Band” . Choose from the following: TV - Select if the DVD Recorder+VCR is connected to an antenna. CATV - Select if the DVD Recorder+VCR is connected to a cable TV source. -
Page 23: Auto Clock Set
General Settings Auto Clock Set Sets the clock automatically whenever the DVD Recorder+VCR is turned off. Press SETUP. Select “GENERAL” > “Clock Set” > ”Auto” . Choose from the following: Time Zone - Set your local time zone to Auto (default), Hawaii, Alaska, Pa- cific, Mountain Central, or Eastern. -
Page 24: Progressive Scan
General Settings Progressive Scan Activates the Progressive Scan output to your TV. Press SETUP. Select“GENERAL”>“Progressive Scan”. Turn Progressive Scan on or off. • Only activate Progressive Scan if your TV is capable of receiving a Progressive Scan signal. NOTE: • If your enable Progressive Scan accidentally, the picture will be distorted.To reset the unit, first remove any disc or tape in the unit,... -
Page 25: Language Settings
Language Settings On-Screen Display Language Sets the default language for the Setup menu and On-Screen Displays. Press SETUP. Select “LANGUAGE” > “Display Menu” . Select your preferred OSD language (English, Français, Português, or Espa- ñol). Disc Menu/Audio/Subtitle Languages Sets your preferred language for DVD disc menus, audio soundtracks, and subtitles. -
Page 26: Audio Settings
Audio Settings Dolby/DTS/MPEG Sets the format of the digital audio signal from the Coaxial and Optical jacks. Press SETUP. Select “AUDIO” > “Dolby Digital” , “DTS” , or “MPEG” . Choose from the following options: PCM – Select if the unit is connected to a 2-channel digital stereo amplifier. -
Page 27: Parental Control Settings
Parental Control Settings Parental Control Rating Blocks playback of rated DVDs based on their content. Not all discs are rated. Press SETUP. Select “LOCK” > “Rating” . Enter your password using the 0-9 keys. • If this is your first visit, you will be prompted to enter and verify your “New Password”... -
Page 28: Record Settings
Record Settings Disc Record Mode Sets the default quality for DVD recording. Press SETUP. Select “RECORD” > “Disc Record Mode” . Choose from the following: XP (best) – 1 hour/disc SP (better) – 2 hours/disc LP (good) – 4 hours/disc EP (fair) –... -
Page 29: Disc Settings
Disc Settings Initializing Discs Whenever you load a blank recordable disc, the DVD Recorder+VCR will initialize the disc (prepare it for recording): DVD-R - DVD-R discs are always initialized in Video mode.They can be recorded only once. DVD-RW - DVD-RW discs can be initialized in VR Mode or Video Mode. -
Page 30: Finalizing Discs
Disc Settings Finalizing Discs Finalizing a disc enables it to be played on other DVD players or computers equipped with DVD-ROM drives. DVD+RW discs are finalized automatically.To finalize a DVD+R, DVD-R, or DVD-RW disc: Press SETUP. Select “DISC” > “Finalize” . Select “OK”... -
Page 31: Playback Control (Pbc)
Disc Settings DVD+RW - Prevents editing, erasing, or overwriting of existing recordings. Allows regular recording. DVD-RW (VR mode) - Prevents edit- ing, erasing, and regular recording. DVD-R/DVD-RW (Video mode) - Not compatible with Disc Protect feature. Playback Control (PBC) PBC stands for Playback Control and refers to special menus and navigation features available on some Video CDs. -
Page 32: Operations
Operations This Chapter shows you how to use the most com- mon features of the DVD Recorder+VCR, including playback, recording, copying, and editing. • • • • DVD Recorder+VCR User’s Guide For playback features, see pages 34-38. For recording features, see pages 39-43. For copying features, see page 44. -
Page 33: Basic Deck Controls
Basic Deck Controls Use these keys for basic control the DVD Recorder+VCR: POWER Press the POWER but- ton to turn the DVD Recorder+VCR on and off. Press the DVD button when you want to control the DVD deck. Press the VCR button when you want to control the VCR deck. -
Page 34: Basic Dvd/Vcr Playback
Basic DVD/VCR Playback Playing a DVD/VCD To play a DVD or Video CD: Press DVD to control the DVD deck. Turn your TV on and select the video input connected to the DVD Recorder+VCR. • If the unit is connected to an audio system, turn it on and select the ap- propriate input. -
Page 35: Special Dvd Playback Options
Special DVD Playback Options Use these keys during DVD playback: Sets two points (A and B) to repeat in a continuous loop. Press once to set point A. Press twice to set point B. Press three times to cancel. AUDIO Displays alternative soundtracks/audio formats on the DVD (if available). -
Page 36: Special Vcr Playback Options
Special VCR Playback Options Use these keys during VCR playback: AUDIO Sets tape audio to HiFi, Left, Right or Mono. CLEAR Resets the current tape counter position to 0:00:00.To automatically go to tape counter posi- tion 0:00:00, press RETURN while the tape is in Stop mode. -
Page 37: Audio Cd/Mp3 Playback
Audio CD/MP3 Playback Playing Audio CDs or MP3/ WMA Files To play an Audio CD, or MP3/WMA files on a recordable CD/DVD: Load your disc in the disc tray. • The “Music” menu appears. Music Title - Audio CD Track 1 Track 2 Track 3 Track 4... -
Page 38: Jpeg Playback
JPEG Playback Viewing JPEG Files To play JPEG files on a recordable CD or DVD: Load your disc in the disc tray. • The “Photo” menu appears. Photo - CD Folder 01 Folder 02 Folder 04 Folder 05 Select MARKER Mark Use the arrow keys to select an image (or folder), then press ENTER. -
Page 39: About Recording
About Recording About Disc Types/Formats • DVD-R, DVD+R, DVD+RW discs are always formatted in “Video” mode— the same as pre-recorded DVD-Video discs. Once finalized, you can play DVD-R, DVD+R, or DVD+RW discs in most regular DVD players. • DVD-RW discs can be formatted in “Video Recording (VR)”... -
Page 40: Basic Recording
Basic Recording Recording from TV To record a TV show to a DVD or VHS tape: Turn on the DVD Recorder+VCR and load a recordable disc or tape. • Make sure your TV input is set to view the DVD Recorder+VCR. Press DVD to control the DVD deck, or VCR to control the VCR deck. -
Page 41: Recording From External Devices
Recording From External Devices Recording from a Camcorder/Other Device To record from a camcorder or other external device: Connect your external device to the front or rear inputs; see pages 18-19. Press INPUT repeatedly to view: AV1 - For a device connected to the rear AV1 Input. -
Page 42: Timer Recording
Timer Recording Setting a Timer Recording You can program up to 8 recordings up to a month in advance.To program a timer recording: Before you begin, make sure the clock is set correctly; see page 23. Insert a recordable disc or VHS tape. Press TIMER to display the “Timer Record”... -
Page 43: Timer Recording Notes
Timer Recording Timer Recording Notes • The Timer indicator lights on the front panel display when the DVD Recorder+VCR is ready for timer re- cording. • If the Disc and Tape indicator are blinking, either no disc or tape is loaded, or the loaded disc is not re- cordable. -
Page 44: One Touch Copy
One Touch Copy Copying VCR to DVD To copy a VHS tape to DVD: Insert the tape you wish to copy in the VCR deck and close the tray. Insert a recordable disc in the DVD deck. Press VCR to control the VCR deck. Find the place on the tape from which you want to start recording (using the PLAY, FF, and REW... -
Page 45: About Editing
About Editing Editing Terminology The following are editing terms used by this DVD Recorder+VCR: Title – A recording (such as a TV show) on a DVD. Each time you start a new recording, a new title is created. Chapter – Sections of a title.You can have chapters created automatically every 5 or 10 minutes during record- ing;... -
Page 46: Editing Options
Editing Options Adding Chapter Markers +R, +RW, -RW (VR) You can divide your titles up into chapters by adding chapter markers during playback or recording. Press DISC MENU/LIST. Select a recorded title and press PLAY. During playback, press ADD CHAP to add a chapter marker at the current playback position. -
Page 47: Making A New Playlist
Editing Options Making a New Playlist -RW (VR) You can create a custom playlist of the contents of your recorded discs.You can then edit this playlist without disturbing the original contents of the disc. Press DISC MENU/LIST. Select the first title (or chapter) you want to add to your new playlist and press ENTER. -
Page 48: Deleting Titles/Chapters
Editing Options Deleting Titles/Chapters +R, +RW, -R, -RW (Video), -RW (VR) There are two places to delete titles and chapters: Playlist Menu - If you delete a title or chapter from the “Playlist” menu, it is only removed from the playlist; the title/chapter remains in the “Original”... -
Page 49: Naming A Title
Editing Options Naming a Title +R, +RW, -R, -RW (Video), -RW (VR) To name a recorded title (up to 32 characters): Press DISC MENU/LIST. Select the title you wish to name and press ENTER. Select “Rename” or “Edit” > “Rename” and press ENTER. -
Page 50: Splitting A Title
Editing Options Splitting a Title To split a title into two parts: Press DISC MENU/LIST. Select the title you wish to split and press ENTER. Select “Divide” and press ENTER. • The “Title Edit-Divide” menu ap- pears. Title Edit Divide TITLE 2 12/07 12:00:00... -
Page 51: Hiding A Title Or Chapter
Editing Options Hiding a Title or Chapter +R, +RW To hide a title or chapter from playing (without deleting it from the disc): Press DISC MENU/LIST. Select the title or chapter you wish to hide and press ENTER. Select “Hide” and press ENTER. Title List DVD+RW TITLE 1... -
Page 52: Overwriting A Title
Editing Options Overwriting a Title To overwrite an existing title with a new recording: Use the CH/ or INPUT keys to select the source you want to record (Ch#, AV1, AV2, or DV). Press DISC MENU/LIST to display the “Title List” menu. Select the title you want to overwrite. -
Page 53: Help
Help This Chapter shows you how to get help, including troubleshooting, customer support, and warranty information. -
Page 54: Programming The Remote
Programming the Remote Programming the Remote to Control Your TV You can program the DVD Recorder+VCR remote control to operate many TV brands and models. In the chart at right, find the code(s) corresponding to your brand of TV. While holding down the TV POWER button, enter the 2-digit code number using the 0-9 buttons. -
Page 55: Language Codes
Language Codes Use this list to input your language preferences for the Disc Audio, Disc Subtitle, and Disc Menu settings; see page 25. Abkhazian 6566 Afar 6565 Afrikaans 6570 Albanian 8381 Ameharic 6577 Arabic 6582 Armenian 7289 Assamese 6583 Aymara 6588 Azerbaijani 6590... -
Page 56: Country Codes
Country Codes Use this list to input your preferred country for the Parental Lock setting; see page 27. Afghanistan Argentina Australia Austria Belgium Bhutan Bolivia Brazil Cambodia Canada Chile China Colombia Congo Costa Rica Croatia Czech Republic Denmark Ecuador Egypt El Salvador Ethiopia Fiji... -
Page 57: Troubleshooting
The Troubleshooting section below will help you solve common issues with your DVD Recorder+VCR. If you don’t find the answers you need here, you can contact our Customer Service Department as follows: Phone (800) 736-7679 E-mail customersupport@govideo.com www.govideo.com SYMPTOM CAUSE No power. Power cord is disconnected. - Page 58 Troubleshooting SYMPTOM Cannot play recorded disc on other DVD player. Cannot record or did not record successfully. Cannot Timer Record. Stereo Recording and/or Playback not present. Remote not working. Resetting the DVD Recorder+VCR If you observe any of the following symptoms: •...
-
Page 59: Product Care & Handling
Product Care & Handling Handling Discs • Do not touch the play- back side of the disc. • Hold the disc by the edges so that finger- prints will not get on the surface • Do not stick paper or tape on the disc. -
Page 60: Technical Specifications
Technical Specifications General Power requirements AC 120 V, 60 Hz Power consumption Dimensions (approx.) 430 X 78.5 X 354 mm (16.9 x 3.1 x 13.9 inches) (w x h x d) Mass (approx.) 5.6 kg (12.32 lbs) Operating temp. 5˚C to 35˚C (41˚F to 95˚F) Operating humidity 5 % to 90 % Signal system... -
Page 61: Other Reference Information
Other Reference Information Restrictions on Video Recording • You cannot record copy-protected video using this recorder. Copy-pro- tected video includes DVD-Video discs and some satellite broadcasts. If copy-protected material is encoun- tered during a recording, recording will pause or stop automatically and an error message will be displayed on-screen. -
Page 62: Warranty
What is Covered and How Long This warranty covers internal operating parts and service/labor to repair or replace covered parts in this GoVideo product for 90 days labor, 1 year parts, from the date of purchase, defined as follows: (1) Original Consumer Retail Purchase;... -
Page 63: Index
Index A-B button 35, 37 Adding/Deleting Channels 22 Aspect Ratio 23 AUDIO button 33, 35, 36, 37 Audio CD Playback 37 Audio Language 25 AutoPlay 31 Auto Channel Search 22 Auto Clock Set 23 CH+/- buttons 33 Channel Settings 22, 23 Chapter Markers Auto 28 Manual 46... - Page 64 3834RV0040C Printed in Korea...