Table of Contents
Advertisement
Advertisement
Table of Contents

Related Manuals for AEG 49106IU-MN


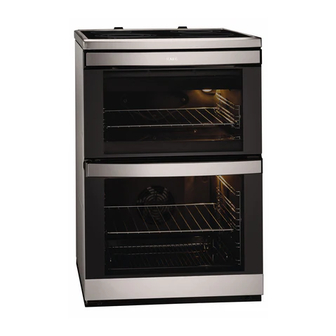
Summary of Contents for AEG 49106IU-MN
- Page 1 User Manual 49106IU-MN Cooker...
-
Page 2: Table Of Contents
14. ENERGY EFFICIENCY..................... 35 FOR PERFECT RESULTS Thank you for choosing this AEG product. We have created it to give you impeccable performance for many years, with innovative technologies that help make life simpler features you might not find on ordinary appliances. Please spend a few minutes reading to get the very best from it. -
Page 3: Children And Vulnerable People Safety
ENGLISH manufacturer is not responsible if an incorrect installation and use causes injuries and damages. Always keep the instructions with the appliance for future reference. 1.1 Children and vulnerable people safety WARNING! Risk of suffocation, injury or permanent disability. This appliance can be used by children aged from 8 •... -
Page 4: Safety Instructions
Metallic objects such as knives, forks, spoons and lids • should not be placed on the hob surface since they can get hot. If the glass ceramic surface / glass surface is cracked, • switch off the appliance to avoid the possibility of electric shock. -
Page 5: Electrical Connection
ENGLISH • Make sure that the appliance is • Use only correct isolation devices: line installed below and adjacent safe protecting cut-outs, fuses (screw type structures. fuses removed from the holder), earth • Parts of the appliance carry current. leakage trips and contactors. Close the appliance with furniture to •... - Page 6 2.4 Care and Cleaning • Do not put flammable products or items that are wet with flammable products in, near or on the appliance. WARNING! • Do not let sparks or open flames to Risk of injury, fire, or damage come in contact with the appliance to the appliance.
-
Page 7: Product Description
ENGLISH • Only use lamps with the same • Cut off the mains cable and discard it. specifications. • Remove the door catch to prevent children and pets to get closed in the 2.6 Disposal appliance. 2.7 Service WARNING! Risk of injury or suffocation. •... -
Page 8: Before First Use
3.3 Accessories • Trivet For roasting and grilling. • Wire shelf Use the trivet only with For cookware, cake tins, roasts. the Grill- / roasting pan. • Grill- / Roasting pan To bake and roast or as pan to collect fat. - Page 9 ENGLISH 5.1 Hob control panel Use the sensor fields to operate the appliance. The displays, indicators and sounds tell which functions operate. Sensor Function Comment field ON / OFF To activate and deactivate the hob. Lock / The Child Safety De- To lock / unlock the control panel.
- Page 10 Display Description Automatic Heat Up function operates. Power function operates. There is a malfunction. + digit A cooking zone is still hot (residual heat). Lock / The Child Safety Device function operates. Incorrect or too small cookware or no cookware on the cooking zone.
- Page 11 ENGLISH for some time and then decreases to the To deactivate the function: set the correct heat setting. cooking zone with and touch . The remaining time counts back to 00. The To activate the function the indicator of the cooking zone goes out. cooking zone must be cold.
-
Page 12: Hob - Hints And Tips
• The hob and both ovens are To deactivate the function: touch connected to one phase. The previous heat setting comes on. • The phase has a maximum electricity load. When you deactivate the • The function divides the power within hob, you also deactivate this function. - Page 13 ENGLISH • crack noise: cookware is made of The bottom of the cookware different materials (sandwich must be as thick and flat as construction). possible. • whistle sound: you the cooking zone with high power level and the Cookware dimensions cookware is made of different Induction cooking zones adapt to the materials (sandwich construction).
-
Page 14: Hob - Care And Cleaning
Heat setting Use to: Time Hints (min) 4 - 5 Steam potatoes. 20 - 60 Use max. ¼ l water for 750 g of potatoes. 4 - 5 Cook larger quantities of food, 60 - 150 Up to 3 l liquid plus ingredi- stews and soups. - Page 15 ENGLISH 8.1 Oven Control Panel Use the sensor fields to operate the appliance Sensor Function Comment field – Display Shows the current settings of the appliance. ON / OFF To activate or deactivate the oven. Oven selection To move between top and main oven. Down key To move in the menu and to set an oven function or programme...
- Page 16 Name Description Lamp / Defrost indica- Shows that the Lamp / Defrost function is active. Heat-up and residual Shows that the Heat-up / residual heat is active. heat indicator Temperature / Clock in- Shows the temperature and the time in minutes.
- Page 17 ENGLISH Symbol Oven function Application Pie/Pizza To bake food on 1 shelf position for a more in- tensive browning and a crispy bottom. Set the temperature 20 - 40 °C lower than for Conven- tional Cooking. Low Tempera- To prepare very lean, tender roasted food. ture Cooking Thermal Grilling To roast larger meat joints or poultry with bones on 1 shelf position.
-
Page 18: Cooling Fan
8.10 Residual heat indicator Temperature Switch-off time When you deactivate the oven, the display shows the residual heat. 30 °C - 115 °C 12.5 h 8.11 Fast heat up function 120 °C - 195 °C 8.5 h The Fast heat up function decreases the 200 °C - 245 °C... -
Page 19: Oven - Clock Functions
ENGLISH 2. Put the deep pan into the oven on the necessary shelf position. • All accessories have small You can use the trivet to grill flat dishes indentations at the top of in large quantities and to toast. the right and left side to 1. -
Page 20: Oven - Hints And Tips
2 minutes. The You can use the functions appliance deactivates. Duration and End Touch a sensor field to stop the acoustic the same time to set the signal. time for how long the appliance should operate... -
Page 21: Top Oven
ENGLISH • You can extend baking times by 10 – • With longer baking times, you can 15 minutes if you bake cakes on more deactivate the oven approximately 10 than one shelf position. minutes before the end of the baking •... - Page 22 Food Temperature (°C) Time (min) Shelf posi- tion Bread rolls / buns 200 - 220 10 - 15 Cakes: Small & Queen 160 - 180 18 - 25 Cakes: Sponges 160 - 175 20 - 30 Cakes: Victoria Sandwich...
-
Page 23: Main Oven
ENGLISH Food Temperature (°C) Time (min) Shelf posi- tion Vegetables: Roast Potatos 180 - 190 60 - 90 Yorkshire Pudding Large 220 - 210 25 - 40 Yorkshire Pudding Individual 210 - 220 15 - 25 Roasting Meat, Poultry Refer to the Roasting table. 10.6 Conventional Baking - Main oven Food... - Page 24 10.7 Thermaflow® Baking Main Oven Shelf positions are not critical but ensure that the oven accessories are evenly spaced when more than one is used. Food Temperature (°C) Time (min) Shelf posi- tion Biscuits 180 - 190 10 - 20 1 –...
- Page 25 ENGLISH 10.8 Pizza Setting Food Temperature (°C) Time (min) Shelf posi- tion Apple Pie 160 - 180 50 - 60 Plate Tart 180 - 200 25 - 50 Pizza, frozen Follow manufacturer`s instructions Pizza, home made 200 - 230 15 - 25 Quiches / Tarts 180 - 200 30 - 50...
- Page 26 Food Temperature (°C) Time (min) Pheasant 170 - 190 35 - 40 minutes per 0.5 kb (1 lb) and 35 - 40 mi- nutes over Rabbit 170 - 190 20 minutes per 0.5 kb (1 lb) and 20 minutes over 10.11 Grilling in general...
- Page 27 ENGLISH 10.13 Thermal Grilling - Main Oven Roasting Food Quantity (kg) Temperature Time (min) Shelf posi- (°C) tion Beef: Pot roast 180 - 230 150 - 180 Beef: Topside beef per cm of thickness 190 - 200 5 - 6 or filler - rare Beef: Topside beef per cm of thickness...
- Page 28 2. Put the meat in a roasting tin or necessary, and cook until done (see directly on the wire shelf. Put the tray the table). below the shelf to catch the fat. 3. Set oven function Low temperature cooking, change the temperature, if...
-
Page 29: Oven - Care And Cleaning
ENGLISH Food Quantity Defrosting Further de- Comments time (min) frosting time (min) Strawberries 300 g 30 - 40 10 - 20 Butter 250 g 30 - 40 10 - 15 Cream 2 x 200 g 80 - 100 10 - 15 Whip the cream when still slightly frozen in places. - Page 30 11.5 Removing and cleaning 1. Clean the oven floor with warm water and washing up liquid, then dry it. the door glasses - top oven 2. Set the function. The door glass in your 3. Set the oven temperature to 250 °C product can be different in and let the oven operate for 1 hour.
-
Page 31: Troubleshooting
ENGLISH WARNING! Danger of electrocution! Disconnect the fuse before you replace the lamp. The lamp and the lamp glass cover can be hot. 1. Deactivate the appliance. 2. Remove the fuses from the fuse box or deactivate the circuit breaker. The back lamp The lamp glass cover is at the back of the cavity. - Page 32 Problem Possible cause Remedy You cannot activate or oper- You touched 2 or more sen- Touch only one sensor field. ate the hob. sor fields at the same time. You cannot activate or oper- STOP+GO function oper- Refer to "Hob - Daily use"...
- Page 33 ENGLISH Problem Possible cause Remedy The oven does not heat up. The clock is not set. Set the clock. The oven does not heat up. The necessary settings are Make sure that the settings not set. are correct. The oven does not heat up. The automatic switch-off is Refer to "Automatic switch- activated.
-
Page 34: Installation
13. INSTALLATION Use small feet on the bottom of WARNING! appliance to set the appliance top Refer to Safety chapters. surface level with other surfaces. 13.1 Technical data 13.4 Electrical installation WARNING! Dimensions The manufacturer is not responsible if you do not... -
Page 35: Energy Efficiency
ENGLISH 14. ENERGY EFFICIENCY 14.1 Product information for hob according to EU 66/2014 Model identification 49106IU-MN Type of hob Hob inside Freestanding Cooker Number of cooking zones Heating technology Induction Diameter of circular cooking Left front 21.0 cm zones (Ø) Left rear 14.0 cm... - Page 36 Top oven: A Energy efficiency class Main oven: A Energy consumption with a standard load, conven- Top oven: 0.75 kWh/cycle tional mode Main oven: 0.99 kWh/cycle Energy consumption with a standard load, fan-forced Top oven: not applicable mode Main oven: 0.89 kWh/cycle...
- Page 37 ENGLISH...
- Page 38 www.aeg.com...
- Page 39 ENGLISH...
- Page 40 www.aeg.com/shop...