Ariens Pro Zoom 54 Manual
Owners manual
Hide thumbs
Also See for Pro Zoom 54:
- Owner's/operator's manual (105 pages) ,
- Owner's/operator's manual (106 pages)

Related Manuals for Ariens Pro Zoom 54


Summary of Contents for Ariens Pro Zoom 54
- Page 1 Pro Zoom ® Owner/Operator Manual Manuel Du Propriétaire/Utilisateur Models 992806 – Pro Zoom 54 992807 – Pro Zoom 60 ENGLISH 03851900A 10/10 FRANÇAIS Printed in USA...
-
Page 2: Table Of Contents
English may be obtained from your travel. Dealer. Visit your dealer or www.ariens.com for a list of ENGINE MANUAL languages available for your equipment. The engine on this unit is covered by a Manuals printed in languages separate manual specific to the engine. -
Page 3: Product Registration
Ariens authorized replacement part may adversely affect the performance, durability, and safety of this unit and may void the warranty. Ariens disclaims liability for any claims or damages, whether regarding warranty, property damage, personal injury or death arising out of the use of unauthorized replacement parts. -
Page 4: Safety
SAFETY WARNING: This cutting machine CAUTION: POTENTIALLY is capable of amputating hands HAZARDOUS SITUATION! and feet and throwing objects. If not avoided, MAY Failure to observe the safety RESULT in minor or instructions in the manuals and on moderate injury. It may also decals could result in serious be used to alert against injury or death. - Page 5 TO AVOID SERIOUS INJURY OR DEATH Read the operator’s manual. Avoid sudden turns. Keep children and others away from unit while operating. Keep safety devices (guards, shields, switches, ect. ) Never direct discharge toward other people. in place and working. Thrown objects can cause injury.
-
Page 6: Safety Rules
4. Danger! • Keep safety devices (guards, shields, switches, etc.) in place and working. Poisonous battery fluid contains sulfuric acid and • Check interlock system per manual its contact with skin, eyes before use. or clothing can cause severe chemical burns. OL4450 •... -
Page 7: Maintenance And Storage
All operators and mechanics should be Never operate with the discharge shield trained. The owner is responsible for training raised, removed or altered, unless using a the users. grass catcher. Never let children or untrained people Do not change the engine governor setting or operate or service the equipment. - Page 8 This manual must be made available to the FOREIGN FLUID INJECTED operator of the Ariens mower at all times. INTO BODY can result in Read this manual carefully and learn how to gangrene. Fluid must be use the machine correctly.
-
Page 9: During Operation
If the starting system does not work, consult Before dismounting, disengage the PTO, your Ariens Dealer immediately. lower all attachments, place the steering Operate the mower only in daylight or when control levers in the park position, turn off the the area to be mowed is lit well by artificial engine, and remove the key. -
Page 10: Hydraulic System
Allow the Ariens mower time to cool before Hydraulic System touching the engine, muffler, or any other part Make sure all hydraulic fluid, hoses, and lines which may be hot. -
Page 11: Assembly
Always wear protective clothing and eye perform the job. If you are not qualified to protection when servicing. make the repairs, take the unit to your Ariens In case of electrolyte contact, rinse area with dealer or a qualified repair service. -
Page 12: Steering Controls
SETUP INSTRUCTIONS Ariens mowers are shipped partially assembled. After uncrating the power unit and mower deck, initial setup is required. IMPORTANT: During the unpacking of the crate all goods should be matched against the packing list and all shortages or damages should be noted and reported to the carrier immediately. -
Page 13: Check Safety Interlock System
Tires Check Function of All Controls See SPECIFICATIONS on page 45. Ensure unit runs and performs properly. CAUTION: Avoid injury! Explosive WARNING: FAILURE OF separation of tire and rim parts is CONTROLS could result in death possible when they are serviced or serious injury. -
Page 14: Fill Fuel Tank
1. Locate the left-side ROPS mount pocket on the inside of the frame above the wheel motor. Mount the left side base weldment (item 9) in the pocket using two 1/2 x 3 1/2 in. hex bolts (item 4), two 1/2 in. -
Page 15: Controls And Features
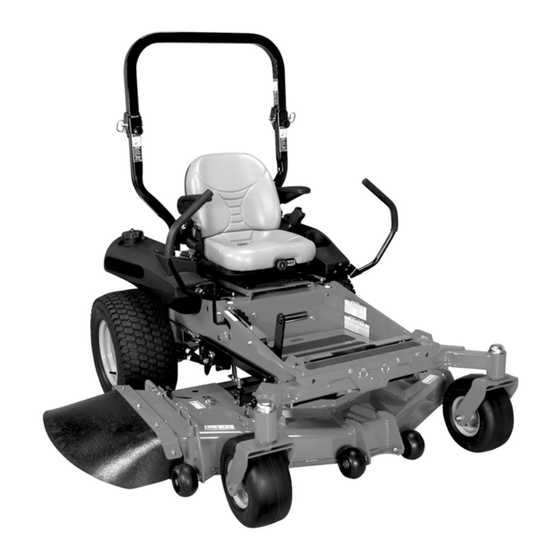
CONTROLS AND FEATURES Figure 8 1. Deck Transport Lock Lever 2. Deck Height Adjustment Dial 3. Control Panel 4. Steering Control Levers 5. Deck Lift Lever 6. Deck Level Adjust 7. Seat Lock GB - 15... -
Page 16: Operation
CONTROLS AND FEATURES NOTE: If the machine does not pass this test, See figure 8 on page 15 for Controls and DO NOT OPERATE. Take it to your Ariens Features locations. Dealer. 3. Move the steering lever rearward and Safety Interlock System release the steering lever. -
Page 17: Control Panel
Power Take Off (PTO) NOTE: Aggressive turning can scuff or damage lawns. ALWAYS keep both wheels Switch rotating when making sharp turns. DO NOT Power take off (PTO) make turns with inside wheel completely switch engages and stopped. To obtain minimum turning radius, slowly reverse inside wheel while moving the disengages the mower outside wheel slowly forward. -
Page 18: Cutting Height
Cutting Height Fixed Axle To change the cutting height, raise the mower deck into the transport position. Turn the Deck Height Adjust Dial until the desired cutting height is shown and then lower the deck to the cutting position. The mower can be adjusted to mow from 1 – 6 inches (25 –... -
Page 19: Filling Fuel Tank
FILLING FUEL TANK Fuel Stabilizer Gasoline left in the fuel system for extended WARNING: AVOID INJURY. periods without a stabilizer will deteriorate, resulting in gum deposits in the system. Read and understand entire These deposits can damage the carburetor Safety section before and the fuel hoses, filter and tank. -
Page 20: Stopping The Engine
1. Bring the steering levers to the neutral the mower to tip backwards. position and disengage the PTO. Ariens Company does not recommend the 2. Move the throttle to the Slow position. use of the mower with the ROPS removed. - Page 21 MOWING Anti-Scalp Mount Here for Wheel WARNING: To avoid damage to 1.0 – 1.5" Cut the mower, re-torque all fastening hardware, including blade and spindle pulley retaining nuts, after the first hour of mowing operation. Operate the unit only when seated in the operator’s position.
-
Page 22: Uneven Terrain
Uneven Terrain Tips For Efficient Mowing WARNING: To avoid the loss of CAUTION: Clear the area of control and to prevent overturning people, pets, and all visible the mower, always across slopes, debris before beginning mowing never up and down. operations. -
Page 23: Loading The Mower
IMPORTANT: Attempting to tow more than 300 pounds (137 kg) with the Ariens mower will lead to premature parts failure and void the warranty. The mower is designed for towing in light duty applications only. -
Page 24: Maintenance Schedule
MAINTENANCE SCHEDULE WARNING: AVOID INJURY. Read and understand entire Safety section before proceeding. Ariens Dealers will provide any service, parts or adjustments which may be required to keep your unit operating at peak efficiency. Should engine require service, contact an Ariens Dealer or an authorized engine manufacturer's service center. - Page 25 Engage parking brake and engage transmission bypass lever (see Parking Brake Moving the Unit with the Engine Off on page 23). Push unit. If unit rolls, contact your Ariens Dealer. Clean Unit Clean engine, battery, seat, mower deck, etc. of all dirt and debris.
- Page 26 Interval Task Action 25 Hours Check Battery Keep battery and battery terminals clean (see Cleaning the Battery or Every on page 31). Season Air Cleaner Inspect and clear away debris, replace if necessary. Elements Lubricate Unit Apply grease to fitting on each front wheel 50 Hours Check Check mower blade mounting hardware and all other fasteners.
-
Page 27: Service And Adjustments
SERVICE AND ADJUSTMENTS WARNING: AVOID INJURY. Read and understand entire Safety section before proceeding. SERVICE ACCESS CAUTION: Shut off the engine before servicing the mower. Make sure the seat is fully raised and locked before performing any maintenance on the mower. The seat can come down very quickly once the seat lock lever is released. -
Page 28: Engine Oil Change
Engine Dipstick Clean Engine Oil Figure 17 Engine Oil Change WARNING: Engine oil is a toxic FULL FULL substance. Dispose of used oil properly. Contact your local authorities for approved disposal Figure 16 OE3281 methods or possible recycling. Oil Filter Change Change the engine oil and filter after the first Change the engine oil filter initially after the 8 hours of operation. -
Page 29: Hydraulic System Maintenance
Changing Hydraulic Fluid Engine Oil Filter CAUTION: Be sure the engine has been stopped, the steering control levers are in the park position, and the key has been removed before changing or checking the hydraulic oil in the mower. Allow the hydraulic fluid to cool. The oil may be hot and could cause serious burns. -
Page 30: Removing The Battery
Removing the Battery 6. Shut off the engine, check and add hydraulic oil as necessary. 7. Close the bypass valves on both pumps. WARNING: The battery terminals Do not over tighten. or metal tools could short against the metal components of the 8. - Page 31 Use only the same size fuse as was originally installed. 1. Positive 2. Negative There are two fuses on your Ariens mower. terminal terminal They are located on the frame on the inside. One is close to the front of the fuel tank. The...
-
Page 32: Neutral Adjustment
7. Install the wheel assembly using the bolt and lock nut removed in step 3. Servicing the Caster Pivot Bearings 1. Park the unit on a level surface, put the steering control levers in the park position, turn off the engine and remove the key. -
Page 33: Leveling The Deck
4. If adjustment is needed, move the control lever back to the inward position and begin to pull rearward. At this beginning rearward motion the clevis pin should begin to contact the end of the slot and start putting pressure on the spring. -
Page 34: Drive Adjustments
2. Loosen the 1/2-13" hex nut (1). If the IMPORTANT: To prevent excessive engine wear, do not run the engine without the air blade height is lower than the height of cleaner installed. cut knob, loosen the 1/2-13 x 1.75" (2) bolt which runs through the height of cut IMPORTANT: The engine is air cooled and requires a large amount of air intake when... -
Page 35: Spark Plug Service
Replace the inner cartridge (6) yearly or The fuel filter cannot be disassembled. If the every 250 hours whichever comes first. fuel filter becomes clogged, replace it with a new one. IMPORTANT: DO NOT attempt to clean the 1. Park the machine safely in a well- secondary element. - Page 36 CAUTION: Do not run the engine before all cooling system parts are reinstalled to keep the cooling and carburetion as intended. TIRE AND WHEEL SERVICE CAUTION: Separation of a tire Spark Plug Wire and rim can cause an explosion Figure 26 that could cause serious injury or OE3341 death.
-
Page 37: Blade Maintenance
BLADE MAINTENANCE DO NOT Sharpen to This Pattern CAUTION: Before removing the blades, be sure the engine has stopped and the key has been removed. The blades may be sharp. Wear gloves or wrap them in a towel before handling them. Inspect the blades daily for straightness, sharpness, and balance. - Page 38 To guarantee long belt life, always use genuine Ariens belts. Drive Belt Removal and Installation WARNING: Most service work Balance Rod requires the engine to be shut OFF.
- Page 39 6. Reconnect the deck belt tension rod and Belt Routing tighten the 3/8-16" nut until the tension spring measures 5-9/16” from hook end- to-hook end. Tighten the other nut against the rod bracket to lock. Install both deck belt shields. 7.
-
Page 40: Storage
10. Engage the deck tension by returning Belt Routing – Pumps the deck tension arm back to the slot. (See Deck Belt Removal and Installation on page 39.) Pump 11. Reattach the negative battery cable. Pump Idler Engine Figure 33 9. - Page 41 TROUBLESHOOTING PROBLEM PROBABLE CAUSE CORRECTION Excessive 1. Loose spindle/blade fasteners. 1. Retorque or replace as necessary. Vibration 2. Blade interference with grass 2. Clean the underside of the buildup in deck. deck. 3. Balance blades. See Blade 3. Blades out of balance. Maintenance on page 37.
- Page 42 TROUBLESHOOTING PROBLEM PROBABLE CAUSE CORRECTION Blades Won’t 1. Deck belt worn, loose or 1. Replace deck belt. broken. Rotate 2. Deck belt off pulley. 2. Reinstall deck belt. 3. Clutch failed. 3. Contact dealer. Mower Places 1. Engine RPM too low. 1.
- Page 43 TROUBLESHOOTING PROBLEM PROBABLE CAUSE CORRECTION Engine Will Not 1. Dead Battery. 1. Charge battery. See Battery Maintenance on page 30. Turn Over 2. Correct the connection. 2. Bad ground connection. 3. Correct the connection. 3. Poor terminal connection at battery. 4.
-
Page 44: Service Parts
TROUBLESHOOTING PROBLEM PROBABLE CAUSE CORRECTION Abnormal 1. Engine mounting bolts loose. 1. Torque engine bolts. Vibration 2. Loose engine pulley. 2. Tighten pulley. 3. Engine pulley damaged. 3. Contact Dealer. SERVICE PARTS – SERVICE PARTS – MOWER TRACTOR Part Description Part Description Number... -
Page 45: Specifications
SPECIFICATIONS Model Number 992806 992807 Model Pro Zoom 54 Pro Zoom 60 Engine Kawasaki Engine Model Number FX751V Engine Displacement - Cu. In. (cc) 52 (852) Maximum Recommended RPM 3600 Liquid or Air Cooled Speed Forward Maximum – MPH (km/h) 12 (19.3) -
Page 46: Warranty
Genuine Ariens or Gravely brand service parts and accessories are warranted to be free from defects in material and workmanship for a period of 90 days after the date of purchase. An authorized Ariens or Gravely dealer will repair or replace any such part or accessory free of charge, except for labor, during that period. - Page 47 Canada. In all other countries, contact place of purchase for warranty information. Disclaimer Ariens may from time to time change the design of its products. Nothing contained in this warranty shall be construed as obligating Ariens to incorporate such design changes into previously manufactured products, nor shall such changes be construed as an admission that previous designs were defective.
- Page 50 ARIENS 655 West Ryan Street Brillion, WI 54110-1072 920-756-2141 Fax 920-756-2407 www.ariens.com...