
Related Manuals for Ariens 991085-Max Zoom 48


Summary of Contents for Ariens 991085-Max Zoom 48
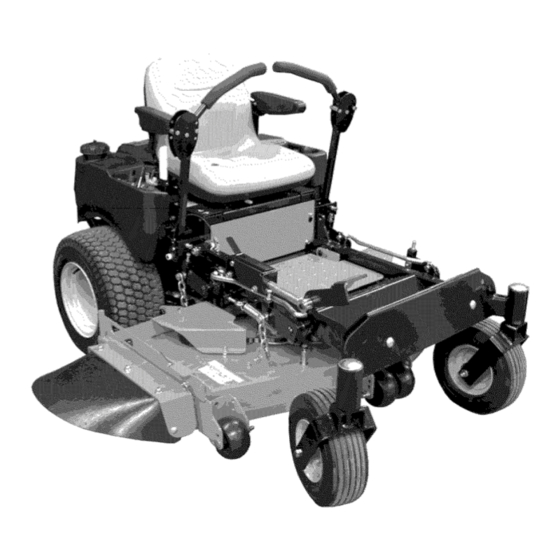
- Page 1 Max Zoom Owner/Operator Manual Models 991085 - Max Zoom 48 991086 - Max Zoom 52 991087 - Max Zoom 60 ENGL,SH 04276000A 10/10 FRAN(_AIS Printed in USA...
- Page 2 Refer to this manual for engine service recommendations. idiomas diferentes del ingles en su distribuidor. Visite a su distribuidor If the engine manual is not available, contact o vaya a w_v.ariens.com para the engine manufacturer for a replacement manual.
- Page 3 NOTE: To locate your nearest Ariens Dealer, Serial Number Label go to www.ariens.com. DISCLAIMER Ariens reserves the right to discontinue, change, and improve its products at any time without public notice or obligation to the purchaser. The descriptions specifications contained in this manual were in effect at printing.
- Page 4 _"/-'_ =1 =1i;l • WARNING: POTENTIALLY WARNING: This cutting machine ,& HAZARDOUS SITUATION! If not is capable of amputating hands and feet and throwing objects. avoided, COULD RESULT in Failure to observe the safety death or serious injury. instructions in the manuals and on decals could result in serious injury or death.
- Page 5 OF1625 Figure 2 1. DANGER! TO AVOID SERIOUS INJURY OR DEATH across. DO NOT operate on slopes over Go up and down slopes, not 10° Read Owner/Operator Manual. If machine stops going uphill, stop blade and back down slowly. OL1801 Avoid sudden turns.
- Page 6 Emission controls and OS0731 components can only be adjusted by an 5. ROTATING PARTS Ariens Company dealer or an authorized engine manufacturer's service center. Contact your Ariens Company Equipment rotating parts. Retailer concerning emission controls and AVOID INJURY.
- Page 7 Inspect unit b efore each u se for: m issing or NEVER place y our hands orany part ofyour damaged decals and shields, correctly body o rclothing inside ornear any moving operating safety interlock system, and part while u nit i srunning. deterioration ofgrass catchers.
- Page 8 Always stand c lear ofthe discharge area. Use a slow speed. Tires may lose traction on ALWAYS disengage PTO, stop unit a nd slopes even though the brakes are engine, remove key, engage parking brake functioning properly. and allow moving parts tostop b efore leaving Do not bypass transmission when on a slope.
- Page 9 Keep the nozzle incontact with the rim ofthe NEVER attempt tomake a ny adjustments fuel tank o rcontainer opening atall t imes until unit w hile e ngine isrunning (except where fueling iscomplete. Donot u se anozzle lock- specifically recommended). Stop e ngine, open d evice.
- Page 10 V-'_,.'$:'] =1 _ I=]_"d 4. Seat- See Seat Adjustments page 13 and Service Position on WARNING: AVOID INJURY. page 18. Read and understand entire 5. Position Steering Levers - Remove Safety section before proceeding. eccentric spacers and rotate steering levers to the operating position. Reinstall spacers.
- Page 11 10. C heck Safety Interlock System - Check 12. On 60-inch Decks: Remove the tosee that the interlock system o perates discharge chute from the transport correctly (See S afety Interlock System position and place the discharge chute on page 12). in the operating position.
- Page 12 D. To turn right, pull the right back or your Ariens dealer for repairs. push the left steering control lever NOTE: When the parking brake is engaged, forward or a combination of both.
- Page 13 Throttle Lever Cutting Height: Put cutting height adjustment pin in desired The throttle lever changes hole. Push mower lift pedal forward and hold the engine speed. Move it while pushing down on the lift lock. Slowly the throttle lever to Fast (1) lower mower lift pedal until deck lift contacts to increase engine speed.
- Page 14 The alert starts counting down t wo hours IMPORTANT: DO NOT OVERFILL! This before the maintenance isdue. The meter equipment and/or its engine may include flashes the word, "Now," when i treaches the evaporative emissions control system maintenance time. components, required to meet EPA and/or CARB regulations, that will only function Press and hold t he toggle button toreset the...
- Page 15 STOPPING IN AN EMERGENCY Fuel Stabilizer Gasoline left in the fuel system for extended periods without a stabilizer will deteriorate, WARNING: Operating unit on resulting in gum deposits in the system. slopes may lead to loss of These deposits can damage the carburetor steering control.
- Page 16 WARNING: Move the steering control levers slowly and keep the throttle control lever atslow speed until you learn h ow to operate the unit. 3.Bring t he steering levers toneutral. 4.Slow the engine down t oabout 3/4 speed. 5.Turn O N the PTO switch toengage the Push Lever In to Drive Position mower.
- Page 17 Proper maintenance can prolong the life of WARNING: AVOID INJURY unit. The following charts show the Read a nd understand entire recommended service schedule. More frequent service may be required due to Safety section before proceeding. working conditions (heavy loads, high ambient temperatures, dusty conditions, or airborne debris).
- Page 18 1. Place unit on a flat level surface. peak efficiency. Should engine service be ALWAYS stop engine. Ensure unit is required, it can be obtained from a Ariens secure and will not tip over. Strap and Dealer or the engine manufacturer's clamp onto lift if used.
- Page 19 Check Hydraulic Fluid Level Check the system with the unit cold and parked on a flat, level surface. Then run the unit for about one minute and recheck the levels. To Add Hydraulic Fluid: 1. Remove the cap from the expansion tank.
- Page 20 7.Fill w ith 20W-50 engine oil w ith anSL 5. Start the engine and slowly move the API c lassification until oil a ppears atthe steering levers in forward and reverse bottom o fthe drain p lug ( about 2quarts five or six times.
- Page 21 Sharpen the Mower Blades BATTERY mower blades while on unit. An CAUTION: DO NOT sharpen Read and understand entire WARNING: AVOID INJURY. unbalanced mower blade will Safety section before proceeding. cause excessive vibration and eventual damage to unit. Check mower blade balance before reinstalling blades.
- Page 22 4. Charge battery according to charger and battery manufacturers' instructions. 5. Replace battery. See Replace Batteryon page 21. Jump-Starting Ariens does not recommend jump-starting your unit. Jump-starting can damage engine and electrical system components. See your engine manual for more detailed information.
- Page 23 4.Start the engine, run engine atfull Aligning the Steering Levers throttle, and release the parking brake. (Figure 14) 5.Move t he steering levers from Forward toReverse several times tomake s ure 1. Shut OFF engine. Engage parking brake. Remove the ignition key. controls are free.
- Page 24 ADJUSTING THE UNIT TO TRACK ADJUSTING THE HEIGHT OF THE STRAIGHT STEERING LEVER HANDLES The handles have three height positions (Figure 16). WARNING: Prior to adjusting the tracking of the unit, shut OFF engine, engage parking brake, and remove the ignition key. Check and adjust tire pressure.
- Page 25 Check Adjustment CAUTION: DAMAGED NOTE: Be sure to check the parking brake on ,& both sides of the unit (Figure 17). WORN BELTS may result in injury and/or damage to unit. 1. Engage parking brake and set both Check belts for excessive wear or transmission bypass valves to the cracks often.
- Page 26 4.Remove short mower belt f rom right PTO Idler Spring Length blade s pindle and from deck. Idler pivot bolt m ust beloosened slightly togain clearance toremove belt f rom under idler pulley (Figure 19). 5.Arrange new mower belt(s) ondeck (short belt first).
- Page 27 Lowest Cutting Height © Cutting Height Figure 22 Removing the Mower Deck 1. Remove PTO belt (See Replacing Mower Belts on page 25). WARNING: AVOID INJURY. Mower lift arms and mower lift pedal could cause severe injury if they are not locked before removing the mower deck.
- Page 28 Check Blade Level and Pitch 1. Raise mower deck to a 3 in. (7.62 cm) cutting height. 2. Shut off engine. Engage parking brake. Remove the ignition key. NOTE: Place blocks under the bottom edge of the deck, not under the reinforcement welded along deck face.
- Page 29 CLUTCH ADJUSTMENT Blade Side-to-Side Level If clutch fails to engage or disengage properly or begins to make abnormal noise, check the air gap adjustment at the three inspection slots. To check: 1. Stop engine, remove key and wait for all hot parts to cool.
- Page 30 P_'__o_;:_]_,,,,_ Part No. Description 79100400 Mulching Kit 48-inch Decks WARNING: AVOID INJURY. Read and understand entire 79206400 Mulching Kit 52-inch Decks Safety section before proceeding. 79206500 Mulching Kit 60-inch Decks SHORT TERM 79206700 Striper Kit NEVER spray unit with high-pressure water 79100700 or store unit outdoors.
- Page 31 Model Number 991085 991086 991087 Model Max Zoom 48 Max Zoom Max Zoom Kawasaki Engine Engine Mode( Number FR691 FR730 Engine Displacement- 44.3 (726) in 3 (cc) Governed RPM (May be different from maximum 3600 + 75 RPM) Liquid or Air Cooled Speed Forward Maximum - mph 8.0 (12.9)
- Page 32 Ariens will be free from defects in material and workmanship for a period of two years after the date of purchase. An authorized Ariens dealer (Ariens brand products), Gravely dealer (Gravely brand products), or Countax dealer (Countax brand products) will repair any defect...
- Page 33 If the applicable warranty period is more than 90 days, Ariens will cover the prorated cost of any defective battery, for up to 12 months after the date of purchase. This battery limited warranty does not apply to the battery packs on AMP series products.
- Page 34 (b)(2). If any such part fails during the period of warranty coverage, it must be repaired or replaced by the Ariens Company. Any such part repaired or replaced under the warranty must be warranted for a time not less than the remaining warranty period.
- Page 35 Gravely, orParker service representative. (7.)Throughout the e vaporative emission control system's warranty period set out insubsection (b)(2), the Ariens Company must maintain asupply ofwarranted parts sufficient tomeet the expected demand for s uch parts. (8.)Manufacturer-approved replacement parts must be used inthe performance...
- Page 36 Ariens Company 655 West Ryan Street Brillion, WI 54110-1072 920-756-2141 Fax 920-756-2407 www.ariens.com _, WARNING ,& The engine exhaust from this product contains chemicals known to the State of California to cause cancer, birth defects or other reproductive harm. An __...
- Page 37 Max Zoom _" Manual del propietario/operador Models 991085 - Max Zoom 48 991086 - Max Zoom 52 991087 - Max Zoom 60 04276002A 10/10 Printed in USA ESPANOL...
- Page 38 Este manual se incluye en la documentaci6n idiomas diferentes del ingles en su entregada junto con la unidad. Consulte este distribuidor. Visite a su distribuidor manual cuando necesite recomendaciones o vaya a www.ariens.com para de mantenimiento del motor. Si no dispone obtener una lista de idiomas del manual del motor, p6ngase en contacto disponibles para su equipo.
- Page 39 Ariens o conducci6n o la TDF esta activada (On). vaya a www.ariens.com en Intemet.
- Page 40 5.Explique los procedimiento Nota p ara elcliente: El c oncesionario leha lubricaci6n ymantenimiento suministrado instrucciones completas para l a recomendados. Asesore alcliente sobre configuraci6n ypreparaci6n que deben los ajustes. Muestrele los controles completarse antes derecibir esta u nidad. El funcionamiento delaunidad.
- Page 41 FORMACION REQUERIDA AL NOTACIONES OPERADOR NOTA: Informaci6n de referencia general para el funcionamiento y practicas de El comprador original de esta unidad ha sido mantenimiento correctos. instruido por el vendedor acerca de su IMPORTANTE: Procedimientos funcionamiento adecuado y seguro. informaci6n especificos requeridos para Si la unidad va a ser utilizada por otra evitar daSos a la unidad o al accesorio.
- Page 42 NUNCA LLEVE NINOS. 3. iADVERTENCIA! No hacer funcionar el cortacesped a menos que los protectores esten en posici6n de funcionamiento o la embolsadora este acoplada. 0L4480 Mantengase siempre alejado arriba y hacia abajo, pero no "/_."_ del area de descarga. transversalmente.
- Page 43 60 aSos se hallan implicados en ser ajustados Qnicamente por un distribuidor un porcentaje mayor de lesiones de Ariens Company o por un centro de servicio relacionadas con cortacespedes. Estos autorizado del fabricante del motor. P6ngase...
- Page 44 NUNCA permita alos nifios h acer funcionar No haga funcionar la m&quina sin que jugar sobre l amaquina ocerca deella. E ste todo el recolector de c_sped o el protector alerta ydesconecte launidad de descarga est_n en su sitio. silosnifios e ntran enel area de trabajo.
- Page 45 Detenga yrevise elequipo sigolpea un Rem61quela s61o con una maquina que tenga objeto osiseprodujeran vibraciones un dispositivo de enganche para remolcar. inusuales. Antes devolver aponer en Fije el quipo remolcado s61o en el punto de marcha launidad, realice las reparaciones enganche.
- Page 46 Cuando sea posible ypractico, saque los Compruebe con frecuencia elfuncionamiento equipos impulsados por g asolina del c amiSn del freno d eestacionamiento. Realice ajustes oremolque yrepSstelos enelsuelo. Si e sto yreparaciones segQn serequiera. no fuera p osible, reposte dicho e quipamiento Mantenga SlEMPRE launidad en...
- Page 47 4. Asiento - Vease Ajustes del asiento en iADVERTENClA7 EVITE LAS la pagina 15,y POSICION DE LESIONES. Antes d eproceder, REPARACION en la pagina 21. lea ycomprenda toda lasecci6n 5. Coloque las palancas de direcci6n - Retire los espaciadores excentricos Seguridad.
- Page 48 13. Nivelaci6n de la plataforma - Revise la iADVERTENClA7 UnFALLO DE unidad para asegurarse de que el nivel LA INTERBLOQUEO junto c on de la plataforma que se ajust6 en la un funcionamiento noapropiado fabrica se haya mantenido (Vease puede resultar enlesiones Nivelaci6n de la plataforma del personales graves.
- Page 49 Si la punto muerto. unidad no funcionara como debe, p6ngase Con el freno de estacionamiento en contacto con su concesionario Ariens para desactivado, el motor no debera arrancar y realizar reparaciones. debera pararse si el operador deja el asiento. NOTA: Con el freno de estacionamiento Palancas de dire€€ion...
- Page 50 B.Para e ldesplazamiento recto h acia Palanca delante, empuje ambas palancas acelerador control hacia a delante. La palanca del acelerador C.Para g irar alaizquierda, tire hacia modifica la velocidad del atras delapalanca izquierda oempuje motor. Mueva la palanca hacia d elante lapalanca derecha de del acelerador a la control deladirecci6n, ouna...
- Page 51 2. Suelte la palanca y deslice el asiento Pedal de elevacion del cortacesped hacia adelante o hacia atras para bloquear el asiento en su posici6n. Horometro OF1700 Pulse y suelte el bot6n de alternancia para cambiar entre diferentes funciones. El pedal de elevaci6n del cortacesped sube y Pulse y mantenga pulsado el bot6n baja la plataforma de corte para cortar el...
- Page 52 LLENADO DEL DEPOSITO DE Es aceptable gasolina con hasta COMBUSTIBLE un 10% de etanol (gasohol) o hasta un 10% MTBE (eter metil tert-butilico). El uso de gasolina diferente iADVERTENCIA7 EVITE LAS a la especificada arriba invalidara LESIONES. Antes de proceder, la garantia del motor.
- Page 53 ARRANQUEYPARADA 2. Compruebe el depurador de aire Compruebe que no haya suciedad en el filtro de aire y limpielo si es necesario. Siga el PRECAUCION: Lea primero todo programa de mantenimiento del Manual del el Manual del propieta- motor. rio/operador, el Manual del embrague y el Manual del motor.
- Page 54 PARA CORTAR EL CESPED CON 3. Tire de las palancas derecha e izquierda de las valvulas de desviaci6n LA UNIDAD hasta la posici6n de punto muerto. Haga funcionar la unidad solamente sentado en la posici6n del operador. 1. Arranque el motor. Deje que el motor se iADVERTENCIA7 transmisi6n cuando se este en No anule la...
- Page 55 PARA UN MEJOR Corte el cesped con el motor ajustado a la aceleraci6n maxima. FUNCIONAMIENTO AI empajar el suelo, elimine solamente 1/3 de Corte el cesped cuando este seco. la Iongitud del cesped en cada corte. Si el Mantenga las cuchillas de corte afiladas. cesped es muy alto, no cortar mas de Mantenga la plataforma del cortacesped 1 pulgada (2.54 cm) de cesped por corte.
- Page 56 Inter- Mantenimiento Tarea valo Revisar los neumaticos Vease ESPECIFICACIONES en la pagina 37 para obtener la presi6n correcta de los neumaticos. darse la separaci6n explosiva del PRECAUClON: iEvite lesiones! Puede neumatico y la Ilanta si se manipulan incorrectamente durante el mantenimiento: No intente montar un neumatico sin el equipo adecuado o sin la experiencia necesaria para realizar el trabajo.
- Page 57 Detenga SIEMPRE el necesitara mantener el motor, puede Ilevarlo motor. Asegerese de que la unidad este a un concesionario Ariens o al centro de bien asegurada y que no pueda volcar. mantenimiento autorizado del fabricante del Si utiliza un montacargas, sujete y fije la motor.
- Page 58 Revise el nivel del fluido hidraulico Revise el sistema con la unidad en frio y estacionada sobre una superficie nivelada y regular. Ponga en marcha la unidad durante un minuto mas o menos y compruebe de nuevo los niveles. Para a_adir liquido hidraulico 1.
- Page 59 4.Limpie lasuperficie demontaje del f iltro del sistema hidraulico Purga ylubrique lajunta d egoma del n uevo filtro d eaceite con aceite hidraulico limpio. iADVERTENClATEste ajuste 5.Haga g irar elnuevo filtro d eaceite debe hacerse con el motor enlacarcasa del filtro hasta q ue entren en marcha.
- Page 60 Recolocacion 2. Afile la cuchilla del cortacesped quitando una cantidad de material igual de cada 1. Vuelva a colocar las cuchillas, las extremo de la misma. NO cambie arandelas c6ncavas y los pernos en los el angulo del filo ni redondee la esquina ejes de los vastagos.
- Page 61 BATERiA iADVERTENCIA7 EVITE LAS LESIONES. Antes de proceder, lea y comprenda toda la secci6n de Seguridad. iADVERTENCIA7 Los bornes de la bateria, terminales y acceso- rios relacionados contienen plomo y compuestos de plomo, sustancias que en el estado de California se sabe que causan cancer y daSos al sistema repro- ductor.
- Page 62 Arranque por puente APAGUE el motor. Ariens no recomienda el arranque por puente 2. Con la unidad erguida y orientada hacia de la unidad ya que se pueden dafiar los una pared, levante la unidad con un gato...
- Page 63 Direcci6n deEje " ..'_ Tornillo deajuste ..... Brazo del control dela direcci6n develocidad Figura 1 3 Alineamiento de las palancas de la direccion (Figura 1. Apague el motor. Accione el freno de estacionamiento. Saque la Ilave de contacto. 2. Coloque el asiento en la posici6n de mantenimiento (Vease POSIClON REPARAClON...
- Page 64 AJUSTE DE LA UNIDAD PARA UN AJUSTE DE LA ALTURA DE LAS TRAZADO EN LINEA RECTA MANILLAS DE LA PALANCA DE DIRECCION iADVERTENCIA7 Antes de Las manillas tienen tres posiciones de altura ajustar el trazado de la unidad, (Figura 16). APAGUE el motor, active el freno de estacionamiento y saque la...
- Page 65 AJUSTE DEL FRENO DE CORREA DE LA TDF ESTACIONAMIENTO iApVERTENCIA7 Las PIEZAS El freno de estacionamiento no necesita MOVILES pueden cortar o ajuste, pero si la unidad no frena amputar partes del cuerpo. correctamente, debera ser ajustado. Apague SIEMPRE el motor, quite Comprobacion del ajuste la Ilave y espere a que todas las...
- Page 66 Sustitucion de las correas del cortacesped NOTA: Para sacar la correa corta del cortacesped, se debe quitar primero la larga. PRECAUCION: Tenga cuidado cuando libere la tensi6n del muelle de la polea tensor& Mantenga las partes del cuerpo bien alejadas de las poleas cuando realice esta operaci6n.
- Page 67 Sustitucion de la correa de bomba hidrostatica 1. Detenga y estacione la unidad apropiadamente (Vease 2" FUNCIONAMIENTO en la pagina 13). 2. Retire la correa de la TDF de la polea del embrague del cortacesped (Vease Sustituci6n de las correas del cortacesped en la pagina 30).
- Page 68 PLATAFORMAS DE CORTE Extraccion de la plataforma de corte 1. Retire la correa de la TDF (Sustituci6n Ajuste del rodillo antidesbroce de las correas del cortacesped en la Los rodillos antidesbroce se ajustan en pagina 30). fabrica para la altura de corte tipica pero pueden ajustarse para condiciones de corte iADVERTENCIA7 EVITE...
- Page 69 Nivelacion de la plataforma cortacesped Estos ajustes deben realizarse en una superficie nivelada con los neumaticos inflados a la presi6n de aire correcta. Comprobacion del nivel e inclinacion de la cuchilla 1. Eleve la plataforma del cortacesped hasta una altura de 7,62 cm (3 pulg.). 2.
- Page 70 10. S i l asmediciones seencuentran fuera Ajuste de la altura de la cuchilla delos valores indicados, eleve l azona Ajuste el nivel y la inclinaci6n de la cortadora baja d elaplataforma utilizando ajustes dealtura d elos soportes con los ajustes de altura de cada soporte de elevaci6n delaplataforma (vease...
- Page 71 Para a justar: A LARGO PLAZO 1.Si e snecesario, afloje l astuercas de Limpie la unidad a fondo con un jab6n suave ajuste del e spacio hasta q ue quepa un y agua a baja presi6n y realice la lubricaci6n lamina calibradora de0,016 pulg.
- Page 72 P_'__o_;_[o_',] Part No. Description Part No. Description 21547900 Filtro de combustible 79100400 Juego para pajote para plataformas de 48 pulg. 21548000 Filtro de aire 79206400 Juego para pajote para 21548100 Filtro de aceite plataformas de 52 pulg. motor 21545100 Filtro de aceite 79206500 Juego para pajote para...
- Page 73 I_,,,,___o,]_o]_]_,,,,_ Model Number 991085 991086 991087 Model Max Zoom 48 Max Zoom Max Zoom Motor Kawasaki Nt3mero de Motor FR691 FR730 Desplazamiento del motor- 44.3 (726) pulg. 3 (cc) RPM regidas (pueden ser diferentes de las RPM 3 600 + 75 maximas) Refrigeraci6n por aire o por...
- Page 74 Ariens sustituira, sin cargo alguno para el comprador original, cualquier bloque de baterias y/o subconjunto que presente algt3n fallo por defectos en materiales o fabricaci6n durante an aSo a contar desde la fecha de compra.
- Page 75 Durante los primeros 90 dias del periodo de garantia, se sustituira una bateria defectuosa sin cargo alguno. Si el periodo aplicable de garantia supera los 90 dias, Ariens aeumira el coste prorrateado de cualquier bateria defectuosa, hasta Ilegar a los 12 meses a partir de la fecha de la compra.
- Page 76 LA GARANTiA: • Como propietario de un equipo peque_o off-road, usted es responsable del mantenimiento requerido que se indica en su manual del usuario. Ariens Company le recomienda que conserve todos los recibos que cubran el mantenimiento de su equipo peque_o off-road, aunque Ariens...
- Page 77 Ariens, Gravely o Parker y sin cargo alguno para el propietario. (5.) Si perjuicio de Io dispuesto en la subsecci6n (4) anterior, los servicios o reparaciones...
- Page 78 Ariens Company 655 West Ryan Street Brillion, WI 54110-1072 920-756-2141 Fax 920-756-2407 www.ariens.com _, WARNING ,& The engine exhaust from this product contains chemicals known to the State of California to cause cancer, birth defects or other reproductive harm. An __...