
Related Manuals for Teledyne 8800T


Summary of Contents for Teledyne 8800T
- Page 1 Model 8800T TRACE MOISTURE ANALYZER Teledyne Analytical Instruments A Business Unit of Teledyne Electronic Technologies...
- Page 2 8800T User’s Manual...
-
Page 3: Table Of Contents
8800T User’s Manual 8800T User’s Manual Table of Contents 1.0 Overview of the 8800T ..........1 2.1 Precautions using the sensor .........3 2.2 Sensor Technical Specifications ........4 2.3 Sensor Installation & Sampling Techniques ....4 2.3.1 In-situ Installation ............5 2.3.2 Extractive Installation ..........7 2.4 Troubleshooting unexpected readings ......9... - Page 4 8800T User’s Manual Appendix H: Uncertainty in LBS & ppmV calculations ..43 Appendix I: Sensor Response Time ........44 Appendix J: Return Authorization Request ......45...
-
Page 5: Overview Of The 8800T
The 8800T uses the Teledyne HTF™ sensor which is encap- sulated in sintered stainless steel, thus it is capable of com- ing into contact with a wide variety of environments. - Page 6 8800T User’s Manual page 2...
-
Page 7: Precautions Using The Sensor
Section 2: Sensor and Sampling Techniques 2.1 Precautions using the sensor The Teledyne HTF™ Al sensor is designed and field proven to be highly reliable, rugged and maintenance free. However the user should consider the following precau- tions: • To avoid the need for prolonged dry-down (when expecting to measure dewpoints dryer than -65ºC), do... -
Page 8: Sensor Technical Specifications
8800T User’s Manual tive. • Do not disassemble the porous metal filter encapsula- tion, as this will damage the sensor and void your fac- tory warranty. • Prior to installation of the probe, ensure that no contam- inants are present in the system (e.g. oil, liquid water). -
Page 9: In-Situ Installation
Section 2: Sensor and Sampling Techniques diameter of tubing, number of interconnecting fittings, dead space in tubing and manifolds; will influence the measure- ment value and response time. The high capacitance HTF™ sensors can be installed either directly in the line to be sampled (in-situ), or in a slip stream of a sample system (extractive). - Page 10 8800T User’s Manual • Under a pressurized system removal of the sensor with- out the installation of isolation valves can be dangerous. If in-situ installation is required, bypass mounting is prefer- able; make sure to install the sensor at the upper surface of...
-
Page 11: Extractive Installation
If the resources to make your own sample system are avail- able, the following two diagrams may be used as a guideline to configure a simple system. Exhaust 4-20mA loop cable 8800T oint Transmitter Think Safety www.xentaur.com Safety shut-off Valve... - Page 12 8800T User’s Manual It is generally recommended to measure at ambient pressure for the following reasons: • The readings will not be affected by variations in line pressure. • The risk of exposing the sensor to liquid water is signif- icantly reduced.
-
Page 13: Troubleshooting Unexpected Readings
Section 2: Sensor and Sampling Techniques • Do not install any devices upstream of the sensor, such as other measuring systems, flow meters etc., which are not absolutely necessary as these are potential leak sources. • Installation of a coalescing and / or particulate filter ahead of the sensor is desirable to prevent any liquid or particulate contamination of the sensor. -
Page 14: T User's Manual
8800T User’s Manual Troubleshooting unexpected readings (table spans 2 pages) Symptom Possible Cause Reading is not Condensation in sample system. changing 1. Water vapor in the system. Slow Response 2. Flow rate too low. 3. Sample pipe too large and/or too long. - Page 15 MOMENTARILY with the sensor in a known dry condition. Polarity is not important, but the contact MUST be very brief or the sensor may be damaged. Remove (unscrew) the sensor. Short the center contact of the 8800T sensor connection to the case, if the instrument reads...
- Page 16 8800T User’s Manual page 12...
-
Page 17: Precautions Using The 8800T
If weather proofing is required consult your representa- tive for an optional cover. 3.1.1 Electromagnetic Compatibility Considerations The 8800T has been designed and verified by testing to meet the requirements of the EC Council EMC Directive 89/336/EEC, for Industrial, Scientific & Medical equip- ment. -
Page 18: Instrument Technical Specifications
RS-232, however to interface to a PC or other RS-232 device an optional adapter is required. In the digital mode the 8800T can be remotely operated and the dewpoint as well as temperature page 14... -
Page 19: Installation
Sample Cell, if you do not have the ability to provide an appropriate sample cavity mounting. If the ¾”x16 thread is used then the 8800T will seal against the wall of the sample cell with the provided Viton A O-ring. If the 14mm x 1.25 spark plug thread is used then an addi-... -
Page 20: Electrical Installation
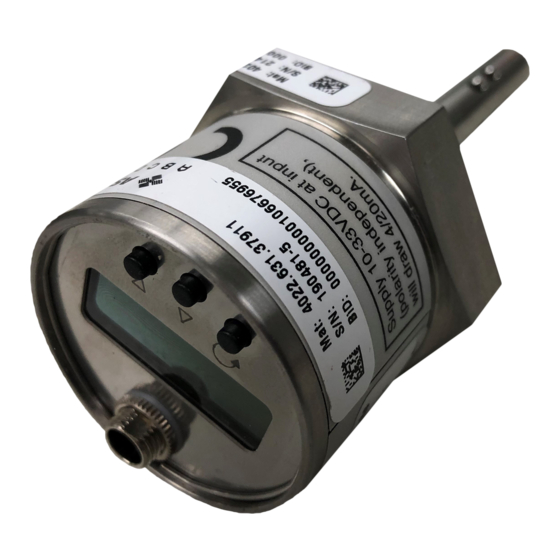
The provided cable is terminated with a connector which has a retainer, the retainer may be used to secure the connector to the 8800T thus avoiding accidental disconnection. The 8800T will draw 4mA to 20mA from the power supply depending on the dewpoint being measured. -
Page 21: Operating The Instrument
To accommodate a variety of installation possibilities, the 8800T front panel may be rotated (360°) by gently pressing down on the spring loaded face plate and turning it to the desired position. - Page 22 8800T User’s Manual not to change any parameter inadvertently. 3. °C°F appear simultaneously, to indicate the sensors’ attenuation in decibels. 4. Values larger than ±1999 or smaller than ±0.01 are dis- ±3 played in powers of 10 . As required, either a “10 ”...
-
Page 23: Push Buttons
Section 3: Instrument 3.4.3 Push Buttons Three push buttons are located on the front panel. Teledyne 8800T x10¯³ HILO TEMP ˚C˚F DEWPOINT G/M³ MODE button UP button DOWN button Each button is marked with an icon engraved above it. In general the MODE button navigates through the different user options “Modes”;... -
Page 24: Viewing Dewpoint Mode
8800T User’s Manual 3.4.4.1 Viewing Dewpoint Mode In this mode the user can view the dewpoint, this is indi- cated by the presence of the ‘DEWPOINT’ legend on the lower left of the display. The available engineering units in which to view the moisture content are °C, °F, PPM, LBS and G/M ;... -
Page 25: Start Calibration (Spancheck™) Mode
Section 3: Instrument 3.4.4.3 Start Calibration (SpanCheck™) Mode The instrument is calibrated at the factory with the sensor it is shipped with and does not need to be re-calibrated prior to installation. Instrument calibration is recommended in approximately 12 month intervals, and the XTR65W sensor should be re-cali- brated after prolonged exposure to liquid water. - Page 26 The display may show alternating as an indication that the measured capacitance is too low to be from a saturated sensor, in this case make sure that the sensor is fully engaged into the 8800T, and repeat the page 22...
- Page 27 Section 3: Instrument calibration procedure. 7. Install the sensor in the sample cell or adapter fitting or put it back into the packaging container for later use. The instrument will retain the calibration even if the power is turned off. Under certain conditions, an over (super) saturated sensor may need to be completely dried out before a calibration is performed.
-
Page 28: Viewing Serial Number Mode
8800T User’s Manual taken that the sensor temperature is not below the tempera- ture of the hand, as in such case condensation could occur and super saturate the sensor. For the same reason, avoid exhaling directly onto the sensor. 3.4.4.4 Viewing Serial Number Mode In this mode the user can view the serial number of the sen- sor calibrated and shipped with the instrument. - Page 29 Section 3: Instrument diagram of the SetUp State. The setup state provides nine capabilities, each one con- trolled from its own mode. Depressing the MODE button navigates through the modes in the following order: lect Alternate Display Units ‹ Select Sensor Type ‹ Measured Attenuation of Sensor at a Low Dewpoint ‹...
- Page 30 8800T User’s Manual tainer is labeled with the proper values. 5. Calibration Adjustment : In this mode the user can enter a sensor specific Adjustment Value to improve the instruments’ accuracy in the range of -50°C to -10°C, this adjustment has very little or no effect outside this range.
- Page 31 Section 3: Instrument f. Observe the display, if the buttons are not being pressed; the display will every few seconds show for a short duration the dewpoint as being computed at the moment (utilizing the current cal-adjust value in the computation).
-
Page 32: Troubleshooting The Instrument
8800T User’s Manual the current loop output, refer to appendix G. 9. Lock/Unlock the instrument : This mode is used to block access to parameter settings, protecting the instru- ment from unauthorized or inadvertent changes of parameters. Attempting to change settings while instru-... - Page 33 Section 3: Instrument DISPLAY EXPLANATION REQUIRED ACTION PROM check sum failed. RAM write/read test failed. cycle power Unidentified power-up failure. if problem persists, EEPROM C heck S um F ailed. return to your representative for service. A/D converter failure. Ref erence voltage for A/D out of spec. check input voltage 10-33VDC Lo w supply voltage.
- Page 34 Under these circumstances the unit display will be blank and the instrument will not draw any current when powered up. The fuse is not user replaceable, therefore the 8800T must be sent to your representative for servicing. page 30...
-
Page 35: Appendix A: Operating State User Interface Flowchart
Appendices Appendix A: Operating State User Interface flowchart 30 seconds anywhere Power ON initialization other than calibration and sign on message without a key press Teledyne 8800T a flashing 1sec. PSI legend means pressure correction is Viewing Teledyne 8800T being applied,... -
Page 36: Appendix B: Set-Up State User Interface Flowchart
8800T User’s Manual Appendix B: Set-Up State User Interface flowchart CAUTION! These parameters are set properly at the factory, to correspond to the shipped sensor. Do not modify them unless you are replacing the sensor. page 32... - Page 37 Appendices User Interface Flow Diagram - Set-Up State (continued from previous page page 33...
-
Page 38: Appendix C: 8800T Mechanical Drawing
8800T User’s Manual Appendix C: 8800T Mechanical Drawing 1.750" oint Transmitter Think Safety www.teledyne-ai.com page 34... -
Page 39: Appendix D: 8800T Electrical Connections
Appendices Appendix D: 8800T Electrical Connections Methods of Using and Interfacing the 8800T Operation with Wall Transformer Operation with Relay Option Board Dewpoint viewed on Instrument Display Dewpoint viewed on Instrument Display and available as 4-20mA output 10-33VDC Relay Option Board... -
Page 40: Appendix E: Sensor/Spancheck™ Theory Of Operation
8800T User’s Manual Appendix E: Sensor/SpanCheck™ Theory of Operation The Sensor is constructed as a capacitor whose dielectric consists of porous Aluminum Oxide as well as the gas that has entered in the pores of the Aluminum Oxide. The plates... - Page 41 This is refered to as SpanCheck™. The advantages of this unique capability of Teledyne sensors and instruments are obvious in time and cost savings for re-calibration, as well as ease of sensor replacement.
- Page 42 8800T User’s Manual page 38...
-
Page 43: Appendix F: Pressure Correction
As all Teledyne dewpoint meters, the 8800T is equipped with the necessary software to perform pressure correction. However, for the lack of space, the 8800T does not have a Pressure Correct button. Therefore the user can not set or enable Pressure Correction, this must be done at the factory. -
Page 44: Appendix G: Current Vs. Dewpoint
8800T User’s Manual Appendix G: Current vs. Dewpoint The current being pulled by the 8800T, varies with the dew- point being measured by the 8800T. To use the current to calculate the value of the dewpoint measurement, one must know the settings of the low and high ends of the analog output range, then: –... - Page 45 It is available at www.Tel- edyne-ai.com. If you are not certain how to carry out such calcu- lations send, by e-mail to Teledyne@Teledyne-ai.com or by fax to (626) 961-2538, your system specifics, and some one will get back to you with appropriate analog output settings.
- Page 46 8800T User’s Manual Relationship of 4-20mA output and instrument reading in ppmV or LBS 289.1 LBS = 0˚C = 6063.8 ppmV 49.3 LBS = -20˚C = 1019.3 ppmV 1.97 LBS = -50˚C = 38.83 ppmV 0.56 LBS = -60˚C = 10.66 ppmV...
-
Page 47: Appendix H: Uncertainty In Lbs & Ppmv Calculations
Appendices Appendix H: Uncertainty in LBS & ppmV calculations 1000 0.25 0.05 Measured Dewpoint ˚C page 43... -
Page 48: Appendix I: Sensor Response Time
8800T User’s Manual Appendix I: Sensor Response Time page 44... - Page 49 Teledyne, 16830 Chestnut St., City of Industry, CA 91748 Tel: (626) 934-1500...