Table of Contents
Advertisement
Quick Links
INSTRUCTION MANUAL
MODEL 300M
CARBON MONOXIDE ANALYZER
TELEDYNE INSTRUMENTS
ADVANCED POLLUTION INSTRUMENTATION DIVISION
(T-API)
6565 NANCY RIDGE DRIVE
SAN DIEGO, CA 92121-2251
TOLL-FREE: 800-324-5190
FAX: 858-657-9816
TEL: 858-657-9800
E-MAIL: api-sales@teledyne.com
WEB SITE: www.teledyne-api.com
04033
Revision A
Copyright 2001 API Inc
1/15/01
Advertisement
Table of Contents
Troubleshooting

Related Manuals for Teledyne 300M


Summary of Contents for Teledyne 300M
- Page 1 INSTRUCTION MANUAL MODEL 300M CARBON MONOXIDE ANALYZER TELEDYNE INSTRUMENTS ADVANCED POLLUTION INSTRUMENTATION DIVISION (T-API) 6565 NANCY RIDGE DRIVE SAN DIEGO, CA 92121-2251 TOLL-FREE: 800-324-5190 FAX: 858-657-9816 TEL: 858-657-9800 E-MAIL: api-sales@teledyne.com WEB SITE: www.teledyne-api.com 04033 Revision A Copyright 2001 API Inc...
- Page 2 SAFETY MESSAGES Your safety and the safety of others is very important. We have provided many important safety messages in this manual. Please read these messages carefully. A safety message alerts you to potential hazards that could hurt you or others. Each safety message is associated with a safety alert symbol.
-
Page 3: Table Of Contents
TABLE OF CONTENTS SAFETY MESSAGES ...II TABLE OF CONTENTS ...III LIST OF FIGURES ... VII LIST OF TABLES... VIII 1 INTRODUCTION ... 1-1 1.1 P ...1-1 REFACE 1.2 W ...1-1 ARRANTY 1.3 P RINCIPLE OF PERATION 1.4 S ...1-5 PECIFICATIONS 1.5 I NSTALLATION AND VERVIEW... - Page 4 3 PERFORMANCE TESTING ... 3-1 3.1 M ANUAL 3.1.1 Zero Check ...3-1 3.1.2 Span Check ...3-2 3.1.3 Dual Range Calibration ...3-3 3.2 S )...3-4 ALVE PTION 3.3 Z ALVES 3.4 A UTOMATIC 3.5 S UMMARY OF RONT 3.6 R EMOTE 3.7 R EMOTE 3.8 P...
- Page 5 7.2 W ...7-4 ARNINGS 7.3 S ...7-6 TATUS ONTROL 7.4 D ...7-8 IAGNOSTICS 7.5 T EASUREMENTS 7.6 V IEWING AND ODIFYING 8 CALIBRATION ... 8-1 8.1 R EQUIRED QUIPMENT AND 8.2 M ULTI OINT ALIBRATION 8.2.1 Procedure ...8-4 8.3 Z HECKING 9 ADJUSTMENTS...
- Page 6 XPENDABLES KIT 12.3 M 300M S ODEL PARE PARTS KIT 12.4 M 300M L ODEL EVEL APPENDIX A TIPS ON CONNECTING THE TELEDYNE API ANALYZER RS- 232 INTERFACE ...A-1 APPENDIX B ELECTRICAL DRAWING INDEX...B-1 ...11-1 CHEDULE ...11-2 ILTER ...12-1 ARK UNITS ...12-2...
-
Page 7: List Of Figures
IAGRAM 1-2: C IGURE ARBON ONOXIDE 1-3: R IGURE ANEL LECTRICAL 1-4: R ...1-14 IGURE ANEL 2-1: M 300M F IGURE ODEL 2-2: I IGURE LLUSTRATION OF 8-1: G IGURE ENERATION 8-2: I IGURE NLET ENTING 9-1: M300M E IGURE... -
Page 8: List Of Tables
LIST OF TABLES 1-1: S ABLE TATUS UTPUTS 1-2: F ABLE INAL EST AND 2-1: P ABLE ASSWORD EVELS 2-2: S ABLE YSTEM ODES 2-3: T ABLE EASUREMENTS 2-4: W ABLE ARNING ESSAGES 2-5: S LED’ ...2-9 ABLE TATUS 3-1: C ABLE ALIBRATION ONTROLS... -
Page 9: Introduction
1 INTRODUCTION 1.1 Preface Teledyne API is pleased that you have purchased the Model 300M. This manual has been designed to allow easy commissioning and operation but if we may be of assistance Teledyne API will be pleased to provide you with any support required. - Page 10 The warranties set forth in this section shall be of no force or effect with respect to any Product: (i) that has been altered or subjected to misuse, negligence or accident, or (ii) that has been used in any manner other than in accordance with the instruction provided by Teledyne API or (iii) not properly maintained.
-
Page 11: Principle Of Operation
Infra Red (IR) radiation by CO molecules at wavelengths near 4.5 microns. As illustrated in Figure 1-1, the Model 300M uses a high energy heated element to generate broad- band IR light. This light is passed through a rotating Gas Filter Wheel causing the beam to alternately pass through a gas cell filled with Nitrogen, (the Measure Cell) and a cell filled with CO/Nitrogen Mixture (the Reference Cell). - Page 12 Teledyne API Model 300M CO Analyzer Instruction Manual, 04033, Rev. A Figure 1-1: Pneumatic Diagram...
-
Page 13: Specifications
1.4 Specifications Ranges Zero Noise Span Noise Lower Detectable Limit Zero Drift (24 hours) Zero Drift (7 days) Span Drift (7 days) Linearity Rise/Fall Time (95%) Sample Flow Rate Temperature Range Humidity Range Dust Temp Coefficient Voltage Coefficient Dimensions HxWxD Weight Power Power, CE... -
Page 14: Installation And Overview
Figure 1-2 for screw location. 3. When installing the Model 300M, allow a minimum of 4 inches (10 cm) of clearance at the back of the instrument and 1 inch (2.5 cm) of clearance on each side for proper ventilation. - Page 15 Check that analyzer is set up for proper voltage and frequency. Power plug must have ground lug. 7. Turn on the M300M by switching the switch on the lower right corner of the front panel (See Figure 2-1). The front panel display should light with a sequence of messages, -API - M300M - software version number, then a normal display as shown in Figure 2-2.
- Page 16 Repeatedly pressing enter during span/zero calibration does not improve the accuracy of the calibration, nor does it speed up stabilization Allow 5 - 10 minutes to establish an accurate average for the span/zero reading. 11. Adjust the analyzer span point. A.
- Page 17 Teledyne API Model 300M CO Analyzer Instruction Manual, 04033, Rev. A Figure 1-2: Carbon Monoxide Analyzer...
- Page 18 Teledyne API Model 300M CO Analyzer Instruction Manual, 04033, Rev. A Figure 1-3: Rear Panel Electrical/Pneumatic Connections 1-10...
-
Page 19: Electrical And Pneumatic Connections
1.6 Electrical and Pneumatic Connections 1.6.1 Electrical Connections Output #1 Carbon Monoxide concentration - Chart Recorder (REC) Output #2 Carbon Monoxide concentration - Data Acquisition System (DAS) Output #3 Test function analog output Input #4 Zero valve request Input #5 Span valve request Input #6 Not Used There are 2 six-pin connector strips on the rear panel shown in Figure 1-3. -
Page 20: Rs-232
See also Appendix A for additional information. 1.6.5 Pneumatic System The Model 300M is equipped with a vacuum pump capable of pulling 800 cc/min across a flow restrictor. This allows a smooth, stable flow of sample through the analyzer. Sample enters the analyzer through a particulate filter element (47 mm diameter) mounted immediately behind the front panel. -
Page 21: Sample Gas Connection
1.6.6 Sample Gas Connection 1/4" O.D. PTFE tubing is needed to connect the sample source to the analyzer. See Figure 1-4. Use PTFE, glass, stainless steel or non-reactive materials for Use vent line when sampling from pressurized manifold - sample pressure should not exceed ±... - Page 22 Teledyne API Model 300M CO Analyzer Instruction Manual, 04033, Rev. A Figure 1-4: Rear Panel Pneumatic Connections 1-14...
-
Page 23: Operation Verification
12. If the TEST functions are within the limits given above, the instrument should function correctly. If there is a problem, please read the manual and check your setup and test values. The Model 300M is now ready for calibration (see Section 3.1). 1-15... - Page 24 Table 1-2: Final Test and Calibration Values Observed Test Values Value CO MEAS CO REF MR RATIO SAMPLE PRESS VACUUM PRESS SAMPLE FLOW BENCH TEMP DC POWER SUPPLY SAMPLE TEMP BOX TEMP WHEEL TEMP Dark Ref Dark Meas Electrical test CO Span Conc CO Slope CO Offset...
-
Page 25: Options
1.8 Options 1.8.1 Rack Mount With Slides This option, including slides and rack mounting ears, permits the analyzer to be mounted in a standard 19" wide x 30" deep RETMA rack. A 1¾ minimum separation between each instrument must be maintained to allow for air circulation. - Page 26 Teledyne API Model 300M CO Analyzer Instruction Manual, 04033, Rev. A INTENTIONALLY BLANK 1-18...
-
Page 27: Operation
2.1.3 E ROM Backup Of Software Configuration The Teledyne API CO Analyzer has a few jumpers that need to be set by the operator. Configuration of the analyzer is done under software control and the configuration options are stored in electrically erasable (E analyzer is powered off. -
Page 28: Data Acquisition (Das)
2.1.5 Data Acquisition (DAS) The Model 300M contains a flexible and powerful built in data acquisition system (DAS) that enables the analyzer to store concentration data as well as many diagnostic parameters in its battery backed memory. For more information on programming custom Data Channels, a supplementary document containing this information can be requested from Teledyne API. -
Page 29: Front Panel
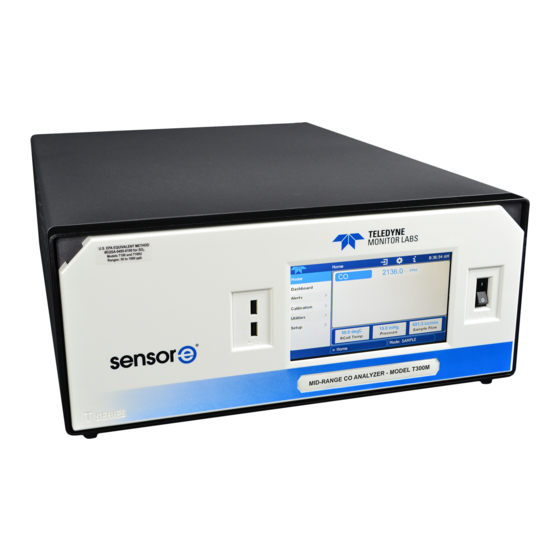
The operator and setup passwords can be disabled. To do this, enter setup-password and toggle “ON” to “OFF”. Push “ENTR” and the 2.2 Front Panel This section describes the operator interface from the point of view of the front panel. The front panel consists of a 2-line by 40-character alphanumeric display, 8 push buttons, and 3 status LED’s. - Page 30 Teledyne API Model 300M CO Analyzer Instruction Manual, 04033, Rev. A Figure 2-1: Model 300M Front Panel The mode field indicates the current mode of the analyzer. Usually, it shows "SAMPLE", indicating that the instrument is in the sample mode. Manual span checking or calibration can only be performed by pressing the buttons on the front panel labeled "CALZ", "CALS", or...
-
Page 31: Table 2-2: System Modes
Table 2-2: System Modes Mode SAMPLE x (1) SAMPLE x (1) ZERO CAL x (2) SPAN CAL x (2) MP CAL SETUP xxx (3) DIAG DAS (4) DIAG I/O (4) DIAG AOUT (4) DIAG D/A (4) DIAG TCHN (4) (1) x = A (auto) (2) x = M (manual), A (auto), R (remote) (3) xxx = software revision (e.g. -
Page 32: Table 2-3: Testm
Table 2-3: Test Measurements Test Message TIME=xx:xx:xx RANGE=xxxx PPM STABIL=x.xxx PPM CO MEAS=xxxxx MV CO REF=xxxxx MV MR RATIO=X.XXX AZERO OFFS=x.xxxxx PRES=xxx IN-HG-A VAC = xxx IN-HG-A SAMPLE FL=xxx CC/M SAMPLE TEMP=xxx C BENCH TEP=xxx C WHEEL TEP=xxx C BOX TEMP=xxx C DCPS=xxxxxx MV SLOPE=x.xxx OFFSET=xx.x MV... -
Page 33: Programmable Push Buttons
Table 2-4: Warning Messages Warning Message SYSTEM RESET RAM INITIALIZED SOURCE WARNING AZERO WARNING SAMPLE FLOW WARN SAMPLE PRESS WARN SAMPLE TEMP WARN BOX TEMP WARNING BENCH TEMP WARNING WHEEL TEMP WARNING CANNOT DYN ZERO CANNOT DYN SPAN V/F NOT DETECTED SYNC WARNING DCPS WARNING The menu field changes depending on the mode of the analyzer and the buttons that have been... -
Page 34: Status Led's
Section 4. 2.2.3 Status LED’s The three status LED’s to the right of the display indicate the general status of the Model 300M Analyzer. The green SAMPLE LED indicates the sampling status. The yellow CAL LED indicates the calibration status. - Page 35 Table 2-5: Status LED’s State Green Blinking Yellow Blinking Blinking (1) This occurs during calibration holdoff, power-up holdoff and when in Diagnostic mode Meaning Not monitoring, DAS Disabled Monitoring normally, taking DAS data Monitoring, HOLD-OFF mode on, no data to DAS (1) Auto Cal disabled Auto Cal enabled Calibrating...
- Page 36 Teledyne API Model 300M CO Analyzer Instruction Manual, 04033, Rev. A INTENTIONALLY BLANK 2-10...
-
Page 37: Performance Testing
3 PERFORMANCE TESTING Zero/span checking and calibration of the Teledyne API CO Analyzer is divided into two sections. Chapter 3 discusses the different methods by which the analyzer's zero and span settings may be checked and adjusted. The emphasis in Chapter 3 is on the operation of the buttons and the internal adjustments they make in the instrument. -
Page 38: Span Check
Teledyne API Model 300M CO Analyzer Instruction Manual, 04033, Rev. A 3.1.2 Span Check Allow the analyzer to sample span gas through the sample port. Press CAL button. After a few minutes the CO reading should be at the expected concentration. If the correct concentration is not reached, then the instrument can be adjusted to read the correct value. -
Page 39: Dual Range Calibration
3.1.3 Dual Range Calibration If the analyzer is being operated in Dual Range mode or Auto-Ranging mode, then the High and Low ranges must be independently calibrated. When the analyzer is in Dual or Auto Range mode you will be prompted to enter the range to calibrate whenever you enter a calibration command from the front panel. -
Page 40: Span Valve (Option)
3.2 Span Valve (Option) If the span valve option is installed and a source of CO span gas from the cylinder (20-25 PSIG) has been connected, the operator can check the span setpoint of the analyzer at any time by pressing the CALS button. -
Page 41: Automatic Zero/Span Check
Teledyne API Model 300M CO Analyzer Instruction Manual, 04033, Rev. A 3.4 Automatic Zero/Span Check Automatic zero/span checking (Z/S check) must be enabled in the setup mode. The Teledyne API Model 300M Carbon Monoxide Analyzer with Zero/Span Valves option offers capability to check the zero and span point automatically on a timed basis, or through remote RS-232 operation (see Section 3.7). - Page 42 The programmed start time must be a minimum of 5 minutes later than the present time. (see Section 4.3 and 4.4 for setting present time) Delta Days: The number of delta days is the number of days between each auto-sequence. Enter desired number of delay days (0-365) and press ENTR.
- Page 43 Teledyne API Model 300M CO Analyzer Instruction Manual, 04033, Rev. A Examples of possible sequences are as following under any one of three available SEQx. Example 1: To perform a 15 minute zero check once per day at 10:30 PM, 12/20/93.
- Page 44 Example 4: to perform zero check once per day at 10:30 PM and a span check once per week starting at 11:30 PM, 12/20/93. 1. Select any one of SEQx and program as example 1. 2. Select any other SEQx and program as example. 3.
-
Page 45: Remote Zero/Span Check Or Adjustment (Contact Closure)
DYN_SPAN is displayed. To change the setting, toggle the value between OFF - ON and press ENTR to store the new value or EXIT to leave the value unchanged. Teledyne API recommends that contact closures remain closed at 10 minutes to allow for an accurate average zero or span value... -
Page 46: Remote Zero/Span Check Or Adjustment (Rs-232)
RS-232 interface to do a remote Z/S check. 3.8 Power-On Hold Off Whenever the Model 300M is powered on it will go through a HOLD-OFF sequence (see Section 3.9) like it does after a zero/span check. -
Page 47: Setup Mode
4 SETUP MODE This section describes the setup variables that are used to configure the analyzer. 4.1 Setup Mode Operation ALL the setup variables are stored in the analyzer's EEPROM and are retained during power off and generally when new software revisions are installed. If a variable is modified, but ENTR is not pressed, the variable will not be changed and the analyzer will beep when EXIT is pressed. -
Page 48: Setting The Time-Of-Day
4. The concentration value is linearized over the range of 0 to 20,000 PPM by a multi-point software look-up table and corrected for temperature and pressure. 5. An average of the last 200 samples is computed and converted to the number displayed on the front panel. -
Page 49: Setting The Co Concentration Range
4.6 Setting the CO Concentration Range The CO concentration range is the concentration value that corresponds to the maximum voltage output at the rear panel (usually 5 volts). The M300M can operate in one of three analog output Range Modes. The Range Mode can be changed through the SETUP-RNGE-MODE menu. The modes are described below. -
Page 50: Setting The Analog Output Offset
4.7 Setting the Analog Output Offset In order to permit the analyzer to connect to a wider variety of strip chart recorders and other instruments, the analog output of the Carbon Monoxide readings can be adjusted by up to ±500 mV for 0-5 V range (or ±10% of current analog output range) in software. The default output offset is 0 mV. -
Page 51: Data Acquisition System (Das)
The Data Channels can be programmed and customized from the front panel. A set of default Data Channels has been included in the Model 300M software. These are described Section 4.11.1. For more information on programming custom Data Channels, a supplementary document containing this information can be requested from Teledyne API. -
Page 52: Software Configuration
The function of each of the default Data Channels is described below: Samples Carbon Monoxide concentration (Low Range) at one minute intervals CONC: and stores an average every hour with a time and date stamp. Readings during calibration and calibration hold off are not included in the data. The last 800 hourly averages are stored. -
Page 53: Gas Alarms
4.13 Gas Alarms An alarm is activated if the gas concentration is above the set limit or an out of limit condition exists. When the gas alarm is triggered, either status output 1 or 2 is closed. See Table 1-1 for the status output. -
Page 54: Table 4-1: Setup Functions
Table 4-1: Setup Functions Button Sequence SETUP-CFG-NEXT SETUP-ACAL-MODE SETUP-DAS-EDIT SETUP-DAS-VIEW SETUP-RNGE-MODE SETUP-RNGE-SET SETUP-RNGE-UNIT SETUP-PASS SETUP-CLK-TIME SETUP-CLK-DATE SETUP-MORE- COMM-BAUD SETUP-MORE- COMM-ID SETUP-MORE- VARS- DAS_HOLD_OFF SETUP-MORE- VARS- DYN_ZERO SETUP-MORE- VARS- DYN_SPAN SETUP-MORE- VARS- RS232_MODE SETUP-MORE- VARS- CLOCK_ADJ Function Default List Software CO Mach Configuration Define/Change Disabled... - Page 55 Table 4-1: Setup Functions (Continued) Button Sequence SETUP-MORE-DIAG- SIGNAL I/O SETUP-MORE-DIAG- ANALOG OUTPUT SETUP-MORE-DIAG- D/A CALIBRATION SETUP-MORE-DIAG- ELECTRICAL TEST SETUP-MORE-DIAG- DARK CALIBRATION SETUP-MORE-DIAG- FLOW CALIBRATION SETUP-MORE- DIAG- TEST CHAN OUTPUT SETUP-MORE-DIAG- RS-232 OUTPUT SETUP-MORE- ALRM-ALM1 SETUP-MORE- ALRM-ALM2 Function Default View the state of internal signals Generate Analog Output Test Pattern...
- Page 56 Teledyne API Model 300M CO Analyzer Instruction Manual, 04033, Rev. A INTENTIONALLY BLANK 4-10...
-
Page 57: Diagnostics
Viewing these test measurements does not interfere with the operation of the Model 300M or the Carbon Monoxide reading in any way, so they may be viewed freely. If the value of any test function is displayed as “XXXX”, this indicates that the reading is off scale or otherwise non-valid. -
Page 58: Diagnostic Tests
5.2 Diagnostic Tests The diagnostic tests are used to help diagnose a problem in the analyzer and should only be used by skilled maintenance people since they can potentially interfere with the Carbon Monoxide reading. Table 5-1 lists low level diagnostic tests. To get into the diagnostic test mode, press SETUP-MORE-DIAG. -
Page 59: Signal I/O
5.2.1 Signal I/O The signal I/O diagnostic mode gives the user access to the digital and analog inputs and outputs on the V/F board. The digital outputs can be controlled through the keyboard. Any signals manually changed through the signal I/O menu will remain in effect until you leave the signal I/O menu. -
Page 60: Table 5-2: I/O Signals
Table 5-2: I/O Signals (Continued) Signal WHEEL_HTR DARK_CAL ELEC_TEST BROWNOUT_RESET ST_CONC_ALARM_1 ST_CONC_ALARM_2 ST_FLOW_ALARM ST_TEMP_ALARM ST_DIAG_MODE ST_POWER_OK ST_PRESS_ALARM (table continued) Control Description Shows the status of the filter wheel heater. This has the same function as the LED in the power supply module. -
Page 61: Table 5-2: I/O Signals
Table 5-2: I/O Signals (Continued) Signal ST_HIGH_RANGE ST_SYSTEM_OK ST_BENCH_ALARM ST_SOURCE_ALAR ST_WHEEL_ALARM CO_MEASURE CO_REFERENCE SAMPLE_PRESURE VACUUM_PRESSUR SAMPLE_TEMP BENCH_TEMP WHEEL_TEMP BOX_TEMP (table continued) Control Description Status Bit - Autorange High Range Logic High = M300M in high range Logic Low = M300M in low range Status Bit - System OK Logic High = No instrument warning present Logic Low = 1 or more alarm present... -
Page 62: Analog Output Test
Table 5-2: I/O Signals (Continued) Signal DCPS_VOLTAGE DAC_CHAN_0 DAC_CHAN_1 DAC_CHAN_2 DAC_CHAN_3 CONC_OUT_1 CONC_OUT_2 TEST_OUTPUT SAMPLE_LED CAL_LED FAULT_LED 5.2.2 Analog Output Test This test cycles the analog output channels from 0% to 100% of full scale in 20% full scale steps. It starts by outputting 0 volts to all channels and displaying a 0% button. Then, every five seconds, the output is increased 20% FS and the button is changed accordingly. -
Page 63: M300M Internal Variables
5.3 M300M Internal Variables The M300M software contains many adjustable parameters. Many of the parameters are set at time of manufacture and do not need to be adjusted for the lifetime of the instrument. It is possible to change these variables either through the RS-232 port or the front panel. Altering the values of many of the variables, especially those not listed on Table 5-3, will adversely affect the performance of the instrument. - Page 64 Teledyne API Model 300M CO Analyzer Instruction Manual, 04033, Rev. A INTENTIONALLY BLANK...
-
Page 65: Handling Warnings
Teledyne API Model 300M CO Analyzer Instruction Manual, 04033, Rev. A 6 HANDLING WARNINGS When a system warning occurs, a warning message is displayed and the FAULT LED blinks. A warning indicates that something in the system needs to be checked or adjusted. Failure by the operator to respond to a warning may result in poor system performance and/or less accurate data acquisition. - Page 66 Teledyne API Model 300M CO Analyzer Instruction Manual, 04033, Rev. A INTENTIONALLY BLANK...
-
Page 67: Communications
7 RS-232 COMMUNICATIONS The Model 300M features a powerful RS-232 interface that is used both for reporting test results and for controlling the analyzer from a host computer. Because of the dual nature of the RS-232 interface, the message format has been carefully designed to accommodate both printers and host computers. -
Page 68: Das Reporting
The "<CRLF>" is a carriage return-line feed combination which terminates the message and also makes the messages appear neatly on a printer. Input messages to the Model 300M have a format which is similar to that for output messages: X COMMAND<CRLF>... - Page 69 Teledyne API Model 300M CO Analyzer Instruction Manual, 04033, Rev. A name is the Data Channel name(must be enclosed in quotes) number is the number of records to print, beginning with the most recent (if this parameter is not specified then all available records for the Data Channel are printed)
-
Page 70: Warnings
Teledyne API Model 300M CO Analyzer Instruction Manual, 04033, Rev. A 7.2 Warnings Whenever a warning message is displayed on the display, it is also sent to the RS-232 output. See Table 2-4 for a list of the warning messages. These messages are very helpful when trying to track down a system problem and for determining whether or not DAS average data is actually valid. -
Page 71: Table 7-3: Rs-232 W
Table 7-3: RS-232 Warning Message Clear Commands Command "W WSYSRES<CRLF>" "W WRAMINIT<CRLF>" "W WSOURCE<CRLF>" "W WSUTOZERO<CRLF>" "W WBENCHTEMP<CRLF>" "W WWHEELTEMP<CRLF>" "W WSAMPFLOW<CRLF>" "W WSAMPPRESS<CRLF>" "W WASMPTEMP<CRLF>" "W WBOXTEMP<CRLF>" "W WSYNC<CRLF>" "W WDCPS<CRLF>" "W WDYNZERO<CRLF>" "W WDYNSPAN<CRLF>" "W WVFDET<CRLF>" Warning Message Cleared SYSTEM RESET RAM INITIALIZED SOURCE WARNING... -
Page 72: Status/Control
7.3 Status/Control This subset of messages is concerned with reporting the status of the analyzer and controlling the analyzer remotely. Whenever the analyzer does a calibration it issues a report to the RS-232 output. The table on the following page summarizes the status reports. Table 7-4: Status Reports Report "C DDD:HH:MM IIII START ZERO CALIBRATION"... - Page 73 Table 7-5: Control Commands Command Message "C ZERO<CRLF>" "C COMPUTE ZERO<CRLF>" "C SPAN<CRLF>" "C COMPUTE SPAN<CRLF>" "C ASEQ1<CRLF>" "C ASEQ2<CRLF>" "C ASEQ3<CRLF>" "C ABORT<CRLF>" "C EXITZ<CRLF>" "C EXITS<CRLF>" "C EXIT<CRLF>" Executed only if the instrument is in the proper calibration mode and concentration is within calibration limits.
-
Page 74: Diagnostics
7.4 Diagnostics The diagnostics mode can be entered from the RS-232 port as well as from the front panel. The diagnostics commands available are listed on Table 7-6. Table 7-6: Diagnostic Commands Command D ENTER SIG D EXIT D LIST D name[=value] The diagnostics mode may only be entered via the RS-232 port when the analyzer is in sample mode. -
Page 75: Test Measurements
Teledyne API Model 300M CO Analyzer Instruction Manual, 04033, Rev. A 7.5 Test Measurements All the test measurements which can be displayed by pressing the TEST button are also available to the host computer via the RS-232 interface. The host computer should issue a request for a test measurement, and then the CPU will send the current value of the test measurement to the RS- 232 output. -
Page 76: Table 7-8: Testm
Table 7-8: Test Measurement Request Commands Command "?<CRLF>" "T LIST<CRLF>" "T CO<CRLF>" "T COMEAS<CRLF>" "T COREF<CRLF>" "T MRRATIO<CRLF>" "T SAMPPRESS<CRLF>" "T VACUUM<CRLF>" "T SAMPFLOW<CRLF>" "T SAMPTEMP<CRLF>" "T BENCHTEMP<CRLF>" "T WHEELTEMP<CRLF>" "T BOXTEMP<CRLF>" "T DCPS<CRLF>" "T COSLOPE<CRLF>" "T COOFFSET<CRLF>" "T CLOCKTIME<CRLF>" Test Measurement RS-232 HELP screen Summary of all TEST's... -
Page 77: Viewing And Modifying Variables
Teledyne API Model 300M CO Analyzer Instruction Manual, 04033, Rev. A 7.6 Viewing and Modifying Variables The most powerful feature of the RS-232 interface is the ability of a host computer to view and modify the analyzer's internal variables. Just as the operator modifies the variables by means of the setup mode, the host computer modifies them by means of the RS-232 interface. - Page 78 After changing the variable's value, the CPU will respond with: V VARIABLE=VALUE WARNLO WARNHI [DATALO-DATAHI] <CRLF> which should reflect the new value. The values in square brackets are not required for all variables. If needed, the values are included on the command line, separated by spaces. For example, to change the instrument ID, the host computer would issue a command like this: V MACHINE_ID=1234<CRLF>...
-
Page 79: Calibration
8 CALIBRATION This section describes a method of performing a multi-point calibration of the Model 300M CO Analyzer and a method of performing a zero-span check. 8.1 Required Equipment and Gas Standards Zero air must be free of CO (less than 0.1 PPM of CO). - Page 80 Teledyne API Model 300M CO Analyzer Instruction Manual, 04033, Rev. A Figure 8-1: Gas Generation System Figure 8-2: Inlet Venting Recommendations...
-
Page 81: Multi-Point Calibration
For minimum back-diffusion through the vent and for minimum back-pressure in the manifold, the following relationship should be met: × × Where Q is the vent flow in cc/min is the analyzer flow in cc/min L is the vent line length in inches D is the ID of the vent line in inches For Q of 1000 cc/min... -
Page 82: Procedure
8.2.1 Procedure 1. Set the analyzer to the desired range. 2. Set the calibration system to deliver a flow of at least 1000 cc/min. The Model 300M draws approximately 800 cc/min. (See Section 8.1 and Figure 8-2 for vent flow calculation.) 3. - Page 83 13. Allow the analyzer to sample the CO concentration. 14. Push “CAL”. 15. Enter password. (If enabled) 16. Push “CONC”. 17. Change the span value in the display to the calculated CO concentration in the manifold in PPM units, and push “ENTR”. 18.
- Page 84 Teledyne API Model 300M CO Analyzer Instruction Manual, 04033, Rev. A If poor correlation exists, check for 1. Flow calculation errors 2. Concentration calculation errors 3. Leaks in manifold 4. Dirt in the manifold 5. Proper manifold venting 6. Zero air system If none of these help, see the TROUBLESHOOTING SECTION 10.
-
Page 85: Zero/Span Checking
Teledyne API Model 300M CO Analyzer Instruction Manual, 04033, Rev. A 8.3 Zero/Span Checking It is recommended that the Model 300M be checked daily for zero and span drift. With the Automatic Zero/Span Check and Remote Zero/Span Check features of the Model 300M, daily zero and span checks are easy. - Page 86 Teledyne API Model 300M CO Analyzer Instruction Manual, 04033, Rev. A INTENTIONALLY BLANK...
-
Page 87: Adjustments
The operations outlined in this chapter are to be performed by qualified maintenance personnel only. All adjustments to the Model 300M are easy to make. Pots and test points are readily accessible without removing any components. Figure 1-2 is a plan view of the Model 300M CO analyzer showing all the major components. - Page 88 Teledyne API Model 300M CO Analyzer Instruction Manual, 04033, Rev. A Figure 9-1: M300M Electrical Block Diagram...
-
Page 89: A/D - D/A Calibration Procedure
9.2 A/D - D/A Calibration Procedure Due to the stability of modern electronics, this procedure should not have to be performed more than once a year or whenever a major sub-assembly is exchanged or whenever analog output voltage range is changed. To calibrate the voltage output, do the following: 4 - 20 mA current output calibration procedure should follow after voltage calibration. - Page 90 To calibrate the 4-20 mA current output, do the following: Verify 5 volt output DIP switch setting (refer to Table 10-4) for 4-20 mA output, since the input voltage of the 4-20 mA IC is configured for 0 - 5 volt range, before proceeding following procedure.
-
Page 91: Dark Current Signal Adjust Procedure
9.3 Dark Current Signal Adjust Procedure The detector dark current change is negligible as the detector ages. Therefore this procedure should not need to be performed more than once per year or whenever a major sub-assembly is changed. To calibrate the dark current signal, press SETUP-MORE-DIAG-DARK-CAL and the analyzer will automatically do the following: 1. -
Page 92: Flow Readout Adjustment
9.5 Flow Readout Adjustment The flow/pressure sensor board consists of 2 pressure sensors. The flow rate value is computed from these two pressure sensors and displayed on the front panel TEST function including two pressure readings. They are: 1. Inlet sample gas pressure - sensor S1 2. -
Page 93: Dc Power Supply
9.6 DC Power Supply Overall performance of the DC power supply may be checked by observing the value displayed during test DCPS. If this value, a composite of the five (5) regulator outputs, deviates by more than 10% from the value recorded in Table 1-1 of this manual under Test Values, the outputs of the individual regulators should be measured. - Page 94 Teledyne API Model 300M CO Analyzer Instruction Manual, 04033, Rev. A INTENTIONALLY BLANK...
-
Page 95: Troubleshooting
10.1 Overview The Model 300M has been designed to rapidly detect possible problems and allow their quick evaluation and repair. During operation, the analyzer continuously performs self-check diagnostics and provides the ability to monitor the key operating parameters of the instrument without disturbing monitoring operations. -
Page 96: Troubleshooting Fundamental Analyzer Operation
10.2 Troubleshooting Fundamental Analyzer Operation When the analyzer is turned on, several actions will normally occur which indicate the proper functioning of basic instrument sub-systems. These actions are: 1. The sample pump should start. 2. The green sample light on the front panel should turn on. 3. -
Page 97: Checking The Cpu And Display
10.2.2 Checking the CPU and Display When the analyzer is turned on, the front panel display should energize and the green "Sample" LED should light. If proper DC power is present (see Section 10.2.1), the absence of these actions will usually indicate either a CPU or Display failure. To determine which module is defective, perform the following procedure: 1. -
Page 98: Table 10-1: Warningm
Table 10-1: Warning Messages Warning Message Meaning SOURCE WARNING The CO REF value is greater than 5000 mV or less than 2500 mV SYNC ERROR No modulation is present on the output of the IR detector. BENCH HEAT Temperature control of the SHUTDOWN Optical bench cannot be maintained at its 48°C set point... -
Page 99: Troubleshooting Using Test Function Values
10.4 Troubleshooting Using Test Function Values The Model 300M provides the capability to display, on operator demand, the values of Test Functions which allow the observation of key analyzer operating parameters. These Test Functions can be accessed by depressing the TEST Button on the instrument's front panel causing the next test function to be displayed. -
Page 100: Table 10-2: Test Function
Table 10-2: Test Function Values Test Function Meaning RANGE The Current Full Scale Range Setting of the analyzer's analog outputs CO MEAS The most recent detector reading taken in Measure mode CO REF The most recent detector reading taken in Reference mode MR RATIO The ratio of the CO... -
Page 101: Troubleshooting Dynamic Problems
6. Confirm the sample temperature, sample pressure, and sample flow readings are correct. Check and adjust as required. 7. If Non-Linear readings persist, contact Teledyne API Customer Service for advanced linearity adjustment techniques and procedures. 10.5.3 Slow Response to Changes in Concentration 1. -
Page 102: Analog Outputs Do Not Agree With Front Panel Readings
10.5.4 Analog Outputs Do Not Agree With Front Panel Readings 1. Confirm that the DAC offset (SETUP-MISC-D/A-OFFS) is set to zero. 2. Perform a DAC/ADC adjustment and Dark Signal adjustment by following the procedure described in Sections 9.2 and 9.3. 10.5.5 Cannot Zero or Cannot Dynamic Zero 1. - Page 103 2. Flow is greater than zero, but is too low, and/or unstable 3. Flow is too high Figure 1-1 in this manual provides a schematic diagram of the flow in a Model 300M. Hazardous voltages present - use caution. Flow is zero: 1.
-
Page 104: Troubleshooting Temperature Problems
Teledyne API Model 300M CO Analyzer Instruction Manual, 04033, Rev. A 10.6.2 Troubleshooting Temperature Problems The Model 300M has been designed to operate at ambient temperatures between 10°C and 40°C. As a first step in troubleshooting temperature problems, confirm the ambient temperature is within this range and that the air inlet slots on the sides of the cover and the fan exhaust on the rear panel are not obstructed. -
Page 105: Checking The V/F Card
If temperature sensor readings appear accurate but control temperatures are not being maintained at their proper value, check the operation of the heaters as follows: 1. Observe the indicator LED's on the Power Supply Module and confirm that the red (right- most) LED is lit, and that the "CEL HTR"... -
Page 106: Table 10-3: V/F Boardj
Table 10-3: V/F Board Jumpers - Factory Settings Factory Set Jumpers Jumper Table 10-4: V/F Board Switch Settings - Ranges for Analog Output Switch S1 (Recorder Output) S2 (DAS Output) S3 (Test Output S4 (Spare) 3. If voltages and jumper settings are correct, the V/F card is faulty and should be replaced. The primary functions of the board can be divided into three areas: 1. - Page 107 10.6.3.1 Analog Inputs 16 Analog channels (0-5 VDC) are multiplexed under microprocessor control by IC U26 and transmitted via buffer amp U29 to the V/F converter section of the board for A/D conversion. Analog to Digital (A/D) conversion is accomplished by performing a Voltage to Frequency (V/F) conversion on the input signal at IC U17 and running the frequency output to a counter comprised of IC's U20, U21, U22.
-
Page 108: Checking The Dc Power Supply Board
The DAC's are operated in bipolar mode allowing a "live zero" on all output. In addition, DAC's 0 and 1 (Strip Chart and DAS) physically provide a Full Scale of 120% of the nominal selected value with the microprocessor providing pre-scaling to achieve the nominal value. This combination provides 20% over-range capability. -
Page 109: Checking The Synchronous Demodulator Board
2. Confirm that the following voltages are present on the V/F Board: A. +5V between V/F TP 4 and V/F TP 5 B. +15V between V/F TP 1 and V/F TP 3 C. -15V between V/F TP 2 and V/F TP 3 D. -
Page 110: Checking The Opto Interrupter
Teledyne API Model 300M CO Analyzer Instruction Manual, 04033, Rev. A 10.6.6 Checking the Opto Interrupter Correct operation of the Opto Interrupter on the gas filter wheel can be confirmed by connecting an oscilloscope U6, Pin 11 on the Sync Demodulator board and comparing the waveform to Figure 10-1. -
Page 111: Flow/Pressure Sensor
10.6.7 Flow/Pressure Sensor The flow/pressure sensor board consists of 2 pressure sensors. The flow rate value is computed from these two pressure sensors and displayed on the front panel TEST functions including two pressure readings. Several minutes may be required for a steady reading if observing the TEST functions. They are: Inlet sample gas pressure –... -
Page 112: Warranty/Repair Questionnaire
Do opto-interrupter and detector waveforms match those shown in Figure 10-1 and Figure 10-2? Thank you for providing this information. Your assistance enables Teledyne API to respond faster to the problem that you are encountering. Phone: (858) 657-9800 Toll Free:(800) 324-5190 FAX: (858) 657-9816 E-MAIL: api-sales@teledyne.com... -
Page 113: Routine Maintenance
The operations outlined in this chapter are to be performed by qualified maintenance personnel only. 11.1 Model 300M Maintenance Schedule The following are the recommended periodic maintenance items for the Teledyne API Model 300M CO Analyzer: Table 11-1: Maintenance Schedule... -
Page 114: Replacement Of Sample Filter
11.3.1 Using a Leak Checker Turn the power off. Disconnect the fittings from the pump and bypass the pump. Connect the leak checker to the sample inlet of the Model 300M. Cap the exhaust of the analyzer. Set the leak checker to pressure mode. -
Page 115: Leak Self Test
Use only bubbles, not liquid. 11.3.2 Leak Self Test If only a Model 300M is available, the following alternate method for leak checking can be used. The power must be on and the pump must be in-line. Disconnect the power from the pump. - Page 116 Teledyne API Model 300M CO Analyzer Instruction Manual, 04033, Rev. A INTENTIONALLY BLANK 11-4...
-
Page 117: Spare Parts Lists
12 SPARE PARTS LISTS 12.1 Spare parts for CE Mark units Note: Use of replacement parts other than those supplied by Teledyne API may result in non-compliance with European Standard EN 61010-1. PART NO. DESCRIPTION 00015 POWER SUPPLY BOARD 00276-0804... -
Page 118: Model 300M Expendables Kit
VA004 SOLENOID, SS, 2-WAY, 24V 12.2 Model 300M Expendables kit PART NO. DESCRIPTION 009600400 300M 47 mm Filter Expendables Kit - KNF Pump Model #NO5ATI Includes: 009690100 Filter, TFE, 47 mm 5 um, Qty. 25 FL0000001 Sintered Filter (002-024900) HW0000020... -
Page 119: Model 300M Level 1 Parts Kit (For Ten Units)
12.4 Model 300M Level 1 parts kit (for ten units) PART NO. DESCRIPTION 037610000 300M Level 1 Spare Parts Kit (for 10 units) Includes: 000941000 Orifice, 13 mil 800 cc, Rx Cell 007930000 Assembly, Fan, PSM (FA0000004 ASSY) 009530000 Pre-amplifier/Detector Assembly... -
Page 120: Appendix A Tips On Connecting The Teledyne Api Analyzer Rs-232 Interface
The problem centers around two areas. First is the physical incompatibility of connectors. Second is the wiring of the connectors. This Note will attempt to provide some guidelines for connecting the Teledyne API analyzers to a variety of other equipment... - Page 121 "Data Terminal Equipment" or DTE. As technology has progressed it has become more ambiguous who was DCE and DTE. Teledyne API analyzers are wired as DTE (i.e. like a printer). As can be seen, this presents difficulties if you a hook a printer to the instrument that is likewise wired as a printer.
- Page 122 Teledyne API Model 300M CO Analyzer Instruction Manual, 04033, Rev. A The modem is configured as Data Communications Equipment (DCE), and may have additional signal requirements to enable transmission. See modem troubleshooting section below. NOTE MODEMS ARE ESPECIALLY DIFFICULT BECAUSE THEY MAY HAVE PINS THAT NEED TO BE AT CERTAIN EIA RS-232 LEVELS BEFORE THE MODEM WILL TRANSMIT DATA.
-
Page 123: Appendix B Electrical Drawing Index
APPENDIX B Electrical drawing index Drawing Number 00015 00016 00514 00515 0053202 0053302 00551 00798 00799 00866 00867 00874 00875 01916 01917 01930 01931 03757 03758 Title Assembly, DC Power Supply PCA Schematic, DC Power Supply PCA Assembly, A/D - I/O Card PCA Schematic, A/D - I/O Card PCA Assembly, Power Supply Module PCA Schematic, Power Supply Module PCA...