Table of Contents
Advertisement
Quick Links
Patent P ending
ModelNo.RBE09950
Sofia!No.
Serial N umber
Decal
(beneath
ramp)
QUESTIONS?
If you have questions,
or if there
are missing
pars,
we will guar-
antee complete
satisfaction
through
direct assistance
from
our factory.
TO AVOID DELAYS, PLEASE
CALL DIRECT TO OUR TOLL-
FREE CUSTOMER HOT LINE.
The trained technicians
on our
customer
hot line will provide
immediate assistance,
free of
charge to you.
CUSTOMER HOT LINE:
1°877°994°4999
Mon.-Fri,
6 a.m.-6
p.m. MST
ER'S
CAUTION
Read all precautions
and instruc-
tions in this manual before using
this equipment.
Keep this manual
for future reference.
it our web$ite
aT
www.reebokhomefitness.eom
new products,
prizes,
fitness
tips, and much
morel.
Advertisement
Table of Contents

Related Manuals for Reebok RL900


Summary of Contents for Reebok RL900
- Page 1 Patent P ending ModelNo.RBE09950 ER'S Sofia!No. Serial N umber Decal (beneath ramp) QUESTIONS? If you have questions, or if there are missing pars, we will guar- antee complete satisfaction through direct assistance from our factory. TO AVOID DELAYS, PLEASE CALL DIRECT TO OUR TOLL- FREE CUSTOMER HOT LINE.
- Page 2 AWARN ING: To reduce the risk ofserious _.jury, read t he fo.owing _mportant precau- tions before using the elliptical exerciser, 1. Read aH instructions in this manual before using the elliptical exerciser. 9. Wear appropriate exercise clothes when using the elliptical exerciser.
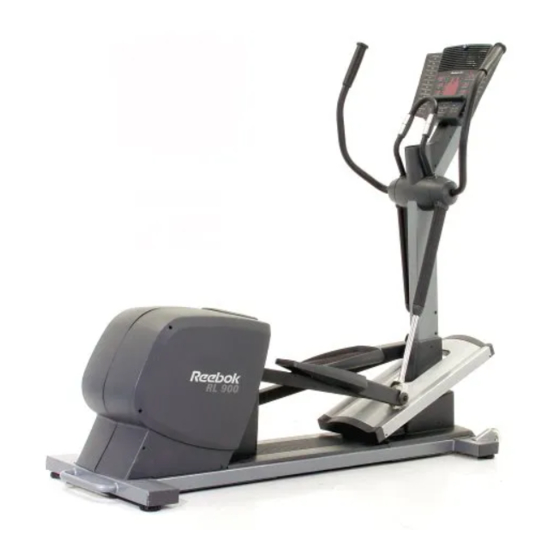
- Page 3 Congratulations for selecting the new REEBOK _ RL Customer Service Department toGfree at 1-877-994- 900 elliptical exerciser. The RL 900 elliptical exerciser 4999, Monday through Friday, 6 a.m. until 6 p.m. is an incredibly smooth exerciser that moves your feet Mountain Time (excluding holidays).
- Page 4 Assemblyrequirestwo persons.Placeallpartsofthe elliptical exerciser in a cleared area and remove the packing materials. Do not dispose of the packing materials until assembly is completed, in addition to the two included hex keys, assembly requires a phillips screwdriver C_--_, two adjustable wrenches a rubber mallet r ..
- Page 5 2. Orient the Rear Stabilizer (2) as shown. Attach the Rear Stabilizer to the Frame (1) with four M8 x 65mm Button Screws (95) and four M8 Split Washers (85). 3. Slide an M8 x 25mm Washer (119) onto an M8 x 20mm Button Screw (118).
- Page 6 5. Attacha Pedal A ssembly ( 39)totheLeftPedal A rm(9) withfiveM4x 16mm Screws (89). Attach theotherPedal A ssembly ( notshown) t othe RightPedal A rm(notshown) i n thesameway. 6. Remove thetwoPivotShafts (10)fromthetwoPivot Arms(notshown). N ext,identify a UnionSet(86),and remove thescrewfromthebarrel. Applya small amount o fgrease totheoutside ofthebarrel.
- Page 7 8. While another person holds the Pulse Sensor Bar (26) near the Upright (4), connect the upper pulse wires to Upper the lower pulse wires, insert the excess wire into the Pulse Upright. Wire Orient the Pulse Sensor Bar (26) as shown. Attach the Pulse Sensor Bar to the Upright (4) with four M8 x Upper 16mm Button Screws (94), being careful...
- Page 8 11. i dentify the LeftHandlebar (7).Attachthe Left Handlebar to theleftPivot A rm(20)withfourM8x 13mmButton Screws (90)asshown. AttachtheRightHandlebar (6)to therightPivot A rm (20)in thesameway. 12.Position t heFrontLeftPivotCover(21)andthe Rear LeftPivotCover(31)overthe leftPivot A rm(20)as shown. A ttachtheLeftPivotCovers withan M4x 16mmRound HeadScrew (91)andtwoM4x 16mm Screws (89). AttachtheFrontRightPivotCover(29)andtheRear RightPivotCover(notshown) o vertherightPivot A rm (notshown) inthesameway.
- Page 9 HOWTO PLUG INTHEPOWER CORD The green=colored rigid ear, lug, or the like extending from the adapter must be connected to a permanent This product ground such as a properly grounded outlet box cover. mustbe Grounded O utletBox Whenever the adapter is used, it must be held in grounded.
- Page 10 CONSOLE DIAGRAM IN FENSITY PROGRAM CENTER O ADJUST INTENSITY HEART RATE FEATURES OF THE CONSOLE audio cable, you can connect the elliptical exerciser to your home stereo, portable stereo, computer, or VCR The advanced console offers a selection of features and play special iFIT.com CD and video programs designed to make your workouts more enjoyable and (iFIT.com CDs and videocassettes are available sepa-...
- Page 11 The Time display HOW TO USE THE MANUAL MODE will show the I _t _t /-o- elapsed time. Note: / ChC Turn on the console. When a program is TIME selected, the dis- play will show the To turn on the console, press any button or begin time remaining in the program instead of the pedaling.
- Page 12 Measure your heartrate Turn on the fans if desired. if desired. if there are To turn on the fans thin sheets of at low speed, press Fans Button the fans button. To plastic on the metal con= turn on the fans at tacts on the high speed, press the button a second...
- Page 13 The program wiJJcontinue until no time remains HOW TO USE A PRESET PROGRAM in the Time display. Turn on the console. Adjust the intensity leve{ of the program desired. See step 1 on page 11. To increase or decrease the intensity level of the program, press the increase and decrease but- Select one of the eight preset programs.
- Page 14 hold the handgrips frequently for the program to HOW TO USE A HEART RATE PROGRAM operate properly. Each time you hold the hand- grips, keep your hands on the metal contacts Each heart rate program helps you to keep your heart for at least 30 seconds.
- Page 15 The pace guide heart rate to the target heart rate setting, the will prompt you to resistance of the elliptical exerciser may automat= increase or icalJyincrease or decrease to bring your heart tOO SlOW fast decrease your rate closer to the target heart rate setting. pedaling pace.
- Page 16 saved in memory. The columns of indicators will HOWTO CREATE AND USE A CUSTOM then move one column to the left, and the resis- PROGRAm1 tance setting for the second segment will be shown in the flashing Current Segment column. Program a resistance setting and a pace setting Turn on the console.
- Page 17 HOW TO CONNECT YOUR PORTABLE STEREO HOW TO CONNECT YOUR CD PLAYER, VCR_ OR COMPUTER Note: if your stereo has an RCA-type AUDIO OUT jack, see instruction A below, if your stereo has a 1/8" LiNE OUT jack, see instruction B. if your To use iFIT.com CDs, the elliptical exerciser must be stereo has only a PHONES jack, see instruction C.
- Page 18 HOW TO CONNECT YOUR HOME STEREO HOW TO CONNECT YOUR COMPUTER Note: If your stereo has an unused LINE OUT jack, Note: If your computer has a 1f8" LINE OUT jack, see Bnstruction A below. Jf the LINE OUT jack is see instruction A.
- Page 19 HOW TO CONNECT YOUR VCR B. Plug one end of the audio cable into the jack beneath the console. Plug the other end of the Note: If your VCR has an unused AUDIO OUT jack, cable into the adapter. Plug the adapter into an see instruction A below.
- Page 20 your workout. Simply follow your personaJ trainer's TO USE IFIT.COM CD AND VIDEO instructions. PROGRAMS The program will function in almost the same way as a preset program (see steps 3 and 5 on page To use iFIT.com CDs or videocassettes, the elliptical 13).
- Page 21 Follow the on-line instructions to start the HOWTO USE PROGRAMS DIRECTLY FROM program. OUR WEB SITE When you start the program, an omscreen count- down will begin. Our Web site at www.iFIT.com allows you to play iFIT.com programs directly from the internet. To use Return to the elliptical exerciser and begin...
- Page 22 HOW TO MOVE THE ELLIPTICAL EXERCISER inspect and properly tighten all parts of the elliptical exerciser regularly. Replace any worn parts immedi- ately. Stand behind the elliptical exerciser and hold the indi- cated handle firmly. Lift the handle until the elliptical For smooth exerciser can be moved on the front wheels, and operation of the...
- Page 23 During the first few minutes of exercise, your body _WARNING: uses easily accessible carbohydrate calories for ener= gy. Only after the first few minutes of exercise does Before beginning this or any exercise pro- your body begin to use stored fat calories for energy. gram, consult your physician.
- Page 24 Key No. Qty. Description Key No. Qty. Description Frame Wheel Cap Rear Stabilizer "C" Magnet Front Stabilizer Spring Power Cord Upright Lower Wire Harness Ramp Right Handlebar Upper Wire Harness Left Handlebar Extension Wire Harness Frame Plate Right Pedal Arm Left Pedal Arm Rear Frame Plate Pivot Shaft...
- Page 25 Key No. Qty. Description Key No. Qty. Desctipt{on Magnet Bracket Bolt Long Clevis Pin Frame Cushion M5 x 16mm Bolt Clamp M8 x 20mm Button Screw Reed Switch Bracket M8 x 25mm Washer M5 x 16mm SeGtapping Screw M4 x 12mm Screw M8 x 47mm Button Screw Belt 8mm Plastic Spacer...
- Page 26 89 t 90 _...
- Page 27 >115...
- Page 28 • The KEY NUMBER and DESCRiPTiON of the part(s) (see pages 24 to 27) REEBOK and the Vector Logo _------_._'_'-are registered trademarks and service marks of Reebok. This product is manufactured and distributed under license from Reebok international. iCON Health & Fitness, Inc. (iCON), warrants this product to be free from defects in workmanship and mate- rial.