Table of Contents
Advertisement
Advertisement
Table of Contents

Related Manuals for Pfaff coverlock 4872


Summary of Contents for Pfaff coverlock 4872
- Page 3 —...
- Page 6 — — —...
- Page 9 Contents Page Rubber feet, cleaning ...,.,..,...,...,...... 1, 2 Safety instructions Seam width adjusting knob Seam width viewing window Seam width, setting Sewing light cover Sewing probiems and their solutions 70, 71 Sewing speed pre-se(ection Specifications p ooi disc Spool holder Stitch formation correction measures 49 62 Stitch length adjustment knob...
- Page 11 (/____•S\ 1I 1 ! I I ! ! I I I I III11I1 Operating instructions Connecting the foot control Electrical connection Connect the plug of the foot control to the connection socket 47 of the machine. Connect the lead cord between the socket 45 of the machine and the wall outlet.
- Page 12 19 is opened, for safety reasons, i.e. sewing with the machine is no longer possible. -‘ PFAFF Waste container To remove the waste container, repeat this procedure in the reverse order. Insert the upper latch of the waste container...
- Page 13 — — Pcnrc Spool holder Telescoping thread guide Before placing thread cones/spools on Pull the telescoping thread guide 39 machine you must pull the spool holder 41 upwards to its highest position. fully away from the back of machine. To ensure optimum thread feed, turn the telescoping parts slowly until you hear the locking balls click into place.
- Page 14 —...
- Page 15 Presser foot With the standard presser foot 10 use the setting “A” of the spring-loaded presser foot latch for the cover stitch programs (Progs. 1, 2, 3), the two-thread chainstitch (Prog. 4), the 4-thread safety-stitch seam (Prog. 191 and the 5-thread safety-stitch seam (Prog.
- Page 16 1L2R2 0 12 1R2 1L21R2 The different needle positions are depicted Need’e position in a schematic drawing in the instruction This machine has 5 needle positions and manual. Also refer to the examples above can sew with a maximum of three needles and below.
- Page 17 Changing the needle Switch off the eectrica power To remove: Lower the presser foot and move the needle(s) to the highest position by turning the handwheel. Push the needle inserting tool (from the accessory box 56) from below upward fully over the needle. Loosen the fastening screw of the needle (without removing it) with the Allen key and pull the needle down to...
- Page 18 Threading the thread guides Place the spools on the spool pins 42. You will find information on the thread net, thre ‘tj ad unreeling disc, reel disc and cone thread adapter on pages 9 and 10. Thread through the thread guides 38 from the back to the front following the colored threading paths.
- Page 20 Threading the ‘ower overedge ‘ooper (yeflow) Turn the handwheel towards you until the lower overedge looper 26 is on the extreme right. Threadinasequenceofi to 10. Note: To make this task easier, use the tweezers which can be found behind the swivel plate. —...
- Page 21 —...
- Page 22 Threadng the two thread chanstftch ooper and cover sttch baper (vioet) Turn the handwheel towards you until the two thread chainstitch looper 28 is on the extreme right. Thread in a sequence of 1 to 11. Note: To make this task easier, use the tweezers which can be found behnd the swivel plate.
- Page 23 Push the lever A upward and hook the thre Thread the thread guides which are marked ad into the slot B. Also refer to the drawing with a violet square in a sequence of 1 to 9. below. Note: The lever returns automat ically to its posi tion as soon as you start sewing.
- Page 24 Exceptwn: Threading the two thread chainstitch looper and cover stitch looper for the cover stitch (violet) (Prog, 1, 2, 3) Turn the handwheel towards you until the two thread chainstitch looper 28 is on the extreme right. Thread in a sequence of 1 to 10. Note: ‘Ic To make this task easier, use the tweezers...
- Page 25 Thread the thread guides, as shown in the Press lever A upward and hook the thread diagram, in a sequence of 1 to 8. Some of into slot B. Also refer to the drawing below. the threads guides are marked with a violet square.
- Page 26 Threading the needles Thread in a sequence of 1 to 8. Note: To make this task easiet use the tweezers which can be found behind the swivel plate. ‘iri mc’, Pl’AF The thread must be guided through the Pull approximately 4” (10cm> of thread lower slot of thread guide 5.
- Page 27 40>.
- Page 28 mportant note on threading If the looper threads break, you must pull the needle threads out of the needle, The needle(s) must always be threaded last rethread the looper thread and then so that the needle threads do not run under rethread the needle threads.
- Page 29 Need!e threader Move the needle(s) into the highest position and lower the presser foot. Place the thread from right to left in notch A of the needle threader (to be found in the accessory boxi. One of the two triangles must point up wards.
- Page 30 —...
- Page 31 Overview of the threading paths and threading sequences Program 06: Program 05: 2-thread flatlock, narrow 2-thread flatlock. wide Program 07: narrow 2-thread serging Program 08: 2-thread flat hem Program 09: folded 2-thread rolled hem Program 10: Program 11: 3-thread overedge, wide 3-thread overedge, narrow Program 16: Program 12:...
- Page 32 Overview of the threading paths and threading sequences Program 15: Program 18: 2-needle 3-thread overedge seam 4-thread overedge seam Program 19: Program 20: 4-thread safety-stitch seam 5-thread safety-stitch seam...
- Page 33 Sewing speed pre-seection Using sewingspeed pre-selection slide 9, the maximum speed can be adjusted anywhere between 700 rev/mm. and 1500 rev/mm. Presser foot pressure The pre-set presser foot pressure on the machine is suitable for medium-heavy fabrics. The presser foot pressure does not need to be adjusted for most fabrics, If you are working with light or heavy fabrics then you may need to adjust the pressure.
- Page 34 Thread chain cutter After finishing the seam, sew an approx. 6” -8” (15 -20 cm> long thread chain. Pull the thread chain from the back to the front over the thread chain cutter 40. This will cut off the thread chain. Cbmp spring for serging thread chain 32 Using this feature you can serge the thread chain at the start of the fabric, by pulling it...
- Page 35 Disengaging the upper bbde Switch off the &ectrical power Move the movable upper blade 30 into its highest position by turning the handwheel. Remove the waste container and open the looper cover and the swivel plate. Now turn the handwheel fully to the right to lower the upper blade 34.
- Page 37 Attaching the converter Position the upper overedge looper 25 right next to the needle by turning the handwheel Switch off the eIectrcaI power towards you. The converter 36 must be attached for all twothread seams (exception: Program 4) and the twoneedle three thread closing seam.
- Page 38 mustration A: Should loops project out of Setting the seam width the workpiece, move the movable upper The required seam width can be adjusted blade 30 to the right by turning the seam anywhere between 3.5 and 6 mm by turning width adjusting knob upwards.
- Page 39 Securing the upper blade Switch off the master switch It is recommended to secure the movable upper blade 30 before sewing heavy fa brics. Raise the needle(s) to its highest posi tion and open the swivel plate. Tighten the screw fully using the Allen key. This screw should always be slightly loosened again af ter sewing heavy fabrics.
- Page 41 Note: Please ensure that the upper overedge looper is disengaged before attaching the power table 57. PFAFF To return the machine to its previous settings after sewing with the cover stitch or two thread chainstitch. Open the looper cover and remove the power table.
- Page 42 Differential feed The differential feed consists of two feed B), one behind the other, which dogs (A feed the fabric. The movement of the front feed dog (A) and thus the amount of material to be fed can be regulated using the regulator wheel 49.
- Page 43 Set the regulator wheel for the differential Here you will avoid stretching in the seam when working with knitwear, such as feed 49 to 2.0. jerseys or gathered fabrics. Instead, a Here the front feed dog feeds twice as fast smooth seam (A) will be achieved.
- Page 44 • —-— — —...
- Page 45 Choice of language cicD_ The following languages can be selected: Czech, Danish, German, English, Spanish, French, Italian, Dutch, Polish, and Portugue Keep both the keys pressed down — simultaneously and switch on the machine. The desired language can then be selected using the keys.
- Page 46 —————----—--—-—- ‘i’ Prog tff: Changing and the stitch will flash. Using the program selection key storing length setting you can adjust the stitch length. The changed stitch length can now be stored by Activate the desired program using the pro pressing the memory key M.
- Page 47 Changin g and storing the stitch length, different ial feed and tension settings Activate the desired program using the program selection keys Press the Prog —. memory selection key P until the memorie s A, B or C appear on the display. By pressing the memory key M, the stitch length display will flash.
- Page 49 —...
- Page 50 Program overview Program Area of application Program 01 Sewing hems and fancy stitches. Cover stitch 2-needle, narrow Program 02 Sewing hems and fancy stitches. Cover stitch 2-Nadel, wide Prograrrr 03 Sewing hems and fancy stitch. Cover stitch 3-needle, 4-thread Ijyers wirer n a Program 04 unhrrq fabric traditional...
- Page 51 ____ \___ __...
- Page 52 •—----r —‘( . •-5: ‘ —...
- Page 53 Stitch formation correction measures cover stitch, 2-need’e, narrow and wide Program 01, 02 When all tensions are correctly set, the needle threads (green and blue) are just slightly visible on the underside of the fa bric. The looper thread (violet) is situated loosely in between.
- Page 54 — — ----...
- Page 55 (4’...
- Page 56 2. If not to sew to the end of the fabric, eg. After the second”click” (if sewrng a 2 needle sewing tubular fabrics: cover stitch> or the third “click” (if sewing a 3-needle cover stitch> turn the handwheel Sew 4-5 stitches on top of each other. Du away from you until the needles are in their ring the last stitch, turn the hand wheel to highest position.
- Page 58 4-thread overedge seam The needle threads (blue and green> are too loose, causing larger loops of needle thread Program 18 on the underside of the fabric. When all tensions are correctly set, the Set the blue and green thread tension to a loops of both looper thread (pink and yel...
- Page 60 3-thread flatlock The needle thread is too tight. Set the needle thread tension (blue) to a narrow and wide lower value. Program 13 and 14 The upper boper thread (pink) appears on The lower looper thread (yellow) is too the underside of the fabric, loose.
- Page 62 34hread flat hem The ri9ht needle thread (green) is too loose. Program 16 Set the green thread tension to a higher va ue The upper looper thread (pink) appears on the lowr looper thread (yellow) sppeai, the underside of the fabric. on the top side of the fabric.
- Page 63 The right needle thread (green) is too loose. 3-thread rolled hem (folded) Set the green thread tension to a higher Program 17 value. The lower (ooper thread (yellow) appears The upper looper thread (pink> only partly on the top side of the fabric. loops around the fabric edge.
- Page 65 2-thread rolled hem (folded) Program 09 Note: If you want to sew the 2-thread rolled hem, then you will need to attach the converter (see page 33). The right needle thread (green> is too loose. Set the green thread tension to a higher value and/or the yellow thread tension to a lower value.
- Page 66 The left needle thread (blue) is too loose. 2-needle 3-thread overedge seam Set the blue thread tension to a higher Program 15 value. Note: If you want to sew the 2-needle 3-thread overedge seam, then you will need to attach the converter (see page 33). The lower looper thread (yellow) is too The right needle thread (green) is too loose.
- Page 68 Removin g the needle plate Raise the presser foot and move the needle(s ) to the highest position . Remove the presser foot and open the swivel plate. Press down the needle plate disengag ing lever 33. The needle plate 18 is raised out of its mount.
- Page 69 (located in the accessor y box> every time you clean the machine . One or two drops of PFAFF sewing machine oil are sufficien t. All other parts are manufac tured from special material s and do...
- Page 73 SDedaI accessory Order No. Multi-purpose foot C 29 924 993 82-017 For sewing on bands, elastic tape, elastic thread and fishing line together with the various elastic tape inserts Elastic tape insert 29 924 993 82-034 For sewing on elastic tape with a width 7.5 mm up to 7.5 mm Elastic tape insert...
- Page 74 Sewing prob’ems and their solutions This machine has been developed with ease of operation in mind. No difficult or tricky set tings need to be made. Sewing problems of the kind described below may occur as a result of minor adjustment and operating errors. They can be easily adjusted by following the in structions.
- Page 75 Prob’em Cause Souton Machine will Power supply interrupted Close looper cover not operate although (see page 8) master switch is on. Fabric not Waste thread between Clean blades. neatly trimmed upper and lower blade Upper blade is blunt. Replace upper blade (see page 66).
- Page 76 Specifications Maximum sewing speed 1500 stitches/mm. 1.4 mm 9.0 mm Seam width Cover stitch width 2.5 mm, 5 mm 4 mm Stitch length 0.5 mm Presser foot exchangeable Lubrication manual Presser foot height 4,5 mm Overedge stroke 2.0 mm Needle system EL X 705, cat no.
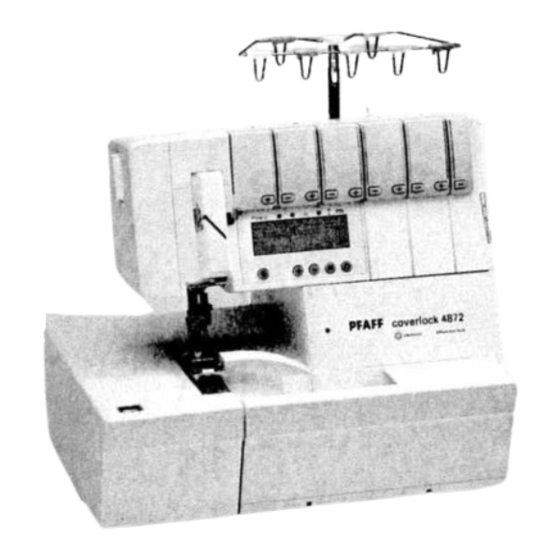
- Page 78 Parts of the coverlock 4872 Thread guides with color coding Telescoping thread guide Thread chain cutter Thread spool stand Thread spool pin Cone thread adapter Spool disc Machine socket, power cord Electrical power master switch Machine socket, foot control Handwheel Regulator whee’...
- Page 79 49— 44<;[ —53 4<,...
- Page 80 Pfaff AktiengeseHschaft Werk Karisruhe-Durlach Gritznerstra1,e 11 76227 Karlsruhe Pnnted in Germany. Druckerei Gablenz GmbH 76356 Weingarten, Stettiner Strasse 17 nformaton subject to change without notice. No.: 29 629 989-54/000 Englisch 11/98...