Table of Contents
Advertisement
Advertisement
Table of Contents

Related Manuals for Pfaff coverlock 4852


Summary of Contents for Pfaff coverlock 4852
- Page 1 coverlock 4852 Owner´s manual...
-
Page 3: Parts List
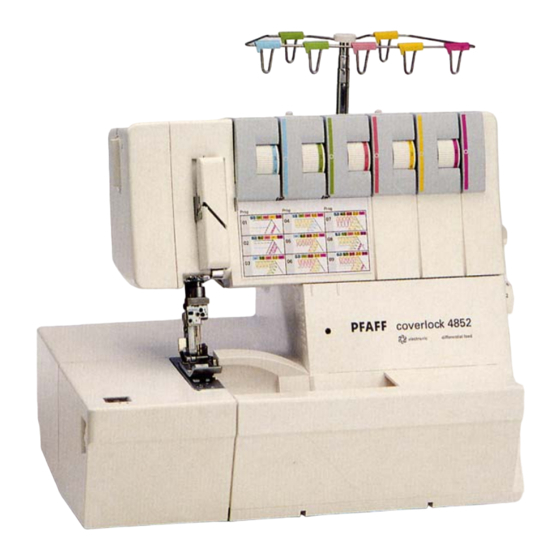
Parts of the coverlock 4852 1 Upper needle-thread tension 2 Upper needle-thread tension 3 Carry handle 4 Thread tension/upper looper thread 5 Thread tension/lower looper thread 6 Thread tension/two-thread chainstitch looper/cover stitch looper 7 Looper cover 8 Blade guard 9 Looper disengaging lever 10 Standard presser foot 11 Needle plate 12 Swivel plate... -
Page 5: Important Safety Instructions
This household sewing machine is designed to comply with IEC/EN 60335-2-28 and UL1594 IMPORTANT SAFETY INSTRUCTIONS When using an electrical appliance, basic safety precautions should always be followed, including the following: Read all instructions before using this household sewing machine. DANGER - To reduce the risk of electric shock: •... - Page 7 It is certainly time well spent, and is the best way to fi nd out just what your machine can do and make full use of all its features. If you have any further questions, just ask your authorized PFAFF dealer. Your dealer is happy to be of service with any help or advice.
-
Page 8: Table Of Contents
Contents Page Accessories ........................ 6 Accessories, optional ....................62, 63 Accessory box ......................6 Adjusting the machine to Prog. 01, 02 ..............34, 35 Changing a spool on a threaded machine ............... 24 Clamp spring ....................... 29 Cleaning the machine ....................58 Cone thread adapter .................... - Page 9 Contents Page Sewing problems and their solutions ..............61 Specifi cations ......................64 Spool dise ........................10 Spool holder ....................... 9 Stitch formation correction measures ..............46 - 56 Stitch length adjustment knob ................. 38 Stitch length, adjusting ..................... 38 Stitch width latch, swivelling ..................
-
Page 10: Accessories
Accessory box Open the accessory box 49 by gently pressing the bottom of the box inwards. The following accessories can be found in the box: Thread nets (5) Overlock needle system EL X 705, cat. no. 2002 Thread unreeling discs (5) Transparent presser foot (F) for cover stitch and two thread chainstitch Clip on thread guide... -
Page 11: Connecting Foot Control/Master Switch
Connecting the foot control Electrical connection Connect the plug of the foot control to the Connect the foot control cord with the wall connection socket 39 of the machine. The outlet. sewing speed is regulated by activating the foot control. You may also regulate the Foot controls to be used: sewing speed by adjusting the slide on the AE040 - EU... -
Page 12: Loopercover
Looper cover Push the looper cover 7 fully to the right and then swivel it down. Five types of stitches and their threading paths are portrayed in color on the inside of the looper cover. Note: The electricity supply of the machine is cut off as soon as the looper cover or swivel plate 12 is opened, for safety reasons, i.e. -
Page 13: Spool Holder
Spool holder Telescopic thread guide Before placing thread cones/spools on Pull the telescopic thread guide 32 upwards machine you must pull the spool holder 34 to its highest position. fully away from the back of machine. To ensure optimum thread feed, turn the telescopic parts slowly until you hear the locking balls fl... -
Page 14: Cone Thread Adapter
Clip on thread guide Spool disc/cone thread adapter Use the clip on thread guide accessory when It is advantageous to use the spool dise sewing with decorative thread. Clip this onto 37 when sewing with large spools (5,000 the telescoping thread guide 32 and thread 10,000 m). -
Page 15: Presser Foot
Presserfoot With standard presser foot 10 use setting ”A” on the spring loaded presser foot latch for the cover stitch (Prog. 02), the 2 thread chainstitch (Prog. 01), the 5 thread safety stitch seam (Prog. 09) and the 4 thread safety stitch seam (Prog. -
Page 16: Needle Position
Needle position The different needle positions are depicted in a schematic drawing in the instruction This machine has 4 needle positions and can manual. Also refer to the examples above sew with a maximum of two needles at any and below. Insert the needle(s) as shown on one time. -
Page 17: Changing The Needle
Changing the needle Switch off the electrical power To remove: Lower the presser foot and move the needle(s) to the highest position by turning the handwheel towards you. Push the needle inserting tool (from the accessory box 49) from below upward fully over the needle. - Page 18 Threading the thread guides Place the spools on the spool pins 35. You will fi nd information on the thread net, thread unreeling disc, spool disc and cone thread adapter on pages 9 and 10. Thread through the thread guides 31 from the back to the front following the colored threading paths.
-
Page 19: Threading The Upper Overedge Looper (Pink)
Threading the upper overedge looper (pink) Turn the handwheel towards you until the upper overedge looper 18 is in its highest position. Thread in a sequence of 1 to 8. Note: To make this task easier, use the tweezers which can be found behind the swivel plate. Thread through the thread guides 1 to 7, Thread from the front through the eye of the which are marked with a pink dot. -
Page 20: Threading The Lower Overedge Looper
Threading the lower overedge looper (yellow) Turn the handwheel towards you until the lower overedge looper 19 is on the extreme right. Thread in a sequence of 1 to 10. Note: To make this task easier, use the tweezers which can be found behind the swivel plate. - Page 21 Thread through the thread guides 1 to 8, Press lever A downwards and hook the marked yellow. thread into guide B. Please also refer to the drawing below. Note: The lever returns automatically to its position as soon as you start sewing. Thread from the front through the eye of the Pull approximately 4”...
- Page 22 Threading the two thread chainstitch looper and cover stitch looper (violet) for the chainstitch Turn the handwheel towards you until the two thread chainstitch looper 20 is on the extreme right. Thread in a sequence of 1 to 11. Note: To make this task easier, use the tweezers which can be found behind the swivel plate.
- Page 23 Thread the thread guides which are marked Push lever A upward and hook the thread with a violet square in a sequence of 1 to 9. into slot B. Also refer to the drawing below. Note: The lever returns automatically to its position as soon as you start sewing.
- Page 24 Exception: Threading the two-thread chainstitch looper and cover stitch looper for the cover stitch (violet) (Prog. 02) Turn the handwheel towards you until the two thread chainstitch looper 20 is on the extreme right. Thread in a sequence of 1 to 10. Note: To make this task easier, use the tweezers which can be found behind the swivel plate.
- Page 25 Thread the thread guides, as shown in the Press lever A upward and hook the thread diagram, in a sequence of 1 to 8. Some of into slot B. Also refer to the drawing below. the threads guides are marked with a violet square.
- Page 26 Threading the needles Thread in a sequence of 1 to 8. Note: To make this task easier, use the tweezers which can be found behind the swivel plate. The thread must be guided through the Pull approximately 4” (10 cm) of thread lower slot of thread guide 4.
- Page 27 Exception: Threading needle L2 when sewing a 5- thread safety-stitch seam (Prog. 09), a 4- thread safety-stitch seam (Prog. 08) and a 2-thread chainstitch (Prog. 01) Thread in a sequence of 1 to 9. Note: To make this task easier, use the tweezers which can be found behind the swivel plate.
-
Page 28: Changing A Spool On A Threaded Machine
Important note on threading If the looper threads break, you must pull the needle threads out of the needle The needle(s) must always be threaded last eye, rethread the loopier thread and then so that the needle threads do not run under rethread the needle threads. -
Page 29: Needle Threader
Needle threader Move the needle(s) into the highest position and lower the presser foot. Place the thread from right to left in notch A of the needle threader (to be found in the accessory box). One of the two triangles must point upwards. - Page 30 Overview of the threading paths and threading sequences Program 01: Program 02: 2-thread chainstitch cover stitch Program 03: Program 04 2-thread fl atlock, narrow 2-thread fl atlock, wide Program 11: 2-thread serging, narrow Program 12: 2-thread rolled hem Program 13: folded 2-thread rolled hem...
- Page 31 Overview of the threading paths and threading sequences Program 05: Program 06: 3-thread overedge. narrow 3-thread overedge, wide Program 14: Program 17: 3-thread rolled hem 3-thread serging, wide Program 15: Program 18: folded 3-thread rolled hem 3-thread fl atlock, wide Program 16 3-thread fl...
-
Page 32: Presser Foot Pressure
Overview of the threading paths and threading sequences Program 09: Program 10: 5-thread safety-stitch seam 2-needle 3-thread assembly seam Presser foot pressure The pre-set presser foot pressure on the machine is suitable for medium heavy fabrics. The presser foot pressure does not need to be adjusted for most fabrics. -
Page 33: Clamp Spring
Thread chain cutter After fi nishing the seam, sew an approx. 6” - 8,1” (15 20 cm) long thread chain. Pull the thread chain from the right to left over the thread chain cutter 33. This will cut off the thread chain. - Page 34 Disengaging the upper blade Switch off the electrical power Move the movable upper blade 23 into its highest position by turning the handwheel towards you. Remove the waste container and open the looper cover and the swivel plate. Push the knob for lowering the upper blade 27 fully to the right.
- Page 35 Swiveling stitch width latch For standard overlock seams: The swiveling stitch width latch 22 remains in the basic position when sewing all types of standard overlock seams (exception: Program 01, 02). For rolled hems: Pull knob (A) to the right and swivel the swiveling stitch width latch 22 downwards.
- Page 36 Attaching the converter Position the upper overedge looper 18 right next to the needle by turning the handwheel Switch off the electrical power towards you. The converter 28 must be attached for all two thread seams (exception: Program 01) and the two needle three thread assembly seam.
-
Page 37: Eam Width Adjusting Knob
Setting the seam width Illustration A: Should loops project out of The required seam width can be adjusted the workpiece, move the movable upper anywhere between 3.5 and 6 mm by turning blade 23 to the right by turning the seam the adjusting knob for seam width 13. - Page 38 Adjusting the machine to the cover stitch (Prog. 02) and two thread chainstitch (Prog. 01) This is only necessary if you do not want to trim the fabric edge. Insert the needle(s) (see page 13) according to the overview of the threading paths and threading sequences (see page 26).
-
Page 39: Power Table
Press the power table 50 downwards into the designated slot on the looper cover. Close looper cover. Note: Please ensure that the upper overedge looper is disengaged before attaching the power table 50. To return the machine to its previous settings after sewing with the cover stitch or two thread chainstitch: Open the looper cover and remove the... - Page 40 Differential feed The differential feed consists of two feed dogs (A + B), one behind the other, which feed the fabric. The movement of the front feed dog (A) and thus the amount of material to be fed can be regulated using the regulator wheel 41.
- Page 41 Set the regulator wheel for the differential Here you will avoid stretching in the seam feed 41 to 2.0. when working with knitwear, such as jerseys or gathered fabrics. Instead, a smooth seam Here the front feed dog feeds twice as fast (A) will be achieved.
-
Page 42: Needle Plate Disengaging Lever
Adjusting the stitch length You can set the desired stitch length between 0.5 mm to 4.0 mm by turning the stitch length adjustment knob (42). Note For the two thread chainstitch, the setting should be 3.0 or higher. Removing the needle plate Raise the presser foot and move the needle(s) to the highest position. -
Page 43: Setting Thread Tension
Securing the upper blade Switch off the electrical power It is recommended to secure the movable upper blade 23 before sewing heavy fabrics. Raise the needle(s) to its highest position and open the swivel plate. Tighten the screw fully using the Allen key. This screw should always be slightly loosened again after sewing heavy fabrics. - Page 44 Needle Stitch Stitch Program Application position length width Program 01 Joining fabric layers where a 2 thread chainstitch traditional pressed open seam is required. Also works well as a basting stitch for test fi tting garments. Program 02 Sewing hems and fancy stitches. Cover stitch Program 03 Serging light fabrics.
- Page 45 Stitch width latch 22 Looper Power table 50 Converter 28 Thread tension ● = with ■ = with ■ = top ® = bottom The value refer to medium-heavy fabrics and normal polyester thread disengaging ° = without ® = without blue green pink yellow violet level 9...
- Page 46 Needle Stitch Stitch Program Application position length width Program 10 Joining and simultaneous serging of light, very stretchy fabrics. 2-needle, 3-thread assambly seam Program 11 Serging light fabrics. 2-thread serging, narrow Program 12 Serging very light fabrics. 2-thread rolled hem Decorative edges.
- Page 47 Stitch width latch 22 Looper Power table 50 Converter 28 Thread tension ● = with ■ = with ■ = top ® = bottom The value refer to medium-heavy fabrics and normal polyester thread disengaging ° = without ® = without blue green pink yellow violet level 9...
- Page 48 Important notes on sewing with the cover Preparing the fabric: stitch When not using the H2 optional accessory The power table is marked with various units guide, it is useful to press under the fabric of measurement. The upper fi gures are in cm. edge before hemming it.
-
Page 49: Edge Guide
2. If sewing on a tubular item, i.e. pant or After the second ”click” tum the handwheel sleeve hem: away from you until the needles are in their highest position. Raise the presser foot (this Sew around tubular item, oversewing 4-5 will release the tension on the threads). -
Page 50: Stitch Formation Correction Measures Cover Stitch
Stitch formation correction measures cover stitch Program 02 When all tensions are correctly set, the needle threads (green and blue) are just slightly visible on the underside of the fabric. The looper thread (violet) is situated loosely in between. The right needle thread (green) is too loose, causing large loops on the underside of the fabric. - Page 51 5-thread safety-stitch seam 4-thread safety-stitch seam Program 09 Program 08 Since the 5-thread safety stitch seam con- Since the 4-thread safety stitch seam sists of the 2-thread chainstitch and the 3- consists of the 2-thread chainstitch and thread overedge seam, you can refer to the the 2-thread fl...
- Page 52 4-thread overedge seam The needle threads (blue and green) are too loose, causing larger loops of needle thread Program 07 on the underside of the fabric. When all tensions are correctly set, the loops Set the blue and green thread tension to a of both looper threads (pink and yellow) are higher value.
- Page 53 3-thread overedge seam The needle thread is too loose, causing loops on the underside of the fabric. narrow and wide Set the relevant needle thread tension to a Program 05 and 06 higher value. When all tensions are correctly set, the loops of both looper threads (pink and yellow) are directly on the edge of the fabric.
- Page 54 3-thread fl atlock The needle thread is too tight. Set the needle thread tension (blue) to a narrow and wide lower value. Program 16 and 18 The upper looper thread (pink) appears on The lower looper thread (yellow) is too the underside of the fabric.
- Page 55 2-thread fl atlock narrow and wide Program 03 and 04 When all tensions are correctly set, the loops of both threads are directly on the underside of the fabric. Note: The converter (see page 32) must be attached to sew the 2-thread fl atlock seam. The needle thread is too loose or the lower looper thread (yellow) is too tight.
- Page 56 3-thread rolled hem The upper needle thread (green) is too loose. Program 14 Set the green thread tension to a higher value The upper looper thread (pink) appears on The lower looper thread (yellow) appears on the underside of the fabric. the top side of the fabric.
- Page 57 3-thread rolled hem (folded) The upper needle thread (green) is too loose. Program 15 Set the green thread tension to a higher value. The upper looper thread (pink) only partly The lower looper thread (yellow) appears on loops around the fabric edge. the top side of the fabric.
- Page 58 2-thread rolled hem Program 12 Note: The converter (see page 32) must be attached to sew the 2 thread rolled hem. The upper needle thread (green) is too tight. Set the green thread tension to a lower value and/or the yellow thread tension to a higher value.
- Page 59 2-thread rolled hem (folded) Program 13 Note: The converter (see page 32) must be attached to sew the 2 thread rolled hem. The upper needle thread (green) is too loose. Set the green thread tension to a higher value and/or the yellow thread tension to a lower value.
- Page 60 2-needle 3-thread assembly seam The lower needle thread (blue) is too loose. Program 10 Set the blue thread tension to a higher value. Note: The converter (see page 32) must be attached to sew the 2-needle 3-thread assembly seam. The upper needle thread (green) is too loose. The lower looper thread (yellow) is too tight.
-
Page 61: Thread Chart
Thread chart for 2- , 3- and 4-thread overedge seams Fabric Thread Stitch length Light fabrics: Cotton no. 50 - 70 2.0 - 4.0 mm organdy, fi ne knitwear, Synthetic thread no. 70 - 140 taffeta, silk, lining fabrics Medium heavy fabrics: Cotton no. -
Page 62: Cleaning The Machine
Lubricate the points shown above with the oil provided (located in the accessory box) every time you clean the machine. One or two drops of PFAFF sewing machine oil are suffi cient. All other parts are manufactured from special materials and do... - Page 63 Changing the upper blade Switch off the electrical power To remove: Set the adjusting knob for seam width to 3.5 mm. Fasten the upper blade (see page 39) before loosening the fastening screw (A) with the wrench provided in the accessory box.
-
Page 64: Sewing Light Cover
Changing the light bulb Switch off the electrical power Using the screw driver in the accessory box loosen the fastening screw to the sewing light cover 16 until the cover can be removed. Push the light bulb fully into its socket. Rotate counter clockwise through half a turn and remove. - Page 65 Sewing problems and their solutions This machine has been developed with ease of operation in mind. No diffi cult or tricky set tings need to be made. Sewing problems of the kind described below may occur as a result of minor adjustment and operating errors.
- Page 66 Optional accessories This machine offers a wide range of optional accessories for special serging details. Consult your PFAFF dealer. Optional accessory Order No. Multi-purpose foot M 29 924 993 82-002 Foot, to which guides Hl, H2 and H3 can be attached.
- Page 67 Optional accessory Order No. MuIti-purpose foot C 29 924 993 82-017 For sewing on bands, elastic tape, elastic thread and fi shing line together with the various elastic tape inserts. Elastic tape insert 29 924 993 82-034 For sewing on elastic tape with a width up to 7.5 mm 7.5 mm.
-
Page 68: Specifi Cations
Specifi cations Maximum sewing speed 1300 stitches/min. Seam width 1.4 mm - 9.0 mm Cover stitch width 5 mm Stitch length 0.5 mm - 4 mm Presser foot exchangeable Lubrication manual Presser foot height 4.5 mm Overedge stroke 2.0 mm Needle system EL X 705, cat no. -
Page 69: Intellectual Property
Intellectual property Patents protecting this product are listed on a label positioned underneath the sewing machine. PFAFF and IDT (image) are registered trademarks or trademarks of VSM Group AB. -
Page 70: Electrical Power Master Switch
Parts of the coverlock 4852 31 Thread guides with color coding 32 Telescoping thread guide 33 Thread chain cutter 34 Thread spool stand 35 Thread spool pin 36 Cone thread adapter 37 Spool disc 38 Electrical power master switch 39 Machine socket, foot control 40 Handwheel 41 Regulator wheel for differential feed 42 Stitch length adjustment knob... - Page 72 VSM Group AB • SE-561 84 Huskvarna • SWEDEN www.pfaff.com...