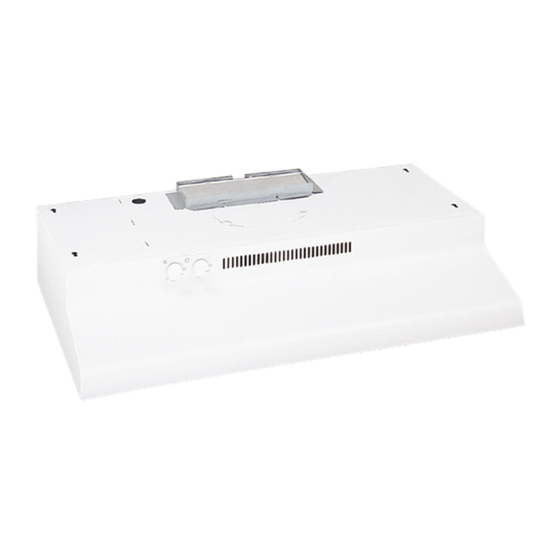
GE JV347 Owner's Manual And Installation Instructions
Hide thumbs
Also See for JV347:
- Owner's manual and installation instructions (21 pages) ,
- Owners and installation manual (16 pages) ,
- Owner's manual (16 pages)
Advertisement
Quick Links
ge.COm
0
........
2, 3
Operating/Care
and
Cleaning
Instructions
Charcoal
Filter.
..............
5
. ...............
4
.................
5
...............
5
....................
4
...6-14
Consumer
Support
..................
] 5
®
1..
_
32 7-Reci_ulation
only
3W338"
_nt
@tions
only
3W34 7* _nt
& Reci_ulation
options
3W36 7* _nt
& Reci_ulation
options
RN328-Reci_ulation
only
Writethemodeland serialnumbers here:
Model #
Serial #
Y_u can find them on a label on the
back wall ot the hood.
49-80389-1 04-06 JR
Advertisement

Summary of Contents for GE JV347
-
Page 1: Table Of Contents
Safety Information ..2, 3 Operating/Care Cleaning Instructions 32 7-Reci_ulation only Charcoal Filter....3W338" @tions only Grease Filter ....3W34 7* _nt & Reci_ulation Hood Light ....options Hood Surfaces ....Controls ....3W36 7* _nt & Reci_ulation... -
Page 2: Safety Information
IMPORTANT SAFETY INFORMATION. READALLINSTRUCtiONSBEFORE USING. SAFETY P RECAUtiONS WARNING - TO R EOUCE RISK WARNING-TO R EOUCE RISK OF FIRE, ELECTRIC SHOCKORINJURY TOPERSONS,OBSERVE A RANGETOPGREASE FIRE: THEFOLLOWING: A. Ne_vr leme surfime units unattended at high A, Use this unit onh in the rammer intended settings, goilo_e_ cause smoking and greas) b_ the manufactureI:... - Page 3 INSTRUCTIONS DE SECURITE IMPORTANTES. LISEZ TOUTES LES INSTRUCTIONS AVANT D'UTIUSER. PRE-CAUTIONS ENMATIERE D ESE-CURITE- fig ',,'¸¸ iiii_: AVERTISSEMENT- PoUR RtDUIRE LE AVERTISSEMENT- R_DUISEZ RISQUED'INCENDIE,DE SECOUSSE _'LECTRIQUE O U DE RISQUED'UN FEUDE GRAISSE SURLA SURFACE DE BLESSURE CORPORELLE, OBSERVEZ LESPRECAUTIONS CUISSONDU FOUR: SUIVANTES: A_ Ne laissezjamais _ms sm'veillance les m_it_s de A.
-
Page 4: Greasefilter
Usingthe hood controls. Throughout this manual, features and appearance may vary from your model. Control Knobs (onsomemodels) Switch Pad Controls (onsomemodels) _._ON iViED FAN Control LIGHT Control Turn to HI, MED or LO as needed. Press the pad at the top to tm'n the light Continuous use of the tim systenl while cooking... -
Page 5: Hood Light
NationalPartsCenter 800.626.2002 _Mways wipe tile SUlti_ce in tile direction of the grain. Follow the ge.com cleaner instructions fi)r cleaning the stainless steel sutthce, Painted Surfaces (on some models) Do not use steel-wool pads or other... -
Page 6: Installation Instruotions
Installation Range Hood Instructions Questions? Ca//800.GE.CARES (800.432.2737)or V isit ge.com our Website BEFORE YOU BEGIN DUCTWORK REQUIREMENTS NOTE: Read ductwork sections only if you do not Read these instructions completely mid carefully, have existing ductwork. If you have existing ductwork, •... - Page 7 Installation Instructions WORKSHEET--CALCULATE TOTAL EQUIVALENT DUCTWORK LENGTH DUCT EQUIVALENT NUMBER DUCT EQUIVALENT NUMBER = TOTAL PIECES LENGTH x USED TOTAL PIECES LENGTH x USED 3W'x 10" 1Ft. 6"Round 24 Ft. Rect., (18ft. w/o wall cap straight with damper) damper 7" Round, 1Ft.
- Page 8 Installation Instructions TOOLS YOU WILL NEED DAMAGE - SHIPMENT/INSTALLATION • If the unit is dmnaged in shipment, return unit to the store in which it was bought for repair or replacement. • If the unit is dmnaged by the customer, repair Flatbladeand Phillips Pencil...
- Page 9 Installation Instructions [] CHOOSE VENT OPTION IMPORTANT: If the hood is to be installed in a that )our installation Detem_ine the xent option will require and that is axailable tot your model from recirculath_g, non:vented ductless manner, do not below choices, knock out any vent openh_gs in the hood.
- Page 10 Installation Instructions []REMOVE WIRING COVER [] REMOVE EXHAUST ADAPTOR If exhausting/venthlg using the 3¼" x 10" rectangular Remo_e the wiring cover ti'om inside the hood, Set the cover and its mounting screw aside. duct---optional for JV338, Jv347 mad Jv367 models tufty: Wiring ]_.elnove the exhaust...
- Page 11 Installation Instructions [] FOR 31/4"X 10" RECTANGULAR FOR RECESSED-BOTTOM DUCTED DISCHARGE CABINETS ONLY INSTALLATIONS ONLY: Attach exhaust adaptor/damper over appropriate knockout opening (fin" vertical or horizontnl, depending on installation) with exhaust adaptor scre_:s. Make sure damper pivot is nearest to top/back edge ot hood.
- Page 12 Installation Instructions MARK HOLES C. Outside rear exhaust Select _ent option that _our installation will (Horizontal duct-31A" x 10" Rectangular) require proceed to that section: • Use tile diagram or tile hood as a template mark tile locations tile cabinet ductwork, A.
- Page 13 OPTIONAL POWER CORD KIT JXHC1 An optional Power Cord Connection Kit, model JXHCI, is awfilable at extra cost fl'om vour GE supplier for installation using a standard 3-prong, Keyhole(4) grounded wall outlet. Follow the Installation Instructions packed...
- Page 14 Installation Instructions [] INSTALL LIGHT BULB [] REPLACE FILTER NOTE: A light bulb is not shiI)ped with tile hood. Make sure blade turns ti'eelv replace tile Obtain locall> Purchase install ordinary filter. NOTE: model,IV347, install metal screw-base not more than 60 watts. or tile light bulb,...
- Page 15 USA. If the product is located in an area where service by a GEAuthorized Servicer is not available, you may be responsible for a trip charge or you may be required to bring the product to an Authorized GE Service Location for service.
-
Page 16: Consumersupport
Caution must be exercised, since improper servicing may cause unsafe operation. ContactUs ge.com If you are not satistied with the service you receive fl'om GE, contact us on our Website with all the details including your phone number;...


