Table of Contents
Advertisement
Available languages
Available languages
Quick Links
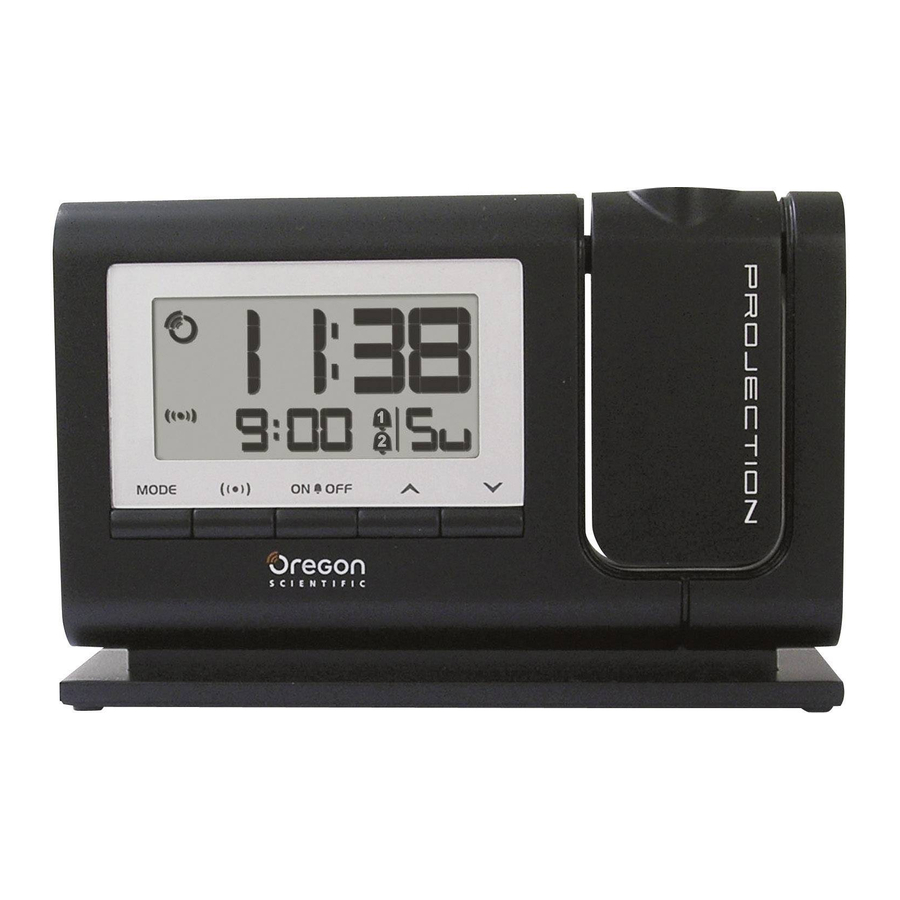
Classic dual-alarm projection clock
Model: RM308P / RM308PA /
RM308PU / RA308PH
USER MANUAL
EN
OVERVIEW
FRONT VIEW
1
2
3
4
5
6
7
8
9
10
1. SNOOZE / LIGHT: activate snooze alarm; activate
backlight
2.
: signal reception indicator
3.
: main unit batteries low / no battery
4. PM: indicate PM
5.
: alarm time is displayed
6. Alarm time / calendar
7. MODE: change settings / display
8.
: view alarm status; set alarm; change to alarm /
calendar display
9. ON
OFF: activate / deactivate alarm function
10.
/
: increase / decrease values of the selected
setting; enable / disable clock reception signal
11. Projector: project time / alarm status
12. Clock with seconds / weekday
13. Time zone offset
14. Alarm 1, 2 is ON
REAR VIEW
1. FOCUS: focus the projected image
2. RESET: reset unit to default settings
3. PROJECTION ON/OFF: enable / disable continuous
projection
4. AC adaptor socket
BOTTOM VIEW
1. Battery compartment
GETTING STARTED
POWER SUPPLY
2 x UM-4 (AAA) batteries
To insert batteries:
1. Remove the battery compartment cover.
2. Insert the batteries, matching the polarities (+/ -).
3. Press RESET after each battery change.
MEANING
Battery is low in power
No battery installed – only AC adaptor
1 x adaptor
Alternatively, use the adaptor supplied to power the unit. For
continuous use of projector, adaptor must be installed.
Make sure the adapter is not obstructed and is easily
accessible to the unit.
NOTE The main unit and adaptor should not be exposed to
wet conditions. No objects filled with liquid, such as vases,
should be placed on the main unit and adaptor.
To completely disconnect from power, the adaptor should be
disconnected from the mains.
CLOCK
CLOCK RECEPTION
This product is designed to synchronize its clock automatically
with a clock signal.
RM308P:
•
EU: DCF-77 signal: within 1500 km (932 miles) of
Frankfurt, Germany.
RM308PA:
•
US: WWVB-60 signal: within 3200km (2000 miles) of
Fort Collins Colorado.
RM308PU:
•
UK: MSF-60 signal: within 1500 km (932 miles) of
Anthorn, England.
To enable / disable signal reception:
Press and hold
to enable or
reception.
NOTE Reception takes 2-10 minutes. If the signal is weak,
it can take up to 24 hours to get a valid signal.
Clock signal reception indicator:
Strong signal
11
If signal reception is unsuccessful, place your unit next to a
12
window, press and hold
to force another signal search.
13
14
MANUALLY SET CLOCK
To set the clock manually, disable the clock signal reception
first.
1. Press and hold MODE to enter.
2. Press MODE to toggle between displays.
3. Press
or
to increase / decrease values of the
selected setting.
4. Press MODE to confirm.
The settings order is: time zone offset, 12/24 hr format,
hour, minute, year, month-day / day-month, month, day and
language.
Time zone offset sets the clock +/- 23 hours from the received
clock signal time. If you have deactivated the clock signal
reception, do not set a value for time zone.
NOTE If you enter +1 in the time zone setting, this will give
you your regional time plus 1 hour.
If you are in the US (RM308PA only) set the clock to:
PA for Pacific time
MO for Mountain time
CE for Central time
EA for Eastern time
NOTE The language options are English (E), German (D),
French (F), Italian (I), and Spanish (S).
ALARM
To set the alarm:
1. Press ALARM to toggle between Alarm 1 / 2.
2. Press and hold ALARM to enter alarm setting.
3. Press
/
to set hour / minute.
1
4. Press ALARM or MODE to confirm.
/
indicates alarm is ON.
To activate / deactivate alarm 1 and / or 2:
1. Press
to select Alarm 1 or 2.
2
2. Press and hold
.
3
To silence the alarm:
•
Press SNOOZE / LIGHT to silence it for 8 minutes
4
OR
•
Press any other key to turn the alarm off and activate it
again after 24 hours.
To select display mode:
•
Press MODE to toggle between displays (alarm,
calendar with seconds and calendar with weekday).
PROJECTION
To activate projection / backlight:
•
Press SNOOZE / LIGHT.
To activate / deactivate continuous projection:
•
Slide PROJECTION switch to ON/OFF when adaptor is
connected.
To flip image 180° (while image is projected):
•
Within 5 seconds of pressing SNOOZE / LIGHT, press
SNOOZE / LIGHT again.
To focus image:
•
Turn FOCUS wheel.
NOTE If projection is illuminated, do not look directly into
the projector.
RESET
Press RESET to return to the default settings.
PRECAUTIONS
•
Do not subject the unit to excessive force, shock, dust,
temperature or humidity.
•
Do not cover the ventilation holes with any items such as
newspapers, curtains etc.
•
Do not immerse the unit in water. If you spill liquid over
it, dry it immediately with a soft, lint-free cloth.
•
Do not clean the unit with abrasive or corrosive
materials.
•
Do not tamper with the unit's internal components. This
invalidates the warranty.
•
Only use fresh batteries. Do not mix new and old
batteries.
•
Images shown in this manual may differ from the actual
display.
•
When disposing of this product, ensure it is collected
separately for special treatment and not as normal
household waste.
•
Placement of this product on certain types of wood
may result in damage to its finish for which Oregon
Scientific will not be responsible. Consult the furniture
manufacturer's care instructions for information.
•
The contents of this manual may not be reproduced
without the permission of the manufacturer.
•
Do not dispose old batteries as unsorted municipal
waste. Collection of such waste separately for special
treatment is necessary.
•
Please note that some units are equipped with a
battery safety strip. Remove the strip from the battery
compartment before first use.
to disable signal
NOTE The technical specifications for this product and the
contents of the user manual are subject to change without
notice.
NOTE Features and accessories will not be available in all
countries. For more information, please contact your local
retailer.
Weak / No signal
SPECIFICATIONS
TYPE
L x W x H
Weight
Power
ABOUT OREGON SCIENTIFIC
Visit our website (www.oregonscientific.com) to learn more
about Oregon Scientific products.
If you're in the US and would like to contact our Customer
Care department directly, please visit: www2.oregonscientific.
com/service/support.asp
For international inquiries, please visit: www2.oregonscientific.
com/about/international.asp
EU-DECLARATION OF CONFORMITY
Hereby, Oregon Scientific, declares that this Classic dual-alarm
projection clock (model: RM308P / RM308PA / RM308PU /
RA308PH) is in compliance with the essential requirements
and other relevant provisions of Directive 1999/5/EC. A copy of
the signed and dated Declaration of Conformity is available on
request via our Oregon Scientific Customer Service.
FCC STATEMENT
This device complies with Part 15 of the FCC Rules. Operation
is subject to the following two conditions: (1) This device may
not cause harmful interference, and (2) This device must
accept any interference received, including interference that
may cause undesired operation.
WARNING Changes or modifications not expressly approved
by the party responsible for compliance could void the user's
authority to operate the equipment.
NOTE This equipment has been tested and found to comply
with the limits for a Class B digital device, pursuant to Part
15 of the FCC Rules. These limits are designed to provide
reasonable protection against harmful interference in a
residential installation.
This equipment generates, uses and can radiate radio
frequency energy and, if not installed and used in accordance
with the instructions, may cause harmful interference to
radio communications. However, there is no guarantee
that interference will not occur in a particular installation. If
this equipment does cause harmful interference to radio or
television reception, which can be determined by turning the
equipment off and on, the user is encouraged to try to correct
the interference by one or more of the following measures:
•
Reorient or relocate the receiving antenna.
•
Increase the separation between the equipment and
receiver.
•
Connect the equipment into an outlet on a circuit different
from that to which the receiver is connected.
•
Consult the dealer or an experienced radio / TV
technician for help.
DECLARATION OF CONFORMITY
The following information is not to be used as contact for
support or sales. Please call our customer service number
(listed on our website at www.oregonscientific.com), or on the
warranty card for this product) for all inquiries instead.
We
Name:
Address:
Telephone No.:
declare that the product
Product No.:
Product Name:
Manufacturer:
Address:
is in conformity with Part 15 of the FCC Rules. Operation is
subject to the following two conditions: 1) This device may not
cause harmful interference. 2) This device must accept any
interference received, including interference that may cause
undesired operation.
DESCRIPTION
145 x 94 x 40 mm
(5.7 x 3.7 x 1.6 in)
157 g ( 5.5 oz) without battery
AC/DC 4.5V adaptor
2 x UM-4 (AAA) 1.5 V batteries
COUNTRIES RTTE APPROVAL COMPLIED
All EU countries, Switzerland CH
and Norway
N
Oregon Scientific, Inc.
19861 SW 95
th
Ave.,Tualatin,
Oregon 97062 USA
1-800-853-8883
RM308P / RM308PA / RM308PU /
RA308PH
Classic dual-alarm projection clock
IDT Technology Limited
Block C, 9/F, Kaiser Estate,
Phase 1, 41 Man Yue St.,
Hung Hom, Kowloon,
Hong Kong
Orolog
p
Modell
RM
MAN
IT
PANORAMICA
VISTA ANTER
1
2
3
4
5
6
7
8
1. SNOOZE /
snooze, e la
2.
: indica
3.
: batte
4. PM: indica i
5.
: indic
6. Ora sveglia
7. MODE: mod
sul display
8.
: cons
impostare la
sveglia e ca
9. ON
OFF
10.
/
: a
selezionata
dell'orologio
11. Proiettore: p
12. Orologio co
13. Differenza d
14. L'allarme 1
VISTA POSTE
1. FOCUS: c
proiettata
2. RESET: rip
3. PROIEZION
continua
4. Ingresso ad
VISTA INFERI
1. Vano batter
OPERAZIONI
ALIMENTAZIO
2 batterie UM-4
Inserimento de
1. Togliere la c
2. Inserire le b
3. Premere RE
1 alimentatore
In alternativa,
alimentare l'un
dell'ora e dello s
collegato.
Verificare che l'e
facilmente acce
NOTA L'unità p
esposti a umidità
devono essere a
Per scollegare
l'alimentatore da
Advertisement
Table of Contents

Related Manuals for Oregon Scientific RM308P


Summary of Contents for Oregon Scientific RM308P
-
Page 1: User Manual
NOTE If you enter +1 in the time zone setting, this will give : view alarm status; set alarm; change to alarm / Hereby, Oregon Scientific, declares that this Classic dual-alarm sveglia e ca you your regional time plus 1 hour. - Page 2 (F), italiano (I) y español (S). EU – DECLARACIÓN DE CONFORMIDAD ALARMA Por medio de la presente Oregon Scientific declara que el Para configurar la alarma: Reloj proyector clásico con alarma dual (modelo: RM308P / 1. Pulse ALARM para alternar entre la alarma 1 y la 2.
-
Page 3: Vorderansicht & Rückansicht Ansicht
HINWEIS Wenn Sie +1 in der Einstellung des Zeitausgleichs RÜCKANSICHT eingeben, ergibt dies Ihre Ortszeit zuzüglich 1 Stunde. Wenn ÜBER OREGON SCIENTIFIC Sie sich in den USA befinden (RM308PA), stellen Sie die Uhr Besuchen Sie unsere Website www.oregonscientific.de und wie folgt ein: erfahren Sie mehr über unsere Oregon Scientific-Produkte. -
Page 4: Manuel De L'utilisateur
REMARQUE Si vous entrez +1 dans le réglage du fuseau FACE ARRIERE altre disposizioni horaire, vous obtiendrez votre heure locale plus une heure. À PROPOS D’OREGON SCIENTIFIC Una copia firmata Si vous êtes aux Etats-Unis (modèle RM308PA) réglez Pour plus d‘informations sur les produits Oregon Scientific è... -
Page 5: Vista Anteriore & Posteriore
14. Alarme 1/2 14. L’allarme 1 / 2 è attivo (ON) NOTA Se si immette il valore +1 nell’impostazione relativa Con la presente Oregon Scientific dichiara che questo prodotto VAL COMPLIED alla differenza di fuso orario, verrà visualizzata l’ora locale... - Page 6 Bezoek onze website (www.oregonscientific.com) om meer te : ontvangstindicator signaal 2. Druk op MODE om tussen weergave-opties te kiezen. bakgrundsb weten over uw nieuwe product en andere Oregon Scientific : batterij van het apparaat zwak / geen batterij 3. Druk om geselecteerde instelling te verhogen...
-
Page 7: Manual Do Usuário
: exibe o status do alarme; ajusta o alarme; altera A ordem de ajuste é: deslocamento de fuso horário, formato SOBRE A OREGON SCIENTIFIC para o display de alarme / calendário de 12/24 horas, hora, minuto, ano, mês-dia / dia-mês, mês, aanzetten / Visite nosso site (www.oregonscientific.com.br) para saber... - Page 8 9. ON OFF: aktivera / inaktivera alarmfunktionen PA för Pacific tid MO för Mountain tid Härmed intygar Oregon Scientific att denna Klassisk dubbel- 5/EC. Een kopie alarm projektionsklocka (modell: RM308P / RM308PA / : öka / minska värden för vald inställning;...