Table of Contents
Advertisement
Available languages
Available languages
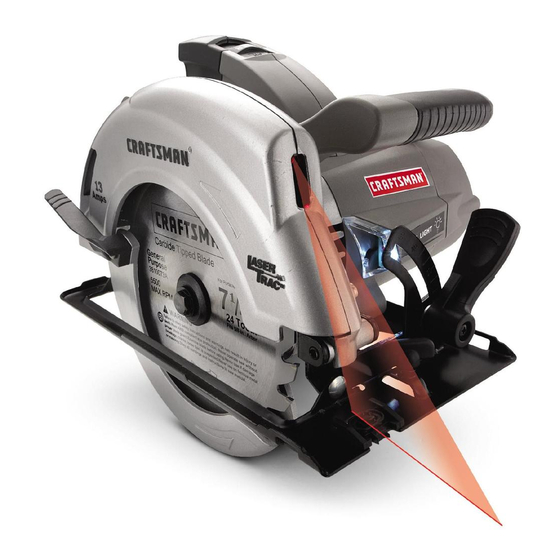
13 Amp
7 14°in° Circular
with Laser Trac T_'_
Model No.
320.10871
(9
DOUBLE
INSULATED
Z_ CAUTION
Read, understand and follow
all Safety Rules and Operating Instructions
in this Manual before using this product.
Sears, Roebuck
and Co.,
Hoffman
Estates,
IL 60179 U.S.A.
Visit our Craftsman
website:
www.craftsman.com
I
I
o WARRANTY
• SAFETY
o UNPACKING
o ASSEMBLY
° DESCRIPTION
,' OPERATION
,' ADJUSTMENTS
• MAINTENANCE
Advertisement
Table of Contents

Related Manuals for Craftsman 320.10871


Summary of Contents for Craftsman 320.10871
- Page 1 Read, understand and follow o UNPACKING all Safety Rules and Operating Instructions o ASSEMBLY in this Manual before using this product. ° DESCRIPTION ,' OPERATION Sears, Roebuck and Co., Hoffman Estates, IL 60179 U.S.A. ,' ADJUSTMENTS Visit our Craftsman website: www.craftsman.com • MAINTENANCE...
-
Page 2: One Year Full Warranty
This warranty does not include expendable parts such as lamps, batteries, bits or blades. If this Craftsman product is used for commercial or rental purposes, this warranty applies for only 90 days from the date of purchase. This warranty gives you specific legal rights, and you may also have other rights, which vary from state to state. -
Page 3: Damage Prevention And Information Messages
We recommend a Wide Vision Safety Mask for use over eyeglasses or standard safety glasses with side shield, available at Sears Stores or other Craftsman Outlets. -
Page 4: Safety Precautions
z_WARNING: BE SURE to read and understand all instructions in this manual before using this circular saw. Failure to follow all instructions may result in hazardous radiation exposure, electric shock, fire and/or serious personal injury. SAFETY PRECAUTIONS FOR LASERS This circular saw has a built-in laser light The laser is a Class Ilia and emits output power of a maximum 1 mW and 635-665nm wavelengths These lasers do not normally present an optical hazard However, DO NOT stare at the beam as this can cause flash blindness... -
Page 5: Work Area Safety
6. DO NOT use on surfaces such as sheet steel that have a shiny, reflective surface. The shiny surface could reflect the beam back at the operator, Be aware that laser light reflected off of a mirror or any other reflective surfaces can also be dangerous 7o ALWAYS turn the laser beam off when not in use. -
Page 6: Care Safety
PERSONAL SAFETY cont. 5. AVOID accidental starting. Re sure switch is in "OFF" position before plugging in DO NOT carry tools with your finger on the switch. Carrying tools with your finger on the switch or plugging in tools that have the switch in the "ON"... -
Page 7: Electrical Safety
ELECTRICAL SAFETY Z_WARNING: Do not permit fingers to touch the terminals of plug when installing or removing the plug from the outlet. 1. Double insulated tools are equipped with a polarized plug (one blade is wider than the other).Thls plug will fit in a polarized outlet only one way. If the plug does not fit fully in the outlet, reverse the plug If it still does not fit, contact a qualified electrician to install a polarized outlet. -
Page 8: Extension Cords
EXTENSION CORDS Use a proper extension cord, ONLY use cords listed by Underwriters Laboratories (UL). Other extension cords can cause a drop in fine voltage, resulting in a loss of power and overheating of tool For this tool an AWG (American Wire Gauge) size of at least 14-gauge is recommended for an extension cord of 25-ft or less in length Use 12-gauge for an extension cord of 50-ft Extension cords 100-ft. -
Page 9: Safety Rules For Circular Saws
SAFETY RULES FOR CIRCULAR SAWS Keep hands away from cutting area and blade. Keep your second hand on the auxiliary handle or motor housing. If both hands are holding the saw, the blade cannot cut them. Z_ CAUTION: Blades coast after saw is switched off. t KEEP your body positioned to eithei side of the saw blade and not in direct line with the saw blade. -
Page 10: For Safe Operation
SAFETY RULES FOR CIRCULAR SAWS cont, NEVER use damaged or incorrect blade washers or bolts. The blade washers and bolts were specially designed for your saw, for optimum performance and safety of operation 13 NEVER cut more than one piece at a time. DO NOT STACK more than one workpiece on the worktable at a time. - Page 11 ADDITIONALRULESFORSAFE OPERATION cont. 4 PROTECT your hearing. Wear appropriate personal hearing protection during use Under some conditions and duration of use, noise from this product may contribute to hearing loss 5 ALL VlSTORS AND BYSTANDERS MUST wear the same safety equipment that the operator of the saw wears, 6 INSPECT the tool cords periodically and if damaged have them repaired at your...
- Page 12 2 Inspect tile saw carefully to make sure that no breakage or damage has occurred during shipping, If any of the items mentioned are missing (refer to PARTS LIST illustration see Fig1 page 13), return tile saw to your nearest Sears store or Craftsman outlet to have the saw replaced in the power cord or operate saw until the broken or missing parts are replaced.
-
Page 13: Parts List
PARTS LIST (Fig. 1) 4. Blade Wrench I[ ! (for changing the blade) 5_ Laser Enhancing _/..,F Safety Glasses (-/ _11 .(7,U (for enhancing laser) "_----" (unassembled, install onto saw) Manual 6. Operator's INSTALLING THE BLADE (Figs. 2 and 2a) Carefully remove the blade from its packing, inspect it to be sure that it is not cracked or damage&... - Page 14 INSTALLING THE BLADE cont. (Figs. 2 and 2a) L_ WARNING: BE SURE to wear protective work gloves while handling a saw blade.The blade can injure unprotected hands,, Z_ WARNING: A 7 1/4-inch blade is the maximum blade capacity of your saw, A larger than 71/4-inch blade will come in contact with the blade guards.
-
Page 15: Led Worklight
9. Soft-grip ergonomically designed contoured rear handle and front assist handle for positive gripping, control, balance and comfort. 10. Includes Craftsman ® 24 tooth carbide-tipped steel general purpose blade. 11. Top mounted blade spindle lock for easy blade changes. 12. Includes edge guide to help produce accurate cuts. - Page 16 This Circular Saw has the following features cont. Fig, 3 TriggerSwitch Rear Handle Laser Light Aperture Front Assist Handle Upper Blade Guard Motor Housing Lower Blade Guard Lever I Scale Bevel Adjustment Locking Lover Base _oge Guide Locking/retaining Screw Mounting Slots for Edge Guide Spindle Clamping...
-
Page 17: Saw Blades
Input 13 Amps 120V, 60HZ AC Rating 5000 RPM No Load Speed Blade Diameter 71/,_-in. (184mm) Cutting Depth at 90 ° 23/a-in. (60.33mm) Cutting Depth at 45 ° 113/1G-in. (46.03mm) 52 ° Maximum Bevel Angle SAW BLADES All saw blades need to be kept clean, Fig. - Page 18 KICKBACK...WHAT CAUSES IT AND WAYS TO HELP PREVENT IT (Fig. 5) The Causes of Kickback Correct Blade Depth Blade is Set Too Deep Fig. 5 1 Kickback is a sudden reaction to a pinched, Fig. 6 bound or misaligned saw blade, which causes an uncontrolled saw to lift up and out of the workpiece and toward the operator.
- Page 19 Ways to Help Prevent Kickback or the saw stalls. Kickback could cause you to lose control of the saw_ Loss of control ALWAYS release trigger switch immediately if the blade binds can lead to serious injury. ALWAYS maintain a firm grip with both (see Fig 7) hands on the saw and position your body and arms to allow you to resist Kickback forces...
- Page 20 MAKING DEPTH-OF-CUT ADJUSTMENTS (Fig. 8) ALWAYS use the correct blade depth setting The correct blade depth setting for all cuts should net be more than 1/4-inch below the material being cut (see Fig 5) Allowing more depth will increase the chance of kickback and cause the cut to be rough Your saw is equipped with a deptb-oFout scale that provides increased depth-of-cut accuracy The depth-of-cut scale is located on the inside back of the upper blade guard Fig, B...
- Page 21 USING THE LASER TRAC _ LASER LIGHT FEATLIRE (Fig. 9) Z_ WARNING: LASER LIGHT. LASER RADIATION, Avoid Direct Eye Exposure, DO NOT stare into beam. Only turn laser beam on when the saw is on the workpiece. Class ilia laser_ NOTE: Your circular saw has a built-in laser light.
- Page 22 STARTING A CUT (Fig. 10) maintain proper control of saw, Failure to clamp and support workpiece and loss of I _ WARNING: ALWAYS clamp and support workpiece securely. ALWAYS control of saw could result in serious injury, 1. ALWAYS use your saw with your hands positioned correctly, with one hand operating the trigger switch and the other on the front assist handle (see Fig.
- Page 23 TO HELP MAINTAIN CONTROL cont.: t0. Squeeze the trigger switch to start the saw. ALWAYS let the blade reach full speed before you begin the cut into the workpiece. 11_ When making a cut, ALWAYS use steady, even pressure. Forcing the saw causes rough cuts and could shorten the life of the saw or cause Kickback.
- Page 24 MAKING RIP CUTS ALWAYS use a guide when making long or wide rip cuts with your saw, You can use either a straight edge or use the edge guide that was included with your saw, USING A STRAIGHT EDGE (Fig. 13) WARNI NG: ALWAYS clamp and support workpiece securely.
- Page 25 "T Fig, 14 INSTALLING AND USING THE EDGE GUIDE cont. Place the edge guide firmly against the edge of the workpiece (See Fig, 14a) Doing this will give you a true cut without pinching the blade BE SURE that the guiding edge of tile workpiece is straight so you can get a straight cuL ALWAYS LETTHE BLADE...
- Page 26 MAKING BEVEL CUTS (Figs. 16 and 16a) Line of Cut 45o Indicator Fig. 16a Fig. 16 WARNING: ALWAYS clamp and support workpiece securely.. ALWAYS maintain proper control of saw. Failure to clamp and support workpiece loss of control of saw could result in serious injury. 1, Your saw can be adjusled to cut at any angle between 0°...
- Page 27 MAKING POCKET CUTS ( Fig. 17) /'_ WARNING: ALWAYS adjust bevel setting tozero before makinga pocket cut. Attempting a pocket cut at any other setting can result in a loss of control of the saw, which can result in serious injury, 1 Adjust the bevel setting to zero, set the blade to the correct blade depth setting, then use the lower blade guard lever to swing the guard up.
- Page 28 POSITIVE0° BEVEL STOP Your s awhasa positive 0 ° bevel s topanditwasadjusted atthefactory toassure 0°angleofthesawblade for900 cuts However, shipping c ancause misalignment HOWTO CORRECTTHE 0 ° ANGLE SE"t-rlNG (Figs.18, 18a and 18b) 1 Unplug the saw Z_ WARNING: ALWAYS unplug saw before making any adjustments. Failure to unplug the saw could result in accidental starting...
-
Page 29: Maintenance
WARNING: Attempting to make cuts without the bevel adjustment locking lever securely tightened can result in serious injury. z_ WARNING: To ensure safety and reliability, all repairs - with the exception of the externally accessible brushes - should be performed by a qualified service technician at a Sears Service Center. - Page 30 Sears and other Craftsman outlets have a large selection of 7 1/4-inch Craftsman steel carbide-tipped blades designed for specific cutting applications,, Contractor bulk packs are also available,,...
- Page 31 NO'_: lOt_ ContaEn_ 30 sg 5_ 57 52 61 _0 fiB_ 107 C_ta_ns ?_ 72 _3...
- Page 32 71/4-in.CIRCULAR SAW- MODEL NUMBER320.10871 The Model Number will be found on the Narneplate Always mention the Model Number in all correspondence regarding your tool Parts No. Item No, Part Description Qty. 2780040000 Laser Set 3420333000 Gear Case 3420335000 Upper Guard 31213390O0 Motor Housing Rear Cover...
- Page 33 71/4-in.CIRCULAR SAW - MODEL NUMBER 320.10871 The Model Number will be found on the Nameplate Always mention the Model Number in all correspondence regarding your tool Parts No. Qty. Item No. Part Description 5610057000 Thread Forming Screw 5700041000 Oil Impreging Bearing 57O0O15OOO Ball Bearing GB/T276-94 6201-2RD 3700780000...
- Page 34 71/4-in.CIRCULARSAW - MODEL NUMBER 320.10871 The Model Number will be found on the Nameplate, Always mention the Model Number in al! correspondence regarding your tool item No, Parts No Part Description Qty. 4870036000 Switch 4810002000 Power Cord & Plug 3700367000 Cord Anchorage 5610093000 Tapping Screw JIS M4°i 1...
- Page 35 Normas de Seguridad e Instrucciones o ENSAMBLAJE de Funcionamiento en este Manual antes de o DESCRIPCION usar este producto. • FUNCIONAMIENTO o AJUSTES Sears, Roebuck and Co., • MANTENIrtilIENTO Hoffman Estates, IL 60179 U.S.A. Visite nuestra p_gina Web Craftsman®: www.craftsman.com...
- Page 36 NOmerosde Tel_fonodel Serviciode Piezas de Repuesto de Sears ..........C0ntratapa GARANTiA DE UN AI_IO COMPLETO SOBRE PRODUCTOS CRAFTSMAN e Si este producto Craftsman falla debido a defectos en el material o mane de obra entre un a5o desde la fecha de cornpra,REGRESELO...
- Page 37 Nosotros recemendamos una M_scara de Seguridad de VisiSn Amplia para usar sabre gafas de seguridad est_ndar con protectores laterales, ta cual est& dispenible en las Tiendas Sears u etros Puntos de Venta Craftsman,...
- Page 38 z_ADVERTENClA: ASEGURESE de leer y entender todas tas instrucciones en este manual antes de usar esta sierra circular. No seguir tedas tss instrucciones podr[a resultar en exposici6n a radiaciones peligrosas, descargas el_ctricas, incendio y/o lesiones personalss graves, PRECAUClONES DE SEGURIDAD PARA EL use DE L.,_SER...
-
Page 39: Seguridad Personal
7. Apague SIEIV1PRE el rayo laser cuando no est6 en uso_ Dejar la herramienta sin supervisiSn tambi6n puede incrementar el riesgo de que otra persona inadvertidamente mire directamente al rayo I&ser. PRECAUClON: Siga SIEMPRE s61o las instrucciones contenidas en este manual cuando use el I&ser, El uso de esta caracteristlca de cualquier manera... - Page 40 SEGURIDAD PERSONAL cont. 6o RETIRE las Ilaves de ajuste o Ilave de la hoja antes de encender la herramientao Una Ilave dejada en la parte rotativa de la herramienta podria resultar en lesiones personales. 7 No se extienda para alcanzar. Mantenga una posici6n firme y balanceada...
- Page 41 "T SEGURIDAD EN EL USOY CUIDADO DE LA HERRAMIENTA cont. 9. USE SOLO accesorios recomendados para esta herramienta. Los accesorios que podrian ser aptos para una herramienta podrfan tornarse peligrosos cuando se usan con otra herramienta. SEGURIDAD ELI_CTRICA /_, ADVE RTENClA: No permita que los dedos toquen los terminales de un enchufe al instalar o retirar el enchufe de la toma.
-
Page 43: Normas De Seguridad
NORMAS DE SEGURIDAD PARA SIERRAS CIRCULARES "t Mantenga las manos lejos de los bordes cortantes y la hoja. I "Mantenga su segunda mano en el mango auxiliar o cubierta del motor. Si arnbas manos es_n sosteniendo la sierra, la hoja no podr_ cortarlas. [ Z PRECAUCI6N: Lahojadeceleran unavezapagadalasierra. - Page 44 NORMAS DE SEGURIDAD PARA SIERRAS ClRCULARES cont. 10 AI aserrar al hilo, USE SIEMPRE una guia de corte o gufa de corte recto. Esto mejora la precisi6n det corte y reduce la posibilidad de atascamiento de la hoja_ USE SlEMPRE hojas del tamaSo correcto y forma correcta det orificio para el eje (diamante vs, redondo).
- Page 45 NORMAS ADIClONALES PARA UN FUNClONAIV]IENTO SEGURO cont. 3_ PROTEJA eLlS puimones. Use una mascara para la cara o mascarilla antipolvn si la operaci6n generar_ polvn 4 PROTEJA sus oidns. Usa protecci6n personal para los oidns apropiada durante el use Bajo ciertas condiciones, el ruido producido per esta herramienta podrfa contribuir a la p6rdida de audici6n 5, TODOS LOS VlSITANTES Y OBSEVADORES DEBEN usar el mismo equipo de...
- Page 46 Si faltase cuatquiera de los items mencionados (refi6rase a ta LISTA DE PARTES de la pb,gina 13), regrese la sierra a su tienda Sears o punto de venta Craftsman m&s cercano para que la sierra sea reemplazada ADVERTENCIA:...
- Page 47 LISTA 3. Gufa Lateral DE PARTES (Fig. 1) 4. Llave de la Hoja t_ I (para cambiar _j la hoja) 5_Galas de _f'_=,] segurldad para O' "_-_11 1. Sierrl meJoramlentodel I_ser 2. HoJa (para mejerar la visualizaci6n del I&ser) (Sin ensamblar. instalada en la sierra) 6.
- Page 48 INSTALACION DE LA HOJA cont. (Figs. 2 y 2a) ADVERTENCIA: ASEGORESE de usar guantes de trabajo de protecciSn mientras manipule la hoja de la sierra. La hoja puede tesionar manos sin protecci6no ADVERTENClA: Una hoja de 7 1/4 putgadas es la capacidad m&xima de tas hojas para su sierra.
-
Page 49: Luz Detrabajo
10o Incluye hoja de acero Craftsman ®24 dientes con punta de carburo de tungsteno para uso general. 11. Bloqueo superior del husillo de la hoja ensamblada para cambios fAciles de ta hoja. - Page 50 La Sierra Circular ofrece las siguientes caracteristicas cont. Inlerruptor del Laser Trac Apertura del rayo I&ser Mango delantero de asistencia Mango posle_ Protector superior de la hoja Cubierta del motor Palanca del protector inferior de la hoja 3 LED Escala del bisel Pelanca de bloqueo Uave de la hoja para ajuste del bisel...
-
Page 51: Hojas De Sierra
Entrada 13 Amps Clasificaci6n 120V, 60HZ AC 5000 Velocidad sin carga Di_me_ro de la hoja 71/4 pulgadas (184 ram) Profundidad de corte a 90 ° 23/8 pulgadas (60.33mm) Profundidad de corte a 45 ° 113/16pulgadas (46.03 52 ° Angulo m&ximo de biselado HOJAS DE SIERRA Toda hoja de sierra debe mantenerse limpia, afilada y ajustada adecuadamente para que corte eficientemente... - Page 52 REBOTE...QU I_ LO OCASIONAY COIVIO AYUDAR A PREVENIRLO (Fig, 5) Los causas del rebote Profundldad correcta de la hoJa La hoJaest_ demasiado en profundfdad Fig. 5 _REBOTE 1 E! rebote es una reacci6n repentina debido a Fig. 6 que la hoja de la sierra est,. presionada, se atasca o est&...
- Page 53 Maneras para prevenir el Rebote Libere SIEMPRE el interruptor gatillo si la hoja se atasca o si la sierra se bloquea. El rebots podria ocasionar que usted pierda el control de la sierra, resultando en lesiones graves, 1. Mantenga SIEMPRE un agarre firme con ambas manos en la sierra (vet Ia Fig 7) y posicione su cuerpo y brazos de manera tal que le permitan resistir Ias fuerzas del...
- Page 54 HACER AJUSTES DE LOS CORTES EN PROFUNDIDAD (Fig. 8) Use SIEMPRE la configuraci6n de plofundidad de hoja co[recta La configuraci6n de profundidad correcta de la hoja no debe set m_.s de 1/4 pulgada pot debajo del material que se est_ cortando (ver la Fig,, 5), Permitir una mayor profundidad incrementar_, la posibilidad de rebote y ocasionar_ que el corte no sea preciso Su sierra est_ equipada con una escala pare cortes en profundidad que ofrece una mayor precisiSn para la profundidad de code, La escala para profundidad de co[re est_ ubicada en Ia parte interne posterior de! protector...
- Page 55 USO DEL RAYO L.&SER LASER TRAC_(Fig. directa de los ojos. NO mire fijamente al rayo, S61o encienda el rayo l_ser cuando la /_, ADVERTENCIA: RA¥O LASER, RADIACION LASER. Evite la exposici6n sierra est6 sobre la pieza de trabajo. L_ser Clase Ilia. NOTA: Su sierra circular est_ equipada con un rayo I_ser integrado.
- Page 56 COMENZAR A CORTAR (Fig. 10) ADVERTENCIA: Sujete y soporte SIEMPRE la pieza de trabajo de manera segura. Mantenga SIEMPRES control adecuado sobre la sierra. No sujetar y soportar la pieza de trabajo y la p6rdida de control sobre la sierra podrian resultar en lesiones graves° 1 SIEMPRE use su sierra con las manos posicionadas de manere cor[ecta, con una mane operando el interruptor gatillo y la otra sobre el mango delantere de asistencia (ver la Fig 10) z_ ADVERTENClA:...
- Page 57 Para ayudarle a mantener el control cont.: 10 Apriete el gatillo para encender la sierra. SIEIvlPRE permita que la hoja alcance su m&xima velocidad antes de comenzar a cortar en la pieza de trabajo 11o AI hacer el corte, SlEMPRE, aplique una presi6n estable y equitativa.
- Page 58 HACER CORTES AL FILO SlEMPRE use una guia al hacer cones al filo largos o anchos con su sierra Puede usar un borde recto o usar la guia de borde qua se incluy6 con su sierra USO DE UN BORDE RECTO (Fig.
- Page 59 Fig. 14 INSTALACION Y USO DE LA GUIA DE BORDE (Figs. 14 y 14a) cont. 6. Coloque la guia de borde firmaments centra el borde de la pieza de trabajo (vet la Fig 14a) Hacer esto le dar_. un corte verdadero sin apretar la hoja 7 ASEGORESE de que el borde guia de la pieza de trabajo est_ recta para obtener un corte...
- Page 60 HACIENDO CORTES BISELADOS (Figs. 16 y 16a) Linea de corte --_ Figo 16a ADVERTENCIA: Sujete y soporte SIEMPRE la pieza de trabajo de manera segura. Mantenga SIEMPRES control adecuado sobre la sierra. No sujetar y soportar la pieza de trabajo y ta p6rdida de control sobre la sierra podrian resultar en lesiones graves.
- Page 61 HACIENDO CORTES DE BOLSILLO (Fig. 17) ADVERTENCIA: SIEMPRE ajuste la configuraeiSn del bisel en cero antes de hacer un corte de botsillo. Intentar un corte de bolsillo en cualquier otra configuraci6n podria resultar en p6rdida de control de la herramienta y consiguientes lesiones graves, Ajuste en cero la configuraci6n del bisel, establezca la configuraci6n de profundidad...
- Page 62 PARADA SEGURA DEL BISEL A 0 ° Su sierra est_ equipada con una parada segura del bisel a 0° el cual fue ajustado en la f_brica para asegurar un _.ngulo de 0° de la hoja de la sierra para cortes a 900 Sin embargo, el transporte podda ocasiona_ una p_rdida de alineaci6n COMO CORREGIR...
- Page 63 ADVERTENCIA: Intentar hacer cortes sin que la palanca de ajuste del bisel est_ apretada de manera segura podria resultar en lesiones graves. Z_ ADVERTENCiA: Para asegurar seguridad y confiabilidad, toda reparaci6n debe set realizada pot t_cnicos calificados en un Centro de Servicio Sears. z_ ADVERTENCIA: Pare su seguridad, apague SIEMPRE el interruptor desenchufe...
- Page 64 Sears y otros puntos de venta Craftsman cuenta con una amplia selecci6n de hojas de 7 V4 pulgadas Craftsman de acero con dientes con punta de carburo de tungsteno, diseRadas para aplicaciones especfficas de corte.
- Page 66 1"- Sierra Circular de 7 1/4pulgadas - MODELO NO. 320.10871 El Nurnero det Modelo se encuentra en la Placa de Identificaci6n Mencione siempre el NQmero del Modelo en toda correspondencia acerca de su herramienta Cant. No. item No. Parte Descripci6n de la Parte Set del laser 2780040000...
- Page 67 Sierra Circular de 7 1/4pulgadas - MODELO NO. 320.10871 El Nt]mero del Modelo se encuentra en la Placa de IdentificaciSn Mencione siempre el Nt3mero del Modelo en toda correspondencia acerca de su herramienta Cant. No. item No. Pa_e Descripci6n de la Parte Tornillo roscado 5610057OOO Rodamiento...
- Page 68 Sierra Circular de 7 1/4pulgadas - MODELO NO. 320.10871 El NQmero del Modelo se encuentra en la Placa de identificaci6n Mencione siempre el Nt]mero del Mode!o en 1oda correspondencia acerca de su herramienta Cant. No. item No. Parte Descripci6n de la Pa[te 4870036000 Interrupter 4810002000...
- Page 69 w_ F...
- Page 72 Get it fixed, at your home or ours! Your Home For ,eLalr - in your home all major brand appliances avm anu garde h equc_rnent or i_ea_ g al,d cecil, g systems. no matter made it. no matter wile sold For the replacement parts accessories and owner's manuals thai you nee(l :_odo,it,/ourself...