Table of Contents
Advertisement
Available languages
Available languages
Operator's Manual
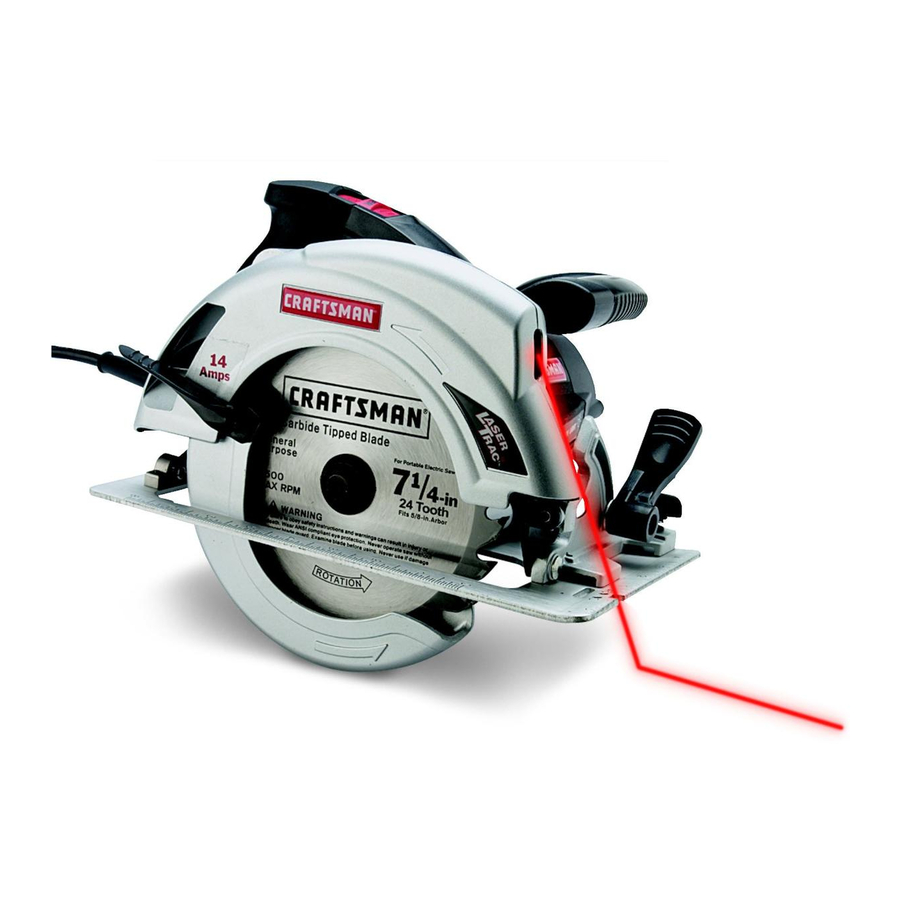
14 Amp
7 _/4-in. Circular Saw
with Laser Trac TM
Model No.
320.10870
®
DOUBLE INSULATED
/_ CAUTION
Read, understand and follow
all Safety Rules and Operating Instructions
in this Manual before using this product.
Sears, Roebuck and Co.,
Hoffman Estates, IL 60179 U.S.A.
Visit our Craftsman webslte: www.craftsman.com
• WARRANTY
* SAFETY
• UNPACKING
* DESCRIPTION
• OPERATION
• ADJUSTMENTS
• MAINTENANCE
Advertisement
Table of Contents

Related Manuals for Craftsman 320.10870


Summary of Contents for Craftsman 320.10870
- Page 1 • WARRANTY * SAFETY all Safety Rules and Operating Instructions • UNPACKING in this Manual before using this product. * DESCRIPTION • OPERATION Sears, Roebuck and Co., • ADJUSTMENTS Hoffman Estates, IL 60179 U.S.A. Visit our Craftsman webslte: www.craftsman.com • MAINTENANCE...
- Page 2 Pages 31 - 34 Sears Repair Parts Phone Numbers ........Back Cover ONE YEAR FULL WARRANTY ON CRAFTSMAN ®PRODUCT tf this Craftsman product fails due to a defect in material or workmanship within one year from the date of purchase, RETURN ITTO THE...
- Page 3 We recommend a Wide Vision Safety Mask for use over eyeglasses or standard safety glasses with side shield, available at Sears Stores or other Craftsman Outlets.
- Page 4 _WARNING: BE SURE to read and understand all Instructions in this manual before using this circular saw. Failure to follow all instructions may result In hazardous radiation exposure, electric shock, fire and/or serious personal Injury. SAFETY PRECAUTIONS FOR LASERS This circular saw has a buift-in laser light. The laser is a Class tile and emits output power of a maximum 1roW and 635-665nm wavelengths.
- Page 5 SAFETY PRECAUTIONS FOR LASERS cont. 6. DO NOT use on surfaces such as sheet steel that have a shiny, reflective surface. The shiny surface could reflect the beam back at the operator. Be aware that laser light reflected off of a mirror or any other reflective surfaces can also be dangerous. 7.
- Page 6 PERSONALSAFETY cont. 5, AVOID accidental starting. Be sure switch is in "OFF" position before plugging in. DO NOT carry tools with your finger on the switch. Carrying tools with your finger on the switch or plugging in tools that have the switch In the "ON"...
- Page 7 ELECTRICALSAFETY I /_ WARNIN G: installing or removing the plug from the outlet. Do not permit fingers to touch the terminals of plug when 1. Double insulated tools are equipped with a polarized plug (one blade is wider than the other). This plug will fit in a polarized outlet only one way, If the plug does not fit fully In the outlet, reverse the plug.
- Page 8 EXTENSION CORDS Use a proper extension cord. ONLY use cords listed by Underwriters Laboratories (UL). Other extension cords can cause a drop in line voltage, resulting in a loss of power and overheating of 1ool. For this tool an AWG (American Wire Gauge) size of at least 14-gauge is recommended for an extension cord of 25-ff.
- Page 9 SAFETY RULES FOR CIRCULAR SAWS second hand on the auxiliary handle or motor housing. If both hands are holding Keep hands away from cutting area and blade. Keep your the saw, the blade cannot cut them. CAUTION: Blades coast after saw Is switched off. 1 KEEP your body positioned to either side of the saw blade and not in direct line with the saw blade°...
- Page 10 SAFETY RULES FOR CIRCULAR SAWS cont, 12o NEVER use damaged or incorrect blade washers or bolts. The blade washers and bolts were specially designed for your saw, for optimum performance and safety of operation. 13. NEVER cut more than one piece at a time. DO NOT STACK more than one workpiece on the worktable at a time.
- Page 11 ADDITIONAL RULES FOR SAFE OPERATION cont. 6. INSPECT the tool cords periodically and if damaged have them repaired at your nearest Sears Service Center or other Authorized Service Facility. BE AWARE of the cord location. 7 ALWAYS check the tool for damaged parts, Before further use of the tool, a guard or other part that is damaged should be carefully checked to determine if it will operate properly and perform its intended function.
- Page 12 6. Inspect the saw carefully to make sure that no breakage or damage has occurred during shipping, tf any of the items mentioned are missing (refer to PARTS LIST on page 13), return the saw to your nearest Sears store or Craftsman outlet to have the saw replaced.
- Page 13 Squeeze for power "ON", release for power "OFF". 8. Oversized machined aluminum base has integrated rip and crosscut ruler. 9. Soft-grip ergonomtcally designed contoured rear handle and front assist handle for positive gripping, control, balance and comfort. 10_includes Craftsman ®24 tooth carbide-tipped steel general purpose blade.
- Page 14 This Circular Saw has the following features (cont.): 11, Top mounted blade spindle lock for easy blade changes, 12. Includes edge guide to help produce accurate cuts. 13oSawdust ejection chute helps direct dust and chips away from operator. 14. Permanently lubricated 100% ball bearings for smooth operation and long life. 15_ Durable machined gearing for efficient power transmission.
- Page 15 HII d .'{e] tjlj_ iH..'] d _[o] I _ [__'11 [el __ input 14 Amps Rating 120V, 60HZ AC 5000 RPM No Load Speed Blade Diameter 7_A-in. (184mm) Cutting Depth at 90 ° 23/a-in (60,33mm) Cutting Depth at 45 ° 1Wle-in (46 03ram) Maximum Bevel...
- Page 16 KICKBACK...WHAT CAUSES IT AND WAYS TO HELP PREVENT IT (Fig. 4) The Causes of Kickback Blade Is Set Too Correct Blade Depth Deep Fig. 4 1, Kickback is a sudden reaction to a pinched, Fig. 5 bound or misaligned saw blade, which causes an uncontrolledsaw to lift up and out of the workpiece and toward the operator, 2.
- Page 17 Ways to Help Prevent Kickback ALWAYS release trigger switch immediately if the blade binds or the saw stalls. Kickback could cause you to lose control of the saw. Loss of control can lead to serious injury. ALWAYS maintain a firm grip with both (see Fig 6) hands on the saw and position your body and arms to allow you to resist Kickback forces_...
- Page 18 MAKINGDEPTH-OF-CUT ADJUSTMENTS (Fig. 7) ALWAYS use the correct blade depth setting° The correct blade depth setting for all cuts should not be more than 1/4-inch below the material being cut (see Fig 4). Allowing more depth will increase the chance of kickback and cause the cut to be rough. Your saw is equipped with a depth-of-cut scale that provides increased depth-of-cut accuracy, "Thedepth-of-cut scale is located on the inside back of the upper blade guard Fig, 7...
- Page 19 LASER LIGHT FEATURE (Fig. 8) USING THE LASER TRAC DO NOT stare into beam, Only turn laser beam on when the saw is on the workpiece. WARNING: LASER LIGHT° LASER RADIATION. Avoid Direct Eye Exposure. Class Ilia laser. saw must be plugged into power source. OTE: Your circular saw has a built-in laser light°...
- Page 20 STARTING A CUT (Fig. 9) maintain proper control of saw° Failure to clamp and support workpiece and loss of _ WARNING: ALWAYS clamp and support workpiece securely. ALWAYS control of saw could result in serious injury, 1. ALWAYS use your saw with your hands positioned correctly, with one hand operating the trigger switch and the other on the front assist handle (see Fig.
- Page 21 TO HELP MAINTAIN CONTROL cont.: 10. Squeeze the trigger switch to start the saw° ALWAYS let the blade reach full speed before you begin the cut into the workpiece. 11. When making a cut, ALWAYS use steady, even pressure° Forcing the saw causes rough cuts and could shorten the life of the saw or cause Kickback.
- Page 22 INTEGRATED RIP AND CROSSCUT RULERS Marked on the base across the front (see Fig, 11a, page 21) is a handy ruler for measuring repetitive cuts. It is marked t V4-inches to the right of 0 ° and 5-inches to the left of 0°, in V1B-inch increments Also marked on the base down the right side edge, is a ruler for measuring length of cuts, marked 0 to 8 inches in 1/16-inch increments,...
- Page 23 INSTALLINGAND USING THE EDGEGUIDEcont. 6, Place the edge guide firmly against the edge of the workpiece (See Fig,, 13a), Doing this wilt give you a true cut without pinching the blade, 7, BE SURE that the guiding edge of the workpiece is straight so you can get a straight cut, 8, ALWAYS LET THE BLADE...
- Page 24 MAKING BEVEL CUTS (Figs. 15 and 15a) Line of Cut _ 45° Indicator Fig. 15a .,.i,,,,. i, ,Hi maintain proper control of saw. Failure to clamp and support workpiece and toss WARNING: ALWAYS clamp and support workpiece securely. ALWAYS of control of saw could result in serious injury..
- Page 25 MAKING POCKET CUTS (Fig. 16) WARNING: WARNING: ALWAYS adjust bevel setting to zero before making a pocket cut. Attempting a pocket cut at any other setting can result in a loss of control of the saw, which can result in serious injury. 1o Adjust the bevel setting to zero, set the blade to the correct blade depth setting, then use the lower blade guard lever to swing the guard up, WARNING:...
- Page 26 POSITIVE 0 ° BEVEL STOP Your saw has a positive 0 ° bevel stop and it was adjusted at the factory to assure 0° angle of the saw blade for 90o cuts,. However, shipping can cause misafignment. HOW TO CORRECT THE 0 °...
- Page 27 WARNING: lever securely tightened can result in serious injury. Attempting to make cuts without the bevel adjustment locking of the externally accessible brushes - should be performed by a qualified service WARNING: To ensure safety and reliability, all repairs - with the exception technician at a Sears Service Center.
- Page 28 CHANGINGTHE BLADE (Figs. 18 and 18a) WARNING: BE SURE to wear protective work gloves while handling a saw blade, The blade can injure unprotected hands. 1. Unplug the saw. Z_ WARNING: To prevent personal injury, ALWAYS disconnect the plug from power source BEFORE assembling parts, making adjustments or changing blades.
- Page 29 CHANGING THE BLADE cont. (Figs. 18 and 18a) 6. Raise lower blade guard using the blade guard lever and hold it in the raised position for the next steps. 7o Completely remove the spindle clamping screw 'W' and the outer "D" washer and the blade (see Fig.
- Page 30 The use of attachments or accessories that are not recommended for this too! might be dangerous and could result in serious injury. Sears and other Craftsman outlets have a large selection of 71/4-inch Craftsman steel carbide-tipped blades designed for specific cutting applications.
- Page 32 71/4-in.CIRCULAR SAW- MODEL NUMBER 320.10870 The Model Number will be found on the Nameplate, Always mention the Model Number in all correspondence regarding your tool. Item No. Pads No. Qty. Part Description 2780040000 Laser Set 3420333000 Gear Case 3420335000 Upper Guard 3121339000 Motor Housing 3121340000...
- Page 33 71/4-in.CIRCULAR SAW- MODEL NUMBER 320.10870 The Model Number will be found on the Nameplate. Always mention the Model Number in all correspondence regarding your too!o Item No. Parts No. Part Description Qty. 5610057000 Thread Forming Screw 5700041000 Oil lmpreging Bearing 5700015000 Bali Bearing GB/T276-94 6201-2RD 3700780000...
- Page 34 71h-in.CIRCULARSAW- MODEL NUMBER 320.10870 The Model Number will be found on the Nameplate_ Always mention the Model Number in all correspondence regarding your tool, Item No, Parts No. Part Description Qty. 4870036O00 Switch 4810002000 Power Cord & Plug 3700367000 Cord Anchorage 5610093000 Tapping Screw JlS M412...
- Page 35 ° DESCRIPCl6N todas las Normas de Seguridad e Instrucciones de Funcionam_ento en este Manual antes de ° FUNClONAMIENTO usar este producto, • AJUSTES • MANTENIMIENTO Sears, Roebuck and Co., Hoffman Estates, IL 60179 U.S.A. Vlslte nuestra pdgina Web Craftsman®: www.craftsman.com...
- Page 36 Servicio Piezas de Repuesto de Sears .......... Contratapa GARANTiA DE UN A1;,IO COMPLETO SOBRE PRODUCTOS CRAFTSMAN e Si este producto Craftsman falla debido a defectos en el material o mano de obra entro un arc desde la fecha de compra,REGRI_SELO...
- Page 37 Nosotros recomendamos una Mdscara de Seguridad de Visi6n Amplia para usar sabre gafas de seguridad estdndar con protectores laterales, la cual estd disponible en lasTiendas Sears u otros Puntos de Venta Craftsman.
- Page 38 i_ADVERTENCIA: ASEGURESE de leer y entender todas las instrucciones en este manual antes de usar esta sierra circular. No seguir todas las instrucciones podr_a resultar en exposici6n a radiaciones peligrosas, descargas electricas, tncendio y/o lesiones personales graves. PRECAUCIONES L_.SER DE SEGURIDAD PARA EL USO DE Esta sierra circular cuenta con un rayo t_.ser integradooEl I_ser es de Clase Ilia y emite...
- Page 39 7. Apague SIEMPRE el rayo l&ser cuando no est_ en usoo Dejar la herramienta sin supervisl6n tambl_n puede incrementar el riesgo de que otra persona inadvertidamente mire directamente al rayo I&ser. /K PRECAUCI6N: Siga SIEMPRE s61o las instrucciones conten|das en este manual cuando use el l&ser.
- Page 40 SEGURIDADPERSONALcont. 6. RETIRE las ilaves de ajuste o !lave de la hoja antes de encender la herramtenta. Una Ilavs dsJada sn la parts rotativa de la herramlenta podrfa resultar sn lesionas personales, 7. No se extienda para alcanzar. Mantenga una posici6n firme y balanceada en todo momento.
- Page 41 SEGURIDAD EN EL USO Y CUIDADO DE LA HERRAMIENTA cont. 9_ USE S6LO accesorios recomendados para esta herramlenta, Los accesorlos podrfan ser aptos para una herramtenta podrfan tornarse peltgrosos cuando se usan con otra herramlenta, SEGURIDAD ELi_CTRICA ADVERTENCIA: No permlta que los dedos toquen los termtnales de un enchufe al lnstalar o retlrar el enchufe de la toma.
- Page 42 CORDONES DE EXTENSION Use un cordbn de extensibn aproptado. SOLO use cordones listados bajo Underwriters Laboratories (UL) Otres cordones de extensi6n podrian ocasionar una caida en el vottaje de ta linea, resultando en la p6rdida de energia y sobrecalentamiento de ta herramienta, Para esta herramienta, se recomienda un cord6n de extensi6n de tamaSo AWG (American Wire Gauge) per Io menos de calibre 14 de longitud de 25 pies e menos Use un cord6n de extensi6n calibre 12 para 50 pies de Iongitud Los cordones de extensi6n...
- Page 43 " • IDL| NORMAS DE SEGURIDAD PARA SIERRAS CIRCULARES Mantenga su segunda mano en el mango auxlliar o cubierta del motor. SI ambas Mantenga las manos leJos de los bordes cortantes y la hoJa. manos estdn sostenlendo la sierra, la hoJa no podrd cortarlas. I /_ PRECAUCION;...
- Page 44 NORMAS DE SEGURIDAD PARA SIERRAS ClRCULARES conL 10,, AI aserrar al hilo, USE SIEMPRE una guia de corte o guia de corte rector Esto mejora la precisi6n del corte y reduce Eaposibilidad de atascamiento de la hoja. 1I. USE SlEMPRE hojas del tamafio correcte y forma correcta del orificio para el eje...
- Page 45 " " I_I NORMAS ADICIONALES PARA UN FUNCIONAMIENTO SEGURO cont. 3. PROTEJA sus pulmones+ Use una mascara para la cara o mascarilla antipolvo si Ia operaci6n generar_ polvo° 4, PROTEJA sus ofdos+ Use protecci6n personal para los oidos apropiada durante el uso+ Bajo ciertas condiciones, el ruido producido pot esta herramienta podrfa contribuir a ta p6rdida de audici6n.
- Page 46 Si faltase cualcjulera delos ftems mencionados (refi_rase a la LISTA DE PARTES de la p_glna 13), regrese la sierra a su tienda Sears o punto de yen:re Craftsman mds cercano pare que la sierra sea reempiazada. ADVERTENCIA:...
- Page 47 3. Gufa Lateral LISTA (almacenado DE PARTES en estuche) __EL___ (Fig. I) 4, Llavedeta Hoja (para cambiar la hoja) 5. Galas de _r-J-_ ) 2. HoJa segurldad pare (Sin ensambtar, meJorsmlento del tnstalada en ta sierra) (para mejorar la visualizaci6n del I&ser) 6.
- Page 48 9, Mango posterior y mango de asistencia delantero, contorneados y diseSados ergon6micamente, de agarre suave para un agarre seguro, control, balance y confort. 10, Incluye hoja de acero Craftsman ®24 dientes con punta de carburo de tungsteno para use general. 11, Bloqueo superior...
- Page 49 _t:__ Entrada 14 Amps ClasificaciSn 120V, 60HZ AC Velocidad sin carga 5000 RPM Di&metro de la hoja 7t/4 pulgadas (184 mm) Profundidad de corte a 90 ° 23/8 pulgadas (60,33mm) Profundidad de corte 113/_6 a 45 o puigadas (46.03 ,_ngu]o m&ximo de biselado 54 5 °...
- Page 50 REBOTE,,.QUle LO OCASIONA Y C(_MO AYUDAR A PREVENIRLO (Fig. 4) Las Causas Del Rebote La hoJa est_ demaslado en profundldad Fig. 4 1, El rebote es una reacci6n repentina debide a Fig. 5 que la hoja de la sierra est& presionada, se atasca o est&...
- Page 51 Maneras p araprevenir e l Rebote LibereSIEMPRE e l interruptor gatillosi la hoja se atasca o si la sierra se bloquea. El rebote podda ocasionar que usted pierda el control de la sierra, resultando en lesiones graves. Mantenga SIEMPRE un agarre firme con ambas manos en la sierra (ver la Fig.
- Page 52 HACER AJUSTES DE LOS CORTES EN PROFUNDIDAD (Fig. 7) Use SIEMPRE la configuraci6n de profundidad de hoja correcta_ La configuraci6n de profundidad correcta de la hoja no debe ser m&s de 1/4 pulgada por debajo del material que se est,. cortando (ver la Fig. 4). Permitir una mayor profundidad incrementar& la posibiiidad de rebote y ocasionar&...
- Page 53 USO DEL RAYO LASER LASER TRAC_(Fig. ADVERTENCIA: RAYO LASER, RADIACION LASER. Evite ia exposicibn directa de los ojos, NO mire fijamente al rayo_ $61o encienda el rayo I_ser cuando ta sierra est(_ sobre la pieza de trabajo. L_ser Clase Ilia. NOTA: Su sierra circular estd equipada con un rayo I_ser integrado.
- Page 54 COMENZAR A CORTAR (Fig. 9) Mantenga SIEMPRES control adecuado sobre la sierra. No sujetar y soportar la pieza [ _ADMERTENcIA: Sujete y sopode SIEMPRE ,a pieza de traba,o de manera segura. I de trabajo y la p6rdida de control sobre la sierra podrian resultar en lesiones graves. I.
- Page 55 Para ayudarle a mantener el control cont.: 10. Aprtete el gatillo para encender la sierra. SIEMPRE permita que la hoja alcance su maxima velocidad antes de comenzar a cortar en la pieza de trabajo 11. AI hacer el corte, SIEMPRE, aplique una presi6n estable y equitativa. Forzar la sierra producir_, cortes imprecisos y podfia acortar la vida fitlt de la sierra u ocasionar el Rebote.
- Page 56 REGLAS INTEGRADAS PARA CORTEAL FILO EN BISELY PARA CORTECRUZADO Marcada en ta base a 1olargo de la parte delantera (v6ase la Fig. 1la, p_,gina 21) encontrar,'_ una regla util para medir cortes repetitivos. Est,_marcada 11/4 -pulgadas a ]a derecha del 0° y 5-pulgadas a la izquierda del 0°, en incrementos de 1/16de pulgada, Tambi6n marcada en la base a t0 largo del lado derecho, encontrar_ una regta para medir la Iongitud de los codes, marcada de 0 a 8 pulgadas en incrementos de 1/16de pulgada.
- Page 57 Fig. 13 INSTALACi6N Y USO DE LA GU|A DE BORDE (Figs. 13 y 13a) cont. 3, Ajuste la guia de borde a la longitud de corte deseada_ 4_ Apriete fa guia de borde con el tornillo de sujeci6n 5 Sujete y soporte la pieza de trabajo de manera segura antes de reatizar el corte,, 6, Coloque ta guia de borde firmemente...
- Page 58 HACIENDOCORTESBISELADOS(Figs. 15 y 15a) Unea de corte_, z_ ADVERTENCIA: Sujete y soporte SIEMPRE la pieza de trabajo de manera segura. Mantenga SIEMPRES control adecuado eobre la sierra. No sujetar y soportar la pieza de trabajo y la p_rdida de control sobre la sierra podrfan resuttar en lesiones graves= 1, Su sierra puede ajustarse para cortar en cualquier &ngulo entre 0°...
- Page 59 HACIENDOCORTESDE BOLSILLO (Fig. 16) ADVERTENCIA: SIEMPRE ajuste la configuraci6n del bisel en cero antes de hacer un corte de bolsillo. Intentar un corte de bolsUlo en cualquier otra conftguraci_n podria resultar en p_rdida de control de la herramienta y consigulentes lesiones graves. 1.
- Page 60 PARADASEGURA DEL BISEL A 0 ° Su sierra est,, equipada con una parada segura del bisel a 0° el cual rue ajustado en la f_brica para asegurar un _ngulo de 0 ° de la hoja de la sierra para cortes a 90o_Sin embargo, el transporte podda ocasionar una p6rdida de alineaciSn.
- Page 61 ADVERTENCIA: Intentar hacer cortes sin que la pa|anca de ajuste del bisel est_ apretada de manera segura podria resultar en lesiones graves. iiiiiii1,1111,111,1 i1,1111,11,1111111 ii iii ,i J z_ ADVERTENCIA: debe ser realizada por tdcnicos calificados en un Centro de Servicio Sears. Para asegurar seguridad y confiabilidad, toda reparaci6n desenchufe la sierra circular de la fuente de alimentaci6n antes de realizar cualquier !tk, ADVERTENClA:...
- Page 62 C6MO CAMBIAR LA HOJA (Flguras 18 y 18a) el enchufe de la fuente de alimentacibn ANTES de ensamblar las piezas, hacer ADVERTENCIA: Para prevenir tesiones personales, desconecte S1EMPRE ajustes o cambiar las hojas. 1o Desenchufe la sierra. I m_rrenAa[_s vmEnRipTuE INach ' °jAa: dAe_E Gi0erR'Ea SEad_ct_asa;0c_a_teesdn_ trrambaj°sde'prp_c_cb_n"...
- Page 63 C6MO CAMBIAR LA HOJA cont. (Figuras 18 y 18a) 6_ Levante et protector inferior de la hoja usando la palanca del protector de la hoja y mant_ngalo en posici6n levantada durante los pasos sigt_ientes 7. Retire per complete el tornil]o de sujeci6n del husillo "A" y la arandela "D" externa y la hoja (vet la Fig.
- Page 64 Sears y otros puntos de venta Craftsman cuenta con una amplia selecciSn de hojas de 7 1/4pulgadas Craftsman de acero con dlentes con punta de carburo de tungsteno, dlseSadas para apticactones especfficas de corte.
- Page 66 Sierra Circular de 7 pulgadas - MODELO NO. 320.10870 El N_mero del Modelo se encuentra en la Placa de identificaciSn, Mencione siempre el NSmero del Mode!o en toda correspondencia acerca de su herramienta. No. item No. Parte Cant' Descripci6n,,de ' !a,,P,a,rte 2780040000 Set del I_,ser 3420333000...
- Page 67 SierraCircularde 7 1/4 pulgadas - MODELONO.320.10870 El N0mero del Modelo se encuentra en la Placa de ldentificaci6n, Mencione siempre et NSmero del Modelo en toda correspondencia acerca de su herramienta. No. item No. Pa_e Descripci6n de la Parte Cant, Torni!lo roscado 5610057000 5700041000 Rodamiento...
- Page 68 SierraCircularde 7 1/4 pulgadas- MODELONO.320.10870 El N_mero det Modelo se encuentra en la Placa de Identificaci6n°Mencione siempre et Nt_mero del Modelo en toda correspondencia acerca de su herramienta, Item No. Parts No. Part Description Qty. 4870036000 Interruptor 4810002000 CordTn y enchufe de alimentaciSn 3700367000 Anclaje del cord6n 5610093000...
- Page 72 Your Home ;i ¸ _i:!'i!i!: ¸_:I ¸_` For repair - in your home - of all major brand appliances, lawn and garden equipment, or heating and cooling systems, no matter who made it, no matter wtlo sold it! For the replacement parts, accessories and owner's manuals that you need to do-it-yourself For Sears professional...