Bose 3-2-1 SERIES II Owner's Manual
Dvd home entertainment system
Hide thumbs
Also See for 3-2-1 SERIES II:
- Owner's manual (80 pages) ,
- Service manual (94 pages) ,
- Quick setup manual (2 pages)
Table of Contents
Advertisement
Advertisement
Chapters
Table of Contents

Related Manuals for Bose 3-2-1 SERIES II


Summary of Contents for Bose 3-2-1 SERIES II
- Page 1 HOME ENTERTAINMENT SYSTEMS Owner's Guide ®...
- Page 2 Please dispose of used batteries properly, following any local regulations. Do not incinerate. This product conforms to the EMC Directive 89/336/EEC and to the Low Voltage Directive 73/23/EEC. The complete Declaration of Conformity can be found on www.bose.com. Additional safety information See the additional instructions on the Important Safety Information sheet enclosed in the shipping carton.
-
Page 3: Table Of Contents
CONTENTS INTRODUCTION SYSTEM SETUPiiii}_X{!i!!j_?,'? SYSTEM CONTROLS AND INUlCATORSiiiiii!ii:ii!:::,:::::!i I OPEaATIONiiiiiiiii}i!ii!ii!:_i_i_ CHANGING SOURCE SETTINGSiiiiiii:{ilili_!!i"ii!i CHANGING SYSTEM OPTIONSiiiiii{iiiiiiii!_!ii!£ MAINTAINING YOUR SYSTEMiiiiiiiiiiiiii:::;!!i!iii TROUBLESHOOTING INTRODUCTION Before you begin ................System features ................Selecting compatible discs ..............Checking for region code compatibility ............Glossary of terms ................Limited warranty ................ - Page 4 OPERATION Turning your system on and off ..............Playing video DVDs ................Basic DVD operations ..............Restricting access to video DVDs ............Playing audio CDs ................Listening to FM/AM radio ............... Tuning to a station ............... Storing stations as presets ..............Erasing a preset .................
-
Page 5: Introduction
INTRODUCTION Before you begin Thank you for purchasing the Bose' 3o2ol Series II or 3o2ol GS Series II DVD home entertainment system, which offers superb sound, elegance, and simplicity in an advanced home audio setup. Using Bose proprietary signal processing technology, the 3,2,1 Series II... -
Page 6: Checking For Region Code Compatibility
INTRODUCTION Checking for region code compatibility For a DVD player and DVD disc to be compatible, their region code numbers must match. These numbers are allocated according to where the player and disc are sold. The 3e2,1 Series II DVD home entertainment systems have a region code which must also match the DVD discs. -
Page 7: Limited Warranty
Details of the limited warranty are provided on the product registration card that came with your system. Please fill out the information section on the card and mail it to Bose. Failure to do so will not affect your limited warranty rights. For your records Serial numbers are located on the bottom of the media center and the rear of the Acoustimass ®module. -
Page 8: System Setup
Check to be sure your system includes the parts shown in Figure 1. If any part of the system appears damaged, do not attempt to use it. Notify Bose or your authorized Bose ®dealer immediately. For Bose contact information, refer to the address sheet included in the carton. -
Page 9: Selecting Locations For Your 3,2,1 Series Ii System Components
SYSTEM SETUP Selecting locations for your 3.2.1 Series II system components Use the following guidelines and Figure 2 to choose locations and positions for the compo- nents of your 3.2.1 home entertainment system. _b Note: While these guidelines are offered to help provide great system performance, you may find other placement choices that are more convenient and provide the sound you enjoy. -
Page 10: Placing The Speakers
You may obtain additional rubber feet (part number 178321) from Bose ®Customer Service. To contact Bose, refer to the list of offices included in the product carton. -
Page 11: Placing The Acoustimass ® Module
SYSTEM SETUP Placing the Acoustimass ® module • Place the Acoustimass ® module within reach of the cable from the music center and an AC (mains) power outlet. • Place the module at the same end of the room as the TV and the speakers (Figure 4). •... -
Page 12: Making System Connections
CAUTION; Do not plug the Acoustimass ®module into an AC power (mains) outlet until all the components are connected. Note;/f additional audio cables or longer cables are needed to make these connections, contact Bose Customer Service. Refer to the list of offices included in the product carton. Connecting the Acoustimass... - Page 13 SYSTEM SETUP At the other end of the speaker cable, separate the left and right speaker cords as much as necessary to reach each speaker (Figure 8). Figure Note: If you purchased a 3.2.1 GS Series II system, the left and Separating left and right speaker cords right speaker cable connectors...
-
Page 14: Connecting The Supplied Antennas
SYSTEM SETUP Connecting the supplied antennas The rear panel of the media center provides jacks for the AM and FM antennas included with your system (Figure 10). Unwind the wires for each antenna to provide the best reception. Figure 10 Antenna connections eb Note: An outdoor antenna may be used in place of the supplied indoor... -
Page 15: Connecting Your Tv To The Media Center
SYSTEM SETUP Connecting your TV to the media center =b Note: If you will be using the 3.2.1 system with both a TV and a VCR, skip this section and go to "Connecting your TV and VCR to the media center" on page 16. Making audio connections... -
Page 16: Connecting Your Tv And Vcr To The Media Center
SYSTEM SETUP Connecting your TV and VCR to the media center Note: There are two options for connecting your TV and VCR to the media center. Before you proceed, you must determine if your TV has audio output jacks. Consult your TV owner's guide if you need assistance. -
Page 17: If Your Tv Does Not Have Audio Output Jacks
SYSTEM SETUP If your TV does not have audio output jacks If your TV does not have audio output jacks, you will need to feed audio to the 3.2.1 home entertainment system through a secondary source, such as a VCR. To do this, you will need one additional video cable, which can be purchased at your local electronics store. -
Page 18: Vcr Considerations
Figure 11. For this connection you will need an S-video cable which can be purchased from your Bose dealer or a local electronics retailer. * Insert one end of the S-video cable into the S-Video OUT jack on the media center (Figure 14). -
Page 19: Making Component Video Connections (Highest Quality Video)
O000000- E]OOOOOooooosoooos 000@00 Anlenu5 TV connector panel Component video cable .AUDIO, ® Stereo cable (red and white connectors) _se, rie_ Note: For more information, or to purchase the video cables, contact your local electronics store or authorized Bose dealer. -
Page 20: Connecting Digital Audio Devices
SYSTEM SETUP Connecting digital audio devices Some audio devices may feature a digital audio output for optimum sound performance. Use an optical digital cable or a coaxial digital cable, as appropriate, to connect this output to the digital input on the media center. You can purchase the required cables at a local electronics store. - Page 21 SYSTEM SETUP Figure Advanced setup: TV,,VCR and cable/satellite box Media center ®®0 ,c , Antennas ,<;::::, Acoustimas_ D = Digital ..$ ..Module C =C0mp 0site Video Video BoseLi_k Optica CBL'SA7 Componenl h____ _____/ S.Video Cable/satellite (CBL/SAT) service Video CBL/SAT Cable/satellite S-video...
-
Page 22: Connecting A Game Console
SYSTEM SETUP Connecting a game console Connect the audio output of a game console to the AUX Left and Right input jacks. Con- nect the video output of the game console to the C (composite) Video IN jack. Figure 18 Game console connections Media center DD@D_DDDDBDDD_DDDD_D_... -
Page 23: Installing The Remote Control Batteries
SYSTEM SETUP Installing the remote control batteries On the back of the remote, slide open the battery compartment (Figure 19). Insert the two supplied AA (IEC-R6) 1.5V batteries, or their equivalent, as shown. Match the plus (+) and minus (-) marked on the batteries with the plus (+) and minus (-) inside the battery compartment. -
Page 24: Connecting The Power Cord
Note: Bose recommends using a safety agency-approved surge protector on all electronic equipment. Voltage variations and spikes can damage electronic components in any system. A quality suppressor can eliminate the vast majority of failures attributed to surges and may be... -
Page 25: Checking Your System Setup
SYSTEM SETUP Checking your system setup Follow these steps when turning on your system for the first time. Be sure to perform step 4 and play the setup DVD. The setup DVD can help you verify that you set up your system cor- rectly for proper sound performance. -
Page 26: System Controls And Indicators
SYSTEM CONTROLS AND INDICATORS Remote control • Turns the system on or off. Remote status Status LED: * Remains off (unlit) during normal operation. * Remains on during setup mode. Turns off briefly with each key press. * Blinks rapidly eight times if the wrong key is pressed during setup or if an unavailable device code is entered. - Page 27 SYSTEM CONTROLS AND INDICATORS Remote control - cont. • Puts the Settings menu for the current source on your TV screen or media center display. Settings • Puts the System menu on your TV screen. Syg_em • Puts the DVD menu of the currently loaded DVD disc on your TV screen. ©...
- Page 28 SYSTEM CONTROLS AND INDICATORS Remote control - cont. • Raises or lowers the volume of the current source. • Pressing ÷ restores muted sound from the current source. • Pressing - lowers the volume of the current source, but does not restore muted sound.
- Page 29 SYSTEM CONTROLS AND INDICATORS Remote control - cont. Aspect ratio or Teletext On/Off control You will see one of two symbols below this button on your remote control. The symbol defines the function. Symbol Function When a video source is selected, changes the video aspect ratio between Normal (4:3) and Widescreen (16:9).
-
Page 30: Setting Up Your Remote To Control Other Audio/Video Devices
SYSTEM CONTROLS AND INDICATORS Setting up your remote to control other audio/video devices Your remote can be set up to control other audio devices such as a TV, VCR, DVR or cable/satellite box by entering a device code while in the setup mode. •... -
Page 31: Searching For A Device Code
SYSTEM CONTROLS AND INDICATORS To set up the remote to control your cable/satellite Turn on both the 3.2.1 system and your cable/satellite box. Press and hold the CBL°SAT button until the remote LED is lit (about five seconds). On the remote keypad, enter the four-digit device code for your cable/satellite box. - Page 32 SYSTEM CONTROLS AND INDICATORS To set up the remote to control your cable/satellite Turn on both the 3.2.1 system and your cable/satellite box. Press and hold CBL°SAT until the remote LED is lit (about five seconds). Alternately press Channel • and CBL°SAT On-Off until your cable/satellite turns off.
-
Page 33: Verifying An Entered Device Code
SYSTEM CONTROLS AND INDICATORS Verifying an entered device code In case you need to check to see what code the remote is using for a particular audio device, do the following: Press and hold a source key (TV, CBLoSAT, or AUX) until the remote LED lights (about five seconds) lnfo ©... -
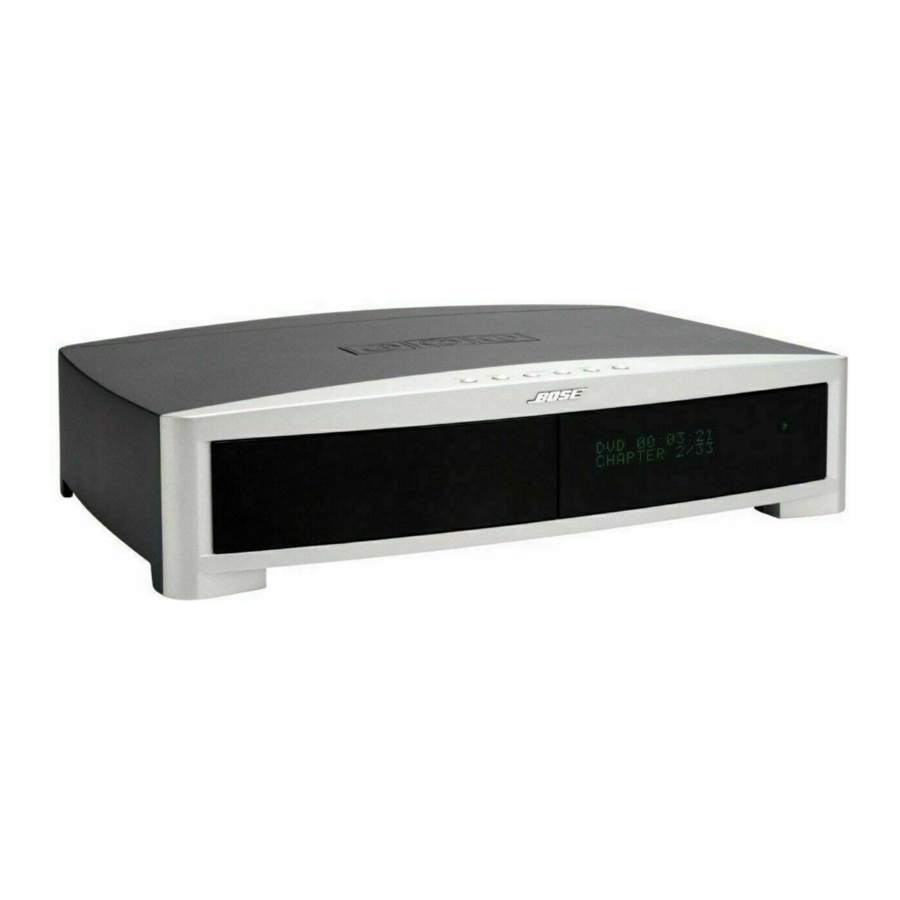
Page 34: The Media Center
SYSTEM CONTROLS AND INDICATORS The media center The media center has a control panel on the top, a display area to show the current status of the system, and a disc tray that opens on the front of the console. Control panel The media center has six buttons located on the top control panel. -
Page 35: Operation
OPERATION Turning your system on and off To turn power on or off: • Point the 3.2.1 remote at the media center and press On/Off. • Press On-Off on top of the media center. To turn the system on to a source: •... -
Page 36: Basic Dvd Operations
OPERATION While a DVD video is playing, elapsed play time and chapter number are displayed on the media center front panel. Figure Sample display for a DVD video Basic DVD operations • Press Pause to pause a movie • Press Pause again or press Play to resume playing a paused DVD •... -
Page 37: Playing Audio Cds
OPERATION Playing audio CDs On the 3.2.1 remote, press CD/DVD to turn the 3.2.1 system on to the CD/DVD source. Eject On the media center control panel, press Eject to open the disc tray. Place the CD disc in the disc tray. Eject Press Eject again to close the tray. -
Page 38: Listening To Fm/Am Radio
OPERATION Listening to FM/AM radio On the 3.2.1 remote, press FM-AM. If the system is off, the radio will turn on to the most recently selected station. Tuning to a station You can tune to a radio station in any of the following ways: •... -
Page 39: Erasing A Preset
OPERATION Erasing a preset Tune to the preset station. Press and hold the 0 button on the remote until the media center display tells you that the preset is erased. Playing other sources Turn on any component connected to the media center by using the remote for that compo- nent or controls on the component front panel. -
Page 40: Changing Source Settings
CHANGING SOURCE SETTINGS Using the settings menus While watching a video or listening to music on your system, you can make quick adjust- ments that will increase your enjoyment of the program. For that purpose, each source you use with this system has its own Settings menu with features appropriate to that source. To view the settings menus You can see the Settings menu for each source on your TV screen (Figure 24) and on the... - Page 41 CHANGING SOURCE SETTINGS To make changes in the settings menus Whether you use your TV screen or the media center display to change settings, the same instructions apply. You can use the actions above to change back to the original (default) settings, too. Do that if you do not like the effect of a change you have made, or accidentally made a change you did not intend.
-
Page 42: Fm/Am Settings Menu
CHANGING SOURCE SETTINGS FM/AM settings menu To see the FM/AM Settings menu, press FM-AM on the remote. Then press Settings. Press Exit to remove the menu from the screen. Name Default Settings Description Auto, Stereo, Auto Output Mode Allows you to listen to stereo broad- Mono (FM only) casts in either stereo or mono output. -
Page 43: Dvd Settings Menu
CHANGING SOURCE SETTINGS DVD settings menu To see the DVD Settings menu, press CD-DVD on the remote while playing a DVD video disc. Then press Settings. Press Exit to remove the menu from the screen. Name Settings Default Description Movie EQ* On, Off Optimizes the tonal balance for movies. -
Page 44: Tv, Cbl*Sat, And Aux Settings Menu
CHANGING SOURCE SETTINGS TV, CBL.SAT, and AUX settings menu The settings below affect programs on the TV, even when the source of the program is VCR, CBLoSAT or AUX. There are no separate setting menus for these sources. Movie EQ, Range Compression and Mono Decoding appear in the menu only if Audio Processing is set to User Adjustable. -
Page 45: Changing System Options
CHANGING SYSTEM OPTIONS Using the System menu Changes to system options are typically made only once. If your system operates as you want it to, there may be no need for any changes. In some cases, however, changes are required to make the system fully compatible with the installation options you have chosen. - Page 46 CHANGING SYSTEM OPTIONS To change system options Changing system options in this menu is similar to changing the settings for a source. Turn on your TV and select the correct TV input to view your 3e2.1 system. Press the System button on your 3e2.1 remote control.
-
Page 47: Audio Options
-14 to +14 Decreased (-) or increased (+) high-frequency reproduction. Audio Processing Automatic [default] Standard Bose ® processing applied. User Adjustable Processing options (Movie EQ, Range Compression, Mono Decoding) available in Source Settings menus. Input Levels: Normal [default] Standard signal level (loudness). -
Page 48: Video Options
CHANGING SYSTEM OPTIONS Video options The video options affect the way the picture looks on your TV. Figure Video system options Settings Description TV Aspect Ratio Normal [default] 4:3 ratio screen display. Widescreen 16:9 ratio widescreen display. Widescreen DVDs Modified [default] Modified [default]. -
Page 49: Media Center Options
Assigns a room code to your 3.2.1 Series II system when Code* L, M, N, or O it is connected to a Bose link source. Restore Settings Maintains current system settings. Reverts system settings back to factory defaults. *Appears only when a Bose link source is connected. -
Page 50: Remote Control Options
CHANGING SYSTEM OPTIONS Remote control options The Remote Control options help you set up your remote to control other audio devices that are connected to your system. Figure Remote Control system options Settings Description TV Brand Brand name Provides a list of TV brands for the 3o2ol remote control to operate. TV Device Code Code number Provides a list of available device codes for the selected TV brand. -
Page 51: Dvd Lock Options
CHANGING SYSTEM OPTIONS DVD Lock options The DVD Lock options allow you to restrict viewing of DVD videos with certain ratings. To activate this feature, you need to set a level of restriction and establish a password in the DVD Lock section of the System menu. Figure 32 DVD Lock system options Settings... - Page 52 CHANGING SYSTEM OPTIONS Enter your four-digit password. Using the down (v) button, scroll down to Lock Discs Rated Above. Press the right arrow (I_) button to see the available settings. Press the up (A) or down (v) arrow button to find the rating you want. Press Enter or the left arrow (4) button to save the setting.
-
Page 53: Maintaining Your System
MAINTAINING YOUR SYSTEM Cleaning Cleaning the media center • Use only a soft, dry cloth to clean the outside surfaces of the media center. • Do not use any sprays near the system. Do not use any solvents, chemicals, or cleaning solutions containing alcohol, ammonia, or abrasives. -
Page 54: Replacing The Remote Control Batteries
Battery compartment cover Accessories The Bose ®3o2ol Series II and 3o2ol GS Series II system shelf speakers are compatible with Bose mounting accessories, including the UB-20 wall brackets, UFS-20 floor stands and UTS-20 table stands (Figure 35). Bose also offers cable adapters for use in running speaker cable through walls. -
Page 55: Troubleshooting
This allows the unit to reset itself. After reconnecting the power cord, wait for the message, "BOSE 3•2•1" to appear on the media center display. • Turn off the unit. -
Page 56: Customer Service
See "Video options" on page 47. You forgot your Enter the password 2673 to access the parental controls and create a new password. password Customer service For additional help in solving problems, contact Bose ®Customer Service. Refer to the address list included in the carton. -
Page 57: Technical Information
TECHNICAL INFORMATION Power rating Maximum ambient temperature USA/Canada: 120V_ 60Hz 300W 104°F (45°C) International: 220-240Vr_ 50/60Hz 300W Dimensions Dual voltage: 115/230V_ 50/60Hz 300W Media center: 3%"H x 133/_"Wx 10"D (8.3 cm x 34.9 cm x 25.4 cm) Audio inputs Remote control: 11/8"Hx 2'/2"W x 9"D AUX - Left, Right (analog);... -
Page 58: Device Codes A
DEVICE CODES Finding the right device codes Using the right device codes, you can set up your new universal remote to control the video devices you want to use with your speaker system. For the remote setup procedure, see your owner's guide. To find available codes for a device, search the listing under the appropriate device type heading. - Page 59 DEVICE CODES Ardem ......0037, 0486,0556,0633, Broksonic ...... 0003, 0180,0236,0463 0714 Bush ......0037, 0208,0217,0282, Television AriZona ......0037, 0556 0486, 0556,0661,0698, 0714, 1037 ART ........ 1037 Caihong ......0817 A-Mark ......0003 Astra ......0037 Cailing ......0748 Abex ......0032 Asuka ......
- Page 60 DEVICE CODES Conrowa ......0145,0156,0698,1156 Durabrand ..... 0003,0171,0178,0180, Fujitsu ......0037,0179,0186,0217, 0463,1034,1463 0683,0809,0853,1181 Contec ......0037,0157,0180,0185, 0698 Dwin ......0093,0720,0774 Fujitsu General ....0217,0683 Cosmel ......0037 Dynatron ......0037 Funai ......0171,0179,0180,0556, 1271 Craig ......0180 Ecco ......0706 Furi .........
- Page 61 DEVICE CODES 0179 Harley Davidson .... Interbuy ......0037, 0512 Kongque ......0817 Harman/Kardon ..... 0054 Intedunk ......0037, 0512 Konka ......0037, 0282,0587,0628, 0632, 0638,0703,0707, 0865 Internal ......0037 Harsper ......0714, 0754,0817 Harvard ......0180 Intervision ...... 0037, 0217, 0282, 0370, Korpel ......
- Page 62 DEVICE CODES Materin ......0208 Nansheng ...... 0817 Palsonic ......0001, 0037,0217,0698 Matsui ......0037,0177,0195,0208, NAT ........ 0226 Panama ......0037, 0217 0217,0335,0443,0556, Panashiba ...... 0001 0629,0714,1037 N_ional ......0051,0055,0208,0226, 0508 Matsushita ..... Panasonic ...... 0051,0250,0650 1650,1410,1177,1175, NEC ....... 1704,1182,1150,0882, 1168,0853,0650,0548, Matsuviama ....
- Page 63 DEVICE CODES Samsux ......0039 0037,0556 Simpson ......0186,0187 ........ 0051,0208,0226,0817 Sandra ......0217 Qingdao ......Singer ......0335,0548,0698,0706, 1537 Qualcraft ......0039 Sansei ......0451 Sinotec ......0706 Quasar ......0051,0055,0165,0250, Sansui ......0037,0463,0587,0602, 0650,0865 0698,0706,0714,1537 Sinudyne ......0177 Quelle ......
- Page 64 DEVICE CODES Texet ......0217 Videotechnic ....0217 Synco ......0000,0060,0092,0093, 0178, 0451 ThemeScene ....0887 Vidikron ......0054 0037 Sysline ......Thompson ..... 0625 Vidtech ......0019, 0178 T+A ........ 0447 Thomson ....... 0037, 0335,0560,0625, Viewsonic ...... 0857,0864,0885,1755 Tacico ......1447 0092,0178,0179,1150 Viking ......
- Page 65 DEVICE CODES Garrard ......0153 Panasonic ...... 0000, 0008,0021,0040, 0107, 0375,1488 GC Electronics ....0056, 0207 Cable box Panther ......0637 GE ........0237 Paragon ......0000 Gehua ......0476 ABC ....... 0001,0003, 0007, 0008, Philips ......0013, 0025,0027,0031, 0011,0013, 0014, 0017, Gemini ......
-
Page 66: Sat
DEVICE CODES Timeless ......0040 ASLF ......0713 Dish Network ....0775, 1005,1170,1505, System 1775 Tocom ......0012, 0013 AssCom ......0853 1005,1505,1775 Dishpro ......0775, Torx ........ 0003 Aston ......1129, 1261 Distratel ......1283 Astra ......0713 Toshiba ......0000, 1509 Distrisat ...... - Page 67 DEVICE CODES 1294 Marantz ......0200 Hauppauge ....Panasonic ...... 0247,0701,0847,1104, 1304,1320,1404,1508, HB ......... 1214 1526 Maspro ......0173, 0713, 0750, 1520, 1530 HDT ....... 1159 Panda ......0173 Mastec ......1334 Hirschmann ....0173,0299,1111 Pans_ ......1159,1551 Matsui ......0173, 1284 Hisense ......
- Page 68 DEVICE CODES Sedea Electronique ..1105,1206,1283 Thomson ....... 0392, 0713, 0820, 0847, Alley ......0698 0853, 1046, 1175, 1291, SEG ....... 1075,1251 Aim ........ 0699,0778,0818,0833, 1498, 1900 1165 Serino ......0610 Tivo ........ 1142, 1442, 1443, 1444 Airis ........ 1005, 1224 Servi Sat ......
- Page 69 DEVICE CODES Brandt ......0503,0551,0651 Dantax ......0539,0713,0790,1089, Fintec ......0784,1169 1358 Broksonic ...... 0695,0868 Fir_line ......0651,0713,0799,0843, 0869 Da_ek ......0872,1005 Bush ......1695,1165,1128,1051, Fisher ......0670 1021,0884,0879,0833, Damon ......0872 0831,0778,0758,0730, DCE ....... 0831 0717,0713,0699,0695, Funai ......0675,0695,1268,1334 0690,0676,0672,0516 DEC .......
- Page 70 DEVICE CODES ISP ......... 0695 NextBase ....... 0826 Malata ......0782, 1159 Jaton ......0665, 1078 Manhattan ..... 0705, 0713 NexxTech ....... 1402 JBL ........ 0702 Marantz ......0539 Nintaus ......1051 JDV ........ 1367 Mark ......0713 No_ent ......0872, 1003,1107,1265 Jeken ......
- Page 71 DEVICE CODES Princeton ....... O674 SEG ....... 0665,0713,0768,0798, Synn ......0768 0872,0884 Prinz ......0831 TAG McLaren ....0894 Semp ......0503 Prism ......0705 Tandbe_ ......0713 Sensory Science ... 1158 Proceed ......0672 Tatung ......0770 Shanghai ....... 0672 Proline ......
-
Page 72: Vcr
DEVICE CODES Voxson ......America Action ....0278 Cimline ......0072 0690,0730,0831 Walkvision ..... 0717 Cineral ......0278 American High ....0035 Welkin ......0831 Amoisonic ...... 0479 Citizen ......0037,0278,1278 0713 Wellington ...... Am_rad ......0000,0072,0278 Clatronic ......0000,0020,0072 Wesder ...... - Page 73 DEVICE CODES Emerson ......Kambrook ...... 0037 1593,1479,1278,0637, Hanseatic ...... 0037, 0038,0081,0209 0593,0561,0479,0348, Hantor ......0020 Ka_her ......0081, O278 0343,0278,0240,0209, 0208,0184,0121,0072, 0278 Haojie ......0240 KEC ....... 0037, 0061,0045,0043,0037, 0035,0002,0000 Harley Davidson .... 0000 Kendo ......0072, 0106,0209,0278, 0020,0240,0278 0315, 0348,0642 .......
- Page 74 DEVICE CODES Quasar ......0035,0162,0278,1035, Onimax ......0642 Melectronic ....0000, 0037, 0038 1162 Memorex ....... 1262, 1237, 1162, 1048, Onkyo ......0222 Quelle ......0081 1037, 0579, 0479, 0348, Optimus ......0037, 0048, 0104, 0162, 0307, 0240, 0209, 0162, Radiaiva ......
-
Page 75: Dvr
DEVICE CODES Seleco ......Ve_or Research .... 0038 0020,0037,0041 Tatung ......0000, 0008,0041,0043, 0045, 0048,0067,0081, 0045 Victor ......0008, 0041,0067 Semp ......0209, 0348,0352 Sentra ......0020,0072 Tchibo ......0348 Video Concepts ..... 0045, 0061 Serie Dorada ....0037 TCM ....... 0348 Video Pro ....... - Page 76 DEVICE CODES Mind ......1972 Niveus Media ....1972 H D-IV Decoder Northgate ...... 1972 Panasonic ...... 0616, 1244, 1807 Accurian ......1653 Philips ......0618, 0739, 1340 DirecTV ......0392 RCA ....... 0880 Epson ......1563, 1650 ReplayTV ....... 0614, 0616 Hisense ......
-
Page 77: Combination
DEVICE CODES TV/VCR/DVD Sharp ......0807 TV/VCR/DVD combination 1232,1295,1296, Sony ......0000, 1297 TV/VCR Sylvaniav 1781 TV/VCR combination Symphonic ....0000,0593 Akai ........ 0899 Teac ....... 0000, 0593, 0637, 0781 Broksonic ...... 0868 Thomas ......0000 Emerson ......0821 Aiwa ....... 0000, 0468, 0479, 0680, Toshiba ...... -
Page 78: Cbl/Dvr
DEVICE CODES Teac ....... 0833, 1483 Hyundai ......1159 Toshiba ......0503 JVC ........ 1170 Zenith ......0741,0869 Kath_in ......1221, 1561 Maximum ....... 1334 Motorola ......0869 CBL/DVR Cable/DVR combination Nokia ......1311 Opentel ......1412 Pace ......1423,1623 Panasonic ...... - Page 79 .__705,L Better sound through research® @2007 Bose Corporation, The Mountain, Framingham, MA 01701-9168 289769 AM Rev.01 CCM-001770 289769-001...