Bose LIFESTYLE 38 Operating Manual
Dvd home entertainment system
Hide thumbs
Also See for LIFESTYLE 38:
- Operating manual (184 pages) ,
- Manual (9 pages) ,
- Installation manual (113 pages)
Table of Contents
Advertisement
Quick Links
Advertisement
Table of Contents

Related Manuals for Bose LIFESTYLE 38


Summary of Contents for Bose LIFESTYLE 38
- Page 1 HOME ENTERTAINMENT SYSTEMS Operating Guide...
- Page 2 Important Safety Instructions sheet enclosed in the shipping carton. ©2004 Bose Corporation. No part of this work may be reproduced, modified, distributed or otherwise used without prior written permission. Manufactured under license from Dolby Laboratories. "Dolby" and the double-D symbol are trademarks of Dolby Laboratories. Confidential Unpublished Works.
-
Page 3: Table Of Contents
Guides. You may not download The Guides; any use shaft be subject to aft restrictions applicable thereto and contained therein. You agree to indemnify, defend and hold harmless AEC and its aftT/iates, and Bose and its affiliates, against any and all claims, damages, costs or other expenses that arise directly or indirectly out of or from (i) your unauthorized use of The Guides, (ii) your violation of this directive and/or (Ni)any unauthorized actMties by you in connection with The Guides. - Page 4 Replacing the remote control batteries ........Changing house code settings ..........Other switches ............For a Bose ®link remote in another room ........Setting up a second room with sound ........... Bose _ link compatible products simplify your decisions ......
-
Page 5: Introduction
Welcome Thank you for purchasing a Bose ® LIFESTYLE ®38 or 48 DVD home entertainment system. Through proprietary Bose technologies and innovative LIFESTYLE ®systems design, this ele- gant and easy-to-use system delivers superior performance for both music and video pro- gramming. - Page 6 European systems only. SACD - An abbreviation for Super Audio Compact Disc, which is used for high-resolution digital audio stored on a CD-sized disc. The new Bose ®LIFESTYLE ®systems (with which this guide is included) play the CD-compatible portion of such discs, identified by the CD disc logo on the front of the disc.
-
Page 7: Presenting A New Way To Play
Enabled by pro- prietary Bose ®technology, it transforms your system into a virtual DJ, capable of playing a continuous stream of the music you most enjoy and adapting to your preferences as they change. -
Page 8: Getting Your Music Into The System
Getting your music into the system Before you can enjoy these benefits, some preparation is required. It involves use of the media center and a simple 3-step procedure for storing your music. Note- Your system is designed to store the tracks of regular CDs only. It will not store MP3 tracks or the contents of DVDs. -
Page 9: How Much Time To Allow For Storing Cds
(using the CD player or Stored as the source), or you can replace the CD with a DVD and watch a video. • If your setup includes a Bose ®link network, you can continue to listen to the system in other rooms, too. -
Page 10: Switch From One To Another Easily
(genre), and other meaningful information that helps characterize the music you enjoy. As a further benefit, Bose issues update discs to keep the music databases current. So even your newest CD acquisitions will have this information available. -
Page 11: Controls And Capabilities
The remote control The advanced radio-frequency remote control provided with the LIFESTYLE ®system works from almost anywhere inside your home. Simply press any button. There is no need to aim the remote at the media center. Power and mute Turns the system on and off. Selects the source last used. Mutes the volume for all connected speakers (main and in other rooms). - Page 12 Menu and program selection Enters the library of stored CD tracks. Library Enters or exits the Settings menu for the current source. Setlings Enters or exits the System menu. © Enters or exits the menu of the DVD disc that is currently loaded. Enters the main menu of a cable or satellite box.
- Page 13 Selection adjustment _,_-_--_ s0_k _ Seek backward or forward to the next strong radio station, CD track, DVD __tzzJ chapter or stored music track. Skip backward or forward to the next CD track, DVD chapter, radio preset (NOT to stored music preset), or to TV channel. Chapter Preset Track...
-
Page 14: If The Remote Does Not Work As You Expect
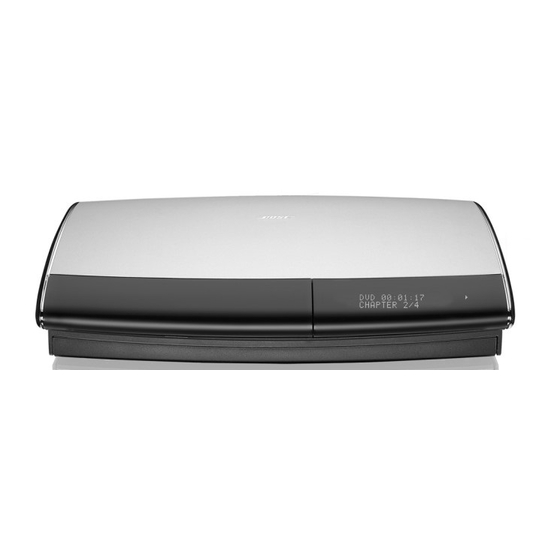
If the batteries are fine and the suggestions concerning "dead spots," above do not work, you may need an antenna extender. To contact Bose ®customer service to request one, refer to the address list included with the system. The media center The disc tray and system controls are located under the front panel door of the media center. - Page 15 Light indicators Shuffle Shows when a CD, MP-3 disc, or contents of an MP-3 folder contents are playing in random order. Shows when the track or disc playing is set to repeat. Repeat Disc Shows when a disc in the disc tray is playing. Track Shows when a track is playing.
-
Page 16: Component Video Or Progressive Scan: Activating Your Selection
Component video or progressive scan: activating your selection If you have used a component video connection between the media center and the TV, you need to make the activation settings as explained below. With the media center turned off, use the controls on its front panel to follow these steps: Press and hold the Enter button on the media center. -
Page 17: System Performance
Some product pointers to ensure satisfaction To turn your system on: • Press the On/Off button on the remote control. Or... • Press the On/Off control on the media center. Or... • Press the OD/DVD, FM/AM, TM, OBL/SAT, or AUX remote button. This turns the system on and selects the source at the same time. -
Page 18: To Adjust What You See Or Hear
To adjust what you see or hear • For changes to a particular source: - Press the Settings menu button on the LIFESTYLE ® remote control. Most of these adjust- ments can be made as you press the up and down arrows on the remote and press Enter to select from options that appear on the media center display. -
Page 19: Control Options
Note: Pressing - registers dislike and te/ts the system to immediately move on to the next track. When you hear a track that is inappropriate for the selected preset, choose this minus rating to lessen your chance of hearing the track again. Pressing +sends a strong message that the cur- rent track and ones like it are pleasing now, and you want to hear all of this one. -
Page 20: Discover The More Advanced Benefits
Add a selection to the Playlist... Press and hold _ while the selection is playing. laylist Hear your Playlist selections... Press 0 • Playlist Make sure a track never plays... Press O' and select Stored OD, Track Action, Delete System Track from the menu. Note: For information on the quick adjustments you can make to Stored CD settings, refer to "Stored CD setting options"... -
Page 21: Respond Actively To Speed Up The Learning Process
3. Justlistenfora while. Notice there's noidentifiable o rdertowhatplays: n otbyCDsthatwerestored first,norby common artistor genre. I t'smorelikeafreewheeling stream oftracksyoumayor maynot haveheard recently. 4. WhileinStored source, p ressing a numbered b utton - from2 to 9- moves intoa different preset. T hemusicplaying willchange when thathappens. Note: You can give each preset a name, up to 8 letters long, for the person or reason for using it. -
Page 22: How To Delete Tracks From The Playlist
How to delete tracks from the Playlist; While listening to music in the Playlist, press and hold the Playlist button as the track you want to remove plays. How to completely clear the Playlist: To use the Playlist again, for a different purpose, you may want to remove all the tracks listed there now. -
Page 23: Playing A Dvd
Use these actions to move around and make selections from the display or the screen: • Press the left, right, up or down arrows to get to the option you want. • Press Enterorthe left arrow to confirm your selection and move back to the features column. -
Page 24: Control Options
0pen/CU0se Press _ again to close the disc tray. Press (_ to begin play, You may need to press the play button more than once, Most DVD videos present on-screen selections before the movie begins. Note: Not all DVDs offer the same features. For example, you can choose subtitles only if the disc provides subtitle information. -
Page 25: Loading And Playing A Cd
Loading and playing a CD The symbols below represent buttons on the LIFESTYLE _> remote control unless otherwise indicated. Press _ to select the CD player and begin playing the CD loaded in the disc tray. This also turns the system on if it is off. To load another disc after the one playing ends: 0pen/CUose Lift up the media center front door and press _... -
Page 26: Using The Radio
Using the radio The symbols below represent buttons on the LIFESTYLE ®remote control. Press _ to select the radio tuner and turn it on if the system was off. This tunes to the FM or AM station that was last selected. Changing stations If you want... -
Page 27: To Reassign A Preset To A Different Station
.remove sonpree ! Tune to the preset number you want to remove. Then follow the step below: • On the remote control, press and hold the 0 number button until the message PRESET: XX.ERASED appears briefly on the media center display. The removal is then complete. To reassign a preset to a different station .. -
Page 28: Controlling External Sources
Using your system remote with other components You can control most brands of external components, such as TVs, VCRs, and cable/satellite boxes, using your LIFESTYLE ®remote control. You can also designate one of these compo- nents as the video tuner (channel selector) for all, to further simplify operation. Your LIFESTYLE ®system includes an infrared (IR) emitter that sends out signals from the front of the music center to any component that your LIFESTYLE ®remote is set to control. - Page 29 Identify the TV brand: • From the RemoteControloptions in the System menu, select "IV Brand (Figure 9). • Move right into the list of brands and up or down to locate the brand for your TV. • Press Entertoselect that brand. Figure 9 TVbrand selection Choose the device code:...
- Page 30 Set the TV to turn on automatically*, as needed: • Move up to the System menu categories and over to Video. • From the Videooptions, select TV Power (Figure 10). • Move right into the list of choices and up or down to select one of the two below: - Automatic (for TV models that do not use a European style SCART connector) - Euro Connector (for TV models that use a SCART connector) •...
-
Page 31: For Cable/Satellite Control
For cable/satellite control While ou can set the LIFESTYLE ®remote to control both cable and satellite boxes, you must designate one or the other, not both, in the steps below. The one connected to the CBL-SAT input on your media center is the one you should desig- nate. -
Page 32: For Vcr (Or Dvr) Control
For VCR (or DVR) control The list of VCR brands and VCR codes include selections for DVRs as well. By following the instructions below, you can set the remote to control one or the other, but not both. If you have both a VCR and a DVR, setting your remote to control the DVR will provide more control options. -
Page 33: Designating One Video Tuner
Follow the process below: Turn on your component. Turn on the TV and be sure to select the Video Input on the TV for the media center. Then using the LIFESTYLE ®remote control, press the AUX source button and continue: Identify the device: •... -
Page 34: Changing Source Settings
Making adjustments to a particular source While watching a video or listening to music on your system, you can make quick adjust- ments that will increase your enjoyment of the program. For example, you may want to hear some or all of the system speakers playing, or boost the center channel volume slightly. For this purpose, each audio source you use with this system has its own Settings menu, with features appropriate to that source. -
Page 35: How To Change The Settings
How to change the settings In the Settings menu on the media center display or on the TV screen, move around and make changes by using the selection buttons shown. On the display or the screen, the same actions apply: •... -
Page 36: Tuner Setting Options (Fm Or Am Radio)
Tuner setting options (FMcrAM radio) There are different settings menus for AM and FM. You can adjust the settings differently for each. Two of the attributes below are available only when the tuner is set to FM. Default Setting; (or AM) Features Options Effect of this Setting... -
Page 37: Stored Cds Setting Options
Stored CD setting options To get into the Stored CD Settings menu, you must have CD tracks stored in the system. Select Stored as the source. Stored Default Setting; Effect of this Setting Features Options uMusic Preset 1 (or last selected Varies with selection of a different preset 1 through 9, number, using the remote control. -
Page 38: Dvd Setting Options
setting options To get into the DUD settings menu, you must have a DUD disc in the disc tray before you select the source. Three attributes (shown in italic type below) appear in the DVD menu only if you have set Audio Processing to User Adjustable in the Audio options of the System menu. -
Page 39: Tv Setting Options (For Vcr, Cbl-Sat, And Aux)
"V.e"ngO "On. r ! The settings below affect programs on the TV, even when the source of the program is VCR, CBL/SAT or AUX. There are no separate settings menus for these sources. Four attributes (shown in italic type below) appear in the TV menu only if you have set Audio Processing to User Adjustable in the Videooptions of the System menu. -
Page 40: Using System Menus
Making system adjustments Adjustments to system properties are ones you typically make only once or not at all. If your system operates as you want it to, there may be no need for any changes. In some cases, however, changes are required to make the system fully compatible with the installation options you have chosen. -
Page 41: Stored Cd Data Options
Stored CD data options Press the System button on the LIFESTYLE ® remote control. Move right to see a preview of Stored CD features. Press the down button to move into an active display of submenus. Note: This choice is avai/ab/e from the System menu on/y when music from at/east one CD has been stored in the system, For information on storing your music, refer to "Getting your music into the system"... -
Page 42: Using The Edit Screen
Ari i As nodefauiti specific t otheCDSeiection ofihisitem ¸biings upanediting scieenl Editing will overwrite artist data. Track no default; specific to the CD Selection of this item brings up an editing screen. May require pressing Enter t o see the options. Track Action Edit Selection of this item brings up an editing screen. - Page 43 To enter new text or add to existing text: Letters appear to the right of existing text. Move to a character and press Enter. Move to the next character and press Enter. To place a space between words: Spaces appear to the right of the last character in the text line. Move to Space bar and press Enter.
-
Page 44: Audio Options
Decreased (-) or increased (+) high-frequency reproduction (-9 to +6) Range available following ADAPTiQ system calibration. Audio Processing Automatic Standard Bose ® processing applied (Movie EQ, Range Compression, User Adjustable Processing options available in Source Settings menus Mono Decoding) TV Analog Input Level... - Page 45 *This network can accommodate some older (non-Bose ®link) products, such as the Wave ® radio and Acoustic Wave ®music system, but with more limited functionality provided than...
-
Page 46: Video Options
Video options Press the System button on the LIFESTYLE ® remote control. Move right to see a preview of video features. Press the down button to move into an active display of submenus. Figure Important Note: DO NOT change settings for Com- Videopreview ponent video or Progressive scan in the System menu. -
Page 47: Media Center Options
Media center options Press the System b utton on the LIFESTYLE ® remote control. Move right to see a preview of media center features. Press the clown button to move into an active display of submenus. Figure Media Center preview Default Settings;... -
Page 48: Remote Control Options
Remote control options Press the System b utton on the LIFESTYLE ® remote control. Move right to see a preview of remote control. Press the down button to move into an active display of submenus. Figure Remote Control preview Default Settings;... -
Page 49: Dvd Lock Options
DVD lock options Press the System button on the LIFESTYLE _*remote control. Move right to see a preview of DVD Lock features. Press the down button to move into an active display of submenus. Figure 22 DVD Lock Menu Default Setting;... -
Page 50: To Set The Restriction Level And Passwords
Parental Control MPAA Audience Setting Rating Restriction None NC-1 7 Adult audiences Mature audiences Mature teenage audiences PG-13 Teenage audiences Mature young audiences Most audiences General For example, by choosing a Parental Control Setting of 4, you restrict access to videos rated above PG-13. -
Page 51: Reference
Changing the batteries as needed is the only regular maintenance required. However, the switches inside the remote battery case may be changed as needed, too. Additional remotes for use in other rooms may need their switches changed, too. For that, refer to "Bose ® link remote switch settings" on page 53. -
Page 52: Other Switches
If the system is on in the main room, listeners in other rooms can enjoy the same program playing there or an entirely different program. Capable of supplying up to 14 additional rooms with Bose sound, one LIFESTYLE ®system can fill your entire living space with music. -
Page 53: Bose _ Link Compatible Products Simplify Your Decisions
As an option to provide sound throughout your home (or even outdoors), the Bose ®link net- work connects all the pieces and offers a variety of Bose products of consistent quality for use in other rooms. -
Page 54: Taking Care Of Your Lifestyle ®System
Taking care of your LIFESTYLE ®system Caring for your system may include: • Cleaning the system's enclosures • Cleaning your compact discs and DVDs • Replacing the remote control batteries (for instructions, refer to the Installation Guide) Cleaning the media center •... -
Page 55: Troubleshooting
Troubleshooting Problem What to do System doesn't Make sure the power connector is inserted securely into the media center, the power cord do anything is inserted securely into the Acoustimass ®module, and the power pack and power cord are fully plugged into operating AC wall outlets. Be sure to press a source button (CD/DVD, AM/FM, etc.) on the LIFESTYLE ®... - Page 56 • Unplug the system and wait for 30 seconds. LIFESTYLE appears on • If neither of these actions restores system operation, contact Bose customer service. the media center display Refer to the address list provided in the carton. You forgot •...
-
Page 57: Contacting Customer Service
Contacting customer service For additional help in solving problems, contact Bose ®customer service. See the address and phone number list included with your system. Limited warranty Your LIFESTYLE ®home theater system is covered by a transferable limited warranty. See your product registration card for details. Please be sure to fill out the information section on the card and mail it to Bose. -
Page 58: End User License Agreement
Technology will terminate if you violate these restrictions. If your license terminates, you agree to cease any and all use of the Technology or Data. Bose, its vendors and licensors reserve all rights in the Technology, including all ownership rights. You agree that the vendors and licensors of Bose may enforce their rights under this Agreement directly in their own name. - Page 60 .__,OSL= IIIIIII !11111111 02_° Bose C0rp0rat_0n, The Mountain, Framingham, MA 01701-9168 274482 274482 AM Rev,00 CCM-000393...