Konica Minolta bizhub C654 User Manual
About this machine user guide
Hide thumbs
Also See for bizhub C654:
- User manual (474 pages) ,
- Quick start manual (158 pages) ,
- Manual (2 pages)
Table of Contents
Advertisement
Advertisement
Table of Contents

Related Manuals for Konica Minolta bizhub C654


Summary of Contents for Konica Minolta bizhub C654
- Page 1 User’s Guide About This Machine...
-
Page 2: Table Of Contents
Table of contents Checking the Name and Function of each Part in this Machine Front side ............................1-2 Rear side ............................1-4 Inside..............................1-5 Checking the Name and Function of each Optional Component Checking the list of optional components..................2-2 Finisher FS-535/Saddle Stitcher SD-512/Punch Kit PK-521 ............ - Page 3 Using the Authentication Unit (Biometric Type) Authentication Unit (Biometric Type) .................... 6-2 Status of authentication unit......................6-3 Operations required to use this function (for the administrator) ..........6-4 6.3.1 Configuring authentication settings of this machine................6-4 6.3.2 Registering user authentication information ..................6-6 Logging in to this machine......................
-
Page 4: Checking The Name And Function Of Each Part In This Machine
Checking the Name and Function of each Part in this Machine... -
Page 5: Front Side
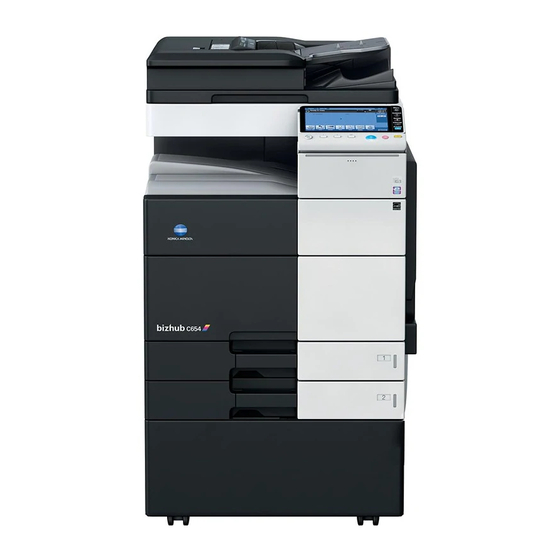
Checking the Name and Function of each Part in this Machine Front side Name Description Used to configure various settings in this machine. Control Panel Used to open the Left Cover. Left Cover Release Lever Open the Left Cover when clearing a paper jam. Left Cover Lateral Guide Adjust this guide along the width of the original. - Page 6 Name Description Used to lock the Automatic Duplex Unit. Automatic Duplex Unit Release Le- Used to reverse paper when performing 2-sided print- Auto Duplex Unit ing. Open this door to clear a paper jam. Top Right Door Used to lock the Top Right Door. Top Right Door Release Lever Bypass Tray Door Open this door when clearing a paper jam in the By-...
-
Page 7: Rear Side
Rear side The illustration shows the main unit with the Heater and optional Fax Kit. Tips The Heater is handled as an optional unit depending on sales areas. Name Description Connect the cable of the Finisher. Finisher Connector Filter Used to collect toner powders inside the main unit. Power Cord Used to supply power to this machine. -
Page 8: Inside
Name Description Used to connect Authentication Unit AU-102 or Au- USB Port (Type A) USB2.0/1.1 thentication Unit AU-201. Used to connect a telephone cord. Jack for connecting a telephone (TEL PORT1) Connect the cord to this connector when using only one telephone line. - Page 9 Name Description Original Glass Used to load the original. Used to fuse toner to paper using heat and pressure. Fusing Unit Press this switch to turn the machine on or off. Main Power Switch Total Counter Counts the total number of printed pages to date. Printhead Cleaner Used to clean the surface of the Print Head Glass when replacing the Imaging Unit.
-
Page 10: Checking The Name And Function Of Each Optional Component
Checking the Name and Function of each Optional Component... -
Page 11: Checking The List Of Optional Components
Checking the list of optional components Checking the Name and Function of each Optional Component Checking the list of optional components Name Description Main unit Scans the original in the scanner section, and prints a scanned image in the printer section. This unit is referred to as "machine", "main unit", or "C754/C654"... - Page 12 Checking the list of optional components Name Description This is used to move the Control Panel. This is also Working Table WT-509 used when the Authentication Unit is installed. Provides an area to temporarily place an original or Working Table WT-506 other materials.
- Page 13 Checking the list of optional components Name Description Install this unit when using the external keyboard and Local Interface Kit EK-604 voice guidance function. This unit is equipped with a speaker. For details on external keyboards, contact your service representative. Install this unit when connecting to the external key- Local Interface Kit EK-605 board, voice guidance function, or Bluetooth-enabled...
-
Page 14: Finisher Fs-535/Saddle Stitcher Sd-512/Punch Kit Pk-521
Finisher FS-535/Saddle Stitcher SD-512/Punch Kit PK-521 Finisher FS-535/Saddle Stitcher SD-512/Punch Kit PK-521 Name Description Output Tray 2 Collects printed pages. Output Tray 1 Collects printed pages. Open this door when clearing a paper jam or staple Front Door jam or when replacing a staple cartridge. bizhub C754/C654... - Page 15 Finisher FS-535/Saddle Stitcher SD-512/Punch Kit PK-521 Name Description Open this cover when removing paper that caused a Horizontal Transport Unit Cover paper jam in the horizontal transport unit. Jam Removal Dial [FS7] Turn this dial to remove paper that caused a paper jam in the finisher.
-
Page 16: Job Separator Js-602
Job Separator JS-602 Job Separator JS-602 Name Description Output Tray Collects printed pages. Open this door to clear a paper jam. Job Separator Cover bizhub C754/C654... -
Page 17: Z Folding Unit Zu-606
Z Folding Unit ZU-606 Z Folding Unit ZU-606 Name Description Pull out this unit to remove jammed paper. Z Folding/Conveyance Unit Guide Lever [FN1] Turn this lever to clear a paper jam. Punch Scrap Box Remove this box when disposing of punch scraps. Open this door when clearing a paper jam or disposing Front Door punch scraps. - Page 18 Z Folding Unit ZU-606 Name Description Jam Removal Dial [FN5] Turn this dial to remove paper that caused a paper jam in the Z-fold unit. Guide Lever [FN3] Turn this lever to clear a paper jam. Jam Removal Dial [FN4] Turn this dial to remove paper that caused a paper jam in the Z-fold unit.
-
Page 19: Post Inserter Pi-505
Post Inserter PI-505 Post Inserter PI-505 2.5.1 Name and function of each part Name Description Post Inserter Control Panel Operate this panel when manually using the finisher. For details on the operation procedure of the post in- serter, refer to page 2-11. When cover paper is loaded, slide this guide to align Lower Tray Paper Guide with the paper size. -
Page 20: Keys On Control Panel
Post Inserter PI-505 2.5.2 Post inserter operations Keys on control panel When the Post Inserter PI-505 is installed on the Finisher FS-535, you can manually operate the Finisher FS-535 using the Post Inserter Control Panel. Name Description Corner Staple Lamp Indicates that the corner staple is selected. -
Page 21: Finishing Using Post Inserter
Post Inserter PI-505 Finishing using Post Inserter Only the lower tray can be used as the output tray. The upper tray is not available. Place paper in the lower tray of the Post Inserter, and align the lateral guide to the paper size. % Load the original by placing it so that its top side faces the back of the machine. -
Page 22: Finisher Fs-534/Saddle Stitcher Sd-511/Punch Kit Pk-520
Finisher FS-534/Saddle Stitcher SD-511/Punch Kit PK-520 Finisher FS-534/Saddle Stitcher SD-511/Punch Kit PK-520 1 1 6 bizhub C754/C654 2-13... - Page 23 Finisher FS-534/Saddle Stitcher SD-511/Punch Kit PK-520 Name Description Output Tray 2 Collects printed pages. Output Tray 1 Collects printed pages. Open this door when clearing a paper jam or staple Front Door jam or when replacing a staple cartridge. Open this cover when removing paper that caused a Horizontal Transport Unit Cover paper jam in the horizontal transport unit.
- Page 24 Finisher FS-534/Saddle Stitcher SD-511/Punch Kit PK-520 Name Description Jam Removal Dial [FS5] Turn this dial to remove paper that caused a paper jam in the finisher. Remove this box when disposing of punch scraps. Punch Scrap Box Staple Cartridge Pull out this cartridge from the punch kit when clearing a staple jam or replacing a staple cartridge.
-
Page 25: Large Capacity Unit Lu-301/Lu-204
Large Capacity Unit LU-301/LU-204 Large Capacity Unit LU-301/LU-204 Name Description Open this door to load paper. Upper Door Rotates when paper is fed to this machine. Paper Take-Up Roller Paper-Empty Indicator Flashes in orange when a tray runs low on paper, and lights up when a paper-out occurs. -
Page 26: Checking The Available Paper Types
Checking the Available Paper Types... - Page 27 Checking the Available Paper Types Paper Type Paper weight Paper capacity Thin paper 13-13/16 lb to 15-11/16 lb Bypass Tray: 150 sheets (52 g/m to 59 g/m Tray 1: 500 sheets Tray 2: 500 sheets Tray 3: 1500 sheets Tray 4: 1000 sheets Large Capacity Unit LU-301: 3000 sheets Large Capacity Unit LU-204: 2500 sheets Plain paper...
- Page 28 Paper where you do not print on both sides (for example, when something is already printed on the front side). Fine and other special paper. Paper where company names, preset text, and others are already printed. Colored paper. Paper that is registered as one of frequently used paper types. For paper weight and media adjustment settings, contact your service representative.
-
Page 29: Checking The Specifications Of This Machine
Checking the Specifications of this Machine... -
Page 30: Type Of This Machine
Checking the Specifications of this Machine Type of this machine Item Specifications Type Scanner, printer, integrated console Document holder Stationary (mirror scanning) Photo conductor Light source LED light-source illumination Copy system Laser electrostatic copying Developing system Dry 2-component HMT developing system Fusing system Belt fusing Paper... - Page 31 Type Paper feed port (Maximum number of sheets to be loaded) Auto- matic Tray 1 / Tray 3 Tray 4 Bypass Duplex Tray 2 Tray Unit Thick 2 (42 lb to 55- o (250 o (700 o (450 o (70 5/8 lb (158 g/m sheets) sheets)
-
Page 32: Mechanical Specifications
Banner paper Width: 8-1/4 to 11-11/16 inches (210 mm to 297 mm) Length: 18 to 47-1/4 inches (457.3 mm to 1200 mm) Mechanical specifications Item Specifications Power supply AC 120 V, 16 A, 60 Hz (AC 220 V to 240 V, 10 A, 50/60 Hz) Max. -
Page 33: Common Specifications
(At letter (8-1/2 e 11 v) or Full color: 3.6 sec. or less A4 v printing) Black: 5.3 sec. or less bizhub C654 Full color: 3.7 sec. or less Black: 5.3 sec. or less Memory size (hard disk ca- 2048 MB (250 GB) -
Page 34: Scanner Functions
Plain paper: 60 sheets/min. Thick 1/Thick1+/Thick 2/Thick 3/Thick 4: 38 sheets/min. 1200 dpi, Special paper/Glossy mode: 25 sheets/min. bizhub C654 Thin paper: 42 sheets/min. Plain paper: 60 sheets/min. Thick 1/Thick1+/Thick 2/Thick 3/Thick 4: 38 sheets/min. 1200 dpi, Special paper/Glossy mode: 25 sheets/min. - Page 35 Item Specifications Image chipping width Top edge 3/16 inches (4.2 mm) (Thin paper: 3/16 inches (5.0 mm)) Bottom edge 1/8 inch (3.0 mm) Right edge 1/8 inch (3.0 mm) Left edge 1/8 inch (3.0 mm) Scanning resolution Push: 200 dpi/300 dpi/400 dpi/600 dpi Pull: Allows you to zoom and scan data.
-
Page 36: Printer Function
Printer function Item Specifications Type Built-in printer controller Memory size 2048 MB (Common to the main unit) Hard disk size 250 GB (Common to the main unit) Ethernet (1000Base-T/100Base-TX/10Base-T) USB 2.0/1.1 Printer language PCL5e/c Emulation PCL XL ver. 2.1 Emulation PostScript 3 Emulation (3016) XPS ver.1.0 Resolution... - Page 37 Item Specifications Printer driver KONICA MINOL- Windows XP Home Edition (Service Pack 1 or later) TA PCL Driver Windows XP Professional (Service Pack 1 or later) (PCL driver) Windows Server 2003, Standard Edition (Service Pack 1 or later) Windows Server 2003, Enterprise Edition (Service Pack 1 or later) Windows Server 2003 R2, Standard Edition Windows Server 2003 R2, Enterprise Edition...
- Page 38 Item Specifications Printer driver KONICA MINOL- Windows XP Home Edition (Service Pack 1 or later) TA PostScript Windows XP Professional (Service Pack 1 or later) Driver (PS driver) Windows Server 2003, Standard Edition (Service Pack 1 or later) Windows Server 2003, Enterprise Edition (Service Pack 1 or later) Windows Server 2003 R2, Standard Edition Windows Server 2003 R2, Enterprise Edition...
-
Page 39: Network Function
Item Specifications Fax driver KONICA MINOL- Windows XP Home Edition (Service Pack 1 or later) TA PCL Driver Windows XP Professional (Service Pack 1 or later) (PCL driver) Windows Server 2003, Standard Edition (Service Pack 1 or later) Windows Server 2003, Enterprise Edition (Service Pack 1 or later) Windows Server 2003 R2, Standard Edition Windows Server 2003 R2, Enterprise Edition... -
Page 40: Checking The Specifications Of Optional Components
Checking the Specifications of Optional Components... -
Page 41: Fax Function (Fax Kit Fk-511)
Checking the Specifications of Optional Compo- nents Fax function (Fax Kit FK-511) Item Specifications Memory size 2048 MB (standard) Number of stored pages 10,000 pages (when an approx. 700-character original with the 8-1/2 e 11 (A4) size is stored with [Fine] resolution) Applicable lines Subscribed telephone lines (including facsimile communication networks) PBX lines... -
Page 42: Large Capacity Unit Lu-204
Large Capacity Unit LU-204 Item Specifications Paper Type Thin paper (13-13/16 lb to 15-11/16 lb (52 g/m to 59 g/m )), Plain paper (15-15/16 lb to 23-15/16 lb (60 to 90 g/m Thick 1 (24-3/16 lb to 31-15/16 lb (91 to 120 g/m )), Thick1+ (32-3/16 lb to 41-3/4 lb (121 to 157 g/m )), Thick 2 (42 lb to 55-5/8 lb (158 to 209 g/m... -
Page 43: Finisher Fs-535
Finisher FS-535 Item Specifications Output tray Output Tray 1 (Sub tray), Output Tray 2 (Main tray) Feeding function Group, Sort, Offset Group , Offset Sort , Staple Fed into Output Tray 2 Paper Type Group, Sort: Thin paper (13-13/16 lb to 15-11/16 lb (52 g/m to 59 g/m Plain paper (15-15/16 lb to 23-15/16 lb (60 to 90 g/m )). - Page 44 Item Specifications Paper loading capacity Group/Sor Thin paper (13-13/16 lb to 8-1/2 e 11 w, 3000 <Output Tray 2> 15-11/16 lb (52 g/m A4 w or less sheets 59 g/m )), Plain paper (15- 8-1/2 e 14 w, 1500 15/16 lb to 23-15/16 lb (60 to B4 w or more sheets 90 g/m...
-
Page 45: Saddle Stitcher Sd-512
Item Specifications Maximum number of sta- 100 sheets pled sheets Thin paper, Plain paper, Recycled paper (13-13/16 lb to 21-1/4 lb (52 g/m 80 g/m Shift amount 1-3/16 inches (30 mm) Power supply Supply from machine Max. power consumption 105 W or less (when all applicable options are installed) Size Width: 28-1/2 inches (724 mm) (When tray is pulled out: 34-11/16 inches (881 mm)) e Width: 27-15/16 inches (709.5 mm) e Height: 40-3/8 inches... -
Page 46: Punch Kit Pk-521
Item Specifications Capacity of Folding Out- Center fold- When the length 1 to 5 sheets sta- 35 sets of paper is pled put Tray 13 inches 6 to 10 sheets sta- 30 sets (330 mm) or more pled 11 to 20 sheets sta- 15 sets pled When the length... -
Page 47: Z Folding Unit Zu-606
Item Specifications Paper Size 11 e 17 w to 5-1/2 e 8-1/2 w, A3 w to A5 w, SRA4 w, 16K w/v, 8K w Width: 5-1/2 inches to 7-3/16 inches (139.7 mm to 182 mm), Length: 11- 11/16 inches to 17 inches (297 mm to 431.8 mm) Paper loading capacity Plain paper 8-1/2 e 11 w, A4 w... -
Page 48: Finisher Fs-534
Finisher FS-534 Item Specifications Output tray Output Tray 1 (Sub tray), Output Tray 2 (Main tray), Folding Output Tray (Top of RU unit) Feeding function Group, Sort, Offset Group, Offset Sort, Staple Paper Type Group, Sort: Thin paper (13-13/16 lb to 15-11/16 lb (52 g/m to 59 g/m Plain paper (15-15/16 lb to 23-15/16 lb (60 g/m to 90 g/m... - Page 49 Item Specifications Paper loading quality Group/Sor Thin paper (13- 8-1/2 e 11 w, A4 w or 3000 <Output Tray 2> 13/16 lb to 15- less, B5 w/v or more sheets 11/16 lb (52 g/m 8-1/2 e 14 w, B4 w or 1500 to 59 g/m )), Plain...
-
Page 50: Saddle Stitcher Sd-511
Item Specifications Max. power consumption 56 W or less Size Width 20-13/16 inches (528 mm), 25-7/8 inches (658 mm ) e Depth: 25- 1/4 inches (641 mm) e Height 40-1/4 inches (1023 mm), 41-15/16 inches (1065 mm The numbers marked by indicate the values applied when the tray is pulled output Weight... -
Page 51: Punch Kit Pk-520
Punch Kit PK-520 Item Specifications Number of punch holes 2 holes, 3 holes, 4 holes Paper Type Thin paper (13-13/16 lb to 15-11/16 lb (52 g/m to 59 g/m )), Plain paper (15-15/16 lb to 23-15/16 lb (60 g/m to 90 g/m )), Recycled paper (15- 15/16 lb to 23-15/16 lb (60 g/m to 90 g/m... -
Page 52: Authentication Unit Au-201
Authentication Unit AU-201 Item Specifications Name Card Authentication Unit AU-201 Dimensions Width 3-5/8 inches (92 mm) e Depth 2-1/2 inches (64 mm) e Height 5/8 inches (16 mm) Weight Approx. 1/4 lb (120 g) Power supply Power feeding from USB port System conditions (operat- Ambient temper- 32 to 104 °F (0 to 40 °C) -
Page 53: Using The Authentication Unit (Biometric Type)
Using the Authentication Unit (Biometric Type) -
Page 54: Authentication Unit (Biometric Type)
Authentication Unit (Biometric Type) Using the Authentication Unit (Biometric Type) Authentication Unit (Biometric Type) The Authentication Unit (Biometric Type) is a "biometrics (biometric authentication) system" that scans fin- ger vein patterns to perform personal authentication. It offers a system that makes it difficult for someone to masquerade as an authorized user, realizing enhanced security. -
Page 55: Status Of Authentication Unit
Status of authentication unit Status of authentication unit The status of the authentication unit is indicated by status indicator LEDs and beep sounds. Status indicator LEDs Status Lit up green Ready state or authentication is completed Flash in green During authentication or scanning operation Lit up red Authentication failed or scanning failed Unlit... -
Page 56: Operations Required To Use This Function (For The Administrator)
Operations required to use this function (for the administrator) Operations required to use this function (for the administrator) 6.3.1 Configuring authentication settings of this machine First, configure the authentication function of this machine (ON (MFP)). Tips This machine does not support external server authentication. Tap [Utility] - [Administrator Settings] - [User Authentication/Account Track] - [General Settings] - [User Authentication]. - Page 57 Operations required to use this function (for the administrator) Select [Yes], then tap [OK]. Press [Authentication Device Settings] - [General Settings] - [Bio Authentication], and configure the fol- lowing setting. Settings Description [Beep Sound] Select whether to give a "blip" sound when the finger vein pattern is scanned successfully.
-
Page 58: Registering User Authentication Information
Operations required to use this function (for the administrator) If desired, tap [Logoff Settings] to configure automatic logout settings. % Select whether to automatically log out when original scanning has been completed (default: [Do not log off]). Tap [Close] to exit the authentication settings of this machine. 6.3.2 Registering user authentication information After the authentication function of this machine (ON (MFP)) has been configured, register user authentication... - Page 59 Operations required to use this function (for the administrator) Enter the user name and password, and tap [Register Auth. Info.]. % To restrict functions applicable to users, select Function Permission. Tap [Edit]. % Up to two authentication information items can be registered for each user. For [Bio Authentication 1] and [Bio Authentication 2], register separate fingers.
- Page 60 Operations required to use this function (for the administrator) % After scanning the finger vein patterns, place the same finger, then tap [Authentication Test]. If the authentication test has succeeded, tap [New]. If the authentication test has failed, retry scanning. NOTICE Do not place anything other than your finger on the scanning section during scanning operation.
-
Page 61: Logging In To This Machine
Logging in to this machine Logging in to this machine The login methods vary depending on the authentication settings of this machine. [1-to-many authentication] allows the user to log in by simply placing his or her finger on the authenti- cation unit. -
Page 62: Using Data Administrator (For The Administrator)
Using Data Administrator (for the administrator) Using Data Administrator (for the administrator) 6.5.1 Data Administrator Data Administrator is a management tool to edit or register authentication information or address informa- tion of the target device through a computer on the network. Using this tool allows you to import authentication information or address information from a device and re- write it to the device after editing. - Page 63 Using Data Administrator (for the administrator) In the [Hardware] tab, click [Properties]. In the [General] tab, click [Change settings]. bizhub C754/C654 6-11...
- Page 64 Using Data Administrator (for the administrator) In the [Driver] tab, click [Update Driver...]. In the screen in which to select how to search the driver software, click [Browse my computer for driver software]. Click [Browse...]. Select the BioDriver (USB-Driver) file in the computer, then click [OK]. Click [Next], and perform the procedure by following the on-screen instructions.
-
Page 65: Installing Biodriver (Usb-Driver) (Windows Vista)
Using Data Administrator (for the administrator) Installing BioDriver (USB-Driver) (Windows Vista) To use Data Administrator, set up the operating environment after configuring authentication settings of this machine. For setup, install the BioDriver (USB-Driver) of the authentication unit, then install Data Administrator PlugIn for Biometric Authentication Unit AU-102. -
Page 66: Installing Biodriver (Usb-Driver) (Windows Xp)
Using Data Administrator (for the administrator) Click [Browse my computer for driver software (advanced)]. Click [Browse...]. Select the BioDriver (USB-Driver) file in the computer, then click [OK]. Click [Next], and perform the procedure by following the on-screen instructions. When the installation is complete, click [Close]. Then, install Data Administrator PlugIn for Biometric Authentication Unit AU-102. - Page 67 Using Data Administrator (for the administrator) Connect the authentication unit to the USB port of your computer. The [Found New Hardware Wizard] dialog box appears. % If the [Windows connect to Windows Update] screen appears, select ["No, not this time"], then click [Next].
-
Page 68: Installing Data Administrator Plugin For Biometric Authentication Unit Au-102
Using Data Administrator (for the administrator) Under [Search for the best driver in these locations.], select [Include this location in the search:], then click [Browse]. Select the BioDriver (USB-Driver) file in the computer, then click [OK]. Click [Next], and perform the procedure by following the on-screen instructions. When the installation completes, click [Finish]. - Page 69 Using Data Administrator (for the administrator) Click [Next]. Select [I accept the terms in the license agreement], and then click [Next]. Click [Install]. When the installation completes, click [Finish]. This completes the installation of Data Administrator PlugIn for Biometric Authentication Unit AU- 102, which completes the setup.
-
Page 70: Registering User Authentication Information
Using Data Administrator (for the administrator) 6.5.3 Registering user authentication information To register user authentication information with Data Administrator, connect the authentication unit to the USB port of the computer, and also connect the computer to this machine via network. To use Data Administrator, set up the operating environment in advance. - Page 71 Using Data Administrator (for the administrator) Select a user template, and click [OK]. % For details about templates, refer to the relevant Data Administrator manual. The User Registration screen appears. Enter the user name and password, select the [AU-102] tab, then click [Register Auth. Info]. % Up to two authentication information items can be registered for each user.
- Page 72 Using Data Administrator (for the administrator) Place your finger on the authentication unit to scan the finger vein pattern. % Place your finger straight so that your finger cushion lightly touches the hollow and protuberance part of the scanning section. % Scan a finger vein pattern three times.
- Page 73 Using Data Administrator (for the administrator) After the registration of authentication information has been completed for all users, click [Export to the device]. % When necessary, select a user name, and click [Edit] to change registered information. Click [Write]. % Data Administrator supports the batch copy function. When necessary, you can collectively write the registered authentication information to multiple devices.
- Page 74 Using Data Administrator (for the administrator) Connect the authentication unit to the USB Port of this machine. NOTICE When connecting or disconnecting the USB cable, hold the plug. Otherwise, the machine may be dam- aged or a failure may occur. bizhub C754/C654 6-22...
-
Page 75: Using The Authentication Unit (Ic Card Type)
Using the Authentication Unit (IC Card Type) -
Page 76: Authentication Unit (Ic Card Type)
Authentication Unit (IC card type) Using the Authentication Unit (IC Card Type) Authentication Unit (IC card type) The Authentication Unit (IC card type) is an "IC card authentication" system that reads the IC card to per- form personal authentication. If you register a compatible noncontact IC card such as an employee ID card, you can use this machine synchronously with functions such as the user entering-leaving management to integrate the authentication system. -
Page 77: Operations Required To Use This Function (For The Administrator)
Operations required to use this function (for the administrator) Operations required to use this function (for the administrator) 7.2.1 Configuring authentication settings of this machine This section explains an example of setting General Settings to [ON (MFP)]. Reference You can also configure settings so that authentication is performed in the LDAP server using the card ID reg- istered in the authentication card (LDAP-IC Card Authentication). - Page 78 Operations required to use this function (for the administrator) Tap [OK]. Select [Yes], then tap [OK]. Tap [Authentication Device Settings] - [General Settings] - [Card Authentication], and configure the fol- lowing setting. Settings Description [Card Detail Settings] Press this button to change setting information of the loadable driver for the registered IC cards on the Web browser of this machine.
-
Page 79: Registering User Authentication Information
Operations required to use this function (for the administrator) Settings Description [Operation Settings] Select how to log in to this machine. • [Card Authentication]: Pass the IC card over the authentication unit to log in. • [Card Authentication + Password]: Pass the IC card over the authenti- cation unit, and enter the password to log in. - Page 80 Operations required to use this function (for the administrator) Select a desired registration number, then tap [Edit]. Enter the user name and password, and tap [Register Auth. Info.]. % To restrict functions applicable to users, select Function Permission. Tap [Edit]. bizhub C754/C654...
- Page 81 Operations required to use this function (for the administrator) Pass or place the IC card over or on the authentication unit, then tap [OK]. NOTICE During scanning, do not leave the IC card close within 1-9/16 inches (40 mm) from the card reader. When [Registration complete.] appears, tap [Close] to finish the user information registration.
-
Page 82: Logging In To This Machine
Logging in to this machine Logging in to this machine The login methods vary depending on the authentication settings of this machine. In [Card Authentication], you can login by simply passing or placing the IC card over or on the authen- tication unit. -
Page 83: Using Data Administrator (For The Administrator)
Using Data Administrator (for the administrator) Using Data Administrator (for the administrator) 7.4.1 Data Administrator Data Administrator is a management tool to edit or register authentication information or address informa- tion of the target device through a computer on the network. Using this tool allows you to import authentication information or address information from a device and re- write it to the device after editing. - Page 84 Using Data Administrator (for the administrator) In the [Hardware] tab, click [Properties]. In the [General] tab, click [Change settings]. bizhub C754/C654 7-10...
- Page 85 Using Data Administrator (for the administrator) In the [Driver] tab, click [Update Driver...]. In the screen in which to select how to search the driver software, click [Browse my computer for driver software]. Click [Browse...]. Select the IC CardDriver (USB-Driver) file in the computer, then click [OK]. Click [Next], and perform the procedure by following the on-screen instructions.
-
Page 86: Installing Ic Carddriver (Usb-Driver) (Windows Vista)
Using Data Administrator (for the administrator) Installing IC CardDriver (USB-Driver) (Windows Vista) To use Data Administrator, set up the operating environment after configuring authentication settings of this machine. For setup, install the IC CardDriver (USB-Driver) of the authentication unit, then install Data Administrator PlugIn for IC Card Authentication Unit AU-201. -
Page 87: Installing Ic Carddriver (Usb-Driver) (Windows Xp)
Using Data Administrator (for the administrator) Click [Browse my computer for driver software (advanced)]. Click [Browse...]. Select the IC CardDriver (USB-Driver) file in the computer, then click [OK]. Click [Next], and perform the procedure by following the on-screen instructions. % If the [Windows Security] dialog box for verifying the publisher appears, click [Install this driver soft- ware anyway]. - Page 88 Using Data Administrator (for the administrator) Connect the authentication unit to the USB port of your computer. The [Found New Hardware Wizard] dialog box appears. % If the [Windows connect to Windows Update] screen appears, select [No, not this time], then click [Next].
-
Page 89: Installing Data Administrator Plugin For Ic Card Authentication Unit Au-201
Using Data Administrator (for the administrator) Under [Search for the best driver in these locations.], select [Include this location in the search:], then click [Browse]. Select the IC CardDriver (USB-Driver) file in the computer, then click [OK]. Click [Next], and perform the procedure by following the on-screen instructions. When the installation completes, click [Finish]. - Page 90 Using Data Administrator (for the administrator) Click [Next]. Select [I accept the terms in the license agreement], and then click [Next]. Click [Install]. When the installation is complete, click [Finish]. This completes the installation of Data Administrator PlugIn for IC Card Authentication Unit AU- 201, which completes the setup.
-
Page 91: Registering User Authentication Information
Using Data Administrator (for the administrator) 7.4.3 Registering user authentication information To register user authentication information with Data Administrator, connect the authentication unit to the USB port of the computer, and also connect the computer to this machine via network. To use Data Administrator, set up the operating environment in advance. - Page 92 Using Data Administrator (for the administrator) Select a user template, and click [OK]. % For details about templates, refer to the relevant Data Administrator manual. The User Registration screen appears. Enter the user name and password, and select the [IC card authentication] tab. Place the IC card on the authentication unit, then click [Start reading].
- Page 93 Using Data Administrator (for the administrator) After the registration of authentication information has been completed for all users, click [Export to the device]. % When necessary, select a user name, and click [Edit] to change registered information. Click [Write]. % Data Administrator supports the batch copy function. When necessary, you can collectively write the registered authentication information to multiple devices.
- Page 94 Using Data Administrator (for the administrator) Connect the authentication unit to the USB port of this machine. NOTICE When connecting or disconnecting the USB cable, hold the plug. Otherwise, the machine may be dam- aged or a failure may occur. bizhub C754/C654 7-20...
- Page 95 http://konicaminolta.com Copyright A2X0-9603DE-00 2011.10 2011...