Table of Contents
Advertisement
USER GUIDE
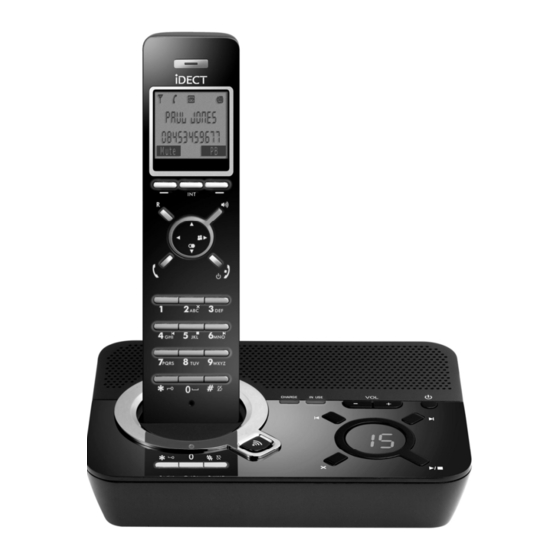
iDECT Q2i System
Digital Cordless Telephone with
100 Name and Number Phonebook
and Answering Machine
UK (BTP) Ver 3, Mar 2008
THIS EQUIPMENT IS NOT DESIGNED FOR MAKING
EMERGENCY TELEPHONE CALLS WHEN THE POWER
FAILS. ALTERNATIVE ARRANGEMENTS SHOULD BE
MADE FOR ACCESS TO DIAL EMERGENCY SERVICES.
Before operating this set,
please read these instructions carefully.
Advertisement
Table of Contents

Related Manuals for Binatone iDECT Q2i System


Summary of Contents for Binatone iDECT Q2i System
- Page 1 USER GUIDE iDECT Q2i System Digital Cordless Telephone with 100 Name and Number Phonebook and Answering Machine THIS EQUIPMENT IS NOT DESIGNED FOR MAKING EMERGENCY TELEPHONE CALLS WHEN THE POWER FAILS. ALTERNATIVE ARRANGEMENTS SHOULD BE MADE FOR ACCESS TO DIAL EMERGENCY SERVICES.
-
Page 2: Table Of Contents
Table of Contents 1 IMPORTANT SAFETY INSTRUCTIONS ...................1 2 INSTALL YOUR PHONE ......................2 2.1 C ONNECT THE B ASE S TATION ..................2 2.2 I NSTALL AND C HARGE THE B ATTERIES ................2 3 GET TO KNOW YOUR PHONE ....................3 3.1 H ANDSET O VERVIEW ...................... - Page 3 7 CLOCK & ALARM ........................16 7.1 D ATE & T IME .......................... 16 7.1.1 C HANGE DATE FORMAT ....................16 7.1.2 C HANGE TIME FORMAT ..................... 16 7.1.3 S ET THE DATE ........................16 7.1.4 S ET THE TIME ........................16 7.2 A LARM ............................
-
Page 4: Important Safety Instructions
5) Do not overload wall outlets and extension cords as this can result in the risk of fire or electric shock. 6) Unplug this product from the wall outlet and contact the Binatone Help Line under the following conditions: • When the power supply cord or plug is damaged or frayed. -
Page 5: Install Your Phone
INSTALL YOUR PHONE Connect the Base Station 1) Plug the power supply and the line cord into the base station. 2) Plug the mains adapter & line cord into the wall socket. 3) Always use the cables provided in the box. Note: The 7-SEG LED display will be flashing "--"... -
Page 6: Get To Know Your Phone
GET TO KNOW YOUR PHONE Handset Overview If you have a Broadband line If you connect your telephone to a line with a broadband connection, you will need to insert a micro-filter between the telephone and the telephone line; otherwise you may get interference between the telephone and the broadband, which could cause problems. - Page 7 EARPIECE In menu mode: Press to scroll up the menu list In Phonebook list / Redial list / Call List: Press to scroll up the list During a call: Press to increase the volume LEFT SOFT KEY In idle mode: Press to access the main menu In sub-menu mode: Press to select the option During a call: Press to mute/unmute the microphone During call screening: Press to intercept a call...
- Page 8 SPEAKERPHONE During a call: Press to turn on / off the speakerphone. Call List / Phonebook entry: Press to make a call with speakerphone During ringing: Press to answer a call with speakerphone During answering machine message playback/call screening: Press to play the message via speaker INTERCOM In idle mode: Press to make internal call During an external call connection: Long press to initiate a...
-
Page 9: Base Station With Telephone Answering Machine (Tam) Control
3.2 Base Station with Telephone Answering Machine (TAM) Control CHARGE IN USE PAGE Press the Page on the base station to page your handset. It will ring for approximately 60 seconds. CHARGING CRADLE CHARGING LED Steadily on while the handset is charging. TAM ON/OFF Press to turn on the answering machine. -
Page 10: Handset Lcd Display
3.3 Handset LCD Display The following icons may be displayed according to the current status of the phone operation. Following icons will be displayed according to Icons Description Steady when the handset is in range of the base. More bars will show when the signal strength is strong. -
Page 11: Menu Structure
3.4 Menu Structure In idle mode, press <Menu> will firstly access the Call List menu. Refer to the following for the menu structure. <UP/DOWN> <UP/ <UP/ <UP/ Key Press <UP/ <UP/ <UP/ <MENU> DOWN> DOWN> DOWN> DOWN> DOWN> DOWN> Main Call List Phonebook Clock/... -
Page 12: Latin Character Table
3.5.1 Latin Character Table (Uppercase) (Lowercase) -
Page 13: Use Your Phone
USE YOUR PHONE 4.1 Power on the Handset If your handset is powered off before, press and hold <TALK OFF> to turn on the handset. You can press and hold <TALK OFF> again to power off the handset. 4.2 Make an External Call 4.2.1 Preparatory dialing Enter the phone number and press <TALK ON>... -
Page 14: Mute A Call
During a call: Press <UP> or <DOWN> to increase or decrease the volume level respectively. The current setting is shown. When you end the call, the volume settings w ill remain at the last selected level. 4.6 Mute a Call You can talk to someone nearby without letting the caller hear you during a call. -
Page 15: Make An Internal Call (For Multi-Handset Versions Only)
4.11 Make an Internal Call (For multi-handset versions only) This feature is only applicable when there are at least two registered handsets. It allows you to make internal calls , transfer external calls from one handset to another handset and make conference calls. 4.11.1 Intercom another handset 1. -
Page 16: Phonebook
PHONEBOOK Your phone can store up to 100 private phonebook entries with names and numbers. Each phonebook entry can have a maximum of 24 digits for the phone number and 12 characters for the name. 5.1 Add a New Entry In idle mode: 1. -
Page 17: Delete The Entire Phonebook
5.5 Delete the Entire Phonebook Remarks: Applicable if there are phonebook entries in the phonebook. In idle mode: 1. Press <Menu> and <UP/DOWN> to scroll to Phonebook. 2. Press <Select> to access the phonebook menu. 3. Press <UP/DOWN> and <Select> to select Delete All 4. -
Page 18: Call List
CALL LIST This feature is available if you have subscribed to the Caller Line Identification service with your network service provider. Your phone can store up to answered calls or unanswered with date/time information in the call list. The number will be shown on the display when the phone is ringing. If the number matches with one of the entries in your private phonebook, the caller’s name stored in the private phonebook will be displayed with the number. -
Page 19: Clock & Alarm
5. Press <OK> to confirm. 7.2 Alarm You can use the iDECT Q2i handset as an alarm clock. When an alarm is set, the <ALARM Icon> is shown on the handset display . When the alarm time is reached, the <ALARM icon> and “ Alarm On ” flash on the display, and the alarm melody is played for 45 seconds or until a any handset key is pressed. -
Page 20: Turn Off The Alarm
Note: a. If the handset keypad lock is on, the keys will still function while the alarm is sounding. b. The alarm volume level setting is the same as the handset ringer volume. If the handset ringer is set to Volume Off, the alarm still sounds at Volume 1 level. -
Page 21: Settings
SETTINGS Your phone comes with a selection of settings that you can change to personalise your phone operation. 8.1 Handset Settings 8.1.1 Set the internal ringer melody In Idle mode: 1. Press <Menu> and <UP/DOWN> to scroll to HS Settings 2. -
Page 22: Turn On Or Off The Auto Answer
3. Press <Select> and <UP/DOWN> to scroll to your desired contrast level (5 contrast levels are provided). The respective contrast effect will display while browsing the contrast level list 4. Press <Select> to confirm the contrast setting. 8.1.7 Turn on or off the auto answer 1. -
Page 23: Reset Handset Settings To Default
4. Enter the system PIN. 5. Press <OK> to confirm the PIN. Note: If the PIN code is entered correctly, the SOS number will be saved and “Saved” will display. If the PIN code is entered incorrectly, “PIN Invalid” will display. Press <UP/DOWN>... -
Page 24: Change The Dial Mode
8.2.4 Change the dial mode 1. Press <Menu> and <UP/DOWN> to scroll to Base Settings 2. Press <Select> and <UP/DOWN> to scroll to Dial Mode . 3. Press <Select> and <UP/DOWN> to scroll to Tone or Pulse . 4. Press <Select> to confirm you dialling mode selection. 8.2.5 Change the Flash Time 1. -
Page 25: Answering Machine
ANSWERING MACHINE Your phone includes a telephone answering machine(TAM) that records unanswered calls when it is on. The answering machine can store up to 59 messages within a maximum recording time of approximately 15 minutes. As well as recording incoming messages, you can record memos for other users of your phone. -
Page 26: Delete All Messages In The Answering Machine
Listen new messages through the Handset: When new messages are recorded on the answering machine, old messages will be played after all new messages are played completely. 1. Press <Menu> and <UP/DOWN> to scroll to Answer Machine 2. Press <Select> and <UP/DOWN> to scroll to Playbac k . 3. -
Page 27: Record Memo
Record Memo You can record a memo message for another user. When you record a memo, the message counter will increase by one and the me ssage is played back in the same way as answering machine messages. Memo recording can still function even when the answering machine is turned off. -
Page 28: Playback & Delete Message
7. Press <OK> to stop and save your personalised OGM or press <Cancel> to return to previous screen without saving the personalised OGM. Note: Any subsequent newly recorded OGM will overwrite the previously recorded OGM. After the recorded OGM is saved, the phone will playback the newly recorded OGM automatically. -
Page 29: Turn On Or Off The Base Screening
9.5.8.3 Access Your Answering Machine Remotely You can ring your iDECT Q2i from another tone-dialing phone to switch the answering machine on or off, or to listen to your messages remotely. 1. Place a call from a tone-dialing phone to your iDECT Q2i 2. -
Page 30: Call Screening
4. Press the following keys to operate the answering machine remotely. Keys Functions While message is not playing While message is playing Delete the current message playback Repeat playing the current message from the beginning. Press twice to skip backward to play the previous message. -
Page 31: Default Settings
DEFAULT SETTINGS Items Default Values External Ring Melody 6 Internal Ring Melody 1 Handset Ring Volume Volume 4 BS Ringer Melody 1 Base Ring Volume Volume 4 Earpiece Volume Volume 3 Speaker Volume Volume 4 Handset Name iDECT Key Tone Battery Tone Out of Range Contrast... -
Page 32: Troubleshooting
Please read out the serial number of this telephone to Help Line. The serial number can be found in the battery compartment after having the batteries removed. For technical support, call Binatone Help Line Customer Service at 0845 345 9677. CONFORMITY... - Page 33 Temperature range Operating 0 C to 40 C Storage -20 C to 60 C Declaration of conformity The Binatone iDECT Q2i complies with the essential protective requirements and objectives of: EC R&TTE Directive 1999/5/EC EC EMC Directive 89/336/EEC and conforms to the following relevant harmonised standards:...