Table of Contents
Advertisement
USER GUIDE
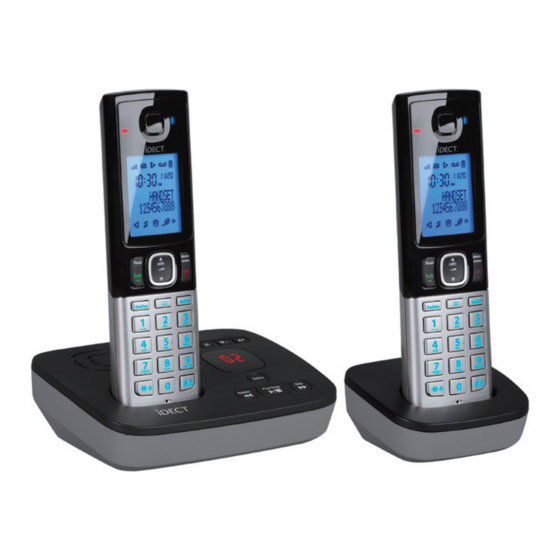
C10i Single
C10i Twin
C10i Triple
C10i Quad
Digital Cordless Telephone
with Answer Machine
Binatone Helpline
(for UK only)
Monday to Friday from 9:00am to 5:00pm
Tel: 0845 345 9677
**Please note that all calls are charged at local rate
Or visit our website: www.binatonetelecom.com
THIS EQUIPMENT IS NOT DESIGNED FOR MAKING
EMERGENCY TELEPHONE CALLS WHEN THE POWER
FAILS. ALTERNATIVE ARRANGEMENTS SHOULD BE
MADE FOR ACCESS TO DIAL EMERGENCY SERVICES.
please read these instructions carefully.
Before operating this set,
Advertisement
Table of Contents

Related Manuals for Binatone iDECT C10i Single


Summary of Contents for Binatone iDECT C10i Single
- Page 1 C10i Twin C10i Triple C10i Quad Digital Cordless Telephone with Answer Machine Binatone Helpline (for UK only) Monday to Friday from 9:00am to 5:00pm Tel: 0845 345 9677 **Please note that all calls are charged at local rate Or visit our website: www.binatonetelecom.com...
-
Page 2: Technical Details
TECHNICAL DETAILS Standard Digital Enhanced Cordless Telecommunication (DECT) 1.88 to 1.9 GHz Frequency range (bandwidth = 20 MHz) Channel bandwidth 1.728 MHz Operating range Up to 300m outdoors; Up to 50m indoors Operating time Standby: 1 hours, Talking: 10 hours Battery charge time:15 hours Temperature range Operating 0 C to 40 C, Storage -20 C to 60 C... -
Page 3: Table Of Contents
TABLE OF CONTENTS IMPORTANT SAFETY INSTRUCTIONS ...........4 INSTALLING YOUR PHONE .............6 Connecting the base station ..............6 Installing and charging the batteries.............6 GETTING TO KNOW YOUR PHONE ..........7 Handset overview ..................7 Display icons and symbols ..............8 Base station with telephone answering machine (TAM) control ..9 3.3.1 Base Message Window ................9 Menu structure ..................10... - Page 4 PRIvATE PHONEBOOK ..............17 Store a contact in the phonebook ............17 Access the phonebook ................17 Modify a phonebook entry..............18 Delete a phonebook entry ..............18 Delete all entries from the phonebook list ..........18 CALLER DISPLAY (NETWORK DEPENDENT) ......19 Access the Call Log ................19 Save a Call Log entry into the phonebook..........19 Delete a Call Log entry................19 Delete all entries in the Call Log ............20...
- Page 5 7.5.3 To modify a Block List number ............28 7.5.4 To delete a Block List number .............28 7.5.5 To delete all Block List numbers ............28 Do not disturb (DND) setting ..............28 7.6.1 Global DND ....................29 7.6.2 Handset DND ..................29 Call Barring setting ................29 7.7.1 Turn on or off the Call Barring .............30 7.7.2...
-
Page 6: Important Safety Instructions
IMPORTANT SAFETY INSTRUCTIONS When using your telephone equipment, basic safety precautions should always be followed to reduce the risk of fire, electric shock and injury, including the following: Read and understand all the instructions. Follow all warnings and instructions marked on the product. Unplug this product from the wall outlet before cleaning. -
Page 7: Package Contents
Package contents The package contains the following items: • 1 Handset • 1 Base station • 1 Mains power adapter • 1 Telephone line cord • 2 AAA rechargeable batteries • 1 User manual NOTE: If you have a Twin, Triple or Quad system, you will also have the requisite extra handset(s) and batteries, and a charger pod for each extra handset. -
Page 8: Installing Your Phone
INSTALLING YOUR PHONE Connecting the base station 1) Plug the power supply and line cord into the base station. 2) Plug the power adapter into a 230Vac, 50Hz mains socket, and the line cord into your telephone line socket. 3) Always use the cables provided in the box Warning: Use only the provided adaptor, using other power supplies may cause a hazard. -
Page 9: Getting To Know Your Phone
GETTING TO KNOW YOUR PHONE Handset overview EARPIECE Ringer / Message LED Flashes when ringing is received or you have a new Charging LED answering machine message Turns on when the handset or caller display entry. is charging. CALL LOG/VOLUME UP In idle mode, press to RECALL access the call log. -
Page 10: Display Icons And Symbols
Display icons and symbols The LCD display gives you information on the current status of the telephone. Icon Meaning Displays when the telephone base is within reception range. Off when the telephone base is out of range. Scrolls to indicate battery charging when handset ... -
Page 11: Base Station With Telephone Answering Machine (Tam) Control
Base station with telephone answering machine (TAM) control You can use the keys on the base station to perform the basic functions of the answering machine. ANSWER ON/OFF CHARGING PAGE Press to turn the answering machine CRADLE Press to ring and locate on/off. -
Page 12: Menu Structure
Menu structure In idle mode, press the <MENU/OK> to go to PLAY MESSAGES, the first option in the Main Menu list. Press <UP> or <DOWN> to go to other options in the menu list. Press <MENU/OK> to enter a sub-menu or function. Press <OFF>... -
Page 13: Text And Digit Entry Table
Text and digit entry table The following table shows you where each letter and punctuation character can be found, by using repeated presses of the alphanumeric keypad. This will be helpful when storing a name in the phonebook or renaming your handset. -
Page 14: Using Your Phone
USING YOUR PHONE Make a call 4.1.1 Pre-dialling Enter the phone number (maximum 20 digits) and then press <TALK> to connect to the line and dial the number. When entering the number, if you make a mistake, press <DEL/INT> to delete digits. 4.1.2 Direct dialling Press <TALK>... -
Page 15: Handset Speakerphone
Handset Speakerphone During a call, you can press <TALK> to alternate between hands-free speakerphone and normal handset use. Adjust the volume There are 5 levels to choose from for each of the earpiece and speaker volumes. During a call, press <UP/DOWN> to select from vOLUME 1 to vOLUME 5. -
Page 16: To Lock/Unlock The Keypad
To lock/unlock the keypad You can lock the keypad so that it cannot be used accidentally while carrying it around. In idle mode, press and hold the <STAR/*> key for 1 second to lock the keypad and show KEYS LOCKED on the display. To turn the keypad lock off, press and hold <STAR/*>... -
Page 17: Make An Internal Call (Multi - Handset Versions Only)
4.10 Make an internal call (Multi - handset versions only) The system allows an intercom call between two handsets registered to the same telephone base. 4.11 To initiate an intercom call 1. In idle mode, press <DEL/INT>. If your telephone system has only two handsets registered, the other handset will be called immediately. -
Page 18: To Initiate An Intercom During A Call
4.13 To initiate an intercom during a call You can intercom with another system handset during a call, or invite another system handset to join in a conference call with you and the external caller. 1. Press <DEL/INT> during an external call. If your telephone system has only two handsets registered, the other handset will be called immediately. -
Page 19: Private Phonebook
PRIvATE PHONEBOOK Your phone can store up to 100 phonebook entries, which can be saved and viewed by any handset registered to the base, although only one handset can access it at a time. Each phonebook entry can have a maximum of 20 digits for the phone number and 14 characters for the name.. -
Page 20: Modify A Phonebook Entry
Modify a phonebook entry 1. Press <PHONEBOOK> to enter the phonebook list. 2. Press <UP/DOWN> to find the desired PHONEBOOK contact. 3. Press <MENU/OK> to show ADD NEW. 4. Press <UP/DOWN> to select EDIT CONTACT and then press <MENU/OK> to select. The current name is displayed. -
Page 21: Caller Display (Network Dependent)
CALLER DISPLAY (NETWORK DEPENDENT) This feature is available if you have subscribed to the Calling Line Identification service with your network service provider. Caller ID lets you see the phone numbers of your callers on the handset display, before you answer and in your Call Log afterwards. -
Page 22: Delete All Entries In The Call Log
Delete all entries in the Call Log 1. Press <CALLS / UP> in idle mode to go to the call list. 2. Press <MENU/OK>. 3. Press <UP/DOWN> to select DELETE ALL and then press <MENU/OK> to show CONFIRM?. 4. Press <MENU/OK> again to confirm, and all entries are deleted. Save a call list entry into the Block List 1. -
Page 23: Phone Settings
PHONE SETTINGS Your phone comes with a selection of settings that you can change to personalise your phone to the way you like it to work. Date and time settings If you subscribe to Caller Display, the time and date settings will be automatically updated by the network when you receive an incoming call. -
Page 24: Alarm Settings
Alarm settings An alarm can be programmed on a handset, to sound at a set time only once or repeated each day. When an alarm is set the alarm icon is shown on the handset display. When the alarm time is reached, ALARM and the alarm icon flash on the display, and the alarm tone sounds for 1 minute, at the same volume setting as the handset ringer, unless the ringer is off, in which case it will ring at volume setting 1. -
Page 25: Handset Settings
Handset settings 7.3.1 Set the ringer volume You can set the handset ringer volume from Level 1 to Level 5 or turn the ringer off. 1. Press <MENU/OK>. 2. Press <UP/DOWN> to select HANDSET TONES and then press <MENU/OK>. 3. Press <MENU/OK> again to select RING vOLUME. 4. -
Page 26: Set The Key Tone
7.3.4 Set the key tone The handset emits a tone with each key press. You can choose to turn this tone on or off. The default setting is ON. To change the key tone setting: 1. Press <MENU/OK>. 2. Press <UP/DOWN> to select HANDSET TONES and then press <MENU/OK>. -
Page 27: Set Energy Save Mode
7.3.8 Set energy save mode With the energy save mode enabled, the handset will automatically turn the handset backlight off and adjust the ringer volume to level 2. 1. Press <MENU/OK>. 2. Press <UP/DOWN> to select SETTINGS and then press <MENU/OK>. 3. -
Page 28: Set The Base Ringer Volume
7.4.2 Set the base ringer volume You can set the telephone base ringer volume from level 1 to level 5 or turn off the ringer 1. Press <MENU/OK>. 2. Press <UP/DOWN> to select BASE TONES. 3. Press <MENU/OK> to show BASE vOLUME and then press <MENU/OK>... -
Page 29: Deregister A Handset
7.4.4 Deregister a Handset This operation should only be necessary if one of your handsets becomes faulty or lost and needs to be replaced. A de-registered handset will have REGISTER YOUR HANDSET on the display. 1. Press <MENU/OK>. 2. Press <UP/DOWN> to select ADv SETTING and then press <MENU/OK>. 3. -
Page 30: To Store A Block List Number
7.5.1 To store a Block List number 1. Press <MENU/OK> and <UP/DOWN> to select BLOCK LIST. 2. Press <MENU/OK> to show the first entry, or ADD NEW if the list is empty. 3. If it is not showing ADD NEW, press <MENU/OK> to display ADD NEW. 4. -
Page 31: Global Dnd
7.6.1 Global DND When global DND is activated, all system handsets and the telephone base will be silent when there is an incoming call. Press and hold the < > button on the telephone base for 5 seconds to turn this feature on. The handsets will show DO NOT DISTURB on their display, and a small light will turn on just below the <... -
Page 32: Turn On Or Off The Call Barring
7.7.1 Turn on or off the Call Barring 1. Press <MENU/OK>. 2. Press <UP/DOWN> to select ADv SETTING. 3. Press <MENU/OK> to show CALL BARRING and then press <MENU/OK>. 4. Modify the displayed PIN, if necessary, using <DEL/INT> to delete digits and the keypad to enter new ones. -
Page 33: Set The Recall Time
Set the recall time You may need the R button to send a Recall signal (also called Flash or Timed Break Recall) for network services or if you are connected to a PBX. You should normally leave the Recall Time at its default setting of Short (100ms), as this is the standard recall required in the UK telephone network, but it can be changed to Medium (250ms) or Long (600ms) if your telephone is connected to a PBX that requires a different recall time. -
Page 34: Answering Machine
ANSWERING MACHINE Your phone includes a telephone answering machine that records unanswered calls when it is on. The answering machine can store up to 59 messages within the maximum recording time of approximately 30 minutes and each message can be up to 3 minutes long. As well as recording incoming messages, you can record memos for other users of your phone. -
Page 35: Message Playback
Message Playback 8.3.1 Using the telephone base 1. Press <PLAY / STOP> on the telephone base to listen to the messages. 2. Press <PLAY / STOP> again to stop the playback. 3. During playback, you can press the following keys on the base for other operations: Operation <... -
Page 36: Delete All Messages
Delete all messages NOTE: only old messages can be deleted. New messages must be played before they can be deleted. 8.4.1 Using the telephone base 1. Press and hold the <DELETE> key to delete all old messages. 8.4.2 Using a cordless handset 1. -
Page 37: Message Window
Message window The base has a two-digit LED display to provide information about the status of the answering machine, as shown in the table below: No display (blank screen) Answering system is off. Indicates incoming message recording in (segments cycling) progress. - Page 38 8.7.1.1 To record your own OGA 1. Press <MENU/OK>. 2. Press <UP/DOWN> to select ANS SYSTEM and then press <MENU/OK>. 3. Press <UP/DOWN> to select ANNOUNCEMENT and then press <MENU/OK>. 4. Press <UP/DOWN> to select ANSWER & REC or ANSWER ONLY for the OGA you want to record, and then press <MENU/OK>.
-
Page 39: Number Of Rings Before The System Answers
8.7.2 Number of rings before the system answers You can select the number of rings before the answering system answers a call and starts playing the OGA. You can set the delay from 3 to 8 rings, or TOLL SAVER. IMPORTANT: If your network voice messaging system (e.g. -
Page 40: Remote Access
8.7.3 Remote Access Your phone lets you check your messages, or otherwise operate your answering machine, by calling in to your answering machine when you are away from home, and then dialling a 4-digit remote access code from a tone-dialling phone. The 4-digit remote access code (see 8.7.3.2) is used to prevent other people from unauthorised access of your answering machine. - Page 41 8.7.3.2 Remote code Your answering system requires a 4-digit Remote Code to permit access to the system remotely by any touch-tone telephone. The default Remote Code is 0000. 8.7.3.3 To view the current remote code 1. Press <MENU/OK>. 2. Press <UP/DOWN> to select ANS SYSTEM and then press <MENU/OK>. 3.
-
Page 42: Voice Language
NOTES: 1. If your answering system is off, it will answer your call after 10 rings and play your ANSWER ONLY announcement, so you can still access the system remotely, provided the Remote Access is activated, see 8.7.3.1. 2. If you enter an incorrect Remote Code, you will hear a triple error beep, and you will need to enter the code again. -
Page 43: Troubleshooting
TROUBLESHOOTING ALWAYS check first that: You have followed all the steps listed in the user manual to install and set up your telephone. All connectors are firmly inserted in their sockets. Mains power to the base unit is switched on at the socket. The handset’s batteries are correctly and securely installed and are not run down. - Page 44 “When I key in a number, it appears on the display, but I cannot make an outside call” Try a different position for the base unit – somewhere higher if possible, or further from other electrical equipment. “The phone does not ring” Check that the base unit’s mains power adapter is plugged in and power is switched on.
- Page 45 “When I try to make a call, I hear busy tone” If you’re using a multi-handset system, check whether another handset is already on a call. “The volume in the earpiece is low when I’m on a call” Make sure you’re holding the earpiece correctly over your ear. Adjust the volume using the UP/DOWN key.
-
Page 46: Declaration Of Conformity
10 DECLARATION OF CONFORMITY We the manufacturer / Importer : Binatone Telecom Plc, 1 Apsley Way London, NW2 7HF. Declare under our sole responsibility that the following product Type of equipment: Digital cordless telephone Model Name: C10i Series Country of Origin:... -
Page 47: Guarantee And Service
11 GUARANTEE AND SERvICE The phone system is guaranteed for 12 months from the date of purchase shown on your sales receipt. This guarantee does not cover any faults or defects caused by accidents, misuse, fair wear and tear, neglect, faults on the telephone line, lightning, tampering with the equipment, or any attempt at adjustment or repair other than through approved agents.