NAIM NAIMUNITI Manual
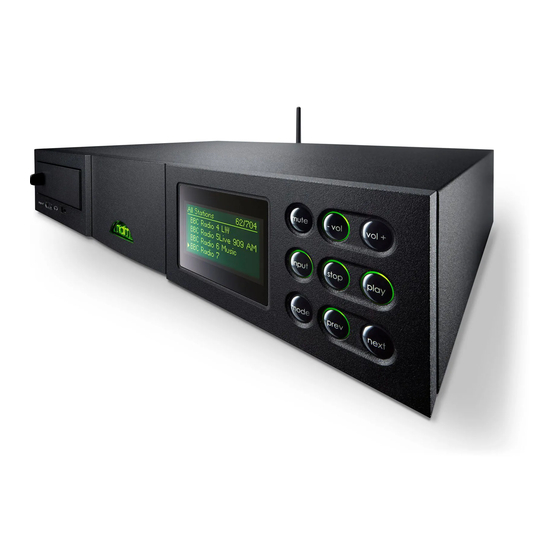
All-in-one audio player
Hide thumbs
Also See for NAIMUNITI:
- Reference manual (25 pages) ,
- Connection manual (22 pages) ,
- Manual supplement (22 pages)
Advertisement
Quick Links
Download this manual
See also:
Reference Manual
R E F E R E N C E M A N U A L
N A I M
U N I T I A L L - I N - O N E A U D I O P L A Y E R
E N G L I S H
Advertisement

Related Manuals for NAIM NAIMUNITI


Summary of Contents for NAIM NAIMUNITI
- Page 1 R E F E R E N C E M A N U A L N A I M U N I T I A L L - I N - O N E A U D I O P L A Y E R E N G L I S H...
- Page 2 C ont ent s Page Section NaimUniti Introduction NaimUniti Installation and Connection NaimUniti Operation NaimUniti Setup NaimUniti Integrated Amplifier NaimUniti CD Player NaimUniti Multi-mode Radio Tuner NaimUniti UPnP™ Audio Interface NaimUniti iPod Interface NaimUniti USB Audio Interface NaimUniti Specifications iPod, and iTunes are trademarks of Apple Inc., registered in the U.S.
- Page 3 Na im Un it i In tro du c tion 1 Naim Uniti Intr oductio n NaimUniti is a highly capable product that will repay time and effort spent on installation and setup. We strongly recommend that you read this manual. NaimUniti effectively incorporates six separate elements.
- Page 4 A transit screw on the underside of the NaimUniti case should be removed before use and replaced if the unit is to be moved. This transit screw must not be used in any other Naim product. Handle NaimUniti with extra care once the transit screw is removed.
- Page 5 2. 6 H ea dp hon e O u tp u t Ethernet-over-mains hardware may be used and provides NaimUniti is fitted on its front panel with a 3.5mm stereo a simple and convenient method of wired home network headphone socket. Insertion of a headphone plug will connection.
- Page 6 Na im Un it i In sta l la ti on a nd C onnec tion 2.9.2 Wireless Network Connection If NaimUniti is to connect wirelessly to the home network the supplied WiFi antenna must be fitted to the rear panel wireless antenna socket. Wireless configuration will also be necessary before NaimUniti is able to connect to the network. See Section 4.6.1 of this manual.
- Page 7 Na im Un it i O pe r a ti on 3 Naim Uniti Oper at ion NaimUniti can be operated from either its front panel controls or from the supplied remote handset. In either case, setting up and operating NaimUniti requires navigation through a menu-driven user interface.
- Page 8 3 . 6 Fr o n t P a n e l D is p l a y ( s e tu p m o d e ) In normal play mode the NaimUniti screen provides a variety of information on the current setup, the input Uniti Setup selected and the material playing.
- Page 9 3. 7 N aimUnit i Re mo t e H an d se t The handset key functions are listed and described in the tables below. Some keys change function when NaimUniti The supplied remote control handset is a multifunctional is in list/setup mode. Normal play mode functions are device designed specifically for NaimUniti. denoted by the text on each key and list/setup mode To fit batteries, remove the battery cover and insert the functions are denoted by the text below each key. Keys batteries into the body taking care with their orientation.
- Page 10 The up ( provides letter ) and down ( keys will also scroll through all the available letters. The enlarged handset image illustrates the number keys and the characters associated with each. pqrs wxyz When prompted on a NaimUniti screen to enter text, select characters in turn by pressing each appropriate key preset store the required number of times. Confirm the text entry by pressing the ok/list key. input + vol +...
- Page 11 NaimUniti’s abilities. The following paragraphs describe each NaimUniti setup menu in turn starting with the setup home menu.
- Page 12 USB device. If is specified the top level Note: The NaimUniti DAB input is not implemented in units folder of the device will be displayed. distributed in territories where Digital Audio Broadcasting is unavailable. 4.3.8 Front Panel Input Front 4.3.4 iRadio Input...
- Page 13 Na im Un it i Setu p Select the Large+Sub option when a subwoofer is on the network. DHCP is a set of rules that enable the connected to NaimUniti and used to augment the low automatic allocation of addresses as items are connected frequency performance of large (full bandwidth) speakers.
- Page 14 If List is selected the settings. Consult your network router’s user documentation keys will return NaimUniti to list mode, and if is selected for help with specifying fixed IP address settings. the keys will be disabled. 4.7 The Front Display Menu...
- Page 15 The input selection keys (cd, radio, pc, iPod, tv, av, hdd, Up/Down Left/Right aux) are located beneath the transport keys key may have up to four inputs assigned to it. The default 4Radio assignments are shown in the following table: Handset Key NaimUniti Inputs Assigned radio: FM, DAB, iRadio disp pc: UPnP™, USB iPod: iPod, Front Analogue 1, Digital 1...
- Page 16 Using the NaimUniti amplifier is simply a matter of selecting the desired input and setting the listening volume level. 5. 1 S elect ing I nputs...
- Page 17 NaimUniti incorporates a fully featured CD player based on established Naim practice using a manual swing-out loading drawer, custom transport control software and unique digital and analogue electronics. Select the NaimUniti CD input to begin using the CD player. 6. 1 D isc Loa ding...
- Page 18 Note: CD playlists cannot contain duplicate tracks. 6. 5 C D P la yer M ain te n an c e It is important for reliable operation of the NaimUniti CD player to ensure that the surfaces of the transport platter and the underside of the puck are free of dust or debris which can prevent the disc from sitting properly and cause it to slip.
- Page 19 FM and DAB operation requires an appropriate aerial to be connected to the rear panel aerial input. Internet radio requires NaimUniti to be connected to a broadband internet service via a network router that incorporates an appropriate firewall.
- Page 20 Note: The Browse Presets menu displays presets stored across all three NaimUniti radio modes (FM, DAB, iRadio). Selecting a preset from a radio mode other than the one currently selected will automatically switch NaimUniti to that mode. Note: It is possible for an internet radio station stored as a preset to be “off-line”...
- Page 21 NaimUniti must be connected, either wirelessly or via ethernet cabling, to a network router. If the router provides an internet connection it should incorporate a firewall. If NaimUniti is already connected to a network, begin by selecting the UPnP™ input.
- Page 22 Naim n-Link cable (available as an accessory). Once an iPod is connected, the NaimUniti user interface and display can be used both to control the iPod and browse its contents. iPods should not be connected to NaimUniti’s front panel USB socket.
- Page 23 Na im Un it i US B I nte r f a c e 10 NaimUn iti USB Int erfa ce NaimUniti can play audio files stored on USB memory sticks inserted into the front panel USB socket. Begin by inserting a memory stick and selecting the NaimUniti USB input.
- Page 24 90WPC into 4Ω Other Outputs: Headphone, 3.5mm jack Antenna Input: F type Analogue Inputs: 3.5mm front panel jack 3 x RCA pairs 1 x DIN with power to support a Naim phono preamplifier Digital Inputs: 5 x S/PDIF (2 x optical TOSLINK, 2 x coaxial, 1 x 3.5mm miniTOSLINK) Analogue Input Overload: 27 dB (RCA connections) (Phono and Front panel: 33.8 dB) USB: Front panel socket...
- Page 25 Naim Audio Limited, Southampton Road, Salisbury, England SP1 2LN Tel: +44 (0)1722 426600 Fax: +44 (0)870 2244702 W: www.naimaudio.com Part No. 12-001-0081 Iss. 1...