JVC DR-M100S Instructions Manual
Instruction manual
Hide thumbs
Also See for DR-M100S:
- Instructions manual (72 pages) ,
- User manual (80 pages) ,
- Quick start manual (5 pages)
Table of Contents
Advertisement
Quick Links
Download this manual
See also:
User Manual
Advertisement
Chapters
Table of Contents

Related Manuals for JVC DR-M100S


Summary of Contents for JVC DR-M100S
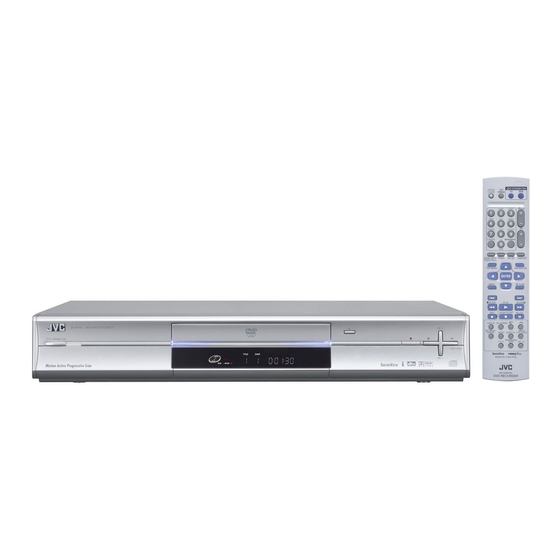
- Page 1 DVD VIDEO RECORDER DR-M100S RAM/RW STANDBY/ON PUSH-OPEN INSTRUCTIONS LPT1024-001B...
-
Page 2: Safety First
SAFETY FIRST Safety Precautions IMPORTANT: 8 Please read the various precautions on page 2 - 4 before installing or operating the unit. The rating plate and the safety caution are on the rear of the unit. 8 It should be noted that it may be unlawful to re-record pre- recorded tapes, DVDs, or discs without the consent of the WARNING: DANGEROUS VOLTAGE INSIDE owner of copyright in the sound or video recording,... - Page 3 DISCLAIMER OF LIABILITY connections on the front and rear panel, the front display panel JVC shall not be liable for any loss relating to the unit’s failure to and the remote control. properly record, store or playback any content (video, audio or ●...
-
Page 4: Some Do's And Don'ts On The Safe Use Of Equipment
SAFETY FIRST Some Do’s And Don’ts On The Safe Use Of Equipment This equipment has been designed and manufactured to meet international safety standards but, like any electrical equipment, care must be taken if you are to obtain the best results and safety is to be assured. DO read the operating instructions before you attempt to use the equipment. -
Page 5: Table Of Contents
CONTENTS SAFETY FIRST EDITING Safety Precautions .................2 DV Dubbing ................. 54 Some Do’s And Don’ts On The Safe Use Of Equipment ....4 Digital Audio Dubbing ..............55 Edit From A Camcorder ............... 56 DISC INFORMATION Edit To Or From Another Recorder ..........57 About Discs ..................6 Output/Input Set ................ -
Page 6: Disc Information
Using discs manufactured by JVC is depending on the disc and recording conditions. recommended since they have been tested to be compatible with ●... -
Page 7: Discs For Playback Only
DISC INFORMATION Discs For Playback Only Unplayable Discs You can use discs with the following logos for playback only. The unit may not be able to play back or it may take some time to read a disc depending on the recording status or condition of the DVD VIDEO Video CD/Super Video CD disc, or if the disc is scratched, dirty or warped. -
Page 8: File Structure Of Discs
DISC INFORMATION Recording Medium And Format Audio CD/Video CD/SVCD Typically, Audio CD discs are divided into separate tracks each containing one song. Each track is assigned a number. For DVD-RAM example, the third track is Track 3. The same is true for Video CD/ ●... - Page 9 DISC INFORMATION DVD VIDEO Marks Placing A Disc Opening the disc tray Sometimes marks are printed on a DVD disc and/or on its Press M to open the disc tray. packaging to indicate information regarding the contents and functions of the disc. Check the marks indicating the contents and functions of the disc.
- Page 10 DISC INFORMATION Care And Handling Of Discs How to handle discs When handling a disc, do not touch the surface of the disc. Since discs are made of plastic, they are easily damaged. If a disc gets dirty, dusty, scratched or warped, the images and sound will not be picked up correctly, and such a disc may cause the unit to malfunction.
-
Page 11: Index
INDEX Front View RAM/RW STANDBY/ON DV IN S-VIDEO VIDEO L(MONO) AUDIO H Front Display Panel A pg. 13 A Standby/On Button (STANDBY/ON A) I S-video Input Connector [S-VIDEO] A pg. 56 B Infrared Beam Receiving Window J Video/Audio Input Connectors [VIDEO/AUDIO (L(MONO)/ C Disc tray R)] A pg. - Page 12 INDEX Rear View A Antenna Input Connector [ANTENNA IN] A pg. 17 J Cooling Fan ● B Component Video Output Connectors [COMPONENT This prevents the temperature from rising inside the unit. )] A pg. 17 VIDEO OUT (Y/P Do not remove it. C L-1 Input/Output Connector [L-1 IN/OUT] A pg.
- Page 13 INDEX Front Display Panel LPCM DISC XP SP LP EP -RW VCD -RAM A Video Indicator (z) A pg. 23 I Random/Programme Playback Mode Indicator (RND/ Lights when video mode is selected by pressing TV z. PRGM) A pg. 34 B Disc Type Indicator ARNDB: Lights when Random Playback mode is set.
- Page 14 T DVD STANDBY/ON Button (DVD A) A pg. 41 U TV STANDBY/ON Button (TV A) For turning on/off the power of a JVC TV. V TV Volume Buttons (TV 8 +/–) For adjusting the volume of a JVC TV.
- Page 15 INDEX Check Contents CHECK ALL THE CONTENTS SHOWN BELOW DVD Video Recorder RAM/RW STANDBY/ON PUSH-OPEN RF Cable AAAB Batteries (x 2) 21-pin SCART Cable Infrared Remote Control Unit You are now ready to install your unit. ( pg. 17)
-
Page 16: On-Screen Display
INDEX On-Screen Display When using Live Memory playback When ON SCREEN on the remote control is pressed, various operational indicators appear on the TV screen. To clear the DVD-RAM 6:36PM TITLE2 0:12:27 TITLE2 CHAPTER1 0:13:34 operational indicators, press ON SCREEN twice. PR 10 EACH When playing back a recorded title... -
Page 17: Installing Your New Unit
INSTALLING YOUR NEW UNIT Basic Connection THESE STEPS MUST BE COMPLETED BEFORE ANY VIDEO OPERATION CAN BE PERFORMED. Place the unit on a stable, horizontal surface. Connect the unit to a TV depending on the TV and cables you use. 8 Basic Connection To connect to a TV with 21-pin SCART input connector ^ TV aerial cable... -
Page 18: Initial Settings
INITIAL SETTINGS ATTENTION: Auto Set Up AAUTOB blinks on the front display panel; do NOT press any button on the unit or remote control until the front display panel shows Auto Channel Set/Auto Clock Set/Auto Guide clock time, APR1B or AcB as illustrated on page 20. ●... -
Page 19: Preset Download
INITIAL SETTINGS If you have connected the unit to your TV via a 21-pin SCART Preset Download cable (A pg. 17), the unit will automatically perform Preset Download instead of the AAuto Set UpB in step 2 on page 18. After Auto Channel Set by Downloading from TV/Auto Clock downloading, the unit sets the clock and Guide Programme numbers automatically. - Page 20 Turn on the TV and select an input mode such as EXT1, then make If you have any difficulty with the above procedures call the JVC sure that all necessary stations have been stored in the unit’s Customer Service Hot Line on 0870 330 5000.
-
Page 21: Language
INITIAL SETTINGS Menu/Audio/Subtitle Language Set Language Some DVD discs contain the DVD menu display, audio and subtitles in multiple languages. With these discs, you can set the ● Turn on the unit. default language as you like. ● ● The procedure shows how to set AMENU LANGUAGEB as an Turn on the TV and select an input mode such as EXT1. -
Page 22: Monitor Set
INITIAL SETTINGS Press SET UP to access the Main Menu screen. Monitor Set Press selection keys to DVD SET UP FUNCTION SET UP INITIAL SET UP select AFUNCTION SET You can select the monitor type depending on the TV used when VIDEO IN/OUT RECORDING SET DISPLAY SET OTHERS... -
Page 23: Basic Operations On Dvd Deck
BASIC OPERATIONS ON DVD DECK To play back an MP3/JPEG disc, see APlayback With MP3/JPEG Basic Playback NavigationB (A pg. 53). Load a disc. ● For details, refer to APlacing A DiscB (A pg. 9). ● Pressing M also closes the disc tray. ●... -
Page 24: Playback Features
BASIC OPERATIONS ON DVD DECK Locating The Start Point Of The Item Or Skip The Item Playback Features ● Turn on the unit. Press S or T during playback. ● Turn on the TV and select an input mode such as EXT1. ●... -
Page 25: One Touch Replay
BASIC OPERATIONS ON DVD DECK Resume Function DVD A It is possible to memorise the position where you stop playback and resume playback from that position. ● Be sure to set ARESUMEB DVD SET UP FUNCTION SET UP INITIAL SET UP to AONB or ADISC VIDEO IN/OUT RECORDING SET DISPLAY SET... -
Page 26: Angle Selection
BASIC OPERATIONS ON DVD DECK Marking Positions To Play Back Again Later Angle Selection It is possible to mark positions (up to 999 points) where you want You can enjoy a variety of scene angles if a DVD VIDEO disc to play back once again later, and start playback from a marked contains Amulti-angleB parts, where the same scene was shot from position. -
Page 27: Audio Channel Selection
BASIC OPERATIONS ON DVD DECK Audio Language/Sound Selection Some DVD VIDEO discs contain the multiple audio language or sound. You can select the desired audio language or sound. For some Video CD/SVCD discs, you can switch the audio channel to choose Karaoke either with or without the vocal. -
Page 28: Live Memory Playback
BASIC OPERATIONS ON DVD DECK Live Memory Playback You can watch a recorded portion of a programme even before recording ends (Live Memory Playback), or watch other programmes (Simultaneous Recording and Playback) while continuing to record onto the DVD-RAM disc. (Recording screen) (Live Memory Playback screen) To start Live Memory Playback,... -
Page 29: Simultaneous Recording And Playback
BASIC OPERATIONS ON DVD DECK Live Memory Playback ● Turn on the unit. ● Turn on the TV and select an input mode such as EXT1. You can play back the previous part of the channel you are recording. To watch from the recording start point Press I during recording. - Page 30 BASIC OPERATIONS ON DVD DECK Buttons To Be Used During Live Memory Playback ● Each press of the button during playback advances the playback speed in 4 steps in the forward direction. ● Pressing during pause mode advances playback at a slower speed.
-
Page 31: Using The On-Screen Bar
BASIC OPERATIONS ON DVD DECK A Disc type. Using The On-screen Bar B Select this for Repeat Playback. (A pg. 31) C Select this for A-B Repeat Playback. (A pg. 32) D Select this for search function. (A pg. 32) E Select this for time search function. -
Page 32: A-B Repeat Playback
BASIC OPERATIONS ON DVD DECK NOTES: DVD-RAM/RW/R ● A-B Repeat Playback may not work properly depending on the type of disc being used. Repeat playback is not performed. ● The subtitles recorded around the A-B point may not appear. ALL REPEAT ●... -
Page 33: Adjusting The Picture Quality
BASIC OPERATIONS ON DVD DECK Adjusting The Picture Quality You can obtain optimal picture quality by selecting an appropriate picture mode. Press ON SCREEN twice to access the on-screen bar. CANCEL Press selection keys to select A B, then press ENTER. The pop-up window appears under the selected item. -
Page 34: Programme Playback
BASIC OPERATIONS ON DVD DECK VIDEO Random Playback Suitable for playing back a video source disc. The outlines on the played back pictures will be soft. To clear the on-screen bar Press ON SCREEN. You can play back all the tracks on the disc in random order. While stopped Programme Playback Press ON SCREEN twice to access the on-screen bar. -
Page 35: Basic Recording
BASIC OPERATIONS ON DVD DECK NOTES: Basic Recording ● It is recommended to format a DVD-RAM disc before use if you use the disc on this unit for the first time. (A pg. 70) ● When using a brand-new DVD-RW disc, format the disc either in VR mode or in Video mode. -
Page 36: Recording Features
BASIC OPERATIONS ON DVD DECK Instant Timer Recording (ITR) Recording Features It is possible to set the recording time during recording. Upon completing recording, the unit stops and shut off automatically. ● Turn on the unit. Press R on the unit to start recording. ●... -
Page 37: Free Rate Function
BASIC OPERATIONS ON DVD DECK Free Rate Function Receiving Stereo And Bilingual Programmes To record the entire programme, the unit automatically sets the Your unit is equipped with a Digital stereo sound decoder (NICAM) appropriate recording mode depending on the combination of the making reception of stereo and bilingual broadcasts possible. -
Page 38: Timer Recording
TIMER RECORDING The APLUSCODE NO.B you entered and the matching timer VIDEO Plus+ Timer Programming recording information are displayed on the TV screen. Check the programme data. To cancel this setting, press RETURN. IMPORTANT: Make sure the channel position number you wish to record is You can programme this unit to timer record as many as 8 displayed. -
Page 39: Manual Timer Programming
TIMER RECORDING Press selection keys to set the desired stop time (ASTOPB), Manual Timer Programming then press E. Each press of F G increases/decreases the stop time in ● 1 minute interval. ● To increase/decrease the stop time in 30 minutes interval, press and hold F G. -
Page 40: On-Disc Timer Programming
TIMER RECORDING To Make The Disc For On-Disc Timer Programming On-Disc Timer Programming Press PROG to access the Programme Check PROGRAMME CHECK screen. ++++++++++++++++++ NEW TIMER PROGRAMME ++++++++++++++++++ Press selection keys to On-Disc Timer Programming is a function used with discs that are select ADISC TIMER especially intended for a specific programme. - Page 41 TIMER RECORDING To Timer Record The Programme With The How Discs Are Overwritten Programmed Disc (Example 1) To record a 1-hour serial drama every Friday in SP mode Load a programmed disc. Press DVD A to turn off the power. ●...
-
Page 42: Check, Cancel And Change Programmes
TIMER RECORDING When Programmes Overlap Each Other Check, Cancel And Change Programmes If APROGRAMME OVERLAPPEDB appears, you have another programme overlapping the programme you have just made. Press PROG. Programme Check screen appears and conflicting programmes will be highlighted in pink. Example: Programme 3 DVD A PROGRAMME CHECK... -
Page 43: Automatic Satellite Programme Recording
TIMER RECORDING Automatic Satellite Programme ● Make sure the satellite receiver is connected to the unit’s [L-2 IN/DECODER] connector. Recording ● Programme the timer on the satellite receiver. Set AL-2 SELECTB to ASAT VIDEO/RGBB or ASAT S-VIDEO/ This function allows you to automatically record a satellite RGBB. -
Page 44: Navigation
NAVIGATION Using Library Database Navigation system, you can easily modify Library Database Navigation registered information, edit the title or play list, as well as search for the beginning of each title. About registration of information The following information is automatically registered for each title when ordinary recording or timer recording is performed, then The Library Database Navigation enables you to search and select stored in an area specified on the unit. -
Page 45: Basic Operation Of Original Information
NAVIGATION Protect Title (DVD-RAM & DVD-RW (VR mode) only) Basic Operation Of Original Information You can protect titles to prevent accidental erasure of the You can scan the beginning of the title easily and play back with important titles. the Library Database Navigation. Press NAVIGATION to display the Library Database Navigation screen. - Page 46 NAVIGATION Delete Unwanted Part Of The Title (DVD-RAM & DVD-RW (VR mode) only) You can delete unwanted part of a title. Press NAVIGATION to ORIGINAL PLAY LIST LIBRARY display the Library 0001 REMAIN TIME 87min(SP) Database Navigation screen. Press selection keys to DANCE select AORIGINALB, then DANCE CURNIV...
-
Page 47: Edit Original Information
NAVIGATION Modify Title Name Edit Original Information Perform steps 1 - 4 of AModify IndexB (A pg. 47) before continuing. Press selection keys to MODIFY INDEX MODIFY NAME MODIFY CATEGORY select AMODIFY NAMEB, DANCE CURNIV then press ENTER. ● Turn on the TV and select an input mode such as EXT1. DELETE DELETE ALL ●... -
Page 48: Basic Operation Of Play List Information
NAVIGATION Confirm the arrow is on Basic Operation Of Play List Information CREATE AINB, then press ENTER. ● The edit-in time is displayed on the left of 0:00:29:24 the AINB window. -:--:--:-- : : : TOTAL TIME Press I to resume Play List playback. -
Page 49: Edit Play List Information
NAVIGATION Modify Play List Name Edit Play List Information Perform steps 1 - 4 of AModify IndexB (A pg. 49) before continuing. Press selection keys to select AMODIFY NAMEB, then press ENTER. ● Turn on the TV and select an input mode such as EXT1. Input a new title name. -
Page 50: Move Scenes
NAVIGATION Delete Scenes Move Scenes Press NAVIGATION to Press NAVIGATION to ORIGINAL PLAY LIST LIBRARY ORIGINAL PLAY LIST LIBRARY display the Library display the Library 0001 REMAIN TIME 87min(SP) 0001 REMAIN TIME 87min(SP) Database Navigation Database Navigation screen. screen. Press selection keys to Press selection keys to DANCE DANCE... - Page 51 NAVIGATION Add Scenes Press NAVIGATION to display the Library Database Navigation screen. Press selection keys to ORIGINAL PLAY LIST LIBRARY select APLAY LISTB, then 0001 REMAIN TIME 87min(SP) press ENTER. Press selection keys to select a play list to which DANCE you wish to add a scene, then press G.
-
Page 52: Edit Library Information
It is not possible to register discs used for On-Disc Timer Programming. (A pg. 40) ● It is not possible to register discs formatted on devices other than JVC’s DVD recorders. NAVIGATION ● It is not possible to register discs recorded on devices other than Selection Keys JVC’s DVD recorders. -
Page 53: Playback With Mp3/Jpeg Navigation
NAVIGATION Locating The Desired Group And Tracks Playback With MP3/JPEG Navigation Load a disc. Press NAVIGATION. Press selection keys to select AMP 3B or AJPEGB, then press ENTER. This unit can play back discs that MP3 sound files and JPEG image files taken with digital still cameras or other devices are Press selection keys to select the desired group, then press recorded. -
Page 54: Editing
EDITING The following on-screen display for DV dubbing appears when DV Dubbing ON SCREEN is pressed while the channel has been set to ADVB. DV DUBBING AUDIO 1 You can dub programmes from a camcorder or DV equipment connected to the unit with a DV cable. The unit’s remote control allows you the limited control of the connected camcorder or DV equipment functions during dubbing. -
Page 55: Digital Audio Dubbing
EDITING Digital Audio Dubbing When you dub from DV equipment other than a camcorder You can dub selected audio from a DVD or Audio CD disc to a A Perform steps 1 - 3. digital audio device. B Locate the point from where you want to start dubbing, However, it is not possible to dub copy-protected discs. -
Page 56: Edit From A Camcorder
EDITING Make connections. Edit From A Camcorder A If the camcorder has no S-VIDEO output connector: ^ connect the camcorder’s AUDIO/VIDEO OUT connectors to You can use a camcorder as the source player and your unit as the the unit’s [VIDEO/AUDIO (L(MONO)/R)] input connectors on recording deck. -
Page 57: Edit To Or From Another Recorder
EDITING Connect another recorder’s 21-pin SCART connector to the Edit To Or From Another Recorder unit’s 21-pin SCART connector as illustrated. A When using your unit as the source player: You can use your unit as the source player or as the recording ^ connect its [L-1 IN/OUT] connector to the recording deck. -
Page 58: Output/Input Set
EDITING * The boldface settings below indicate the settings at your purchase. Output/Input Set L-1 OUTPUT SCART VIDEO / SCART S-VIDEO / SCART RGB / COMPONENT ● Turn on the TV and select an input mode such as EXT1. SCART VIDEO If a connected appliance’s input is compatible only with regular video signals, set to ASCART VIDEOB SCART S-VIDEO:... - Page 59 EDITING L-2 Select Setting ● If AL-2 SELECTB is set to ASAT S-VIDEO/RGBB, be sure to set AL-1 OUTPUTB to ASCART S-VIDEOB. Set AL-2 SELECTB to the appropriate mode depending on the type F-1 Input Setting of appliance connected to the unit’s [L-2 IN/DECODER] connector. Perform steps 1 and 2 of AL-1 Output And L-1 Input SettingB Set AF-1 INPUTB to the appropriate mode depending on the (A pg.
-
Page 60: System Connections
SYSTEM CONNECTIONS Connecting To A Satellite Receiver Connecting To A Dolby Digital Decoder Or An Amplifier With Built-in DTS Connect the satellite receiver to the [L-2 IN/DECODER] connector, then connect the [L-1 IN/OUT] connector to the TV’s connector. These instructions enable you to connect your unit to a Dolby NOTES: Digital Decoder or an amplifier with built-in DTS. -
Page 61: Subsidiary Settings
SUBSIDIARY SETTINGS * The boldface settings below indicate the settings at your purchase. Mode Set AUDIO OUTPUT DIGITAL AUDIO OUT DOLBY DIGITAL/PCM / STREAM/ ● Turn on the unit. / PCM ONLY ● Turn on the TV and select an input mode such as EXT1. Set to the appropriate mode according to the type of the device connected to [DIGITAL AUDIO OUT] connector. - Page 62 SUBSIDIARY SETTINGS RECORDING SET DISPLAY SET SAVE AS LIBRARY OFF / SUPERIMPOSE OFF / AUTO When this function is set to AONB, the recording information is When this function is set to AAUTOB, various operational indicators automatically stored in the library. For details, refer to AEdit Library appear on the TV screen.
-
Page 63: Remote Control Functions
This is the setting for engaging timer recording standby mode. Remote Control 1/2/3/4 Code Switching The remote control is capable of controlling four JVC video units Press TIMERj to engage timer recording standby mode. independently. Each of the units can respond to one of the four codes (1, 2, 3 or 4). -
Page 64: Scan Mode Set
SUBSIDIARY SETTINGS Scan Mode Set Tray Lock If you connect the unit and TV with Component Video Connection You can lock the disc tray to prohibit the unwanted disc ejection by (A pg. 11), you can select the scan mode from two modes: children. -
Page 65: Video Plus+ System Setup
SUBSIDIARY SETTINGS Guide Programme Number Set VIDEO Plus+ System Setup Press SET UP to access the Main Menu screen. IMPORTANT: Press selection keys to select AINITIAL SET UPB, then press Normally, Auto Set Up (A pg. 18), Preset Download (A pg. 19) ENTER for confirmation. -
Page 66: Tuner Set
SUBSIDIARY SETTINGS Tuner Set IMPORTANT: ● In certain reception conditions, station names may not be Your unit needs to memorise all necessary stations in channel stored correctly, and Auto Guide Programme Number Set may positions in order to record TV programmes. Auto Channel Set not work properly. -
Page 67: Manual Channel Set
SUBSIDIARY SETTINGS Manual Channel Set Delete A Channel Store channels that were not stored during Auto Set Up Perform steps 1 - 3 of AManual Channel SetB (A pg. 67). (A pg. 18), Preset Download (A pg. 19) or Auto Channel Set Press selection keys to select the channel you want to delete. - Page 68 SUBSIDIARY SETTINGS Set Stations (A) Fine-Tuning Channels Already Stored Set station names that are registered in your unit. Perform steps 1 - 3 of AManual Channel SetB (A pg. 67). Perform steps 1 - 3 of AManual Channel SetB (A pg. 67). Press selection keys to select the channel you want to fine- Press selection keys to select the channel you want to modify, tune, then press ENTER twice.
-
Page 69: Clock Set
SUBSIDIARY SETTINGS Press selection keys to select AJUST CLOCKB, then press Clock Set ENTER. Press selection keys to set to the desired mode, then press ENTER. ● The default setting is AOFFB. IMPORTANT: ● If you set to AOFFB, you can disregard the next step as you If you performed Auto Set Up (A pg. -
Page 70: Format A Disc
SUBSIDIARY SETTINGS Format A DVD-RAM Disc Format A Disc Press SET UP to access the Main Menu screen. Press selection keys to select ADVD SET UPB, then press ENTER. Some DVD-RAM/RW discs are unformatted. Press selection keys to DVD SET UP FUNCTION SET UP INITIAL SET UP Format the disc when you use an unformatted disc or you want to... -
Page 71: Finalise A Disc
● Although DVD-R/RW discs finalised on this unit become playable on DVD players compatible with DVD-R/RW discs, some discs still may not play, for which JVC cannot take responsibility. ● Marked points marked before finalising will be deleted, and titles will be divided automatically into AchaptersB approximately every 5 minutes. -
Page 72: Troubleshooting
The setting of the remote control code is inappropriate. ] Load a recordable disc on the unit. (A pg. 6) ] To operate the unit using a JVC TV remote control, set the ● The disc loaded is not formatted. - Page 73 TROUBLESHOOTING Timer Recording Other Problems Timer programming cannot be made. The image of the TV broadcast appears distorted on the TV screen. ● Date and time is not correct. ] Set date and time correctly. (A pg. 20, 69) ] Press PROGRESSIVE SCAN for 3 or more seconds so that the ●...
- Page 74 TROUBLESHOOTING On-screen Message THE i.LINK DEVICE THAT YOU HAVE CONNECTED IS NOT RECOGNIZED MAKE SURE THAT THE DEVICE IS CONNECTED PROPERLY DISC NOT REGISTERED IN THE LIBRARY AND POWERED ON REGISTER DISC? ● An attempt has been made to start DV dubbing when a digital ●...
-
Page 75: Appendix
APPENDIX Language Code List Afar Indonesian Russian Abkhazian Icelandic Kinyarwanda Afrikaans Hebrew Sanskrit Ameharic Yiddish Sindhi Arabic Javanese Sangho Assamese Georgian Serbo-Croatian Aymara Kazakh Singhalese Azerbaijani Greenlandic Slovak Bashkir Cambodian Slovenian Byelorussian Kannada Samoan Bulgarian Korean (KOR) Shona Bihari Kashmiri Somali Bislama Kurdish... -
Page 76: Tv Station And Id List
APPENDIX TV Station And ID List The AIDB abbreviation is what is shown on-screen in lieu of the station name. The AIDB abbreviation is listed in the Confirmation screen and is displayed on the TV screen when the unit is tuned to a different station. STATION NAME STATION NAME ANGL... - Page 77 APPENDIX TV Station Channel Number Guide Only the main stations are listed. There are in addition many relay stations, and full lists are available from the BBC and ITV. BBC1 BBC2 BBC1 BBC2 London & South-East North-West Bluebell Hill ......40 Caldbeck ......
-
Page 78: Specifications
SPECIFICATIONS GENERAL Input/Output Power requirement S-video input : 1.0 Vp-p, 75 K AC 220 V - 240 VH, 50 Hz/60 Hz : 0.3 Vp-p, 75 K Power consumption : 1.0 Vp-p, 75 K (pin jack) Video input Power on: 31 W Audio input : 2 Vrms (pin jack) Power off: 6.4 W... -
Page 79: List Of Terms
LIST OF TERMS ..........32 ........ 40 A-B Repeat Playback On-Disc Timer Programming ........33 ............ 25 Adjusting The Picture Quality One Touch Replay ............26 ............31 Angle Selection On-screen Bar ........... 27 ............ 16 Audio Channel Selection On-Screen Display ....... - Page 80 Printed in China © 2005 Victor Company of Japan, Limited 0305CSH-SW-SC...