Canon Color imageCLASS MF8050Cn Basic Operation Manual
Canon imageclass mf8050cn: user guide
Hide thumbs
Also See for Color imageCLASS MF8050Cn:
- Basic operation manual (159 pages) ,
- Starter manual (33 pages) ,
- Specifications (2 pages)
Table of Contents
Advertisement
Quick Links
Basic Operation Guide
Network Setting Procedure
Security Functions
Searching in Detail
See the e-Manual.
User Software CD-ROM
Searching the Installation and
Connection Procedure
See the Starter Guide.
Be sure to read the manual before using
the machine.
Keep the manual for future reference.
Quick View- Perform Useful Tasks
1
Before Using the Machine
2
Document and Paper Handling
3
Co p yi n g
4
Printing from a Computer
5
Registering a Destination in the
Address Book
6
Using the Fax Functions
7
Using the Scan Functions
8
M ai n t en an ce
9
Tr o u b l esh o o t i n g
10
Registering/
Setting the Various Functions
11
A p p en d i x
Next
Page
P.1-1
P.2-1
P.3-1
P.4-1
P.5-1
P.6-1
P.7-1
P.8-1
P.9-1
P.10-1
P.11-1
Advertisement
Chapters
Table of Contents
Troubleshooting

Related Manuals for Canon Color imageCLASS MF8050Cn


Summary of Contents for Canon Color imageCLASS MF8050Cn
-
Page 1: Basic Operation Guide
M ai n t en an ce Searching in Detail See the e-Manual. User Software CD-ROM P.9-1 Tr o u b l esh o o t i n g Searching the Installation and Registering/ Connection Procedure P.10-1 Setting the Various Functions See the Starter Guide. - Page 2 Network Settings & Remote UI There are a variety of copy functions that are available in later pages of this manual as well as in the e-manual. You can enlarge or reduce copies as well as copy multiple documents onto one sheet. Additionally, you can erase the background of documents or adjust the density and image quality before copying.
- Page 3 Network Settings & Remote UI There are a variety of print functions that are available in later pages of this manual as well as in the e-manual. Enlarge or reduce documents and print multiple-page data onto one sheet. If you are using the MF8350Cdn, you can also perform 2-sided printing.
- Page 4 Network Settings & Remote UI There are a variety of fax functions that are available in later pages of this manual as well as in the e-manual. The machine is equipped with a Super G3 fax, with high transmission speeds as well as the PC function which can send a document from a computer directly, which reduces paper costs.
- Page 5 You can print the stored documents at any time. If you do not then dialing ID number for fax receiving. need them, you can delete them, saving paper to be used.
- Page 6 Network Settings & Remote UI There are a variety of scan functions that are available in later pages of this manual as well as in the e-manual. You can easily send scanned documents to your computer as well as save scanned images or documents to a USB memory directly from the machine.
- Page 7 Network Settings & Remote UI There are a variety of network settings that are available in later pages of this manual as well as in the e-manual. Since the machine has the built-in network board, you can print, fax, and scan via a network from a computer. You can also perform efficient management by configuring the machine using the Remote UI.
-
Page 8: Table Of Contents
2-sided Printing (MF8350Cdn Only) Placing Documents Checking/Deleting Print Jobs Placing Documents on the Platen Glass Checking Print Status in the Middle of Printing or Waiting Loading Document in the Feeder Deleting Print Job in the Middle of Printing or Waiting Paper Requirements... - Page 9 5. Registering a Destination in the Changing the Fax Settings (Items to Be Specified Using the Address Book [Menu] Button) 6-17 The Procedure for Specifying the Settings for Sending 6-17 Address Book Setting Items for the Send Settings 6-17 Register Username 6-18 One-touch Keys Change Defaults...
- Page 10 Paper Jams in the Multi-purpose Tray (MF8350Cdn Only) Paper Jams in the Manual Feed Slot (MF8050Cn Only) Paper Jams in the Rear Cover or Duplex Unit (MF8350Cdn Only) Paper Jams in the Output Area (MF8350Cdn Only) Paper Jams in the Output Area and Rear Cover (MF8050Cn Only)
-
Page 11: Manuals For The Machine
Registering a Destination in the Functions • Appendix Address Book • Using the Fax Functions e-Manual The e-Manual is included in the User Software CD-ROM. • Setting and Managing from Read the desired chapter • Basic Operation • Computer Copy to suit your needs. -
Page 12: Available Features
"Available Features" (→P.vi) The display used in this manual The display used in this manual is the factory preset display for the MF8350Cdn in default setting. Depending on the system configuration and product purchased, the appearance of the display may differ. -
Page 13: Important Safety Instructions
Important Safety Instructions Please read these "Important Safety Instructions" thoroughly before operating the machine. As these instructions are intended to prevent injury to the user and other persons or destruction of property, always pay attention to these instructions and operational requirements. -
Page 14: Maintenance And Inspections
Lightening the machine and unplug the power plug if the machine can result in a fire, electrical shock or malfunction. will not be used for an extended period of time, such as for several days. CAUTION •... - Page 15 • When loading paper or removing jammed documents or A part of the power cord becomes hot. paper, be careful not to cut your hands with the edges of the paper. • Check regularly that the power cord and plug are not han- dled in the following manner.
- Page 16 2. Avoid using the telephone during an electrical storm, as there may be a remote risk of electric shock from lightning. 3. Do not use the telephone to report a gas leak in the vicinity of the leak.
-
Page 17: Installation Requirements And Handling
• If water droplets (condensation) form inside the machine, (If you use the machine for a long time or to perform a large this can result in paper jams or poor print quality. amount of printing in a poorly ventilated room, the ozone... -
Page 18: Customer Support
If you encounter a problem with the machine's operation, try to solve it by using the informa- tion in Chapter 11. If you cannot solve the problem or if you think your machine needs servicing, contact Canon Customer Care Center at 1-800-828-4040 between the hours of 8:00 A.M. -
Page 19: Legal Notices
Legal Notices (3) You may use the SOFTWARE solely for use with the Canon As an ENERGY STAR Partner, Canon U.S.A., Inc. product you purchased (the “PRODUCT”). has determined that this product meets the ENERGY STAR Program for energy efficiency. - Page 20 C. Power Requirements This equipment has been tested and found to comply with the limits for a class B digital device, pursuant to Part 15 of the FCC The machine should be connected to a standard 120 volt Rules. These limits are designed to provide reasonable protec- AC, three-wire grounded outlet only.
-
Page 21: Users In Canada
• The Ringer Equivalence Number is an indication of the sion, the date and time it is sent and an identification of the maximum number of devices allowed to be connected to business or other entity, or other individual sending the mes- a telephone interface. -
Page 22: Utilisation Au Canada
étrangers) NOTE NOTE Respecte les limites de la classe B de la NMB-003 du Canada. Canon vous conseille d’utiliser une ligne individuelle conforme aux normes industrielles, à savoir: ligne téléphonique 2,500 (pour appareil à clavier) ou 500 (pour appareil à... -
Page 23: Laser Safety
Laser Safety This machine complies with 21 CFR Chapter 1 Subchapter J as a Class 1 laser product under the U.S. Department of Health and Human Services (DHHS) Radiation Performance Standard according to the Radiation Control for Health and Safety Act of 1968. - Page 24 xviii...
-
Page 25: Before Using The Machine
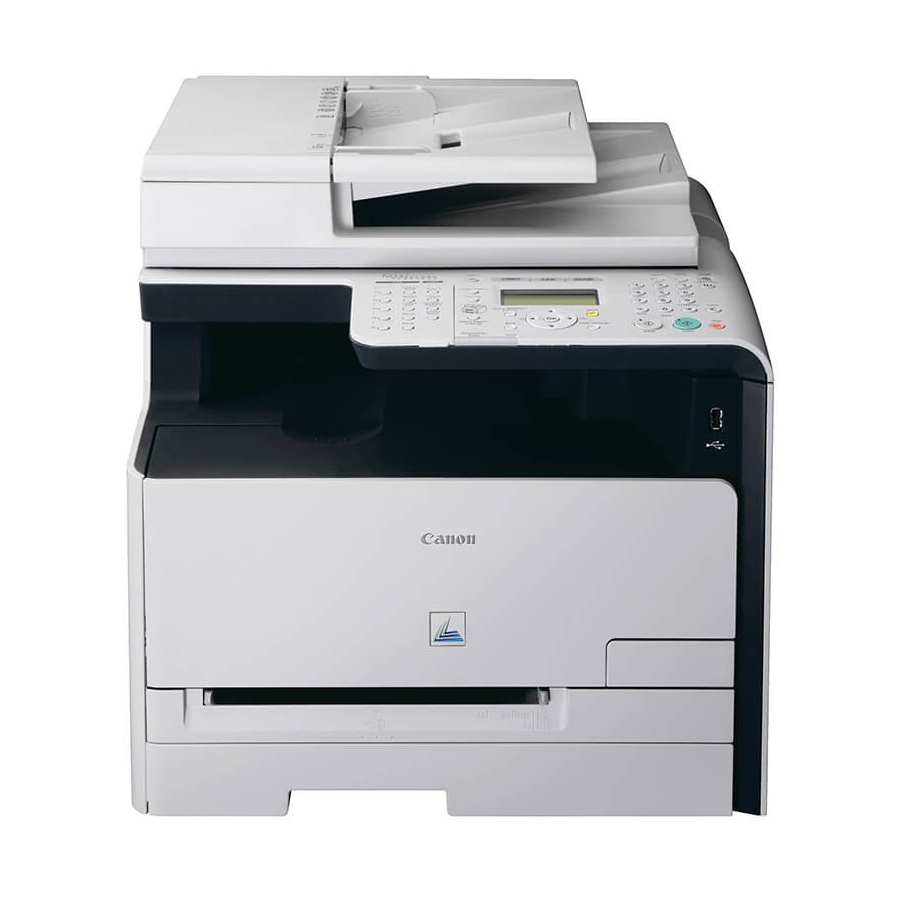
Chapter Before Using the Machine This category describes the features of the machine and its useful functions. Names and Functions on Each Part of the Machine 1-2 Front Side Back Side Interior Multi-purpose Tray (Manual Feed Slot) Paper Cassette Operation Panel... -
Page 26: Names And Functions On Each Part Of The Machine
(18) Original guides Tray extension Adjust to the width of the original. Pull out the tray extension when the paper is hanging out of the multi-purpose tray such as Legal size paper. Feeder Document delivery tray The feeder enable you to automatically perform continuous scanning the documents. -
Page 27: Back Side
(7) (8) (3) (4) MF8050Cn USB port Rating label Connect the USB cable. The current value indicated in this rating label shows the average power current consumption. LAN port Ventilation slots Connect the LAN cable. Telephone line jack Power supply Connect the telephone cable. -
Page 28: Interior
MF8350Cdn MF8050Cn Y (Yellow) toner cartridge slot K (Black) toner cartridge slot The Y (yellow) toner cartridge is installed in this slot. The K (black) toner cartridge is installed in this slot. M (Magenta) toner cartridge slot Toner cartridge tray The M (magenta) toner cartridge is installed in this slot. -
Page 29: Multi-Purpose Tray (Manual Feed Slot)
Open to prevent the paper from hanging out of the multi- purpose tray when loading long-size paper, such as A4. The auxiliary tray (MF8350Cdn Only) Be sure to pull out this tray when loading paper in the multi- purpose tray. -
Page 30: Paper Cassette
Lock release lever Lock release lever (changing cassette size) Hold this lever to slide the paper guides. While holding this lever, pull out the paper cassette when loading paper longer than A4 size. Paper guide Adjust the position of the paper guides to the paper. -
Page 31: Operation Panel
Specifies the settings for 2-sided printing. Switch the entry mode of characters. When sending a fax, • [Frame Erase] key (MF8050Cn only) using the key to transmit the tone signal from the dial line. Specifies the settings for frame erasing when copying. • [#] key [Image Quality] key/[Density] key Press to enter symbols. -
Page 32: Fax Operation Panel
[Color] key (21) [Select Paper/Settings] key Starts the copy/scan/operation in color. Registers a size and type of paper to be loaded in the paper (15) [Reset] key cassette or multi-purpose tray. [Paper Select] indicator Resets the settings. (Resets the copy/scan/fax mode to the standard mode.) -
Page 33: Lcd (Standby Mode)
NOTE - - - - - - - - - - - - - - - - - - - - - - - - - - - - - - - - - - - - - - -... -
Page 34: Text Input Method
Enter information into the machine using the following key. Moving the Cursor (Entering a Space) Move with [ ] or [ Move a cursor to end of the characters and press [ ], then a space is entered. Delete the Characters Delete with [ ] (Clear). -
Page 35: Setting The Sleep Timer
NOTE - - - - - - - - - - - - - - - - - - - - - - - - - - - - - - - - - - - - - - -... - Page 36 1-12...
-
Page 37: Document And Paper Handling
When Printing Paper with a Letterhead or Logo 2-14 Printing on Envelopes 2-15 Setting a Paper Size and Type 2-16 For the Paper Cassette 2-16 Registering the Default Paper Settings for the Multi-purpose Tray (Manual Feed Slot) 2-16 Registering a Custom Paper Size 2-17... -
Page 38: Documents Requirements
1 sheet Maximum 50 sheets * When copying transparent documents such as tracing paper or transparencies, use a piece of plain white paper to cover the document after placing it face-down on the platen glass. 21 lb Bond (80 g/m... -
Page 39: Fax
3/64 in. 3/64 in. (1 mm) (1 mm) Scan (Saving in a Computer) Platen Glass Feeder 1/16 in. (1.5 mm) Scan (Saving in a USB Memory) Platen Glass Feeder 1/16 in. (1.5 mm) 1/64 in. (0.5 mm) 1/64 in. (0.5 mm) -
Page 40: Placing Documents
Place a document face down. Pull out the tray extension before loading the large size document. Pull out the tray extension when the document is hanging out of the document feeder tray. Align the document with the appropriate paper size marks. - Page 41 IMPORTANT Be sure to align the original guides with the width of the paper If the original guides are too loose or too tight, this may result in misfeeds or paper jams. While scanning a document Do not add or remove documents.
-
Page 42: Paper Requirements
You can load paper of the following custom paper sizes. * MF8350Cdn Width 4" to 8 1/2" (100 to 215.9 mm); Length 5 7/8" to 14" (148 to 355.6 mm) * MF8050Cn Width 3" to 8 1/2" (76.2 to 215.9 mm); Length 5" to 14" (127 to 355.6 mm) You can load paper of the following custom paper sizes. -
Page 43: Paper Type
Only in MF8350Cdn, auto 2-sided print in A4 or LETTER size is available. Recycled paper can be used. Use only the transparencies designed for laser printers. Canon recommends that you use Canon type transparencies with this machine. To prevent paper jams, do not use the following types of paper. -
Page 44: Printable Range
Printable Range The shaded area indicates the approximate printable area of A4 paper and envelope. Note that the margin widths listed below are rough standards and there may be slight variations in actual use. 1/4 in. 1/4 in. (5 mm) (5 mm) 1/4 in. -
Page 45: Loading Paper
NOTE - - - - - - - - - - - - - - - - - - - - - - - - - - - - - - - - - - - - - - -... -
Page 46: When Loading Envelopes
When loading envelopes Align the paper guides with the loaded paper. (1) Close the envelope flap. (2) Place the stack of envelopes on a flat surface, flatten them to release any remaining air, and be sure that the edges are pressed tightly. -
Page 47: In The Multi-Purpose Tray (For Mf8350Cdn)
"Paper Loading Orientation" (→P.2-14) the different paper from that is in the paper cassette. Open the multi-purpose tray. Hold the handle at the center of the tray to open the multi- purpose tray. When loading envelopes (1) Close the envelope flap. -
Page 48: In The Manual Feed Slot (For Mf8050Cn)
When the paper touches the back of the tray, it is sent into the slot a little. Only one sheet of the paper can be loaded in the manual feed slot. -
Page 49: Precautions When Loading Paper
NOTE - - - - - - - - - - - - - - - - - - - - - - - - - - - - - - - - - - - - - -... -
Page 50: Paper Loading Orientation
Paper Loading Orientation When Printing Paper with a Letterhead or Logo Load the paper in the proper orientation as follows. Be sure to load paper in portrait orientation. l Paper cassette : Feeding direction) Portrait layout Landscape layout Paper cassette... -
Page 51: Printing On Envelopes
Paper cassette Envelope Monarch*, No.10, DL, ISO-C5 Load the envelopes so that the flap is toward the left of the paper cassette when they are viewed from the front. Close the flap and load the envelope. -
Page 52: Setting A Paper Size And Type
Select the paper type with [ ] or [ ], and then press [OK]. If the setting is different from the size of the loaded paper, an error message appears, or printing is not performed correctly. Paper Type Plain 2 (19 lb Bond-... -
Page 53: Registering A Custom Paper Size
If you select <Custom Size> Select <Multi-Purpose Tray> with [ ] or [ Specifies the size of <X> direction and <Y> direction of the and then press [OK]. custom paper. Paper Settings (1) Select the direction with [ ] or [ ], and then press [OK]. - Page 54 Register Custom Paper Select <Not Registered> with [ ] or [ ], and then press [OK]. When selecting the registered custom paper, you can edit and delete the custom paper. Register Custom Paper 1. Not Registered 2. Not Registered 3. Not Registered Specifies the size of <X>...
-
Page 55: Copying
Adjusting the Density Selecting Image Quality (Copy) 2-Sided Copying (MF8350Cdn Only) Enlarging/Reducing Copies Multiple Documents onto One Sheet (N on 1) Collating Copies Erase Dark Borders and Frame Lines (Frame Erase) Emphasize the Outline of an Image (Sharpness) Copying the ID Card... -
Page 56: Basic Copying Method
Place documents on the platen glass or load them in the feeder. "Placing Documents" (→P.2-4) "Documents Requirements" (→P.2-2) * Up to 50 documents can be loaded in the feeder. The 51st and subsequent documents are not scanned. Press [ Use numeric keys to enter the desired copy quantity (1 to 99). -
Page 57: Copy Settings
Original Type: Text... density darker. 2-Sided: Off Adjusting density with [ ] or [ ] → [OK] * You can display the setting screen also by selecting Background Adjustment Adjusting the color <Density> in the copy mode screen. Setting screen*... -
Page 58: Selecting Image Quality (Copy)
Map (Quality)> This option scans the document at a high resolution. Photo Priority You can set the priority for image quality either of text or photos. <Printed This option is suitable for the documents that contain photos printed in Image>... -
Page 59: Enlarging/Reducing Copies
(1) Select <Custom Ratio> with [ ] or [ ] → [OK] (2) Specify the ratio with [ ] or [ You can also enter the copy ratio using the numeric keys. Copy Ratio Custom Ratio Custom Ratio 100% Direct... -
Page 60: Collating Copies
Select <On> with [ ] or [ ] → [OK] Printouts of a complete job are grouped. For example, if you are copying three copies of a three-page <Off> document, printouts of a complete job are grouped, arranged in this page order: "1, 1, 1", "2, 2, 2", "3, 3, 3". -
Page 61: Copying The Id Card
Place the card with a 1/4" (5 mm) space created from the left edge NOTE - - - - - - - - - - - - - - - - - - - - - - - - - - - - - - - - - - - - - - of the platen glass. -
Page 62: Changing The Default Values
Changing the Default Values The default values of the copy are the function which is applied Select a setting item with [ ] or [ ], and then when [ ] (Reset) is pressed or the power is turned ON. You press [OK]. -
Page 63: Printing From A Computer
Printing from a Computer Scaling Print Output Printing Multiple Documents onto One Sheet 2-sided Printing (MF8350Cdn Only) Checking/Deleting Print Jobs Checking Print Status in the Middle of Printing or Waiting Deleting Print Job in the Middle of Printing or Waiting... -
Page 64: Installing The Printer Driver
→ Network Settings → Computer Settings About the printer driver The printer driver is software required for printing from an application. Print data will be sent to the printer after converting print data of application software to data for the printer. -
Page 65: Printing From A Computer
NOTE - - - - - - - - - - - - - - - - - - - - - - - - - - - - - - - - - - - - - - •... -
Page 66: 2-Sided Printing (Mf8350Cdn Only)
NOTE - - - - - - - - - - - - - - - - - - - - - - - - - - - - - - - - - - - - - - -... -
Page 67: Checking Print Status In The Middle Of Printing Or Waiting
NOTE - - - - - - - - - - - - - - - - - - - - - - - - - - - - - - - - - - - - - - -... -
Page 69: Registering A Destination In The Address Book
Chapter Registering a Destination in the Address Book This section describes the procedures for registering destinations in the address book and changing or deleting the registered settings. Address Book One-touch Keys Coded Dialing Group Dialing Storing/Editing One-Touch Keys Storing/Editing from the Operation Panel... -
Page 70: Address Book
"Storing/Editing Recipients for Group Dialing" (→P.5-9) NOTE - - - - - - - - - - - - - - - - - - - - - - - - - - - - - - - - - - - - - -... -
Page 71: Storing/Editing One-Touch Keys
] (Address Book). <Apply> When storing a one-touch key newly Name: CANON Destination: (1) Confirm that <Register New to Address Book> is selected, and then One-Touch: 01 press [OK]. (9) Use the numeric keys to specify <Destination>. Register New to Addr Press [OK] to specify <Settings>... -
Page 72: Storing/Editing From The Remote Ui
When editing a registered one-touch key (3) Select a destination that you want to delete with [ ] or [ and then press [OK]. (1) Press [ CANON 0123456789 CANON 0123456789 (4) Select <Yes> with [ ], and then press [OK]. - Page 73 (3) Specify the required settings in the edit screen for destinations, and then click [OK]. When deleting a registered one-touch key (1) Select the check box for which you want to delete the number, and then click [Delete]. Click [Not Registered] or the number which is not registered.
-
Page 74: Storing/Editing Coded Dial Codes
Press [ ](Address Book). Destination (Max 40) When storing a coded dial code newly 0123456789 (1) Confirm that <Register New to Address Book> is selected, and then <Apply> press [OK]. Settings Register New to Addr (9) Select <Apply> with [ ], and then press [OK]. - Page 75 Address Book Details Name: CANON Delete from Address Destination: 0123456... Coded Dial: 001 (3) Select a destination that you want to delete with [ ] or [ When editing a registered one-touch key and then press [OK]. (1) Press [...
-
Page 76: Storing/Editing From The Remote Ui
Storing/Editing from the Remote UI When deleting a registered coded dial code (1) Select the check box for which you want to delete the number, and then click [Delete]. Start the web browser. Click [Not Registered] or the number which is not Enter "http://<the IP address of the machine>/"... -
Page 77: Storing/Editing Recipients For Group Dialing
(4) Select <Group> with [ ], and then press [OK]. • Before registering group addresses, register them for an unused one-touch key or coded dial code. Keep a one-touch key or coded Destination Type dial available for group dialing. •... - Page 78 CAON02 9876543... CAON02 9876543... CAON03 0011223... CAON03 00112233 (12) Repeat Step (10) and (11) to select the destinations to be added. (7) Select <Apply> with [ ], and then press [OK]. (13) Select <Apply> with [ ], and then press [OK].
- Page 79 GROUP 3 Destinat Address Book Details (4) Select <Yes> with [ ], and then press [OK]. (3) Select a group for which the group name is changed with ] or [ ], and then press [OK]. Delete from address book? CAON02 9876543...
-
Page 80: Storing/Editing From The Remote Ui
(1) Click the number or name. (2) Click [Edit]. (3) Click [Address Book]. (4) Click [One-Touch] or [Coded Dial] from the drop-down list, select the check box for the number to be added in a group, and then click [OK]. 5-12... - Page 81 Click [One-Touch] or [Coded Dial] from the drop- down list, select the check box for the number to be registered in a group, and then click [OK]. Check if the registered destinations are displayed in [Members List], and then click [OK].
- Page 82 5-14...
-
Page 83: Using The Fax Functions
Chapter Using the Fax Functions This section describes the procedure for using the fax functions. Basic Method for Sending Faxes Changing the Fax Settings (Items to Be Specified Using the [Menu] Button) 6-17 Canceling Sending Fax Documents The Procedure for Specifying the Settings for Sending... -
Page 84: Basic Method For Sending Faxes
(3) When all documents are scanned completely, select <Start The settings specified here are effective only for the current sending Sending>, and then press [OK]. operation. To make the settings effective for all the copy operations, see "Changing the Default Values for Fax" (→P.6-16). Canceling Sending Fax Documents When <Cancel?>... -
Page 85: Fax Settings
<->. This can reduce the moire effect (patchy patterns called "moire"). If you want to clearly scan text or lines, adjust the sharpness to <+>. It is appropriate to scan documents which are blueprints or thinly... -
Page 86: Specifying Destinations
] (Clear). Specifying Destinations Using the One-Touch Keys Press the one-touch key (01 to 19) of the destination. To use this feature, you need to register destinations in one-touch keys beforehand. "Storing/Editing One-Touch Keys" (→P.5-3) If incorrect keys are pressed After pressing [ ] (Reset), repeat the procedure from the document scanning. -
Page 87: Specifying Destinations Using The Group Dialing
After entering the characters from the operation panel and searching the abbreviation of destinations from the registered address book (one-touch keys, coded dial, or group dialing), the destinations to be specified appear on the display. You can specify the displayed address as a destination. -
Page 88: Redialing (Manual Redialing)
NOTE - - - - - - - - - - - - - - - - - - - - - - - - - - - - - - - - - - - - - - -... -
Page 89: Useful Fax Sending Method
NOTE - - - - - - - - - - - - - - - - - - - - - - - - - - - - - - - - - - - - - - -... -
Page 90: Sending A Fax Abroad (Adding Pauses)
NOTE - - - - - - - - - - - - - - - - - - - - - - - - - - - - - - - - - - - - - - -... -
Page 91: Sending To Multiple Destinations At A Time (Sequential Broadcast)
NOTE - - - - - - - - - - - - - - - - - - - - - - - - - - - - - - - - - - - - - - -... -
Page 92: Receiving Faxes
Operation for when an incoming call is received Th e m ac h i n e ju d g e s w h e t her the incom ing call is a fax or voice c all.* Wh e n th e c a l l i s a f a x When the call is a voice c all The machine receives the fax automatically. - Page 93 T h e ma c h i n e c a n n o t re c e iv e a c a l l an d fa x .*...
-
Page 94: Changing The Receive Mode
- <End>: Disconnects the call. - <Receive>: Receives a fax. If you select <Fax/Tel> and press [OK], you need to specify the detailed settings. See "Detailed Settings for the Fax/Tel Mode" (→P.6-12) and specify Select <Apply> with [ ] or [ ], and then press the settings. -
Page 95: Checking/Deleting/Transferring Fax Documents In The Memory
Checking/Operating Fax Documents in Status Monitor/Cancel Memory Device Status Copy Job Status You can check or operate the status of the fax documents in Fax Job Status/Histo the memory. Print Job Status/Hi... Checking/Canceling Fax Transmission Documents You can check the detailed information about fax documents Select <Receive Job Status>... -
Page 96: Checking/Deleting Received Fax Documents
NOTE - - - - - - - - - - - - - - - - - - - - - - - - - - - - - - - - - - - - - - -... -
Page 97: Checking The History Of Received/Sent Fax Documents
Checking the History of Received/Sent Fax Documents Press [ ] (Status Monitor/Cancel) to close the screen. You can check the history of the received or sent documents. Keys to be used for this operation Status Monitor/Cancel Press [ ] (Status Monitor/Cancel). -
Page 98: Changing The Default Values For Fax
Changing the Default Values for Fax The default values for fax are the function which is applied Select <Change Defaults> with [ ] or [ ], and automatically when [ ] (Reset) is pressed or the power is then press [OK]. -
Page 99: Changing The Fax Settings
Changing the Fax Settings (Items to Be Specified Using the [Menu] Button) Change the settings for sending and receiving faxes. Select <Send Settings> with [ ] or [ ], and then For details on the procedure for setting specifications or the press [OK]. -
Page 100: Register Username
NOTE - - - - - - - - - - - - - - - - - - - - - - - - - - - - - - - - - - - - - - -... -
Page 101: Pause Time
Automatic redialing enables the machine to automatically redial the recipient's fax number if the recipient cannot be Menu reached due to a busy line, or if a sending error occurs. Common Settings You can set the number of time or the interval for redialing. -
Page 102: Setting Items For The Receive Settings
Setting Items for the Receive Settings Received Page Footer You can specify whether a received date, day of the week, time, The receive settings have the following items. number, and page number at the bottom of documents when Send/Receive Settings printing received documents. -
Page 103: Incoming Ring
NOTE - - - - - - - - - - - - - - - - - - - - - - - - - - - - - - - - - - - - - - -... -
Page 104: Setting Items For The System Settings
However, you can store the documents temporarily in the "Restrict New memory without printing. You can print the stored documents Destinations" (→P.6-23) at any time. If you do not need them, you can delete them, "Allow Driver Faxing" (→ P.6-23) saving paper to be used. -
Page 105: Address Book Pin
NOTE - - - - - - - - - - - - - - - - - - - - - - - - - - - - - - - - - - - - - - -... - Page 106 6-24...
-
Page 107: Using The Scan Functions
Chapter Using the Scan Functions The documents scanned by the machine can be stored in a computer or a USB memory. Basic Operation Methods for Scanning Scanning Documents and Saving Them in a Computer (USB & Network Connection) Saving Scanned Documents in a USB Memory... -
Page 108: Basic Operation Methods For Scanning
NOTE - - - - - - - - - - - - - - - - - - - - - - - - - - - - - - - - - - - - - - -... -
Page 109: Saving Scanned Documents In A Usb Memory
NOTE - - - - - - - - - - - - - - - - - - - - - - - - - - - - - - - - - - - - - - -... - Page 110 ], and then press [OK]. Status Monitor/Cancel Device Status Copy Job Status Fax Job Status/Hist... Print Job Status/Hi... (3) Select <Remove Memory Media> with [ ] or [ and then press [OK]. Device Status Paper Information Toner Gauge Remove Memory Media Check Counter (4) Remove the USB memory.
-
Page 111: Maintenance
Chapter Maintenance This section describes the maintenance of this machine, replacement of the toner cartridges, and the adjustment of this machine such as calibration. Cleaning the Machine Cleaning the Exterior Cleaning the Fixing Unit Cleaning the ITB Cleaning the Platen Glass... -
Page 112: Cleaning The Machine
NOTE - - - - - - - - - - - - - - - - - - - - - - - - - - - - - - - - - - - - - - -... -
Page 113: Cleaning The Itb
Turn OFF the main power switch and disconnect the power cord from If dirt sticks to the transfer belt and results in deterioration in the AC power outlet. Failure to do so can result in a fire or electrical print quality, clean the transfer belt inside the machine. -
Page 114: Cleaning The Feeder Automatically
Cleaning the Feeder Automatically Load 10 sheets of A4 or Letter size plain paper in the feeder, and then press [OK]. If your documents have black streaks or appear dirty after Cleaning starts. It takes approximately 65 seconds. copying them using the feeder, this may be caused by pencil lead rubbing off the documents and onto the roller. -
Page 115: Replacing Toner Cartridges
: 1,500 sheets Canon Cartridge 116 Cyan The average yield is on the basis of "ISO/IEC 19798"* when printing A4 size paper with the default print density setting. * "ISO/IEC 19798" is the global standard related to "Method for the determination of toner cartridge yield for color printers and multi- function devices that contain printer components"... -
Page 116: Handling Toner Cartridges
NOTE - - - - - - - - - - - - - - - - - - - - - - - - - - - - - - - - - - - - - - -... -
Page 117: When A Message Appears
NOTE - - - - - - - - - - - - - - - - - - - - - - - - - - - - - - - - - - - - - - -... -
Page 118: Precautions When Replacing Toner Cartridges
If you cannot close the front cover Make sure that the toner cartridge tray is closed. Do not try to forcefully close the front cover, as this may damage the machine. - - - - - - - - - - - - - - - - - - - - - - - - - - - - - - - - - - - - - - - - - - - - - Precautions when Replacing Toner Cartridges See "Maintenance and Inspections"... -
Page 119: Purchase Consumables
NOTE - - - - - - - - - - - - - - - - - - - - - - - - - - - - - - - - - - - - - - -... -
Page 120: Recycling Used Cartridges
Instead, this rapidly growing program returns used cartridges to the manufacturing process, thus conserving an array of resources. Becoming a part of this worthwhile program is easy. When your cartridge is of no further use, simply follow the instructions detailed for U.S. -
Page 121: Shipping
• Give the shipment to your UPS driver when you receive your next regular delivery; (UPS may charge a fee for customers who call UPS to pick up a cartridge shipment if they do not already have a delivery scheduled.) •... -
Page 122: Canada Program-Canada Programme
• Deposit your empty cartridge in any full size street mailbox or take it to your local Canada Post outlet or franchise. Option B: Volume Box Return (eight or more cartridges) We encourage you to use this option as a more efficient way to ship cartridges. -
Page 123: Transporting The Machine
Power cord (5) Unplug the power plug from the AC power outlet. (6) Remove it from the machine. * Whether the cable is connected or not varies depending on your environment. Disconnect the power cord. If a LAN cable is connected, disconnect it from the machine. -
Page 124: Precautions When Transporting The Machine
Be sure to turn off the power switches of the machine and your computer, and then unplug the power plug and interface cables. Failure to do so can damage the cables or cords, resulting in a fire or electrical shock. -
Page 125: Troubleshooting
Chapter Troubleshooting This section describes solutions for cases such as where a paper jam occurs and where trouble is not solved. Clearing Jams Document Jams in the Feeder Paper Jams in the Paper Cassette (Cassette 1 or 2) Paper Jams in the Multi-purpose Tray (MF8350Cdn Only) -
Page 126: Clearing Jams
NOTE - - - - - - - - - - - - - - - - - - - - - - - - - - - - - - - - - - - - - - -... -
Page 127: Paper Jams In The Paper Cassette (Cassette 1 Or 2)
Pull out the paper cassette. Hold the paper cassette with both hands. Remove the document by pulling it gently If the optional paper cassette (Cassette 2) is installed in MF8350Cdn, pull out the optional paper cassette also. Remove the paper by pulling it gently. -
Page 128: Paper Jams In The Multi-Purpose Tray (Mf8350Cdn Only)
Do not touch the rubber pad (A) Touching it may result in deterioration in print quality. If the jammed paper cannot be removed easily Do not try to remove it forcefully but proceed to Step 3. Close the multi-purpose tray. -
Page 129: Paper Jams In The Manual Feed Slot (Mf8050Cn Only)
NOTE - - - - - - - - - - - - - - - - - - - - - - - - - - - - - - - - - - - - - - -... -
Page 130: Paper Jams In The Rear Cover Or Duplex Unit (Mf8350Cdn Only)
(MF8350Cdn Only) (1) Hold the tabs (A) on both sides. (2) Push them down. Referring to the procedure on the display, follow the steps below to remove jammed documents. Keys to be used for this operation Remove the paper by pulling it gently. -
Page 131: Paper Jams In The Output Area (Mf8350Cdn Only)
Referring to the procedure on the display, follow the steps below to remove jammed documents. Keys to be used for this operation Make sure that no paper is jammed inside the paper output guide, and then close it. Remove the paper by pulling it gently. -
Page 132: Paper Jams In The Output Area And Rear Cover (Mf8050Cn Only)
The machine is ready to print. Paper Jams in the Output Area and Rear Cover (MF8050Cn Only) Referring to the procedure on the display, follow the steps below to remove jammed documents. Keys to be used for this operation Remove the paper by pulling it gently. -
Page 133: Display Messages
The message appears when the paper size specified in <Drawer 1>, <Drawer 2>*, or <Multi-Purpose Tray> in the <Paper Settings> menu is different from the size of the paper loaded in the multi-purpose tray. If the message appears, perform the following operations. -
Page 134: Troubleshooting
"Clearing Jams" (→P.9-2) Turn OFF the main power switch of the machine, wait for more than 10 seconds, and then turn it ON. When the problem is solved, the Error indicator is turned off, and the display returns to the standby mode. If the Error indicator keeps blinking, unplug the power cord, and contact your local authorized Canon dealer or the Canon help line. -
Page 135: Is A Message Displayed On The Display?
If there is no problem Is the telephone line connected or configured properly? Check that the telephone cable is correctly connected. Check if the cables for the telephone line port and external device port on the back of the machine are connected inversely. -
Page 136: If A Power Failure Occurs
IMPORTANT Data storage for when power supply is cut off Even if power is suddenly lost due to a power failure or accidental unplugging, any sent or received documents stored in memory are backed up for about 5 minutes. NOTE - - - - - - - - - - - - - - - - - - - - - - - - - - - - - - - - - - - - - - - - - - - - - - - - - - - - - - - - - - - - - - - - - - - - - - - - - - - - - - - - - - - - - - - Charging the built-in battery It takes approximately 5 hours to completely charge the built-in battery after the machine is turned ON. -
Page 137: If You Cannot Solve A Problem
Steps you have taken to solve the problem and the results WARNING If the machine makes strange noises, emits smoke or odd odor, turn OFF the main power switch immediately, disconnect the power cord, and contact Canon Customer Care Center. Do not attempt to disassemble or repair the machine yourself. -
Page 138: Customer Support (Canada)
Steps you have taken to solve the problem and the results WARNING If the machine makes strange noises, emits smoke or odd odor, turn OFF the main power switch immediately, disconnect the power cord, and contact Canon Customer Care Center. Do not attempt to disassemble or repair the machine yourself. -
Page 139: Registering/Setting The Various Functions
Chapter Registering/Setting the Various Functions You can set or change the machine functions from the setting menu according to your purpose. Setting Menu List 10-2 Printing a User Data List 10-2 Contents of the Setting Menu 10-2... -
Page 140: Setting Menu List
Cancels the setting and returns to the initial Reset screen. - Settings or values with " * " mark may not appear depending on the availability of the optional accessories. - Settings or values with " " mark appear only in MF8350Cdn. - Page 141 <How to display> CD-ROM Press [Paper Select/Settings]. Invert Screen Colors CD-ROM The paper selection screen is displayed. Press [ ] to select [Paper Settings], and then press [OK]. Default Screen Screen After Auto Reset CD-ROM Selected Screen Inch Entry CD-ROM...
- Page 142 Auto, Preset - Reduction Ratio: 97, 95, 90, 75(%) - Reduction Direction: Vertical/Horizontal, Vertical Multi-Purpose Tray Received Page Footer P.6-20 Drawer 1 Continue Printing When Toner Is Low P.6-20 Drawer 2 Fax Settings CD-ROM Basic Settings Other Fax No. P.6-18...
- Page 143 Sleep Timer 10 to 240 (minutes) (MF8350Cdn) P.1-11 Auto Obtain 20 to 240 (minutes) (MF8050Cn) Select Protocol Auto Reset Timer 0=Off, 1 to 2 to 9 (minutes) DHCP CD-ROM Auto Offline Time 0=Off, 1 to 5 to 60 (minutes) BOOTP CD-ROM...
- Page 144 Initilize All - Ethernet Type: 10 Base-T, 100 Base-TX Reports MAC Address <How to display> Communications Settings Press [Report]. The report output menu is displayed. Fax Settings Send Start Speed 33600 bps P.6-22 14400 bps Receive Start Speed P.6-22 9600 bps...
-
Page 145: Appendix
Chapter Appendix Please note that the following contents may be changed due to the improvement of product, or depending on the products to be released in the future. Main Specifications 11-2 Machine Specifications 11-2 Copy specifications 11-2 Printer Specification 11-2... -
Page 146: Main Specifications
• MF8050Cn Multi-purpose tray: Approx 50 sheets (16 to 24 17" x 19 1/8" x 16 7/8" (430 mm x 484 mm x 429 lb Bond (60 to 90 g/m Paper cassette: Approx 250 sheets (16 to 24 lb •... -
Page 147: Scanner Specifications
• 10 Base-T Power Supply From main unit Host Interface • Hi-Speed USB 17 1/8" x 17 7/8" x 4 7/8" (435 mm x 455 mm x • Dimensions 124 mm) Operating System Windows 2000/XP/Vista/7 Weight Approx. 8.8 lb (4 kg) •... -
Page 148: Index
Coded Dial Codes External telephone jack ........1-3 Editing ................5-6 Storing ................5-6 Coded Dialing ............5-2 Contents of the Setting Menu ....... 10-2 Fax Documents in the Memory ..... 6-13 Copying ..............3-1 Forwarding ..............6-13 2-Sided Copying ............3-4 History................ - Page 149 Storing ................5-3 One-touch Keys............5-2 If <Incorrect size/setting> Appears ....9-9 Operation Panel ............. 1-7 If a Power Failure Occurs ........9-12 Fax Operation Panel ..........1-8 If You Cannot Solve a Problem....... 9-13 Main Operation Panel ..........1-7 Image Quality Operation panel .............
- Page 150 Transporting the Machine ....... 8-13 Tray extension ............1-2 Troubleshooting ............ 9-1 Clearing Jams ............... 9-2 Error Code ..............9-9 If <Incorrect size/setting> Appears....9-9 If a Power Failure Occurs ........9-12 If You Cannot Solve a Problem ....... 9-13 11-6...
- Page 151 CANON EUROPA N.V. Bovenkerkerweg 59-61 1185 XB Amstelveen, The Netherlands CANON CHINA CO., LTD. 15F Jinbao Building No.89 Jinbao Street, Dongcheng District, Beijing 100005, China CANON SINGAPORE PTE. LTD. 1 HarbourFront Avenue #04-01 Keppel Bay Tower, Singapore 098632 CANON AUSTRALIA PTY. LTD.