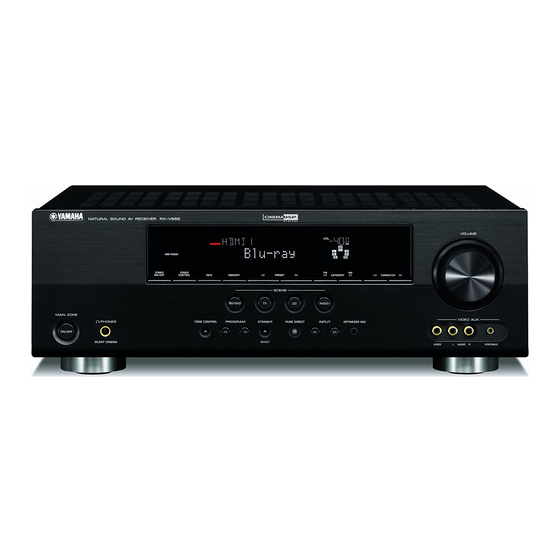
Yamaha RX-V665 Owner's Manual
Owner's manual
Hide thumbs
Also See for RX-V665:
- Owner's manual (148 pages) ,
- Hook-up example (2 pages) ,
- Firmware update procedures (5 pages)
Table of Contents
Advertisement
Advertisement
Table of Contents
Troubleshooting

Related Manuals for Yamaha RX-V665


Summary of Contents for Yamaha RX-V665
- Page 1 RX-V665 AV Receiver OWNER’S MANUAL...
-
Page 3: Important Safety Instructions
If this product is This product, when installed as indicated in the instructions found to be the source of interference, which can be determined by contained in this manual, meets FCC requirements. Modifications turning the unit “OFF”... - Page 4 Allow ventilation space of at least power plug from the wall outlet in the main room and Zone2. 30 cm on the top, 20 cm on the left and right, and 20 cm on 19 VOLTAGE SELECTOR (Asia and General models only) the back of this unit.
-
Page 5: Table Of Contents
................46 Bluetooth™ wireless audio receiver....17 Selecting a decoder used with a sound field program Using the VIDEO AUX jacks on the front panel ..17 ................46 Connecting the FM and AM antennas ..... 18 Setting sound field parameters......... 46 Connecting the power cable........ -
Page 6: Introduction
INTRODUCTION Features ■ Built-in 7-channel power amplifier • Neural Surround decoder (U.S.A. model only) • Minimum RMS Output Power (1 kHz, 0.9% THD, 8 Ω) ■ Radio tuners • FRONT L/R: 90 W + 90 W • FM/AM tuning capability •... -
Page 7: About This Manual
• y indicates a tip for your operation. • Some operations can be performed by using either the keys on the front panel or the ones on the remote control. In case the key names differ between the front panel and the remote control, the key name on the remote control is given in parentheses. -
Page 8: Part Names And Functions
Lights up during pass-through output of an HDMI signal input Changes FM/AM frequencies or XM/SIRIUS tuner channels. to this unit while this unit is on standby (see page 54). SCENE Switches between linked sets of input sources and sound field programs (see page 22). -
Page 9: Rear Panel
MULTI CH INPUT PRE OUT SIRIUS terminal MONITOR OUT For connecting a SiriusConnect tuner (separately sold) (see Outputs visual signals from this unit to a video monitor, such as page 35). a TV (see page 14). DOCK terminal MULTI CH INPUT terminals... -
Page 10: Front Panel Display
Lights up when a SiriusConnect tuner is selected as an input source. XM indicator Lights up when an XM tuner is selected as an input source. HDMI indicator Lights up during normal communication when HDMI is selected as an input source. -
Page 11: Remote Control
40). TRANSMIT MUTE Lights up when a signal is output from the remote control. Turns the mute function of the sound output on and off (see CODE SET page 23). Sets remote control codes for external component operations External component operation keys (see page 59). -
Page 12: Quick Start Guide
Quick start guide When you use this product for the first time, perform setup following the steps below. See the related pages for details on operations and settings. Step 1: Prepare items for setup Step 2: Set up your speakers... -
Page 13: Preparation
• Do not spill water or other liquids on the remote control. • Do not drop the remote control. compartment. • Do not leave or store the remote control in the following conditions: – places of high humidity, such as near a bath Snap the battery compartment cover back –... -
Page 14: Connections
Connections Placing speakers This unit supports up to 7.1-channel surround. We recommended the following speaker layout in order to obtain the optimum surround effect. 7.1-channel speaker layout Speaker channels ■ Front left and right speakers (FL and FR) The front speakers are used for the front channel sounds (stereo sound) and effect sounds. -
Page 15: Connecting Speakers
When you connect speakers, connect them to the respective terminals as follows, according to your speaker layout. • Connect optional presence speakers or Zone2 speakers (see page 57) to the EXTRA SP jacks. • You can connect up to two subwoofers. When two subwoofers are connected, the same sound is output from them. ■... -
Page 16: Connecting The Speaker Cable
Connect one end of the colored/striped cable to the “+” (red) terminal of this unit and the other end to that of your speaker, and connect one end of the other cable to the “–” (black) terminal of this unit and the other end to that of your speaker. -
Page 17: Information On Jacks And Cable Plugs
Connections Information on jacks and cable plugs This unit has the following input and output jacks. Use jacks and cables appropriate for components that you are connecting. ■ ■ Audio jacks Video/audio jacks Jack and cables Description Jack and cables... -
Page 18: Connecting A Tv Monitor Or Projector
Connecting a TV monitor or projector Connect a video monitor such as a TV or projector to an output terminal of this unit. You can select one of the following three types according to the input signal format supported by the video monitor. -
Page 19: Connecting Other Components
SCENE function (see page 22). • You can change the name of the input source displayed on the front panel display or the OSD on the video monitor as necessary (see page 55). -
Page 20: Connecting An External Amplifier
About audio/video output terminals Among the analog audio and analog video signals input to this unit via input terminals, the audio/video signals of the selected input sources are output from the AV OUT jack and AUDIO OUT jack. An HDMI input signal, COMPONENT VIDEO input signal or digital audio input signal cannot be output. -
Page 21: Using Remote In/Out Jacks
When the components are the Yamaha products and have the capability of the transmission of the remote control Use the VIDEO AUX jacks on the front panel to connect a signals, connect the REMOTE IN and REMOTE OUT game console or a video camera to this unit. Be sure to... -
Page 22: Connecting The Fm And Am Antennas
(or gPOWER on the remote control) • Position the AM loop antenna away from this unit. • If you cannot get good reception, we recommend that you use an outdoor to turn on this unit. antenna. For more details, consult the nearest authorized Yamaha dealer or service center. -
Page 23: Optimizing The Speaker Setting For Your Listening Room (Ypao)
We recommend that you first adjust the output characteristics with the YPAO when you use this unit. “MIC ON. View OSD MENU” appears on the front panel Caution display. - Page 24 • If you press oENTER before removing the optimizer microphone, speakers or outside the room. “1 Auto Setup” of “Speaker Setup” in the setup menu (see page 51) is displayed. When measurement is successfully completed, “YPAO Complete”...
-
Page 25: When An Error Message Is Displayed During Measurement
[ENTER]:Return Retry • See page 70 for details on warning messages. Performs “Auto Setup” again. • Optimization will not be performed while a warning message is Exit displayed. We recommend that you solve the problem and perform “Auto Setup” again. -
Page 26: Basic Operation
RADIO TUNER 7ch Enhancer • When this unit is on standby, you can turn on this unit by pressing the • You can change the input source name displayed on the front panel SCENE key. display or the OSD on the video monitor as necessary (see •... -
Page 27: Muting Audio Output Temporarily (Mute)
The display returns the previous screen soon after you release the key. Notes • The tone control settings are not effective during playback in Pure Direct mode. • If you set the balance extremely off, sounds may not match those from other channels well. -
Page 28: Displaying Input Signal Information
Information displayed on the front panel display can be changed by pressing EINFO (or jINFO). • Input signal information is displayed on both a video monitor and the The following information can be displayed according to front panel display. -
Page 29: Enjoy The Sound Field Programs
Program name Notes • Sound field programs are stored for each input source. When you change the input source, the sound field program previously selected for that input source is applied again. • When you play back the Dolby Digital Plus, Dolby TrueHD, DTS Express, DTS-HD Master Audio, or DTS-HD High Resolution Audio sources, this unit does not apply any sound field program other than the surround decoder and they are played back in straight decode mode. - Page 30 Program Descriptions 2ch Stereo Use this program to mix down multi-channel sources to 2 channels. • When multi-channel signals (Dolby Digital and DTS) are input, they are downmixed to 2 channels and output from the front left and right speakers.
- Page 31 Surround-incompatible PCM signals are reproduced in stereo. The Neural Surround decoder is especially suitable for the XM HD Surround program of XM Satellite Radio. • An input source is played back in straight decode mode (see page 28) when multi-channel audio signal is input.
-
Page 32: Enjoying Unprocessed Input Sources (Straight Decoding Mode)
(see page 52), this unit operates in Virtual CINEMA DSP mode. Note • Virtual CINEMA DSP is not available in the following conditions even if you set “Sur. L/R SP” to “None” (see page 52). – headphone plug is connected to the PHONES jack. -
Page 33: Fm/Am Tuning
FM/AM tuning The FM/AM tuner of this unit provides the following two • You can switch between stereo and monaural for FM broadcast in the modes for tuning. option menu (see page 44). ■ Frequency tuning mode (Auto tuning/Manual To tune in by direct frequency tuning, enter... - Page 34 • Preset numbers to which no stations are registered will be skipped. preset • When “No Presets” or “No Presets in Memory” is displayed it means that no stations are registered. See page 29 and register stations. You can manually register AM stations or FM stations •...
-
Page 35: Satellite Radio Tuning (U.s.a. Model Only)
Listening to Satellite Radio To listen to Satellite Radio, you’ll need to connect either a SIRIUS or XM Satellite Radio tuner (sold separately) to your satellite-ready receiver. Satellite Radio is available to residents of the US (except Alaska and Hawaii). -
Page 36: Xm Satellite Radio ® Operations
008 80's • If no key is pressed within a few seconds after you enter a one-digit or two-digit number, this unit automatically confirms the entered channel number. -
Page 37: Registering Xm Satellite Radio Channels
• To store the selected channel under an empty preset number automatically, press and hold FMEMORY (or iMEMORY) 008 80's for more than 2 seconds instead of step 2. In this case, the following steps are unnecessary. • To cancel the preset operation, press oRETURN. -
Page 38: Displaying The Xm Satellite Radio™ Information
All CH Search 008:'80s Note :Decades :Sanumemo • If a status message or an error message appears on the front panel display :Road to India or video monitor, see “XM Satellite Radio” (see page 65). ■ Front panel display Press EINFO (or jINFO) repeatedly to toggle the following XM Satellite Radio information display modes. -
Page 39: Sirius Satellite Radio™ Tuning (U.s.a. Model Only)
SiriusConnect tuner must be placed at or near a window with no obstacles in the path to the sky. The orientation of the antenna for SIRIUS Satellite Radio online information the best reception differs depending on the area. Refer to the instruction... - Page 40 Press ITUNING/CH l / h (or iTUN./CH k / • If no key is pressed within a few seconds after you enter a one-digit or n) repeatedly to search for a channel within all two-digit number, this unit automatically confirms the entered channel number.
-
Page 41: Registering The Sirius Satellite Radio™ Channels
• You can also select a preset number by pressing the tNumeric keys. • If you select a preset number being used (“*” appears next to the preset number), the current preset channel will be overwritten. Press FMEMORY (or iMEMORY). -
Page 42: Setting The Parental Lock
Write it down the space provided below. Code number: ________________________________ • If you forget the Parental lock code or want to change it, reset it using “SR PIN” (see page 60). Tuning into the locked channels Press oENTER twice to confirm the code number. -
Page 43: Displaying The Sirius Satellite Radio™ Information
■ Video monitor (OSD) Note • If a status message or an error message appears on the front panel display Press qDISPLAY on the remote control to turn or video monitor, see “SIRIUS Satellite Radio” (see page 66). on or off the information display. -
Page 44: Using Ipod
• Once the connection between your iPod and this unit is complete, “iPod connected” appears on the front panel display. • For a complete list of status messages that appear on the front panel display and on the video monitor, see the “iPod” section on page 68. - Page 45 Using iPod™ Press oCursor k / n / l / h to select a Shuffle/repeat playback menu item and then oENTER to start You can use a special playback function such as shuffle playback. playback and repeat playback by setting the option menu.
-
Page 46: Using Bluetooth™ Components
Using Bluetooth™ components You can connect a Yamaha Bluetooth wireless audio receiver (such as YBA-10, sold separately) to the DOCK terminal of this unit and enjoy the music contents stored in your Bluetooth component (such as a portable music player) without wiring between this unit and the Bluetooth component. -
Page 47: Advanced Operation
ADVANCED OPERATION Setting the option menu for each input source (OPTION menu) This unit has an OPTION menu of frequently used menu items for input sources compatible with this unit. The procedure for setting the OPTION menu items is described below. - Page 48 Notes PLIIx Always reproduces signals in 6.1- or 7.1- • “No Signal” is displayed when no signals are input and “---” is displayed Music channel using the PLIIxMusic decoder whether when signals that this unit cannot recognize are input.
-
Page 49: Outputting A Video Signal Input From Another Input Source During Reproducing A Multi-Channel Audio Signal
See page 33. video monitor. For example, even if an audio and video When SIRIUS is selected: See page 37. component such as a DVD player that does not support a ■ Parental Lock multi-channel digital audio output, the video signal can be... -
Page 50: Editing Surround Decoders/Sound Field Programs
• PLIIx Movie (PLII Movie) • A complete list of the parameters of some sound field programs may exceed one page. In this case, press oCursor k / n to scroll • Neo:6 Cinema through pages. Setting sound field parameters To end the edit, press mSETUP. - Page 51 In a large size room such as a music Note hall, the duration from when reflected sound is heard until • When the presence speakers are not used, the 3D DSP parameters are not displayed. when the next reflected sound is heard is long. Thus, ■...
- Page 52 Reverberant sound attenuates faster as you decrease the value. Rev.Time adjustment allows you to create a natural reverberant sound, by setting the attenuation time longer for a sound source or room with less echo, or shorter for a Time Time sound source or room with more echo.
-
Page 53: Center Width
(dB) Choices: Off*/On Adjusts the soundscape of the front sound field. Sends Rev.LEVEL stereo signals to the surround speakers as well as the front speakers for a wraparound effect. Dimension Adjustable range: -3 to STD* to +3 Time Adjusts the difference in level between the front sound field and the surround sound field. -
Page 54: Operating Various Settings For This Unit (Setup Menu)
You can call the setup menu using the remote control and change the settings of various menus. You can change the following settings in the setup menu. For details, read “Basic operation of the setup menu” first, and see the respective pages. -
Page 55: Basic Operation Of The Setup Menu
;Memory Guard To finish the setting, press mSETUP. [ ]/[ ]:Up/Down [ENTER]:Enter • When oCursor or other keys do not work after completing the menu, Front panel display select the input source again using hInput selection keys. Speaker Setup ;Speaker Setup You can set various items for speakers. - Page 56 Note SMLx1 Select this when one small surround back • When “LFE/Bass Out” is set to “Front,” you can only select “Large.” If speaker is connected. “LFE/Bass Out” is changed to “Front,” “Front SP” automatically SMLx2 Select this when two small surround back switches to “Large”...
-
Page 57: Sound Setup
“SBL” and “SBR.” Off*/On Choices: • You can adjust the volume listening to test tones when you set “Test Switches between on and off of an oscillator that generates Tone” to “On” (see page 53). • If your subwoofer has a volume control or a crossover frequency control, test tones. -
Page 58: Function Setup
• When a video monitor is connected to this unit via the HDMI jack, this unit automatically detects a resolution that the monitor supports. An sync function or you set “HDMI Auto” to “Off.”... -
Page 59: Max Volume
VOLUME: low VOLUME: high The following characters are available for input. A to Z, 0 to 9, a to z, symbols (#, *, –, +, etc.) and space Auto Adjusts the dynamic range automatically. Not adjust the dynamic range automatically. -
Page 60: Dsp Parameter
Sets the maximum volume level and initial volume level You can set parameters for the sound field programs. For of Zone2. details, see page 46. Memory Guard • This item is displayed only when “Extra SP Assign” is set to “Zone2.” ■ Max Volume Off*/On Choices: Adjustable range: -30.0dB to +15.0dB / +16.5dB*... -
Page 61: Using Multi-Zone Configuration
Using multi-zone configuration This unit allows you to configure a multi-zone audio system. The Zone2 feature allows you to set this unit to reproduce separate input sources in the main zone and the second zone (Zone2). You can control this unit from the second zone using the supplied remote control. -
Page 62: Controlling Zone2
Switches bMAIN/ZONE2 to ZONE2 position, separately) connected to the DOCK terminal. and press gPOWER. Note • You must complete each step while the ZONE2 indicator is flashing on ■ Operating Zone2 the front panel display. Otherwise, the Zone2 mode is automatically canceled and this unit returns to the normal operation mode. -
Page 63: Controlling Other Components With The Remote Control
Controlling other components with the remote control You can control external components for a selected input source with the remote control. The keys available for controlling external components are as follows: eSOURCE POWER Default Input source Category Manufacturer Turns on and off an external component. -
Page 64: Advanced Setup
The default setting are marked with “*.” Press AMAIN ZONE ON/OFF, turns off this system, and press AMAIN ZONE ON/OFF • Set values are placed in XXX of the following parameters on an again. actual display screen. The value set in step 3 becomes effective, and this SP IMP. -
Page 65: Appendix
Troubleshooting Refer to the table below when this unit does not function properly. If the problem you are experiencing is not listed below or if the instruction below does not help, turn off this unit, disconnect the power cable, and contact the nearest authorized Yamaha dealer or service center. - Page 66 1) Change the input source to another one. 2) With the selected sound field program, sound is not output from that speaker. Select another sound field program. 3) “None” may have been selected for that speaker on this unit.
- Page 67 A DTS-CD is being played back. 1) When only noise is output 15, 44 If a DTS bitstream signal is not properly input to this unit, only noise is output. Connect the playback component to this unit by digital connection and play back the DTS-CD.
-
Page 68: Hdmi
The video software is copy-protected. disturbed. This unit suddenly The internal temperature becomes too Wait about 1 hour for this unit to cool down and then — enters the standby high and the overheat protection circuitry turn it back on. -
Page 69: Xm Satellite Radio (U.s.a. Model Only)
XM Satellite Radio (U.S.A. model only) If an operation takes longer than usual or an error occurs, one of the following messages may appear on the front panel display. In this case, read the cause and follow the corresponding remedies. -
Page 70: Sirius Satellite Radio (U.s.a. Model Only)
SIRIUS Satellite Radio (U.S.A. model only) If an operation takes longer than usual or an error occurs, one of the following messages may appear on the front panel display. In this case, read the cause and follow the corresponding remedies. -
Page 71: Remote Control
Wrong distance or angle. The remote control will function within a maximum does not work or range of 6 m (20 ft) and no more than 30 degrees function properly. offaxis from the front panel. Direct sunlight or lighting (from an Adjust the lighting angle or reposition this unit. -
Page 72: Ipod
Troubleshooting iPod™ Note • In case of a transmission error without a status message appearing on the front panel display and on the OSD, check the connection of your iPod (see page 17). Problem Cause Remedy page Loading... This unit is in the middle of recognizing the connection with your iPod. -
Page 73: Troubleshooting
Auto Setup (YPAO) Notes • If the “ERROR” or “WARNING” screen appears, resolve the problem and then run “Auto Setup” again. • Warning message “W-2” or “W-3” indicates that the adjusted settings may not be optimal. • Depending on the speakers, warning message “W-1” may appears even if the speaker connections are correct. - Page 74 W-2:OVER 24m (80ft) The distance between the speaker and the Bring the speaker within 24 m (80 ft.) area around — listening position is over 24 m (80 ft). the listening position. W-3:LEVEL ERROR...
-
Page 75: Glossary
Deep Color There are three modes available: “Music mode” for music sources, Deep Color refers to the use of various color depths in displays, up “Movie mode” for movie sources (for 2-channel sources only) and from the 24-bit depths in previous versions of the HDMI specification. -
Page 76: Dts Digital Surround
This channel reproduces low-frequency signals. The frequency range master, and 96/24 5.1-channel sound with full-quality full-motion of this channel is from 20 Hz to 120 Hz. This channel is counted as video for music programs and motion picture soundtracks on DVD 0.1 because it only enforces a low-frequency range compared to the... -
Page 77: Sound Field Program Information
Early reflections actually add clarity to the direct sound. compression artifact. As a result, flattened complexity due to the loss of high-frequency fidelity as well as lack of bass due to the loss of Reverberations low-frequency bass is compensated, providing improved performance These are caused by reflections from more than one of the overall sound system. -
Page 78: Information On Hdmi
Master Audio, DTS-HD High Resolution Audio, DTS Express • If the input source component can decode the bitstream audio signals of audio commentaries, you can play back the audio sources with the audio commentaries mixed down by using the following connections: –... -
Page 79: Specifications
[Asia and General models]........... 490 W ................86 dB or more • Dimensions (W x H x D) ........435 x 151 x 364 mm AV5, etc. Input Shorted (250 mV to Front Speakers) (17-1/8 x 6 x 14-3/8 in) ................ -
Page 80: Index
Cursor indicator, front panel display ....6 INPUT l / h, front panel ......4 ANTENNA jack, rear panel ......5 Cursors k / n / l / h, remote control ....7 Input selection key, remote control ....7 Aspect, 1 HDMI, function setup ....54 ■... - Page 81 PROGRAM l / h, front panel ......4 Standard, sound field program ....... 25 Projector connection ........14 Standby Through, 1 HDMI, function setup ... 54 PURE DIRECT, front panel ......4 Straight decoding mode ......... 28 Straight Enhancer, sound field program ..27 ■...
-
Page 82: List Of Remote Control Codes
List of remote control codes Ausind 0249 Clatronic 0243, 0249, 0259, Durabrand 0077, 0097, 0133, Autovox 0249, 0257, 0259, 0260, 0261, 0262, 0225 A.R. Systems 0274 0260, 0328 0268, 0269, 0273, 0271 Acme 0260 Aventura 0097 0274, 0328 Dwin 0224... - Page 83 Fujitsu Siemens 0425, 0426, 0427, Hinari 0261, 0262, 0266, Kaisui 0260, 0261, 0262, Magnavox 0072, 0088, 0090, 0428, 0429 0268, 0271, 0273, 0270, 0273, 0274, 0091, 0095, 0096, Funai 0033, 0034, 0035, 0274 0327, 0328 0098, 0114, 0115, 0036, 0037, 0097,...
- Page 84 0259, 0264, 0265 0304, 0324, 0325, Nikko 0072, 0077, 0096 0409, 0414 0243, 0250, 0257 0340, 0358, 0362, Nobliko 0249, 0260, 0263, Philips Magnavox 0089, 0114, 0115 Rhapsody 0327 0369, 0386, 0392, 0327 Phoenix 0243, 0257, 0268, R-Line 0268, 0271, 0274...
- Page 85 Sylvania 0072, 0088, 0089, Triumph 0274 Adventura 1023 Dumont 1072, 1078 0090, 0091, 0095, Uher 0243, 0249, 0265, Adyson 1090 Durabrand 1032 0096, 0097, 0098, 0268, 0274 Aiwa 1023, 1072, 1073, Dynatech 1023 0175, 0177, 0210 Ultravox 0257, 0260, 0263,...
- Page 86 1018, 1019, 1073 Panasonic 1007, 1008, 1009, Sentra 1076, 1090 Kodak 1021, 1022 1022, 1026, 1042, Sentron 1079, 1090 United Quick Star 1075, 1091 Korpel 1079, 1090 1043, 1068, 1082, Sharp 1031, 1045, 1057, Universum 1072, 1077, 1078 Kyoto 1090...
- Page 87 ATACOM 2318 Enzer 2302 2080, 2107, 2115, 2252, 2256, 2260, Audiovox 2111, 2199 Epson 2165 2116, 2141, 2188, 2268, 2282, 2332, Avious 2317 2219 2211, 2215, 2237, 2333, 2343, 2344, 2313 Finlux 2304, 2312, 2317 2239, 2285, 2293, 2345, 2367, 2371,...
- Page 88 2305 Yamaha 2018 Coolmax 3045 Proscan 3015, 3016 Starmedia 2308, 2318 3006 Pulsar 3040 Sungale 2158 Cryptovision 3060 PVP Stereo Visual Matrix Sunkai 2312 Bush 2060 Director 3006 3064 Superscan 2196 Panasonic 2037, 2038, 2039, Eastern 3025 Quasar 3040 2040, 2041, 2042...
- Page 89 4139 4090, 4093, 4135, DStv 4140 Hughes Network Systems Metz 4093 4136, 4137 Dune 4074 4021 Micro electronic 4136, 4137, 4139 AudioTon 4086, 4098 Echostar 4011, 4019, 4039, Humax 4051, 4075, 4076, Micro Technology 4139 Aurora 4140 4064, 4092, 4139...
- Page 90 4101, 4103 4138, 4150, 4152, 4139 Viewsat 4048 4153, 4155, 4156 Skyvision 4098 Visiosat 4095, 4098, 4138, Phoenix 4096 SM Electronic 4134, 4139 4139 Smart 4133, 4139 Phonotrend 4084, 4087, 4098 Voom 4065 Pioneer 4124, 4135 Sony 4017, 4020, 4135...
- Page 92 © 2009 Yamaha Corporation All rights reserved. Printed in China WQ95310...
- Page 93 RX-V665 The letters in circles and the numbers in squares correspond to those in the Owner's Manual. ■ Front panel VOLUME HDMI THROUGH ZONE2 ZONE2 ON/OFF CONTROL INFO MEMORY PRESET CATEGORY TUNING/CH SCENE BD/DVD RADIO MAIN ZONE VIDEO AUX PHONES...
- Page 94 ■ Remote control MAIN ZONE2 TRANSMIT CODE SET POWER POWER SOURCE SLEEP HDMI AUDIO V-AUX [ A ] [ B ] DOCK TUNER SIRIUS MULTI CATEGORY PRESET TUN./CH INFO MEMORY ENHANCER SUR. DECODE MOVIE MUSIC STEREO STRAIGHT PURE DIRECT SCENE...