Yamaha RX-V665 Owner's Manual
Hide thumbs
Also See for RX-V665:
- Owner's manual (96 pages) ,
- Hook-up example (2 pages) ,
- Firmware update procedures (5 pages)
Table of Contents
Advertisement
Available languages
Available languages
Advertisement
Chapters
Table of Contents

Related Manuals for Yamaha RX-V665


Summary of Contents for Yamaha RX-V665
- Page 1 RX-V665 AV Receiver OWNER’S MANUAL MANUAL DE INSTRUCCIONES...
- Page 2 12 Only voltage specified on this unit must be used. Using this unit with a higher voltage than specified is dangerous and may cause fire, damage to this unit, and/or personal injury. Yamaha will not be held responsible for any damage resulting from use of this unit with a voltage other than specified.
-
Page 3: Table Of Contents
Connecting an external amplifier......16 Function Setup ............45 Using REMOTE IN/OUT jacks....... 17 DSP Parameter............47 Connecting a Yamaha iPod universal dock or Memory Guard............47 Bluetooth™ wireless audio receiver....17 Using multi-zone configuration ......48 Using the VIDEO AUX jacks on the front panel ..17 Connecting Zone2............ -
Page 4: Introduction
[Video] Composite video x 1 ■ DOCK terminal • Phono input x 1 • DOCK terminal to connect a Yamaha iPod universal Output terminals dock (such as YDS-11, sold separately) or Bluetooth • Monitor output wireless audio receiver (such as YBA-10, sold... -
Page 5: About This Manual
DTS logos, Symbol, DTS-HD and DTS- HD Master Audio are trademark of DTS, Inc. © 1996-2007 DTS, Inc. All Rights Reserved. “SILENT CINEMA” is a trademark of Yamaha Corporation. iPod™ “iPod” is a trademark of Apple Inc., registered in the U.S. and other countries. -
Page 6: Part Names And Functions
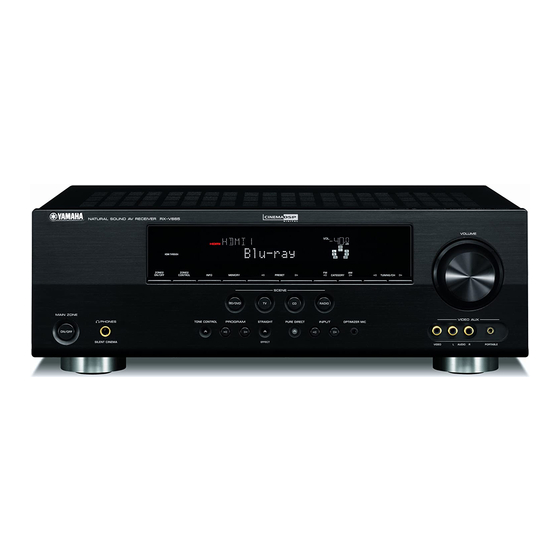
Part names and functions Front panel VOLUME HDMI THROUGH ZONE2 ZONE2 ON/OFF CONTROL INFO MEMORY PRESET TUNING SCENE BD/DVD RADIO MAIN ZONE VIDEO AUX PHONES TONE CONTROL PROGRAM STRAIGHT PURE DIRECT INPUT OPTIMIZER MIC ON/OFF SILENT CINEMA EFFECT VIDEO AUDIO PORTABLE MAIN ZONE ON/OFF PURE DIRECT... -
Page 7: Rear Panel
MULTI CH INPUT PRE OUT DOCK terminal MULTI CH INPUT jacks For connecting an optional Yamaha iPod universal dock (YDS- For connecting a player that supports a multi-channel output 11) or Bluetooth wireless audio receiver (YBA-10) (see page 16). (see page 17). -
Page 8: Front Panel Display
Part names and functions Front panel display VOL. SLEEP ZONE STEREO MUTE TUNED SBL SB SBR HDMI indicator Lights up during normal communication when HDMI is selected as an input source. CINEMA DSP indicator Lights up when a sound field program that uses CINEMA DSP is selected. -
Page 9: Remote Control
Transmits infrared signals. DISPLAY Changes the operation mode of the iPod connected to the MAIN/ZONE2 Yamaha iPod universal dock (see page 31). Switches amplifiers (Main or Zone2) to be operated by the remote control (see page 49). MUTE Turns the mute function of the sound output on and off TRANSMIT (see page 23). -
Page 10: Quick Start Guide
☞P. 11 • Connecting speakers Front right speaker Video monitor • This unit has a YPAO (Yamaha Parametric Room Acoustic Optimizer) that automatically optimizes this unit based on room acoustic Subwoofer characteristics (audio characteristics of the speakers, speaker positions, Front left speaker and room acoustics, etc.). -
Page 11: Preparation
PREPARATION Preparing remote control Installing batteries in the remote Using the remote control control The remote control transmits a directional infrared ray. Be sure to aim the remote control directly at the remote control sensor on this unit during operation. Remote control sensor window within 6 m (20 ft) Take off the battery compartment cover. -
Page 12: Connections
(LFE) sounds included in Dolby Digital and DTS signals. Use a subwoofer with a built-in 60˚ amplifier, such as the Yamaha Active Servo Processing 80˚ Subwoofer System. Place it exterior to the front left and right speakers facing slightly inward to reduce reflections... -
Page 13: Connecting Speakers
Connections ■ Presence left and right speakers (PL and PR) 0.5 to 1 m (1 to 3 ft) 0.5 to 1 m (1 to 3 ft) The presence speakers supplement the sound from the front speakers with extra ambient effects produced by the sound field programs (see page 25). -
Page 14: Connecting The Speaker Cable
Connections Connecting the speaker cable Caution • A speaker cable is a pair of insulated cables running side by side in general. One of the cables is colored differently or striped to indicate a polarity. Connect one end of the colored/striped cable to the “+” (red) terminal of this unit and the other end to that of your speaker, and connect one end of the other cable to the “–”... -
Page 15: Information On Jacks And Cable Plugs
Connections Information on jacks and cable plugs This unit has the following input and output jacks. Use jacks and cables appropriate for components that you are connecting. ■ ■ Audio jacks Video/audio jacks Jack and cables Description Jack and cables Description AUDIO jacks To transmit conventional analog... -
Page 16: Connecting A Tv Monitor Or Projector
Connections Connecting a TV monitor or projector Connect a video monitor such as a TV or projector to an output terminal of this unit. You can select one of the following three types according to the input signal format supported by the video monitor. Note •... -
Page 17: Connecting Other Components
Connections Connecting other components This unit has input and output terminals for respective input and output sources. You can reproduce sound and movies from input sources selected with the front panel display or remote control. Audio / video input Phono input Audio / video output (AV OUT) (AV 1-6) (PHONO) -
Page 18: Connecting An External Amplifier
Connections ■ Audio player Output jacks on the connected external component Input sources/jacks of this unit External components Output jacks External component with optical digital Optical digital output AV 1 (TV) OPTICAL output AV 4 OPTICAL External component with coaxial digital Coaxial digital output AV 2 COAXIAL... -
Page 19: Using Remote In/Out Jacks
Using REMOTE IN/OUT jacks Using the VIDEO AUX jacks on the front panel When the components are the Yamaha products and have the capability of the transmission of the remote control Use the VIDEO AUX jacks on the front panel to connect a signals, connect the REMOTE IN and REMOTE OUT game console or a video camera to this unit. -
Page 20: Connecting The Fm And Am Antennas
• Position the AM loop antenna away from this unit. • If you cannot get good reception, we recommend that you use an outdoor [General model] antenna. For more details, consult the nearest authorized Yamaha dealer or service center. Voltages are AC 110/120/220/230-240 V, 50/60 Hz. -
Page 21: Optimizing The Speaker Setting For Your Listening Room (Ypao)
Optimizing the speaker setting for your listening room (YPAO) This unit has a Yamaha Parametric Acoustic Optimizer (YPAO). With the YPAO, this unit automatically adjusts the output characteristics of your speakers based on speaker position, speaker performance, and the acoustic characteristics of the room. - Page 22 Optimizing the speaker setting for your listening room (YPAO) DIST To select a sound character for adjustment, Displays the speaker distance from the listening position press oCursor n to select “EQ Type” and in the following order: then press oCursor l / h. Closest speaker distance/Farthest speaker distance If this unit does not work when you press oCursor, press mSETUP once and then operate this unit.
-
Page 23: When An Error Message Is Displayed During Measurement
Optimizing the speaker setting for your listening room (YPAO) When an error message is displayed When a warning message is displayed during measurement after measurement If a problem occurs during measurement, “WARNING” is Press oCursor n once, and select “Retry” or displayed on the result display screen. -
Page 24: Basic Operation
SCENE key. display or the OSD on the video monitor as necessary (see • When connecting a Yamaha DVD/CD player that has the REMOTE OUT page 46). jack of this unit, you can play back a DVD/CD on the player by selecting BD/DVD or CD SCENE function. -
Page 25: Muting Audio Output Temporarily (Mute)
Playback Press hInput selection keys on the Enjoying pure hi-fi sound remote control for the input source whose Use Pure Direct mode to enjoy the pure high fidelity remote control code was registered in step 1 sound of the selected source. When Pure Direct mode is for about 3 seconds while pressing down activated, this unit plays back the selected source with the lSCENE key whose assignment you want... -
Page 26: Displaying Input Signal Information
Playback Displaying input signal information Using the sleep timer When HDMI1-4 or AV1-4 is selected as the input source, The sleep timer is useful if you want to go to sleep while you can display audio/video signal information. this unit is playing or recording a source. Press fSLEEP repeatedly to set the amount of •... -
Page 27: Enjoy The Sound Field Programs
Enjoy the sound field programs This unit is also equipped with a Yamaha digital sound field processing (DSP) chip. You can enjoy multi-channel sounds for almost all input sources using various sound field programs stored on the chip and a variety of surround decoders. - Page 28 Enjoy the sound field programs Program Descriptions Drama This sound field features stable reverberations that match a wide range of movie genres from serious dramas to musicals and comedies. The reverberations are modest but offer an optimum 3D feeling, reproducing effects tones and background music softly but cubically around clear words and center positioning in a way that does not fatigue the listener even after long hours of viewing.
- Page 29 Enjoy the sound field programs For Multi-channel stereo reproduction Program Descriptions 7ch Stereo Use this program to output sound from all speakers. When you play back multi-channel sources, this unit downmixes the source to 2 channels, and then outputs the sound from all speakers. This program creates a larger sound field and is ideal for background music at parties, etc.
-
Page 30: Enjoying Unprocessed Input Sources (Straight Decoding Mode)
Enjoy the sound field programs Enjoying unprocessed input sources Enjoy sound field programs with (Straight decoding mode) headphones (SILENT CINEMA™) In straight decoding mode, sounds are reproduced without SILENT CINEMA allows you to enjoy multi-channel sound field effect. 2-channel stereo sources are output sources with your headphones. -
Page 31: Fm/Am Tuning
FM/AM tuning When you press and release the key The FM/AM tuner of this unit provides the following two modes for tuning. The tuner increases or decreases the frequency in steps. Use this method when the tuner cannot receive strong ■... - Page 32 FM/AM tuning Press FMEMORY (or iMEMORY) again to • You can select the preset number at which the preset starts by pressing iPRESET k / n or oCursor k / n while the front register. panel display is in the state as shown in the below figure. When registration is complete, the screen returns to •...
-
Page 33: Using Ipod
• Some features may not be compatible depending on the model or the software version of your iPod. • Some features may not be available depending on the model of Yamaha iPod universal dock. The following sections describe the procedure when using the YDS-11. - Page 34 Using iPod™ Press oCursor k / n / l / h to select a Shuffle/repeat playback menu item and then oENTER to start You can use a special playback function such as shuffle playback. playback and repeat playback by setting the option menu. Menu items of “Music”...
-
Page 35: Using Bluetooth™ Components
Using Bluetooth™ components You can connect a Yamaha Bluetooth wireless audio receiver (such as YBA-10, sold separately) to the DOCK terminal of this unit and enjoy the music contents stored in your Bluetooth component (such as a portable music player) without wiring between this unit and the Bluetooth component. -
Page 36: Advanced Operation
ADVANCED OPERATION Setting the option menu for each input source (OPTION menu) This unit has an OPTION menu of frequently used menu items for input sources compatible with this unit. The procedure for setting the OPTION menu items is described below. Select an input source using OINPUT l / h OPTION menu items (or hInput selection keys). - Page 37 Setting the option menu for each input source (OPTION menu) ■ Extended Surround ■ Signal Info Input source: HDMI1-4, AV1-4 Input source: HDMI1-4, AV1-4 Choices: Auto*/PLIIxMovie/PLIIxMusic/EX/ES/ Displays information on audio and video signals on the video monitor and front panel display. You can change Selects whether to reproduce multi-channel input signals items to be displayed using oCursor k / n.
-
Page 38: Outputting A Video Signal Input From Another Input Source During Reproducing A Multi-Channel Audio Signal
Setting the option menu for each input source (OPTION menu) ■ Auto Preset Outputting a video signal input from Input source: TUNER another input source during Automatically detects radio stations in the FM frequency reproducing a multi-channel audio band and registers them as preset stations (see page 29). signal ■... -
Page 39: Editing Surround Decoders/Sound Field Programs
Editing surround decoders/sound field programs Press oCursor k / n to select the parameter Selecting a decoder used with a sound that you want to change, and press oCursor field program l / h to change the parameter. When using sound field programs for movies or TV An asterisk (*) appears on the left of the sound field programs, you can select a surround decoder to be used parameter name displayed on the monitor when you... - Page 40 Editing surround decoders/sound field programs Dialog Lift Adjusts attenuation characteristics of early-reflected sound. You can create a lively sound field (with a high Choices: 0* to 5 reverberant sound level) as you increase the value, and a Use this feature to adjust the vertical position of the dead sound field (with a low reverberant sound level) as dialogues in movies.
- Page 41 Editing surround decoders/sound field programs Rev.Time parameter adjusts the attenuation time of the Source sound rear reverberant sound based on the time that about 1kHz reverberant sound takes for 60dB of attenuation. Early reflections Reverberant sound attenuates faster as you decrease the value.
- Page 42 Editing surround decoders/sound field programs Rev.Level parameter adjusts the reverberation sound level. Decoder parameters Increasing the value of Rev.Level makes the reverbration sound level higher, which allows you to create more echo. You can customize decoder effects by setting the following parameters.
-
Page 43: Operating Various Settings For This Unit (Setup Menu)
Operating various settings for this unit (Setup menu) You can call the setup menu using the remote control and change the settings of various menus. You can change the following settings in the setup menu. For details, read “Basic operation of the setup menu” first, and see the respective pages. -
Page 44: Basic Operation Of The Setup Menu
Operating various settings for this unit (Setup menu) “A)Config” display (example) Basic operation of the setup menu A)Config The setup menu screen appears on both video display Center SP (OSD) and front panel display. Video display (OSD) Setup Menu None >Small Large . - Page 45 Operating various settings for this unit (Setup menu) LFE/Bass Out Center SP SWFR/Front/Both* None/Small*/Large Choices: Choices: Selects speaker(s) for outputting low-frequency Sets the size of center speaker. components of the LFE (low-frequency effect sound) None Select this when no center speaker is channel or other channels.
-
Page 46: Sound Setup
Operating various settings for this unit (Setup menu) Crossover Freq. ■ D)Equalizer Adjusts sound quality and tone using a parametric graphic 40Hz/60Hz/80Hz*/90Hz/100Hz/110Hz/120Hz/ Choices: equalizer. 160Hz/200Hz Sets the lower limit of the low frequency component EQ Type Select output from a speaker with a size set to “Small (SMLx1/ Auto PEQ/GEQ*/Off Choices: SMLx2).”... -
Page 47: Function Setup
Operating various settings for this unit (Setup menu) ■ Audio Output Outputs sound without adjusting the dynamic range of the input signals. Amp*/TV/Amp+TV Choices: Selects this unit or a component connected to this unit via ■ 2 Lipsync the HDMI OUT jack of this unit for reproducing sound Adjusts delay between video output and audio output. - Page 48 Operating various settings for this unit (Setup menu) ■ Max Volume 2 Display Adjustable range: -30.0dB to +15.0dB/+16.5dB* (5.0 dB step) You can set items for a monitor or the front panel display. Sets the maximum volume level so that the volume will ■...
-
Page 49: Dsp Parameter
Operating various settings for this unit (Setup menu) 5 Zone2 DSP Parameter Sets the maximum volume level and initial volume level You can set parameters for the sound field programs. For of Zone2. details, see page 37. Memory Guard • This item is displayed only when “Extra SP Assign” is set to “Zone2.” ■... -
Page 50: Using Multi-Zone Configuration
Compliance with minimum speaker impedance connections that best meet your requirements. • Some Yamaha models can be directly connected to the REMOTE jacks information for all channels must be maintained at all of this unit. You may not need use an infrared signal emitter for these times. -
Page 51: Controlling Zone2
Zone2 (see page 29). select the desired input source of Zone2. • Playing back music stored on your iPod stationed in a Yamaha iPod universal dock (such as YDS-11 sold Note separately) connected to the DOCK terminal. -
Page 52: Controlling Other Components With The Remote Control
Input source Category Manufacturer Turns on and off an external component. code oCursor, ENTER, RETURN [DOCK] DOCK Yamaha 5011 Operates the menus of external components. — — — qDISPLAY “—” indicates no assignment Switches between the screens of external components. -
Page 53: Advanced Setup
Setting a remote control ID actual display screen. REMOTE ID -XXX Two IDs are provided for the remote control of this unit. If another Yamaha amplifier is in the same room, setting a Choices: ID1*/ID2 different remote control ID to this unit prevents unwanted Sets a remote control ID. -
Page 54: Appendix
Refer to the table below when this unit does not function properly. If the problem you are experiencing is not listed below or if the instruction below does not help, turn off this unit, disconnect the power cable, and contact the nearest authorized Yamaha dealer or service center. General... - Page 55 Troubleshooting Problem Cause Remedy page No picture. An appropriate video input is not selected Select an appropriate video input on the monitor. — on the monitor. The composite output terminals are used If your monitor does not support the HDMI to output a component video signal, or the connection, connect it to the COMPONENT OUT COMPONENT VIDEO jacks are used to...
- Page 56 Troubleshooting Problem Cause Remedy page Press MSTRAIGHT or the kSTRAIGHT on the No sound is heard This unit is in the “STRAIGHT” mode from the surround and a monaural source is being played remote control to turn off the “STRAIGHT” mode. speakers.
-
Page 57: Hdmi
Troubleshooting Problem Cause Remedy page This unit does not The internal microcomputer is frozen due Disconnect the power cable from the AC wall outlet, — operate properly. to an external electric shock (such as wait about 30 seconds and then plug it in again. lightning or excessive static electricity) or by a drop in power supply voltage. -
Page 58: Remote Control
Troubleshooting Problem Cause Remedy page The desired station The signal is weak or the antenna Adjust the AM loop antenna orientation. cannot be tuned into connections are loose. Use the manual tuning method. with the automatic tuning method. There are continuous Supplied AM loop antenna is not Connect the AM loop antenna correctly even crackling and hissing... -
Page 59: Ipod
Connect error There is a problem with the signal path Turn off this unit and reconnect the Yamaha iPod from your iPod to this unit. universal dock to the DOCK terminal of this unit. Remove your iPod in the Yamaha iPod universal dock and then place it back in the dock. -
Page 60: Auto Setup (Ypao)
• Warning message “W-2” or “W-3” indicates that the adjusted settings may not be optimal. • Depending on the speakers, warning message “W-1” may appears even if the speaker connections are correct. • If error message “E-10” occurs repeatedly, contact a qualified Yamaha service center. Before Auto Setup... - Page 61 Troubleshooting Error message Cause Remedy page E-9:USER CANCEL “Auto Setup” was cancelled due to an Run “Auto Setup” again. inappropriate user operation. E-10:INTERNAL ERROR An internal error occurred. Run “Auto Setup” again. After Auto Setup Error message Cause Remedy page W-1:OUT OF PHASE Speaker polarity is not correct.
-
Page 62: Glossary
Glossary ■ ■ Audio and video synchronization (lip sync) Dolby Digital Surround EX Lip sync, an abbreviation for lip synchronization, is a technical term Dolby Digital EX creates 6 full-bandwidth output channels from 5.1- that involves both a problem and a capability of maintaining audio and channel sources. - Page 63 Glossary ■ ■ HDMI Direct Stream Digital (DSD) technology stores audio signals on HDMI (High-Definition Multimedia Interface) is the first industry- digital storage media, such as Super Audio CDs. Using DSD, signals supported, uncompressed, all-digital audio/video interface. Providing are stored as single bit values at a high-frequency sampling rate of an interface between any source (such as a set-top box or AV receiver) 2.8224 MHz, while noise shaping and oversampling are used to and an audio/video monitor (such as a digital television), HDMI...
-
Page 64: Sound Field Program Information
Based on a wealth of actually measured data, Yamaha CINEMA DSP provides the audiovisual experience of a movie theater in the listening room of your own home by using the Yamaha original sound field technology combined with various digital audio systems. -
Page 65: Information On Hdmi
Information on HDMI™ ■ HDMI signal compatibility Audio signals Audio signal types Audio signal formats Compatible media 2ch Linear PCM 2ch, 32-192 kHz, 16/20/24 bit CD, DVD-Video, DVD-Audio, etc. Multi-ch Linear PCM 8ch, 32-192 kHz, 16/20/24 bit DVD-Audio, Blu-ray Disc, HD DVD, etc. 2/5.1ch, 2.8224 MHz, 1 bit SA-CD, etc. -
Page 66: Additional Information
Additional information About the HDMI™ control function Connect a TV that supports the HDMI control function to this unit via the HDMI connection. This unit supports the HDMI control function. When a TV that supports the HDMI control function is Turn on all components connected to this connected with this unit via the HDMI connection, the unit via the HDMI connection. -
Page 67: Specifications
Specifications AUDIO SECTION • Tone Control (Front Speakers) BASS Boost/Cut............±10 dB at 50 Hz • Minimum RMS Output Power for Front, Center, Surround, BASS Turnover Frequency ..........350 Hz Surround back TREBLE Boost/Cut ..........±10 dB at 20 kHz [U.S.A. and Canada models] 1 kHz, 0.9% THD, 8 Ω... -
Page 68: Index
Index ■ Numerics Connecting Bluetooth wireless audio HDMI OUT/HDMI 1-4 terminals, Receiver .............17 rear panel ............. 5 1 Dynamic Range, sound setup ..... 44 Connecting external amplifier ......16 HDMI THROUGH, front panel ....... 4 1 HDMI, function setup ......... 45 Connecting external decoder ......16 HDMI, troubleshooting ......... - Page 69 Index ■ Surround right speaker ........10 SWFR, C)Distance, speaker setup ....44 Registering input source .........22 Registering sound field program ....22 ■ Remote control ..........7 The Bottom Line, sound field program ..26 Remote control code resetting ......50 The Roxy Theatre, sound field program ..26 Remote control code setting ......50 Tone control ...........
- Page 70 El uso de este aparato con una tensión superior a la especificada resulta peligroso y puede provocar incendios, daños en el aparato y/o lesiones personales. Yamaha no se hará responsable de ningún daño debido al uso de este aparato con una tensión diferente a la especificada.
- Page 71 Funcionamiento de los diversos ajustes de esta Conexión de un dock universal para iPod de unidad (Setup menu) ........41 Yamaha o de un receptor de audio inalámbrico Bluetooth™ ........17 Funcionamiento básico del setup menu ....42 Uso de los terminales VIDEO AUX del panel Speaker Setup ............
-
Page 72: Introducción
[Video] Vídeo componente x 1, vídeo compuesto x 1 • Terminal DOCK para conectar un dock universal para • Salida Audio/Visual iPod de Yamaha (como el YDS-11, que se vende por [Audio] Analógica x 1 separado) o un receptor inalámbrico de audio Bluetooth [Vídeo] Vídeo compuesto x 1... -
Page 73: Notas Sobre Este Manual
DTS es una marca registrada, y el símbolo y logotipos DTS, DTS-HD y DTS-HD Master Audio son marcas comerciales de DTS, Inc. “SILENT CINEMA” es una marca comercial de Yamaha Corporation. © 1996-2007 DTS, Inc. Todos los derechos reservados. iPod™... -
Page 74: Nombres Y Funciones De Las Piezas
Nombres y funciones de las piezas Panel delantero VOLUME HDMI THROUGH ZONE2 ZONE2 ON/OFF CONTROL INFO MEMORY PRESET TUNING SCENE BD/DVD RADIO MAIN ZONE VIDEO AUX PHONES TONE CONTROL PROGRAM STRAIGHT PURE DIRECT INPUT OPTIMIZER MIC ON/OFF SILENT CINEMA EFFECT VIDEO AUDIO PORTABLE... -
Page 75: Panel Trasero
PRE OUT Terminal DOCK Terminal MONITOR OUT Para conectar un dock universal para iPod de Yamaha opcional Da salida a señales visuales desde esta unidad a un monitor de (YDS-11) o un receptor de audio inalámbrico Bluetooth (YBA- vídeo, como, por ejemplo, un televisor (vea la página 14). -
Page 76: Visor Del Panel Delantero
Nombres y funciones de las piezas Visor del panel delantero VOL. SLEEP ZONE STEREO MUTE TUNED SBL SB SBR Indicador HDMI Se enciende durante la comunicación normal cuando HDMI está seleccionado como fuente de entrada. Indicador CINEMA DSP Se enciende cuando está seleccionado un programa de campo sonoro que utiliza CINEMA DSP. -
Page 77: Mando A Distancia
(vea la página 50). V-AUX PHONO [ A ] DOCK DOCK Selecciona un dock universal para iPod de Yamaha / receptor de audio inalámbrico Bluetooth conectado al TUNER MULTI terminal DOCK. TUNER Selecciona el sintonizador de FM/AM. -
Page 78: Guía De Inicio Rápido
• Conexión de los altavoces sistema de sonido de 5.1 canales. Altavoz delantero derecho • Esta unidad dispone de un YPAO (Yamaha Parametric Room Acoustic Optimizer) que mejora automáticamente esta unidad basándose en las Monitor de vídeo características acústicas de la sala (características de audio de los Subwoofer altavoces, posiciones de los altavoces y acústica de la sala, etc.). -
Page 79: Preparación
PREPARACIÓN Preparación del mando a distancia Instalación de las pilas en el mando a Utilización del mando a distancia distancia El mando a distancia transmite un rayo infrarrojo direccional. Asegúrese de apuntar directamente el mando a distancia al sensor de mando a distancia de esta unidad durante el funcionamiento. -
Page 80: Conexiones
(LFE) incluidos en 80˚ señales Dolby Digital y DTS. Utilice un subwoofer con un amplificador incorporado, como, por ejemplo, el Yamaha Active Servo Processing Subwoofer System. Colóquelo en la parte exterior de los altavoces delanteros izquierdo y derecho, mirando ligeramente hacia dentro, para reducir los reflejos de una pared. -
Page 81: Conexión De Los Altavoces
Conexiones ■ Altavoces de presencia izquierdo y derecho 0,5 a 1 m 0,5 a 1 m (PL y PR) Los altavoces de presencia son un suplemento para el sonido de los altavoces delanteros, con efectos ambientales adicionales producidos por programas de campo sonoro (vea la página 25). - Page 82 Conexiones Conexión del cable del altavoz Precaución • Un cable de altavoz consiste generalmente en un par de cables aislados uno junto al otro. Uno de los cables tiene un color diferente o presenta franjas para indicar una polaridad. Conecte un extremo del cable de color/franjas al terminal “+”...
-
Page 83: Información Sobre Terminales Y Clavijas De Cables
Conexiones Información sobre terminales y clavijas de cables Esta unidad posee los siguientes terminales de entrada y salida. Utilice terminales y cables apropiados para los componentes que esté conectando. ■ ■ Terminales de audio Terminales de vídeo/audio Terminal y cables Descripción Terminal y cables Descripción... -
Page 84: Conexión De Un Proyector O De Un Monitor De Tv
Conexiones Conexión de un proyector o de un monitor de TV Conecte un monitor de vídeo, como un TV o un proyector, a un terminal de salida de esta unidad. Puede seleccionar uno de los tres tipos siguientes según el formato de la señal de entrada admitido por el monitor de vídeo. Nota •... -
Page 85: Conexión De Otros Componentes
Conexiones Conexión de otros componentes Esta unidad tiene terminales de entrada y salida para las fuentes de entrada y salida respectivas. Usted puede reproducir sonido y películas desde las fuentes de entrada seleccionadas, utilizando el visor del panel delantero o el mando a distancia. Entrada de audio / Entrada de micrófono Salida de audio / vídeo (AV OUT) -
Page 86: Conexión De Un Amplificador Externo
Conexiones ■ Reproductor de audio Terminales de salida del componente externo conectado Fuentes/terminales de entrada de esta unidad Componentes externos Terminales de salida Componente externo con salida digital Salida digital óptica AV 1 (TV) OPTICAL óptica AV 4 OPTICAL Componente externo con salida digital Salida digital coaxial AV 2 COAXIAL... -
Page 87: Uso De Los Terminales Remote In/Out
Esta unidad dispone del terminal DOCK, al que puede Consola de juegos/ Reproductor de música Videocámara conectar un dock universal para iPod de Yamaha (YDS- 11, que se vende por separado) o un receptor de audio Nota inalámbrico Bluetooth (YBA-10, que se vende por •... -
Page 88: Conexión De Antenas De Fm Y Am
[Modelo General] antena exterior. Para obtener información detallada, consulte con el centro de servicio o conesionario Yamaha autorizado más cercano. Las tensiones son CA 110/120/220/230-240 V, 50/60 Hz. • Utilice siempre la antena de cuadro de AM incluso si está conectada a la antena exterior. -
Page 89: Optimización De Los Ajustes De Los Altavoces Para Su Sala De Escucha (Ypao)
(YPAO) Esta unidad dispone de un Yamaha Parametric Acoustic Optimizer (YPAO). Con el YPAO, esta unidad ajusta automáticamente las características de salida de sus altavoces basándose en la posición y rendimiento de los altavoces, así como en las características acústicas de la sala. - Page 90 Optimización de los ajustes de los altavoces para su sala de escucha (YPAO) Para seleccionar un carácter de sonido para Muestra el número de altavoces conectados a esta unidad un ajuste, pulse oCursor n con objeto de en el siguiente orden: seleccionar “EQ Type”...
-
Page 91: Cuando Aparece Un Mensaje De Error Durante La Medición
Optimización de los ajustes de los altavoces para su sala de escucha (YPAO) Cuando aparece un mensaje de error Cuando aparece un mensaje de error durante la medición después de la medición Si se produce un problema durante la medición, aparece Pulse oCursor n una vez y seleccione “Retry”... -
Page 92: Funcionamiento Básico
SCENE. Reproduzca el componente externo que ha • Si conecta un reproductor de DVD/CD de Yamaha que tenga el terminal REMOTE OUT de esta unidad, usted puede reproducir un DVD/CD en el seleccionado como la fuente de entrada o reproductor seleccionando la función BD/DVD o CD SCENE. -
Page 93: Silenciamiento Temporal De Salida De Audio (Mute)
Reproducción Pulse hTeclas selectoras de entrada en Para disfrutar del sonido hi-fi puro el mando a distancia para la fuente de Utilice el modo Pure Direct para disfrutar del sonido de entrada cuyo código del mando a distancia alta fidelidad puro de la fuente seleccionada. Cuando el estaba registrado en el paso 1 durante 3 modo Pure Direct está... -
Page 94: Visualización De Información Sobre Las Señales De Entrada
Reproducción Visualización de información sobre Utilización del temporizador para las señales de entrada dormir Cuando se selecciona HDMI1-4 o AV1-4 como la fuente El temporizador para dormir es útil si desea acostarse de entrada, puede visualizar información sobre la señal de mientras esta unidad reproduce o graba una fuente. -
Page 95: Para Disfrutar De Los Programas De Campo Sonoro
Para disfrutar de los programas de campo sonoro Esta unidad también está equipada con un chip de procesamiento de campo sonoro digital (DSP) Yamaha. Puede disfrutar de sonidos multicanal para casi todas las fuentes de entrada, utilizando diversos programas de campo sonoro almacenados en el chip y una amplia variedad de descodificadores surround. - Page 96 Para disfrutar de los programas de campo sonoro Programa Descripciones Drama Este campo sonoro proporciona reverberaciones estables que se adaptan a la amplia gama de géneros cinematográficos, desde dramas a musicales y comedias. Las reverberaciones son modestas, pero ofrecen una sensación tridimensional óptima, reproduciendo suavemente tonos de efectos y música de fondo, con las palabras claras y un posicionamiento central que no fatiga al oyente incluso después de pasar largas horas viendo programas.
- Page 97 Para disfrutar de los programas de campo sonoro Para reproducción estéreo multicanal Programa Descripciones 7ch Stereo Use este programa para dar salida al sonido de todos los altavoces. Cuando reproduzca fuentes de múltiples canales, esta unidad mezclará las fuentes en 2 canales, y luego dará salida al sonido por todos los altavoces. Este programa crea un campo sonoro más grande, y es ideal para música de fondo en fiestas, etc.
-
Page 98: Para Disfrutar De Fuentes De Entrada No Procesadas (Modo De Descodificación Directa)
Para disfrutar de los programas de campo sonoro Para disfrutar de fuentes de entrada Para disfrutar programas de campo no procesadas (Modo de sonoro con auriculares descodificación directa) (SILENT CINEMA™) En modo de descodificación directa los sonidos se SILENT CINEMA le permite disfrutar de fuentes reproducen sin efecto de campo sonoro. -
Page 99: Sintonización De Fm/Am
Sintonización de FM/AM Si pulsa y suelta la tecla El sintonizador de FM/AM de esta unidad proporciona los dos modos de sintonización siguientes. El sintonizador aumenta o disminuye la frecuencia por pasos. Utilice este método cuando el sintonizador no pueda ■... - Page 100 Sintonización de FM/AM Pulse FMEMORY (o iMEMORY) de nuevo • Puede seleccionar el número presintonizado en el que comienza la presintonización pulsando iPRESET k / n o oCursor k / n para registrarlo. mientras el visor del panel delantero se encuentra en el estado que Cuando el registro está...
-
Page 101: Uso De Un Ipod
• Algunas funciones pueden no ser compatibles dependiendo del modelo o de la versión de software de su iPod. • Es posible que algunas funciones no estén disponibles dependiendo del modelo de dock universal para iPod de Yamaha. En las secciones siguientes se describe el procedimiento de uso del YDS-11. - Page 102 Uso de un iPod™ Pulse oCursor k / n / l / h para Reproducción aleatoria/repretición de reproducción seleccionar un elemento de menú y después oENTER para iniciar la reproducción. Mediante el ajuste del menú de opciones puede utilizar una función de reproducción especial, como la Elementos del menú...
-
Page 103: Uso De Los Componentes De Bluetooth
Uso de los componentes de Bluetooth™ Puede conectar un receptor de audio inalámbrico Bluetooth de Yamaha (como un YBA-10, que se vende por separado) al terminal DOCK de la unidad y disfrutar de los contenidos musicales almacenados en su componente Bluetooth (p. ej., un reproductor de música portátil) sin necesidad de conectar con cables esta unidad y el componente Bluetooth. -
Page 104: Funcionamiento Avanzado
FUNCIONAMIENTO AVANZADO Ajuste del menú de opciones para cada fuente de entrada (menú OPTION) Esta unidad tiene un menú OPTION de elementos de menú de uso frecuente para fuentes de entrada compatibles con esta unidad. A continuación se describe el procedimiento para ajustar los elementos del menú OPTION. Elementos del menú... - Page 105 Ajuste del menú de opciones para cada fuente de entrada (menú OPTION) ■ Extended Surround ■ Signal Info Fuente de entrada: HDMI1-4, AV1-4 Fuente de entrada: HDMI1-4, AV1-4 Opciones: Auto*/PLIIxMovie/PLIIxMusic/ Muestra información sobre señales de audio y vídeo en el EX/ES/Off monitor de vídeo y en el visor del panel delantero.
-
Page 106: Cómo Dar Salida A Una Entrada De Señal De Vídeo Desde Otra Fuente De Entrada Durante La Reproducción De Una Señal De Audio Multicanal
Ajuste del menú de opciones para cada fuente de entrada (menú OPTION) ■ Auto Preset Cómo dar salida a una entrada de Fuente de entrada: TUNER señal de vídeo desde otra fuente de Detecta automáticamente emisoras de radio en la banda de entrada durante la reproducción de frecuencias de FM y las registra como emisoras presintonizadas (vea la página 29). -
Page 107: Edición De Descodificadores De Surround/Programas De Campo Sonoro
Edición de descodificadores de surround/programas de campo sonoro Pulse oCursor k / n para seleccionar el Selección de un descodificador utilizado parámetro que desea cambiar y pulse con un programa de campo sonoro oCursor l / h para cambiar el parámetro. Cuando se utilizan programas de campo sonoro para Aparece un asterisco (*) a la izquierda del nombre del películas o programas de TV puede seleccionar un... - Page 108 Edición de descodificadores de surround/programas de campo sonoro Dialog Lift Ajusta las características de atenuación del sonido reflejado inicialmente. Puede crear un campo sonoro vivo Opciones: 0* a 5 (con un nivel de sonido de alta reverberación) cuando Use esta función para ajustar la posición vertical de los incremente el valor y un campo sonoro apagado (con un diálogos de las películas.
- Page 109 Edición de descodificadores de surround/programas de campo sonoro El parámetro Rev.Time ajusta el tiempo de atenuación del Sonido fuente sonido reverberante trasero, basándose en el tiempo que un sonido reverberante de 1 kHz aproximadamente tarda Primeros reflejos en 60 dB de atenuación. El sonido reverberante se atenúa más rápido a medida que usted reduce el valor.
- Page 110 Edición de descodificadores de surround/programas de campo sonoro El parámetro Rev.Level ajusta el nivel de sonido de Parámetros del descodificador reverberación. El aumento del valor de Rev.Level hace que el nivel de sonido de reverberación sea mayor, lo que le Puede personalizar los efectos del decodificador ajustando permite crear más eco.
-
Page 111: Funcionamiento De Los Diversos Ajustes De Esta Unidad (Setup Menu)
Funcionamiento de los diversos ajustes de esta unidad (Setup menu) Puede acceder al setup menu utilizando el mando a distancia y cambiar los ajustes de diversos menús. Puede cambiar los siguientes ajustes del setup menu. Para obtener información detallada, lea primero “Funcionamiento básico del setup menu”... -
Page 112: Funcionamiento Básico Del Setup Menu
Funcionamiento de los diversos ajustes de esta unidad (Setup menu) Visualización de “A)Config” (ejemplo) Funcionamiento básico del setup menu A)Config La pantalla del setup menu aparece tanto en la visualización de Center SP vídeo (OSD) como en el visor del panel delantero . Visualización de vídeo (OSD) Setup Menu None >Small Large... - Page 113 Funcionamiento de los diversos ajustes de esta unidad (Setup menu) LFE/Bass Out Center SP Opciones: SWFR/Front/Both* Opciones: None/Small*/Large Selecciona el altavoz o altavoces para dar salida a Establece el tamaño del altavoz central. componentes de baja frecuencia del canal de LFE (sonido None Seleccione esta opción cuando no esté...
-
Page 114: Sound Setup
Funcionamiento de los diversos ajustes de esta unidad (Setup menu) Crossover Freq. ■ D)Equalizer Ajusta la calidad y el tono del sonido utilizando un Opciones: 40Hz/60Hz/80Hz*/90Hz/100Hz/110Hz/120Hz/ ecualizador gráfico paramétrico. 160Hz/200Hz Establece el límite inferior de la salida de los componentes EQ Type Select de baja frecuencia desde un altavoz con un tamaño Opciones: Auto PEQ/GEQ*/Off... -
Page 115: Function Setup
Funcionamiento de los diversos ajustes de esta unidad (Setup menu) ■ 2 Lipsync ■ Audio Output Ajusta el retardo entre la salida de vídeo y la salida de audio. Opciones: Amp*/TV/Amp+TV Selecciona esta unidad o un componente conectado a esta HDMI Auto unidad a través del terminal HDMI OUT de esta unidad Opciones: Off*/On... -
Page 116: Input Rename
Funcionamiento de los diversos ajustes de esta unidad (Setup menu) ■ Max Volume 2 Display Margen ajustable: -30.0dB a +15.0dB/+16.5dB* (paso de 5,0 dB) Puede establecer elementos para un monitor o el visor del Establece el nivel de volumen máximo, de forma que el panel delantero. -
Page 117: Dsp Parameter
Funcionamiento de los diversos ajustes de esta unidad (Setup menu) 5 Zone2 DSP Parameter Establece el nivel de volumen máximo y el nivel de Puede establecer parámetros para los programas de campo volumen inicial de Zone2. sonoro. Para conocer más detalles, vea la página 37. Memory Guard •... -
Page 118: Uso De La Configuración Multizona
Vea este manual del propietario para de servicio o concesionario Yamaha autorizado más cercano sobre las hacer un uso correcto. conexiones de Zone2 que mejor puedan satisfacer sus necesidades. -
Page 119: Control De Zone2
Zone2 (vea la página 29). ■ • Reproducción de música almacenada en su iPod Encendido de Zone2 colocado en un dock universal para iPod de Yamaha Cambia bMAIN/ZONE2 a la posición ZONE2 y (como, por ejemplo, YDS-11, que se vende por pulse gPOWER. -
Page 120: Control De Otros Componentes Con El Mando A Distancia
Enciende y apaga un componente externo. entrada predeterminado oCursor, ENTER, RETURN [PHONO] — — — Controla los menús de componentes externos. [TUNER] Tuner Yamaha 5007 qDISPLAY [DOCK] DOCK Yamaha 5011 Cambia entre las pantallas de componentes externos. — — —... -
Page 121: Ajuste Avanzado
REMOTE ID -XXX Se suministran dos ID para el mando a distancia de esta unidad. Si hay otro amplificador Yamaha en la misma Opciones: ID1*/ID2 sala, el ajuste de una ID del mando a distancia diferente al Establece una ID de mando a distancia. -
Page 122: Apéndice
Consulte la tabla inferior cuando el equipo no funcione correctamente. Si el problema que usted tiene no aparece en la lista inferior o las instrucciones no le sirven de ayuda, apague esta unidad, desenchufe el cable de alimentación y póngase en contacto con un centro de servicio o concesionario Yamaha autorizado. Generalidades... - Page 123 Resolución de problemas Vea la Problema Causa Remedio página No hay imagen. En el monitor no se ha seleccionado una Seleccione una entrada de vídeo apropiada en el — entrada de vídeo apropiada. monitor. Los terminales de salida compuesta se Si su monitor no admite la conexión de HDMI, utilizan para dar salida a una señal de conéctelo a los terminales COMPONENT OUT o a...
- Page 124 Resolución de problemas Vea la Problema Causa Remedio página Pulse MSTRAIGHT o kSTRAIGHT del mando No se oye sonido por Esta unidad está en el modo los altavoces “STRAIGHT” y se está reproduciendo a distancia para apagar el modo “STRAIGHT”. surround.
-
Page 125: Hdmi
Resolución de problemas Vea la Problema Causa Remedio página Esta unidad no El microprocesador interno está dañado Desenchufe el cable de alimentación de la toma de — funciona por una descarga eléctrica externa (rayo o CA, espere unos 30 segundos y enchúfelo de nuevo. correctamente. -
Page 126: Mando A Distancia
Resolución de problemas Vea la Problema Causa Remedio página La emisora deseada no La señal es débil o las conexiones de la Ajuste la orientación de la antena de cuadro se puede sintonizar con antena están flojas. de AM. el método de Utilice el método de sintonización manual. -
Page 127: Ipod
Yamaha al terminal DOCK de esta unidad. Quite su iPod del dock universal para iPod de Yamaha y después vuelva a colocarlo en el dock. Unknown iPod El iPod que se está usando no es Esta unidad admite iPod Touch, iPod (Click and —... -
Page 128: Auto Setup (Ypao)
• En función de los altavoces, es posible que aparezca el mensaje de advertencia “W-1” incluso si las conexiones de los altavoces están bien realizadas. • Si se produce repetidamente el mensaje de error “E-10”, póngase en contacto con un reconocido centro Yamaha de atención al cliente. - Page 129 Resolución de problemas Después de Auto Setup Vea la Mensaje de error Causa Remedio página W-1:OUT OF PHASE La polaridad de los altavoces no es la Compruebe las polaridades (+, –) del altavoz correcta. Este mensaje puede aparecer mostrado. Si son correctas, los altavoces funcionan dependiendo de los altavoces aunque correctamente incluso cuando aparece este mensaje.
-
Page 130: Glosario
Glosario ■ ■ Sincronización audio y vídeo Dolby Digital Surround EX (sincronización de voz) Dolby Digital EX crea 6 canales de salida de banda ancha de fuentes de 5.1 canales. La sincronización de voz es un término técnico que se refiere al Para obtener los mejores resultados, Dolby Digital EX deberá... - Page 131 Glosario ■ ■ HDMI La tecnología Direct Stream Digital (DSD) guarda señales de audio en medios HDMI (High-Definition Multimedia Interface) es la primera interfaz de almacenamiento digital, como los Super Audio CDs. Usando DSD, las de audio/vídeo completamente digital sin comprimir admitida por el señales se guardan como valores de un solo bit a frecuencias de muestreo altas sector.
-
Page 132: Información Sobre Los Programas De Campo Sonoro
SILENT CINEMA Lo que realmente crea los tonos ricos y completos de un instrumento Yamaha ha desarrollado un algoritmo DSP de efectos de sonido son los múltiples reflejos de las paredes de la habitación. Además de naturales y realistas para los auriculares. Los parámetros para los dar vida al sonido, estos reflejos nos permiten saber dónde están... -
Page 133: Información Sobre Hdmi
Información sobre HDMI™ ■ Compatibilidad con señales HDMI Señales de audio Tipos de señales de audio Formatos de señales de audio Medios compatibles 2ch Linear PCM 2 can., 32-192 kHz, 16/20/24 bits CD, DVD-Vídeo, DVD-Audio, etc. PCM lineal multicanal 8 can., 32-192 kHz, 16/20/24 bits DVD-Audio, Blu-ray Disc, HD DVD, etc. -
Page 134: Información Adicional
Información adicional Acerca de la función de control de HDMI™ Conecte un TV que admita la función de control de HDMI en esta unidad a través de la Esta unidad admite la función de control de HDMI. conexión de HDMI. Cuando un TV que admite la función de control de HDMI está... -
Page 135: Especificaciones
Especificaciones SECCIÓN DE AUDIO • Control de tono (Altavoces delanteros) Refuerzo/corte BASS ..........±10 dB a 50 Hz • Potencia de salida RMS mínima para los altavoces delanteros, Frecuencia de transisión BASS ...........350 Hz central, surround y surround trasero Refuerzo/corte TREBLE ........±10 dB a 20 kHz [Modelos de EE.UU. -
Page 136: Índice
Índice ■ Numericos Conexión de un amplificador externo ....16 HDMI THROUGH, panel delantero ....4 Conexión de un descodificador externo ..16 HDMI, información ........63 1 Dynamic Range, sound setup ..... 44 Conexión de un dock universal para iPod ..17 HDMI, resolución de problemas .... - Page 137 Índice Programa de campo sonoro, edición ....37 Tecla numérica, mando a distancia ....7 Programa de campo sonoro, registro ....22 Tecla selectora de entrada, mando a Proyector, conexión ........14 distancia ............7 PURE DIRECT, panel delantero ......4 Tecla selectora de sonido, mando a distancia ............
-
Page 138: Lista De Códigos De Mando A Distancia
List of remote control codes Lista de códigos de mando a distancia Audiovox 0104, 0144, 0225 Clatronic 0243, 0249, 0259, Dumont 0076, 0090, 0108, Ausind 0249 0260, 0261, 0262, 0257, 0260, 0263, A.R. Systems 0274 Autovox 0249, 0257, 0259, 0268, 0269, 0273, 0328 Acme 0260... - Page 139 Frontech 0259, 0261, 0264, 0259, 0260, 0261, 0057, 0101 Magnadyne 0257, 0263, 0271 0265, 0273, 0328 0270, 0273, 0274, Jensen 0072, 0090 Magnafon 0249, 0260, 0263, Fujitsu 0023, 0024, 0025, 0328 0017, 0018, 0019, 0327 0105, 0328 Hema 0273, 0328 0092, 0093, 0094, Magnavox 0072, 0088, 0090,...
- Page 140 0026, 0053, 0072, Philips 0040, 0088, 0089, Radiotone 0243, 0268, 0273, 0259, 0260, 0263, 0090, 0096, 0102, 0090, 0091, 0094, 0274 0266, 0271, 0273, 0103, 0266, 0328 0098, 0099, 0102, Rank 0266 0274, 0300, 0327, Neckermann 0243, 0257, 0260, 0114, 0135, 0143, 0071, 0072, 0073, 0328 0264, 0268, 0269,...
- Page 141 1090, 1091 Harman/Kardon 1018 Tokai 0268, 0274, 0328 Xrypton 0274 Curtis Mathes 1018, 1020, 1022 Harwood 1090 Tokyo 0260, 0327 Yamaha 0000, 0001, 0002, Cybernex 1020 1079, 1090 Tomashi 0270 0003, 0004, 0005, CyberPower 1066 Headquarter 1019 Toshiba 0027, 0043, 0053,...
- Page 142 1077 Lloyd’s 1023 1124, 1127, 1128, Solavox 1076 XR-1000 1022, 1023 Loewe Opta 1077, 1078 1129 Sonic Blue 1041, 1068 Yamaha 1018, 1019 Logik 1079, 1090 Philips Magnavox 1030 Sonneclair 1090 Yamishi 1079, 1090 Lumatron 1075, 1091 Phonola 1078 Sonoko...
- Page 143 Apple 2163 Electrohome 2312 Lawson 2305 Philips 2026, 2061, 2062, Arrgo 2216 Elin 2312 Lecson 2303 2075, 2090, 2094, Asono 2318 Elta 2263, 2312, 2315 Lenco 2308, 2312, 2317 2096, 2097, 2103, Aspire 2140, 2202 Emerson 2196, 2211, 2219 Lenoxx 2203, 2218 2110, 2126, 2180, Astar...
- Page 144 2122, 2142, 2143, Venturer 2199 2101, 2114, 2117, Magnavox 3029 2144, 2181, 2190, Viewmaster 2318 2118, 2119 Maspro 3049 2228, 2262, 2375 Vocopro 2156 Yamaha 2106 Matsui 3049 Shinsonic 2167 VocoStar 2157 MegaCable 3039 Cable Sigmatek 2309, 2318 Waitec 2318...
- Page 145 Tristar 3045 Channel Master 4060, 4085 Expressvu 4039 Kathrein Eurostar 4133 Tudi 3052 Chaparral 4025 Fenner 4074, 4134, 4139 Klap 4138 Tusa 3026, 3041 CHEROKEE 4138 Ferguson 4084, 4102, 4132 Konig 4137 TV86 3031 Chess 4134, 4139 Fidelity 4136 Kosmos 4099 Unika 3019, 3020...
- Page 146 Telewire 4098 DOCK 4088, 4102 4041, 4042, 4081, Tempo 4141 Nova 4140 4082, 4083, 4114, Tevion 4090, 4139 Yamaha 5011, 5022 Novis 4095 4150, 4154 Thomson 4070, 4084, 4102, Oceanic 4097 4085, 4136 4104, 4130, 4133, Octagon 4083, 4086, 4096...
- Page 148 © 2009 Yamaha Corporation All rights reserved. Printed in China WQ95330...