Advertisement
Quick Links
Advertisement

Related Manuals for Danfoss BOCK F18


Summary of Contents for Danfoss BOCK F18
- Page 1 F18 / F76 / F88 F18 / F76 / F88 ® BOCK Service guide F18/2735 FX18/2735 F18/3235 FX18/3235 F76/1570 FX76/1570 F76/2050 FX76/2050 F76/1800 FX76/1800 F76/2425 FX76/2425 F88/2735 FX88/2735 F88/3235 FX88/3235 Translation of the original instructions AX452438944357en-000301...
-
Page 2: Table Of Contents
Observe the safety instructions contained in these instructions. • No original replacement parts have been used Contents Page Safety Fault diagnosis Disassembly of the compressor Checking the compressor parts Assembly of compressor 2 | AX452438944357en-000301 © Danfoss | Climate Solutions | 2023.09... -
Page 3: Safety
• Risk of burns! Depending on the operating conditions, surface temperatures of over 60 °C on the pressure side or below 0 °C on the suction side can be reached. • The maximum permissible overpressure must not be exceeded, even for testing purposes. © Danfoss | Climate Solutions | 2023.09 AX452438944357en-000301 | 3... -
Page 4: Fault Diagnosis
- Filter / dryer in the liquid line blocked - Expansion valve not functioning properly - Check the setting of the expansion valve - Solenoid valve on the liquid line not opening - Check the control / function 4 | AX452438944357en-000301 © Danfoss | Climate Solutions | 2023.09... - Page 5 - Pressure fins of valve plate leaking - Replace valve plate - By-pass between suction and discharge side - Localize leak between the discharge and suction side and repair it © Danfoss | Climate Solutions | 2023.09 AX452438944357en-000301 | 5...
- Page 6 - Refrigerant in oil - see „Oil foams during start-up phase“ - Piston rings worn - Replace piston rings - Suction / discharge fins of the valve plate - Replace valve plate leaking 6 | AX452438944357en-000301 © Danfoss | Climate Solutions | 2023.09...
- Page 7 - Belts vibrating excessively - Check belt tension V belt drive, increased noise Use tensioning roller / guidance roller generation - Incorrect alignment of compressor and motor - Check alignment and adjust anew © Danfoss | Climate Solutions | 2023.09 AX452438944357en-000301 | 7...
-
Page 8: Disassembly Of The Compressor
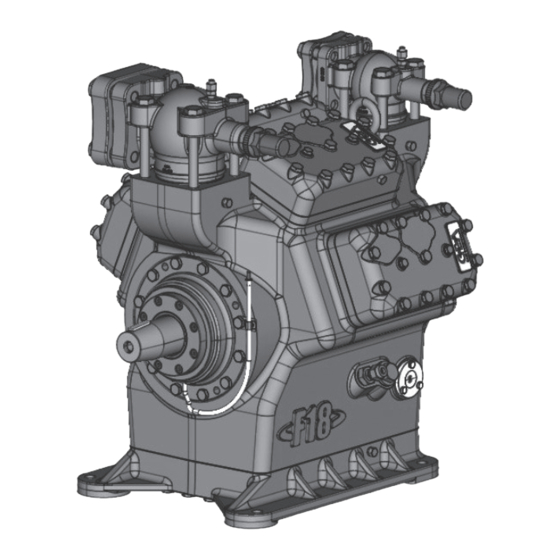
The following illustrations show a F18 compressor in standard design. Components of other designs can differ from these illustrations. However, the procedure for disassembly and assembly of the compressor is identical. 8 | AX452438944357en-000301 © Danfoss | Climate Solutions | 2023.09... - Page 9 You can find the exploded drawing at the end of the maintenance manual. Preparation: Necessary tools Pos. Tool Size Oil collection container > 10 Liter Spanner SW 10, 13, 15, 17, 19, 24, 27 Allen key 6 mm, 10 mm Needle-nosed pliers © Danfoss | Climate Solutions | 2023.09 AX452438944357en-000301 | 9...
- Page 10 - Unscrew the fixing screws of shut-off valves F18, F76: 355, 410 F88: 220, 410 2060, 2070 - Remove the shut-off valves and the seals 210, 400 - Remove the suction filter and the seal 230, 400 10 | AX452438944357en-000301 © Danfoss | Climate Solutions | 2023.09...
- Page 11 - Position a suitable container to collect the oil underneath F18, F76: 505 - Unscrew the plug screw and drain the oil F88: 517 - Remove the gasket - Unscrew the oil filter © Danfoss | Climate Solutions | 2023.09 AX452438944357en-000301 | 11...
- Page 12 - Losen screws at the cylinder cover and unscrew 50, 70 - Remove cylinder cover with seals and valve plate 1,2: M8x90, Sealing ring 14x8x1 11, 13, 15: M10x90 Other: M10x110 12 | AX452438944357en-000301 © Danfoss | Climate Solutions | 2023.09...
- Page 13 - Remove the feather key / woodruff key, the shaft seal cover with the floating ring, the guide ring, the O-ring 790, 882, 880, 830 and the spring F88: 850 © Danfoss | Climate Solutions | 2023.09 AX452438944357en-000301 | 13...
- Page 14 Working course - Place the compressor into the oil collection pan and turn it sideways - Unscrew the screws from the baseplate 20, 30 - Remove the baseplate and the seal 14 | AX452438944357en-000301 © Danfoss | Climate Solutions | 2023.09...
- Page 15 - Push the piston and connecting rod upwards as far as it goes 300, 295, - Remove the piston rings - The same procedure should be applied for the remaining connecting rods © Danfoss | Climate Solutions | 2023.09 AX452438944357en-000301 | 15...
- Page 16 - Losen the screw at the front bearing flange and unscrew - Remove the front bearing flange, the seal and the thrust washer 730, 745 F76: 735, 736 F88: 2250 16 | AX452438944357en-000301 © Danfoss | Climate Solutions | 2023.09...
- Page 17 Parts list position: 2050 parts list Tools: - Working course - Pull out the crankshaft carefully in direction of the front bearing flange, observe woodruff key / feather key 780, 790 © Danfoss | Climate Solutions | 2023.09 AX452438944357en-000301 | 17...
- Page 18 - Losen the screw at the oil pump and unscrew 460, 470 - Remove the oil pump and seal - Unscrew the screws from the rear bearing flange - Take off rear bearing flange and seal 740, 765 18 | AX452438944357en-000301 © Danfoss | Climate Solutions | 2023.09...
- Page 19 270, 2030 - Press the piston pins out of the pistons and remove pistons 2100 - In order to prevent mix-ups, fasten the connecting rod caps to the connecting rods again © Danfoss | Climate Solutions | 2023.09 AX452438944357en-000301 | 19...
- Page 20 - Unscrew screw-in fitting with union nut and sealing cap F18, F76: 545 F88: 545, 546, 547 - Remove screw-in fitting, union nut, sealing cap, locking screw and gasket 531, 534, 500 - Unscrew transport eyelet 20 | AX452438944357en-000301 © Danfoss | Climate Solutions | 2023.09...
-
Page 21: Checking The Compressor Parts
Check the condition of the piston rings for wear, fractures and other irregularities. Connecting rods There should be no damages on bearing surfaces. The connecting rod shank must be straight. correct faulty © Danfoss | Climate Solutions | 2023.09 AX452438944357en-000301 | 21... - Page 22 Thus, concealed defects of parts which have been in operation may be prevented. 22 | AX452438944357en-000301 © Danfoss | Climate Solutions | 2023.09...
-
Page 23: Assembly Of Compressor
You can find the exploded drawing at the end of the maintenance manual. Preparation: Necessary tools Pos. Tool Size Spanner SW 10, 13, 15, 17, 19, 24, 27 Allen key 6 mm, 10 mm Needle-nosed pliers Torque spanner Piston ring plier © Danfoss | Climate Solutions | 2023.09 AX452438944357en-000301 | 23... - Page 24 531, 534, 500 - Screw in transport eyelet Align hand-tight 25 Nm 25 Nm 100 Nm 13 Nm 15 Nm 13 Nm 15 Nm 100 Nm 100 Nm 15 Nm 24 | AX452438944357en-000301 © Danfoss | Climate Solutions | 2023.09...
- Page 25 2030, - Assemble piston and connecting rod with piston pin, use some oil for easier assembly 2100, 270, - Mount circlips with pliers on both sides of the piston pins © Danfoss | Climate Solutions | 2023.09 AX452438944357en-000301 | 25...
- Page 26 -> The butt joints of the piston rings have to be installed min. 90° twisted to each other and may not be lying upon each other Pressure ring Oil scraper ring Double bevel ring 26 | AX452438944357en-000301 © Danfoss | Climate Solutions | 2023.09...
- Page 27 The measurement has to be at the disassembly shaft seal cover. play larger than starting disc replaced by a thicker starting disc (3.0 mm instead of 2.5 mm). © Danfoss | Climate Solutions | 2023.09 AX452438944357en-000301 | 27...
- Page 28 Working course 780, 790 - Fit the crankshaft so that the drive journal engages into the gump gear and oil the bearing zones, keep woodruff key / feather key at hand 28 | AX452438944357en-000301 © Danfoss | Climate Solutions | 2023.09...
- Page 29 - Install the front bearing flange with oiled gasket to the body so that the hole for the leak oil collection ring 730, 745 faces upwards. If present insert thrust washer and dowel pin. F76: 735, F88: 2250 - Tighten the screws 45 Nm 75 Nm 75 Nm © Danfoss | Climate Solutions | 2023.09 AX452438944357en-000301 | 29...
- Page 30 - Turn the crankshaft by hand. In case the crankshaft does not rotate freely check the seating of the connecting rods; if necessary, disassemble the connecting rods and carry out this step once more 29 Nm 30 | AX452438944357en-000301 © Danfoss | Climate Solutions | 2023.09...
- Page 31 - Tighten the M12 x 80 (F18, F88) resp. M10 x 60 (F76) screws F18, F88: 10 6 2 4 8 12 F76: 10 6 2 4 8 50 Nm 100 Nm 7 3 1 5 7 3 1 5 9 13 © Danfoss | Climate Solutions | 2023.09 AX452438944357en-000301 | 31...
- Page 32 - Press the shaft seal cover onto the bearing flange and tighten the screws - Turn the crankshaft by hand - Insert woodruff key / feather key 20 Nm 45 Nm 32 | AX452438944357en-000301 © Danfoss | Climate Solutions | 2023.09...
- Page 33 - Then screw in M10 x 90 and M10 x 110 screws 1,2: M8x90, sealing ring 14x8x1 11, 13, 15: M10x90 Sonstige: M10x110 1. M8x70: tighten by hand M10x90, M10x110: 45 Nm 2. M10x90, M10x110: 75 Nm M8x70: 29 Nm © Danfoss | Climate Solutions | 2023.09 AX452438944357en-000301 | 33...
- Page 34 F18, F76: 500 - Install gasket F88: 516 F18, F76: 505 - Screw on the M22 x 1.5 mm plug screw and tighten it F88: 517 37 Nm 100 Nm 34 | AX452438944357en-000301 © Danfoss | Climate Solutions | 2023.09...
- Page 35 2060, 2070, - Install the shut-off valves (on the discharge and suction side) with seals and screws F18, F76: 355, 410 F88: 220, 410 M12: 90 Nm M16: 100 Nm © Danfoss | Climate Solutions | 2023.09 AX452438944357en-000301 | 35...
- Page 36 5 I Assembly of compressor Final assembly Parts list position: Position in parts list Tools: Working course - Do the next step, such as commissioning, according to the installation instructions of the compressor 36 | AX452438944357en-000301 © Danfoss | Climate Solutions | 2023.09...
- Page 37 Online link to VAP (Compressor selection program) for additional information (eg. spare part lists, exploded drawings): https://vap.bock.de In the event of inquiries please contact our Department for Application Technology, phone +49 7022 9454-0. © Danfoss | Climate Solutions | 2023.09 AX452438944357en-000301 | 37...
- Page 38 38 | AX452438944357en-000301 © Danfoss | Climate Solutions | 2023.09...