Dymo Rhino 6000 - Industrial Labeling Printer Manual
- Quick start manual (33 pages) ,
- User manual (32 pages) ,
- Brochure (2 pages)
Advertisement
- 1 Overview
- 2 About Your New Printer
- 3 Getting Started
- 4 Getting to Know Your Printer
- 5 Working with Label Files
- 6 Formatting a Label
- 7 Creating Industrial Labels
- 8 Using Barcodes
- 9 Adding Symbols
- 10 Using the Text Library
- 11 Adding Graphics
- 12 Creating a Series of Labels
- 13 Printing Options
- 14 Using Printer Memory
- 15 Cleaning Your Printer
- 16 Using RHINO Connect Software
- 17 Connecting to your Computer
- 18 Symbols
- 19 Library Text
- 20 Troubleshooting
- 21 Documentation Feedback
- 22 Contacting Customer Support
- 23 Documents / Resources
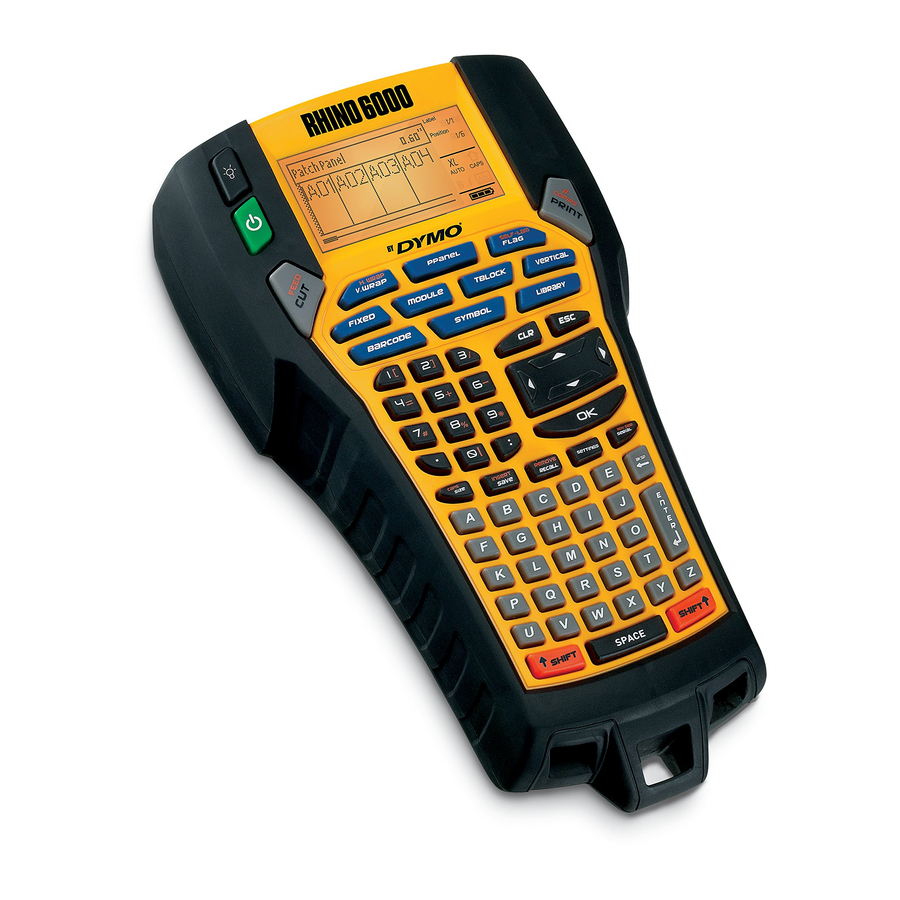
Overview

Figure 1 RHINO 6000 LabelPrinter
About Your New Printer
With your new RHINO label printer, you can create a wide variety of high-quality, self-adhesive labels. You can choose to print your labels in many different sizes, and styles. The printer uses RHINO Industrial label tape cassettes in widths of 6 mm, 9 mm, 12 mm, 19 mm, or 24 mm. RHINO tape cassettes are also available in a wide range of materials, such as flexible nylon, permanent polyester, vinyl, non-adhesive tag, and heat shrink tubes.
Visit www.dymo.com for information on the full line of labels and accessories for your printer.
Warranty Registration
Please complete the warranty registration card and return it to the appropriate customer service address within seven days. Visit www.dymo.com for details.
Getting Started
Follow the instructions in this section to start using your printer for the first time.
Connecting the Power
The printer can operate on battery or AC power. A power adapter and a rechargeable battery pack is included with your printer.

The printer can operate with six AA alkaline batteries for power; however, alkaline batteries should only be used as temporary backup power.
To save power, the printer will automatically turn off after five minutes of inactivity.
Connecting the Power Adapter
The printer uses a 110V-240V power adapter. Connecting the power adapter with the battery pack inserted recharges the battery pack.
To connect the power adapter
- Plug the power adapter into the power connector on the bottom of the printer. See Figure 2.

- Plug the other end of the power adapter into a power outlet.

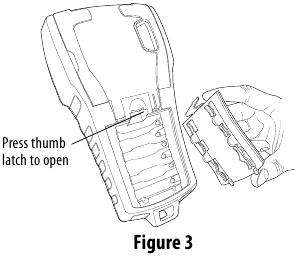
Inserting the Battery Pack
The printer uses the rechargeable, Lithium-ion battery pack when not connected to the power adapter. As temporary backup power, the printer can operate using six AA alkaline batteries.
To insert the battery pack
- Press the thumb latch on the back of the printer to remove battery compartment cover. See Figure 3.
![]()
- Insert the battery pack into the battery compartment. See Figure 3.
- Replace the battery compartment cover.
Remove the batteries if the printer will not be used for a long period of time.
Recharging the Battery Pack
The battery pack automatically recharges while the printer is connected to a power source through the power adapter. Charging the battery pack for the first time will take approximately eight hours; recharging the battery pack will take approximately two hours.
Inserting and Removing the Tape Cassette
Your printer comes with a starter tape cassette. Visit www.dymo.com for information about purchasing additional tape cassettes.
To insert the tape cassette
- Gently lift the tape cassette door on the back of the printer.
- Make sure the tape and ribbon are taut across the mouth of the cassette and that the tape passes between the guides. If necessary, turn the ribbon rewind spool clockwise to tighten the ribbon.
- Insert the cassette with the tape and ribbon positioned between the guideposts.

- Press gently on the cassette until the cassette moves into place. The insertion mechanism will guide the cassette into place.
- Close the tape cassette door.

To remove the tape cassette
- Gently lift the tape cassette door on the back of the printer.
- Press the cassette eject button. The tape cassette is lifted from the printer.
- Gently remove the tape cassette.
- Insert a new tape cassette as described above.
- Reset the tape width as described in Setting the Tape Width.
Setting the Tape Width
Each time you insert a tape cassette into the printer, you are prompted to set the tape width so the printer knows what size label tape you are currently using. Some of the features you use to design labels are dependent on the width of the tape.
However, to create a label for a tape width different than what is currently in the printer, you can set the tape width from the Settings menu.
To set the tape width
- Press SETTINGS. The Settings menu appears on the display.
- Select Tape Width.
- Select the width of the label tape currently inserted in the printer.
- Press OK and then select Done (ESC).
Selecting a Language
Several language-related features on the printer are determined by the language setting, such as special characters, menu text, and so on. By default the language is set to English.
To select a language
- Press SETTINGS and select Language.
- Select the language.
- Press OK and then select Done (ESC).
Selecting Units of Measure
You can choose to work in inches or millimeters.
To select the units of measure
- Press SETTINGS and select Units.
- Select Inch or mm.
- Press OK and then select Done (ESC).
Getting to Know Your Printer
Become familiar with the location of the feature and function keys on your printer. See Figure 1 on the inside front cover. The following sections describe each feature in detail.
Power
The ![]() button turns the power on and off. If no keys are pressed after five minutes, the power is turned off automatically.
button turns the power on and off. If no keys are pressed after five minutes, the power is turned off automatically.
When the printer is turned off, the current label file and its settings are remembered for the next time the printer is turned on. If the battery pack and power adapter are disconnected at the same time, some of the settings are remembered; however, the current label file is lost and you will need to reset the tape width when you reconnect the power and turn on the printer.
LCD Display
The printer's LCD display includes a caption bar across the top, showing the current label type, and feature indicators on the right side, showing which features are currently selected. See Figure 5.

When the text you have entered will not fit on the label as currently defined, the portion of the text that will not fit is shaded. If you attempt to print the label containing text that will not fit, the excess text will not be printed.
Using the Backlight
In low light conditions, you can turn on the backlight to make it easier to see the display. To save power, the back light will turn off automatically after 15 seconds of inactivity. Pressing any key will turn the backlight back on again. The backlight key acts as a toggle to turn the light on and off. To toggle backlighting on and off
- Press
![]() .
.
Adjusting the Display Contrast
In addition to backlighting, you can adjust the display contrast to help in different lighting conditions.
To adjust the display contrast
- Press SETTINGS.
- Select LCD contrast and press OK.
- Use the arrow keys to select a value between 0 (lighter) and 8 (darker). The contrast changes as you select the different settings.
- Press OK, and then select Done (ESC).
Hiding the Caption Bar
The Caption bar at the top of the display shows the current label type and for some label types, additional information about the label, such as size or barcode type. The Caption bar can be hidden to allow more lines of the label to be shown in the display. This is very useful for multi-line labels.
To hide the Caption bar
- Press SETTINGS.
- Select Caption bar and press OK.
- Select Hide, press OK, and then select Done (ESC).
CAPS Mode
The CAPS key toggles capitalization on and off. When CAPS mode is turned on, the CAPS indicator is shown on the display and all letters that you enter will be capitalized. The factory default setting is CAPS mode on. When CAPS mode is off, all letters entered appear in lower case.
To toggle CAPS on and off
- Press CAPS (SHIFT + SIZE).
Shift Key
The SHIFT keys are used to select the function or symbol printed above a key. For example, when you press the 9 key, the number 9 appears in the display; however, if you press SHIFT and then 9, an asterisk (*) appears in the display. Pressing one of the Shift keys toggles the function on and off, so you do not need to hold down both keys together.
Escape Key
The ESC key returns you to the previous menu from within any menu without making a selection.
Navigation Keys
The navigation keys operate as follows:
| Key | Function |
| , | Moves one character to the left in the display Returns to the previous menu (can also use ESC ) |
| SHIFT, | Moves one label to the left in the display |
| = | Moves one character to the right in the display Moves to the next menu level (can also use OK ) |
| SHIFT = | Moves one label to the right in the display |
| ; | Moves up in a list of items |
| : | Moves down in a list of items |
| OK | Selects a menu item |
Backspace Key
The ![]() key removes the character to the left of the cursor.
key removes the character to the left of the cursor.
Clear Key
The CLR key clears all current text settings and format, returning the display to the General label type.
Cutter Button
The Cutter button cuts the label tape. When printing multiple labels, the printer pauses after printing each label so that you can cut the label. You can turn this feature off, so that multiple labels will print continuously. See Pausing between Labels.
Hot Keys
A number of hot keys are available for creating specific types of labels, adding barcodes, inserting symbols, and using the text from the library. These hot keys are described in detail later in this user guide.
Working with Label Files
The printer creates and stores labels as label files. A label file can contain one or more labels. When you create a new label, you also create a new label file. You can then insert additional labels, remove labels, and store the group of labels as a label file in memory.
Creating a Label File
The printer remembers the last label that you were working on when the power was turned off. You need to clear that label text and formatting before you create a new label.
To create a new label file
- If necessary, press CLR to clear the previous label and formatting from the display.
- Type some text using the keypad.
- Format the text using Text Size or Text Style. See Formatting a Label.
- Save the label to memory. See Saving a Label File.
Adding Labels to a Label File
You can add additional labels to an existing label file.
To add a label to a file
- Press INSERT (SHIFT + SAVE).
- Select To the right to add a label to the right of the cursor position or To the left to add a label to the left of the cursor position.
- Press OK.
A new blank label is inserted in the display to the left or right of the current label.
You can move from label to label using the arrow keys.
Removing Labels from a File
You can remove one or more labels from a label file.
To remove a label
- Press REMOVE (SHIFT + RECALL).
- Select one of the following:
- All to remove all of the labels in the file.
- Current to remove the label at the current cursor position.
- Range and then select the range of labels to remove.
- Press OK. The selected labels are removed from the display.
Printing a Label File
When you print a label file, you choose whether to print all of the labels, the current label, or a range of labels in the file.
To print labels
- Press PRINT. If your label file contains more than one label, a print menu is displayed.
- Select one of the following:
- All to print all of the labels in the file.
- Current to print the label at the current cursor position.
- Range and then select the range of labels to print.
- Press OK. The labels selected are printed.
- Press CUT and remove the labels.
Formatting a Label
You can choose from a number of formatting options to enhance the appearance of your labels.
Changing the Text Size
You can print the text on your label in eight sizes: extra-extra-small, extra-small, small, medium, large, extra-large, extra-extra-large and BIG (all capital letters). The text size selected applies to all the text on all the labels in a label file.
You can also select Auto as the text size. When Auto is selected, the best text size is automatically determined for the height and width of the label you are creating. BIG font is not used when Auto text size is selected.
The text size available for you to use depends on the width set for the label tape and the type of label you are creating.
To set the font size
- Press SIZE. Each time you press SIZE, the next available font size is highlighted on the Size feature indicator on the display.
You can also select the font size from the Settings menu.
Changing the Text Style
You can print the text on your label in several styles: bold, italic, underlined, and boxed. And, you can choose normal width or narrow width. The text style applies to all the text on all the labels in the label file, including most symbols. Text style is not applied to user defined symbols.
To set the text style
- Press SETTINGS.
- Select Text style and press OK.
- Use the arrow keys to select a style.
- Press OK and then select Done (ESC).
Creating Multi-Line Labels
You can create multi-line labels depending upon the width of the label tape, as follows:
| Tape Width | 6 mm | 9 mm | 12 mm | 19 mm | 24 mm |
| # Lines | 1 | 3 | 3 | 5 | 5 |
The display shows two lines of text with the Caption bar displayed; or three lines with the caption bar hidden. Use the arrow keys to scroll through multiple lines. See Hiding the Caption Bar.
To create a multi-line label
- Type the text for the first line, and press ENTER.
- Type the text for the next line.
- Repeat these steps for each additional line.
Using International Characters
The printer supports the extended Latin character set using RACE technology. Similar to using a mobile phone keypad, holding down a letter key will scroll through variations of that letter.
For example, if you hold down the letter a, you will see a à á â ã ä å and so on through all the variations available. The order in which the character variations appear depends on the language you selected to use.
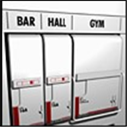
Creating Industrial Labels
You can quickly create labels for special industrial applications, such as cable wraps, flags, patch panels, terminal blocks, or modules. You can create fixed length labels or self-laminated labels.
Hot keys are available for each of the label types available. The current label type is displayed in the Caption bar. By default, the label type is General with no special formatting, text centered, and the length automatically determined by the amount of text.
The hot keys toggle the label type on and off. For example, if you choose Flag and later want a General label, just press the Flag key a second time to remove the Flag settings and return to General label type.
Creating Wire Wrap Labels
You can create several types of labels that wrap around a cable or wire: vertical wire wrap, horizontal wire wrap, self-laminating, and flag labels.
Creating Vertical Wrap Labels
A Vertical Wrap label is placed around the width of a wire or cable. You can enter up to five lines of text and the text is repeated as many times as possible depending on the size of the text and the length of the label.
To create a vertical wrap label
- Press V.WRAP.
- Enter the diameter of the cable and press OK.
- Select Done (ESC) to create the label. To create multiple labels quickly, see Creating a Series of Labels.
Creating Horizontal Wrap Labels
A Horizontal Wrap label is placed horizontally along the length of the wire or cable. The label text is repeated as many times as possible depending on the size of the text and the width of the tape.
To create a horizontal wrap label
- Press H.WRAP (SHIFT + V.WRAP).
- Enter the label length and press OK. Select AUTO to have the length automatically set to fit the text.
- Select Done (ESC) to create the label. To create multiple labels quickly, see Creating a Series of Labels.
Creating Self-Laminating Labels
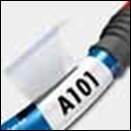
The Self-Laminating label is designed to be used with RHINO Self-Laminating Labels (part number 1734821). The text of the label is printed on the top portion of the label so the clear, bottom half of the label can wrap around and cover the text.
Self-Laminating tape is 24 mm wide; however, you can only enter two lines of text and are limited to using extra-extra-small, extra-small, and small font sizes.
To print a self-laminating label
- Press SELF-LAM (SHIFT + FLAG).
- Enter the label length or select AUTO to have the label length automatically set to fit the text.
- Press OK to create the label.
To create multiple labels quickly, see Creating a Series of Labels.
Creating Flag Labels

Flag labels wrap around a wire or cable leaving the text part of the label extending out from the cable. The text on flag labels is automatically printed on both ends of the label leaving a blank space in the middle that wraps around the cable. When the label is applied to the cable, both ends of the label are applied back to back leaving a tail or flag.
The result is a label that can be read from both sides.
To print a flag label
- Press FLAG.
- Enter the length for the flag portion of the label. Select AUTO to have the length automatically set to fit the text. The total length of the label is calculated by doubling the flag length and adding 34 mm to wrap around the cable.
- Press OK to create the label.
- Enter the text for the label and press PRINT. To create multiple labels quickly, see Creating a Series of Labels.
Creating Fixed Length Labels
Normally, the length of the label is determined by the length of the text entered. However, you may wish to make a label for a specific purpose that is a fixed length regardless of the length of the text.
The factory default fixed length is 25 mm. Any change you make to the fixed length setting remains in effect until you change it.
To set the label length
- Press FIXED.
- Enter the length of the label and press OK. Any text that does not fit within the fixed length appears shaded in the display and will be truncated when the label is printed.
Creating Patch Panel Labels
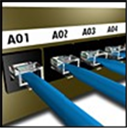
Patch panel mode allows you to label a row of ports on a patch panel. You select the distance between ports, enter the desired text, and print. The result is a long label with multiple, evenly spaced text for each port.
To create a patch panel label
- Press PPANEL.
- Select Port distance.
- Enter the distance between each port and press OK.
The factory default is 15 mm. - Select # of ports.
- Enter the number of ports and press OK.
- Select Done (ESC) to create the label. Each port is separated by a solid black line on the display.
- Enter the text for each port in the label. Use the left or right arrow key to move from port to port.
To create data for the ports automatically, see Creating a Series of Labels.
To print vertical lines between the ports, see Printing Vertical Lines between Cells.
Creating Terminal Block Labels
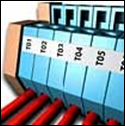
Terminal block labels are very similar to patch panel labels; however, the text is printed vertically for each block.
To create a terminal block label
- Press TBLOCK.
- Select # of blocks and press OK.
- Enter the number of blocks and press OK.
- Select Block size and press OK.
- Enter the width of each block and press OK. The factory default is 17.5 mm.
- Select Done (ESC) to create the label.
- Enter the text for each terminal.
Use SHIFT +, or = to move among terminals. To create data for the terminal blocks automatically, see Creating a Series of Labels.
Creating Module Labels
The Module label type allows you to label a row of fuses. You set the width of a fuse and the number of fuses, enter the desired text for each fuse, and print. The result is a long label with multiple, evenly spaced text for each port. You can use fuse multipliers to adjust the width of individual modules as necessary.
To create a module label
- Press MODULE.
- Select Fuse length and press OK.
- Enter the fuse length and press OK. Select the length that applies to the smallest size fuse in the module. You can then use fuse multipliers to increase the size of any individual modules that are larger. See step 6. The factory default fuse length is 17.5 mm.
- Select # of modules and press OK.
- Enter the number of modules for this label and press OK.
- Adjust the size of individual modules using fuse multipliers. See Using Fuse Multipliers.
- Select Done (ESC) to create the label.
- Enter the text for each module. Use the left or right arrow key to move from module to module. To create the data for the modules automatically, see Creating a Series of Labels.
Using Fuse Multipliers
Fuse multipliers allow you to adjust the size of individual fuse modules within a module type label.
To adjust the size of an individual module
- Create a module label as described in Creating Module Labels.
- Press SETTINGS.
- Select Current label config. and press OK.
- Select Multipliers and press OK.
- Use the arrow keys to select the module number to adjust and press =.
- Select the multiplier for that module.
- Press OK and then Done (ESC) to return to the label.
Printing Empty Modules
You can choose to print empty modules at the end of Module labels. By default, printing empty modules is turned off.
To print empty modules
- Press SETTINGS.
- Select Print empty modules and press OK.
- Select On and press OK.
- Select Done (ESC) to return to the label. Any empty modules at the end of a module label will now be printed.
Creating Vertical Labels
You can choose to print labels with the text running vertically. Labels with multiple lines of text will print as multiple columns of text.
To print a vertical label
- Enter the text for your label.
- Press VERTICAL.
- Enter a length for the label. Select AUTO to have the length of the label automatically set to fit the text.
- Press OK to create the label.
Changing the Label Type
Once you create a label using one label type, you can easily change the label type without losing your data. When you change from a multi-cell label, such as a patch panel, to a single cell label, such as General or Flag, each cell becomes a new label. All blank cells are deleted.
If the data from one label type will not fit in the new label type, the text that will not fit is shaded in the display.
To change the label type
- Press the hot key for the new label type.
- Make any necessary adjustments to the settings for the label type.
Changing the Label Settings
Once you create a specific label, you can change the settings without starting all over again.
To change the label settings
- Press SETTINGS.
- Select Current label config. and press OK. The settings for the particular label type are displayed.
- Make the necessary changes.
- Press OK and then select Done (ESC).
Printing Vertical Lines between Cells
For multiple cell labels, such as Patch Panel, Terminal Block, and Module, you can choose to print a vertical line between each of the cells.
To print vertical lines between cells
- Press SETTINGS.
- Select Vert. lines and press OK.
- Select On.
- Press OK and then select Done (ESC).
A vertical mark is printed between each cell.
Using Barcodes
The printer can generate the following types of barcodes.
| Code 39 | EAN 8 |
| Code 128 Auto | EAN13 |
| UPC A | UPC E |
You can only print a barcode on 19 mm and 24 mm wide label tape. You can choose to print the humanreadable text or not, and you can serialize barcodes.
The barcode prints horizontally along the label with the text in small print underneath the barcode. You can optionally add text before and after the barcode.
Adding a Barcode
The barcode text appears on the label in the display just like any other text. However, if the cursor is positioned within the barcode text, Barcode and the type of barcode are displayed in the Caption bar.
To add a barcode
- Press BARCODE.
- Use the arrow keys to select the barcode type, and press OK.
- Enter the text for the barcode within the barcode and press OK.
Editing a Barcode
You edit an existing barcode or delete a barcode in the same manner.
To edit a barcode
- Move the cursor anywhere within the barcode text.
- Press BARCODE or type a character. A message appears asking if you would like to edit the barcode.
- Press OK. The text of the existing barcode appears.
- Edit the barcode text and press OK.
Deleting a Barcode
A barcode is entered on the label as one character.
To delete a barcode
- Place the cursor at the end of the barcode on the display.
- Press
![]() .
.
 .
.Hiding Barcode Text
You can choose to hide the human-readable text for the barcode.
To hide barcode text
- Press SETTINGS.
- Select Barcode HR and press OK.
- Select Off.
- Press OK and then select Done (ESC).
Adding Symbols
Your printer includes a set of default symbols to use on your labels. The symbols are separated into several categories:
| Electrical | Brackets |
| Voice/Data | Arrows |
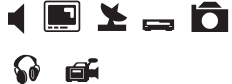
| Audio/Video | Numbers |
 | Currency |
| Punctuation |
A complete list of the default symbols can be found beginning.
Some of the more popular symbols can be accessed from the number keys using SHIFT plus the number. For example, pressing SHIFT + 1 inserts an open bracket ([).
If you transfer a custom set of symbols from the RHINO Connect™ Software to the printer, an additional set of User symbols becomes available. See Using RHINO Connect Software for more information.
Inserting Symbols
Symbols added to a label can be formatted or deleted just like any other character you enter.
To insert a symbol
- Press SYMBOL.
- Select Default, if necessary.
- Select a category of symbols.
- Use the arrow keys to find the symbol you want.
- Press OK to insert the symbol on the label.
Inserting User Symbols
Custom symbols downloaded from RHINO Connect
Software are stored as User symbols. See Using RHINO Connect Software for more information.
You insert User symbols in the same manner as predefined symbols; however, User symbols cannot be formatted.
To insert a User symbol
- Press SYMBOL.
- Select User.
- Use the arrow keys to find the symbol you want.
- Press OK to insert the symbol on the label.
Using the Text Library
Your printer includes a pre-defined text library. The library is separated into several categories:
| Location | Voice/Data |
| Audio | Security |
| Video |
An additional category, called My Library, is available for you to add custom text to use on your labels.
My Library text is not included when you select All from the Library menu.
A complete list of pre-defined text strings can be found beginning.
Inserting Library Text
Library text added to a label can be edited, formatted, or deleted just like text you enter from the keypad.
To add text to a label
- Press LIBRARY.
- Select one of the categories.
- Press the first letter of the text string you wish to use. The cursor jumps to the first text string that begins with that letter.
- Press OK to insert the text on the label.
Adding My Library Text
You can download custom text from RHINO Connect Software or you can add custom text to the library directly from the printer. See Using RHINO Connect Software for more information.
To add custom text
- Press LIBRARY.
- Use the arrow keys to select My Library.
- Select Add new text and press OK.
- Enter the text and press OK.
The text is added to My Library.
Deleting My Library Text
You can delete custom text from My Library.
To delete My Library text
- Press LIBRARY.
- Use the arrow keys to select My Library.
- Select the text to delete.
- Press
![]() . A confirmation message appears.
. A confirmation message appears. - Press OK to delete the text.
Adding Graphics
When labels are transferred to the printer from RHINO Connect Software, any images are stored separately in the printer as graphic files. You can apply these graphic files to most labels. When a graphic cannot be used with a certain label, a warning appears on the display.
See RHINO Connect Software Online Help for more information about placing images on a label.
To add a graphic
- Press SETTINGS.
- Select Choose graphic and press OK.
- Select the graphic file you want to use and press OK. The graphic does not appear in the display, but will print on the label.
Creating a Series of Labels
You can automatically generate labels by creating a series. You create a starting pattern, and then set the increment and count for the series.
You can serialize any number or letter by selecting the position to be incremented, such as the number 2 in 123 or the letter B in ABC. For example, when the 2 is selected in 123 and the increment #=3, the resulting labels would print as 123, 153, and 183.
Letters can be incremented from A to Z and a to z, and numbers from 1 to 9. When the letter Z or the number 9 is reached during serialization, a letter or number is added to increase the increment. For example, Az increments to Aaa, AZ increments to BA, and A9 increments to A10.
Three methods of serialization are available: simple, simultaneous, and advanced.
Using Simple Serialization
Simple serialization creates a series of labels by incrementing one alphanumeric character in the pattern. For example, 101, 102, 103, 104, and so on.
To use simple serialization
- Enter the text for your label.
- Press SERIAL. A box appears around the first character in the label.
- Use the arrow keys to move the cursor to the position you wish to increment and press OK.
- Select the amount you want to increment each label and press OK. You choose to increment in steps up to 10.
- Select the number of labels you want to create and press OK. You can choose to create up to 99 labels. A new label is added in the display for each label in the series.
To print multiple copies of the same serialized label, press # COPIES (SHIFT + PRINT) and enter the number of copies of each label to print. See Printing Multiple Copies.
Using Simultaneous Serialization
Simultaneous serialization creates a series of labels by incrementing two different alphanumeric characters at the same time. For example, A-101, B-102, C-103, and so on.
To use simultaneous serialization
- Enter the text for your label.
- Press ADV.SER. (SHIFT + SERIAL).
- Select Simultaneous and press OK. A box appears around the character where the cursor was positioned.
- Select the first character position you want to increment and press OK.
- Select the second character position you want to increment and press OK.
- Select the amount you want to increment these characters on each label and press OK. You can choose to increment in steps up to 10.
- Select the number of times to increment these characters and press OK.
A new label is added in the display for each label in the series.
Using Advanced Serialization
Advanced serialization creates a series of labels by allowing you to select two sequences in the pattern and increment them consecutively.
For example, A-101, A-102, A-103, B-101, B-102, B103, C-101, C-102, C-103, and so on.
To use advanced serialization
- Enter the text for your label.
- Press ADV.SER. (SHIFT + SERIAL).
- Select Advanced and press OK. A box appears around the character where the cursor was positioned.
- Select the first character position you want to increment and press OK.
- Select the amount you want to increment this character position and press OK. You can choose to increment in steps up to 10.
- Select the number of times to increment this character position and press OK.
- Repeat Steps 4 through 6 for the second character position you want to increment.
A new label is added in the display for each label in the series.
Printing Options
You can choose to print multiple copies of the same label, collate the copies, pause to cut between labels, advance the label tape, and adjust the print contrast.
Printing Multiple Copies
You can print up to 99 copies of the same label at one time.
To print multiple copies
- Press # COPIES (SHIFT + PRINT).
- Press the S arrow to increase the number of copies to print. The default is 2 copies.
- Press the T arrow to decrease the number of copies (maximum is 99).
- Press OK or PRINT to begin printing.
You may notice a brief pause in printing between each label for more complex formats.
When printing is finished, the number of copies to print returns to 2.
Collating Multiple Copies
When printing multiple copies of a label file containing more than one label, all the copies of a label are printed before the next label starts printing. You can choose to have the label file print collated, so each complete copy of the file prints before the second copy starts. The following example shows three copies of a label file containing three labels printed normally and collated.
Normal
A101 A101 A101 A102 A102 A102 A103 A103 A103
Collated
A101 A102 A103 A101 A102 A103 A101 A102 A103
To collate multiple copies
- Press SETTINGS.
- Select Collate multi. copies and press OK.
- Select On.
- Press OK and then select Done (ESC).
Pausing between Labels
By default the printer pauses after printing each label so you can cut the label. You can turn this feature off to have the labels print continuously.
To set the printer to print continuously
- Press SETTINGS.
- Select Pause to cut btw labels and press OK.
- Select Off.
- Press OK and then select Done (ESC).
Advancing the Label Tape
The default leader space for all labels is approximately 10 mm. To add additional blank space to the beginning or end of your label, you can feed the tape in 10 mm increments.
To advance the tape
- Press FEED (SHIFT + CUT).
- Press OK to advance the tape.
Adjusting Print Contrast
Depending on the label material you choose, you may need to lighten or darken the print on the label.
To adjust the print contrast
- Press SETTINGS.
- Select Print contrast and press OK.
- Use the arrow keys to adjust the print contrast.
- Press OK and then select Done (ESC).
- Repeat as necessary until you are satisfied with the print quality.
Using Printer Memory
The printer has a powerful memory feature that can store label files for later recall. The number of label files that can be stored is dependent on the size of the label files and the number of images they contain. The more images a file contains, the less memory that is available for storing label files.
Saving a Label File
You can save label files for later use. When you save a label file, all the label text and formatting are saved. A label file name can be up to 20 alphanumeric characters in length.
To save a label file
- Create the labels in your label file.
- Press SAVE.
- Use the arrow keys to select New and press OK.
- Enter a name for your label file and press OK.
- Press CLR to start a new label.
Recalling a Label File from Memory
Once a label is saved to memory, you can recall the label to print or edit. Recalling a label replaces the current label.
To recall a label from memory
- Press RECALL. The memory locations are displayed.
- Use the arrow keys to move to the memory location that contains the label you want and press OK. A message appears confirming that you want to clear the current label text and formatting.
- Press OK.
Deleting a Label File from Memory
When you no longer need a stored label, you can delete it from memory.
To delete a label from memory
- Press RECALL. The saved label files are displayed.
- Use the arrow keys to move to the label file you wish to delete.
- Press
![]() and then press OK to clear the memory location.
and then press OK to clear the memory location.
Cleaning Your Printer
Your printer is designed to give you long and troublefree service, while requiring very little maintenance.
Clean your printer from time to time to keep it working properly.
To clean the print head
- Remove the tape cassette.
- Remove the cleaning tool from inside the tape cassette door.
- Gently wipe the padded side of the tool across the print head.
Using RHINO Connect Software
Your printer can be used as a standalone label printer or you can print labels directly from your computer using RHINO Connect Software. This software is optional, and is not included with all printers. RHINO Connect Software offers the following features:
- Upload and download label files for in-the-field and on-demand printing
- Insert customized graphics, logos, symbols, and industry terms
- Import data from any Windows program
- Create labels using the step-by-step wizard
- Print labels directly from RHINO Connect Software Visit www.dymo.com for more information about obtaining the software. In addition, you can download a free Windows printer driver so you can print directly to your RHINO printer from any Windows application.
Connecting to your Computer
The printer connects to your computer using the USB connection located on the bottom of the printer.

While data is being transferred between the printer and your computer, PC Connected... Do not disconnect is displayed on the printer and you cannot use any of the printer functions.
Refer to the RHINO Connect Software Online Help for complete information about using the printer while connected to your computer.
Symbols
The following tables list the default symbols by category.
Electrical
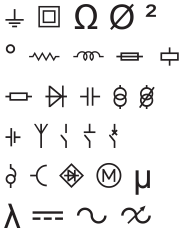
Voice/Data

Audio/Video
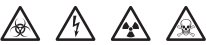
Warning
Punctuation
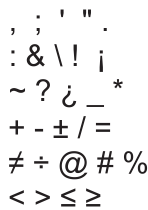
Brackets

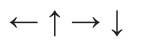
Arrows
Numbers
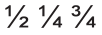
Currency

Library Text
The following tables list the library text by category.
| Location | |
| ATTIC | KITCHEN |
| BACK | LAUNDRY ROOM |
| BASEMENT | LEFT |
| BATH | LIBRARY |
| BEDROOM | LIVING ROOM |
| BILLIARDS ROOM | LOBBY |
| CENTER | LOWER |
| CLOSET | MAIN FLOOR |
| DECK | MASTER BATH |
| DEMARC | MASTER BEDROOM |
| DEN | MEDIA ROOM |
| DINING ROOM | OFFICE |
| DRESSING ROOM | OUTSIDE |
| DRIVEWAY | PATIO |
| FAMILY ROOM | PLAY ROOM |
| FLOOR | POOL |
| FOYER | PORCH |
| FRONT | RIGHT |
| GARAGE | SITTING ROOM |
| GATE | SPA |
| GUEST BATH | STUDY |
| GUEST HOUSE | SUNROOM |
| GUEST ROOM | THEATER |
| GYM | UPPER |
| HOT TUB | UTILITY ROOM |
| INSIDE | YARD |
| Audio | |
| ANALOG | PHONO |
| AUDIO | RIGHT BACK SPKR |
| CD | RIGHT FRONT SPKR |
| CENT FRONT SPKR | RIGHT OUTD. SPKR |
| CENTER BACKSPKR | RIGHT SIDE SPKR |
| DIGITAL | RIGHT SURR. SPKR |
| LEFT BACK SPKR | SPEAKER |
| LEFT FRONT SPKR | SUBWOOFER |
| LEFT OUTD SPKR | SURROUND |
| LEFT SIDE SPKR | TAPE |
| LEFT SURR. SPKR | VOLUME CONTROL |
| OPTICAL | ZONE |
| Video | |
| CATV | RF |
| COMPONENT | RCB |
| COMPOSITE | RS-232 |
| DVD | REMOTE |
| DVI | S-VIDEO |
| DVR | SAT |
| HDMI | TV |
| HDTV | TOUCH SCREEN |
| IR | VCR |
| KEYPAD | VESA |
| MONITOR | VIDEO |
| NANNY CAM | VIDEO GAME |
| PROJECTOR | |
| Voice/ Data | |
| CO | LAN |
| CABLE MODEM | LAPTOP |
| DSL | NETWORK |
| DSLAM | PHONE |
| DEMARC | PHONE SYSTEM |
| DESKTOP | USB |
| FAX | VoIP |
| INTERNET | WIRELESS |
| Security | |
| BACK DOOR | HEAT DETECTOR |
| CCTV | HIGH WATER |
| CAMERA | HORN |
| CARBON MONOXIDE | LOW TEMP |
| CELL | MOTION SENSOR |
| CONTACT | PIR |
| CONTROLLER | PHONE |
| DOOR | POOL |
| DOOR CONTACT | POWER |
| DRIVEWAY | REMOTE |
| DUAL TECH | SENSOR |
| DUCT | SHOCK SENSOR |
| FAN CUTOFF | SIREN |
| FRONT DOOR | SLIDERS |
| GARAGE DOOR | SMOKE DETECTOR |
| GAS | SPARE |
| GATE | STROBE |
| GLASS BREAK | WATER DETECTOR |
| GROUND | |
Troubleshooting
Review the following possible solutions if you encounter a problem while using your printer.
| Problem/Error Message | Solution |
| Battery Low Battery Empty  |
|
| Poor Print Quality |
|
| Tape Jam Motor is stalled due to tape jam. |
|
| Uneven or slanted printing The cassette is not inserted correctly. |
|
| Cannot close the tape cassette lid The cassette is not inserted correctly. | Make sure nothing is blocking the cassette cover and that the tape cassette is inserted properly. See Inserting and Removing the Tape Cassette. |
| Unable to return to the previous menu |
|
| Nothing shows on the display |
|
| End of Tape Tape cassette is empty. | The printer cannot detect the end of the tape cassette. Make sure you have tape left in the cassette before starting a large print job. |
| Display text is too light to read |
|
| Too many lines Too many lines for this tape width. |
|
| Barcode not allowed Barcodes can only be printed on 19 mm and 24 mm tape. |
|
| Printing Self-Lam label not allowed Self-Lam labels can only be printed on 24 mm Self-Laminated tape. |
|
| Print error... The tape is jammed. |
|
| No response when pressing keys One of the keys may be jammed. |
|
If you still need assistance, contact DYMO Customer Support for your country. A list of contact numbers for each country is listed inside the back cover of this User Guide.
Safety Precautions for Lithium-Ion Rechargeable Battery Pack
Inaccurate handling of Lithium-ion rechargeable battery may cause leakage, heat, smoke, an explosion, or fire. This could cause deterioration of performance or failure. This may also damage the protection device installed in the battery pack. This could damage equipment or injure users. Thoroughly follow the instructions below.
While Charging

- When charging the battery, use dedicated chargers and follow the specified conditions.
- Do not connect directly to an electric outlet or cigarette lighter charger.
- Do not use or store battery close to fire or inside the car where temperature may be over 60°C.
- Stop charging the battery if charging is not completed within the specified time.

- Thoroughly read this user guide before charging the battery.
- Do not charge in a place that generates static electricity.
- Battery can only be charged within 0°C~45°C temperature range.
When Discharging the Battery
- Use the battery only in the specified equipment.
- Do not use or store battery close to fire or inside the car where temperature may be over 60°C.
- Do not charge in a place that generates static electricity.
- Battery can only be used within -20°C~60°C temperature range.
Documentation Feedback
We are constantly working to produce the highest quality documentation for our products. We welcome your feedback.
Send us your comments or suggestions about our user guides. Please include the following information with your feedback:
- Product name, version number, and page number
- Brief description of content (instructions that are inaccurate or unclear, areas where more detail is needed, and so on)
We also welcome your suggestions about additional topics you would like to see covered in the documentation.
Send email messages to: documentation@dymo.com
Please keep in mind that this email address is only for documentation feedback. If you have a technical question, please contact Customer Support.
Contacting Customer Support
| Country | Telephone Support | Fax Support |
| Australia | 1800/ 633 868 | 1800/ 817 558 |
| België/Belgique | 02/713 38 08 | +31/ 20/ 581 93 80 |
| Canada | (800) 263-6105 | |
| Ceská Republika | 02/619 12 720 | 02/619 12 730 |
| Danmark | 35 25 65 08 | +31/ 20/ 581 93 80 |
| Deutschland | 069/ 66 56 85 29 | +31/ 20/ 581 93 80 |
| España | 91/662 31 49 | +31/ 20/ 581 93 80 |
| France | 01/69 32 49 32 | +31/ 20/ 581 93 80 |
| Hong Kong | 02 2527 1928 | |
| Hungaria | 1 424 6600 | 1 424 6601 |
| International a | +32 (0) 205040566 | |
| Ireland | 01 411 89 34 | |
| Italia | 02/ 45 28 13 08 | +31/ 20/ 581 93 80 |
| Mexico | 5368 2066 | |
| Nederland | 020/581 93 86 | 020/ 581 93 80 |
| New Zealand | 0800 803 966 | 0800 737 212 |
| Norge | 22 97 17 10 | +31/ 20/ 581 93 80 |
| Österreich | 01/ 599 14 20 12 | 02/627-400-160 |
| Polska | 022/349 15 02 | +31/ 20/ 581 93 80 |
| Portugal | 21 120 61 64 | |
| Schweiz/Suisse | 044 342 04 66 | +31/ 20/ 581 93 80 |
| Slovakia | 02/619 12 720 | 02/619 12 730 |
| Suomi | 09 229 07 04 | +31/ 20/ 581 93 80 |
| Sverige | 08/ 632 00 57 | +31/ 20/ 581 93 80 |
| Türkiye | 212/ 286 26 30 PBX | 212/ 286 26 28 |
| United Kingdom | 020/ 7341 55 29 | +31/ 20/ 581 93 80 |
| United States | (203) 588-2500 |

Documents / ResourcesDownload manual
Here you can download full pdf version of manual, it may contain additional safety instructions, warranty information, FCC rules, etc.
Download Dymo Rhino 6000 - Industrial Labeling Printer Manual
Advertisement
Thank you! Your question has been received!


Need Assistance?
Do you have a question about the Rhino 6000 that isn't answered in the manual? Leave your question here.