Table of Contents
Advertisement
Quick Links
Advertisement
Table of Contents

Related Manuals for NEFF N70 B24CR71G0B


Summary of Contents for NEFF N70 B24CR71G0B
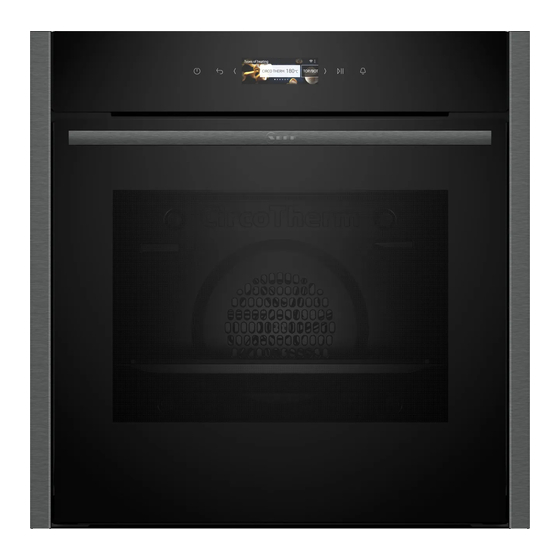
- Page 1 Oven User manual and installation instructions B24CR71.0B...
-
Page 2: Table Of Contents
en Safety Further information and explanations are available online: Table of contents 1 Safety INFORMATION FOR USE Observe the following safety instructions. 1.1 General information Safety .............. 2 ¡ Read this instruction manual carefully. Preventing material damage ...... 5 ¡ Keep the instruction manual and the Environmental protection and saving en- product information safe for future refer- ergy .............. 5... - Page 3 Safety en 1.4 Safe use WARNING ‒ Risk of scalding! Always place accessories in the cooking com- The accessible parts of the appliance become partment the right way round. hot during operation. ▶ Never touch these hot parts. → "Accessories", Page 9 ▶ Keep children at a safe distance. WARNING ‒ Risk of fire! Hot steam may escape when you open the Combustible objects that are left in the cook-...
-
Page 4: Safety
en Safety An ingress of moisture can cause an electric If the door seal is damaged, a large amount shock. of heat is generated around the door. ▶ Do not use steam- or high-pressure clean- ▶ Do not scrub or remove the seal. ▶... -
Page 5: Preventing Material Damage
Preventing material damage en 2 Preventing material damage ▶ Do not keep moist food in the cooking compartment 2.1 General for a long time with the door closed. ▶ ATTENTION! Do not store food in the cooking compartment. ▶ Take care not to trap anything in the appliance Alcoholic vapours may catch fire in the hot cooking door. -
Page 6: Familiarising Yourself With Your Appliance
en Familiarising yourself with your appliance If the cooking time is relatively long, you can switch Allow frozen food to defrost before cooking. the appliance off 10 minutes before the cooking time ¡ This saves the energy that would otherwise be re- ends. -
Page 7: Functions
Functions en Values Values Increase Swipe right on the display with your Decrease Swipe left on the display with your finger finger 4.3 Buttons The buttons are touch-sensitive areas. To select a function, press the corresponding button. Symbol Name On/Off Switch the appliance on or off Back Navigate back Left arrow... - Page 8 en Functions Function Name Cleaning ¡ Pyrolytic self-cleaning cleans the cooking compartment almost by itself → "Pyrolytic self-cleaning cleaning function", Page 20 ¡ Easy Clean removes light dirt from the cooking compartment → "Easy Clean cleaning aid", Page 22 ¡ Drying function dries the cooking compartment → "Drying", Page 22 Basic settings Individually adjust the appliance settings → "Basic settings", Page 16...
-
Page 9: Accessories
Accessories en 5.2 Additional options You can find an overview of other options here. To display the options, press Symbol Name Lighting Switch the lighting in the cooking compartment on or off Childproof lock Activate the childproof lock Remote start Activate remote start → "Home Connect ", Page 17 5.3 Symbols You can find an overview of other symbols on the display here. -
Page 10: Before Using For The First Time
You can purchase other accessories from our after- sales service, specialist retailers or online. You will find a comprehensive range of products for your appliance in our brochures and online: www.neff-international.com Tray Slide the tray in with the sloping Accessories vary from one appliance to another. When E.g. -
Page 11: Basic Operation
Basic operation en Press the minutes. Wipe the smooth surfaces in the cooking compart- Use or to select the minutes. ment with a soft, damp cloth. Press to confirm the time. Press to switch the appliance on. → "Switching on the appliance", Page 11 Setting the date Set the required type of heating and temperature for Use or to select the year. -
Page 12: Time-Setting Options
en Time-setting options 8.5 Changing the temperature 8.9 Sabbath-compliant use You can also change the temperature or level once you If you want to operate your appliance so that it is Sab- have started the appliance. bath-compliant, use the time-setting options and change the basic setting for the lighting. Press "Temperature". - Page 13 Dishes en 9.2 Cooking time ¡ You cannot use the delayed start function with every type of heating. Once the set duration has elapsed, the appliance stops Place the food into the cooking compartment and heating automatically. You can only use the cooking close the appliance door.
-
Page 14: Dishes
en Dishes To call up the information, press "Information". Some ¡ Leg of lamb on the bone, well done notifications are displayed automatically. ¡ Boned leg of lamb, medium ¡ Lamb shoulder, boned and rolled - British style Programmes ¡ Meat loaf made from fresh mince The optimum type of heating, temperature and cooking ¡... -
Page 15: Favourites
Favourites en 11 Favourites 11.2 Selecting favourites In the "Favourites", you can save your settings and use these again. If you have saved favourites, you can use these to set Notes the operation. ¡ Depending on the appliance type/software status, Press "Favourites". you must first download this function to your appli- Press the required favourites. -
Page 16: Childproof Lock
en Basic settings 14 Basic settings You can configure the basic settings for your appliance Appliance set- Selection to meet your needs. tings Pull-out system ¡ Retrofitted (if 2 or 3 sets of pull- 14.1 Overview of the basic settings out rails are fitted) ¡... -
Page 17: Home Connect
Home Connect en To change other basic settings, use to return to the basic settings. 15 Home Connect 15.1 Setting up Home Connect This appliance is network-capable. Connecting your ap- pliance to a mobile device lets you control its functions Requirements via the Home Connect app, adjust its basic settings ¡... - Page 18 en Home Connect Basic setting Possible settings Explanation Wi-Fi You can use the Wi-Fi to switch off the network connection for your appliance. When you have connected successfully once, you can deactivate the Wi-Fi and not lose your detailed data. As soon as you activate Wi-Fi again, the appliance connects automatically.
-
Page 19: Cleaning And Servicing
Cleaning and servicing en Note: Please note that the Home Connect functions can only be utilised with the Home Connect app. In- formation on data protection can be retrieved in the Home Connect app. 16 Cleaning and servicing ▶ Do not use hard scouring pads or cleaning To keep your appliance working efficiently for a long sponges. -
Page 20: Pyrolytic Self-Cleaning Cleaning Function
en "Pyrolytic self-cleaning" cleaning function Cooking compartment Area Suitable cleaning agents Information Enamel surfaces ¡ Hot soapy water Soak any heavily soiled areas and use a brush or steel wool. Leave the appliance door open to dry the cooking compartment ¡ Vinegar water after cleaning it. - Page 21 "Pyrolytic self-cleaning" cleaning function en The outside of the appliance gets very hot when the Cleaning set- Cleaning Duration in hours cleaning function is in progress. ting level ▶ Never hang combustible objects, e.g. tea towels, on Approx. 2:15 the door handle. High Approx.
-
Page 22: Easy Clean Cleaning Aid
en "Easy Clean" cleaning aid 18 "Easy Clean" cleaning aid Use the "Easy Clean" cleaning aid for intermediate Press to start the cleaning aid. cleaning of the cooking compartment. The "Easy a A notification stating that you should carry out the Clean"... -
Page 23: Rails
Rails en Leave the appliance door open for 1-2 minutes so that the cooking compartment dries completely. 20 Rails 20.2 Attaching the rails To thoroughly clean the rails and the cooking compart- ment, or to replace the rails, you can remove the rails. Notes ¡... - Page 24 en Appliance door Close the appliance door fully . Grab hold of the Close the locking levers on the left- and right-hand appliance door with both hands (on the left and hinges. right) and pull it upwards and out . a The locking levers are closed.
-
Page 25: Appliance Door
Appliance door en Remove the inner panel upwards at an angle and 21.4 Fitting the door panes set it down carefully on a flat surface. Note: Open the left- and right-hand metal strip in the direc- Ensure that the arrow is on the top left on the interme- tion of the arrow ... -
Page 26: Troubleshooting
en Troubleshooting Note: The lettering "Pyro" must be legible at the top, Open the appliance door fully. as shown in the picture. Close the locking levers on the left- and right-hand hinges Slide the inner pane into the retainer at the bottom and fit it at the top. - Page 27 Adjustment values, e.g. temperature or cooking time, depend on the recipe, quantity and food. ▶ Next time, set lower or higher values. Tip: A lot of other information about the food preparation and corresponding adjustment values can be found in the Home Connect app or on our website www.neff-interna- tional.com.
-
Page 28: Disposal
en Disposal 23 Disposal 23.1 Disposing of old appliance This appliance is labelled in accord- ance with European Directive Valuable raw materials can be reused by recycling. 2012/19/EU concerning used elec- Unplug the appliance from the mains. trical and electronic appliances Cut through the power cord. (waste electrical and electronic equip- Dispose of the appliance in an environmentally ment - WEEE). -
Page 29: Declaration Of Conformity
Directive 2014/53/EU. A detailed Declaration of Conformity can be found on- A detailed RED Declaration of Conformity can be found line at www.neff-home.com/uk among the additional online at www.neff-international.com among the addi- documents on the product page for your appliance. - Page 30 en How it works ¡ When roasting meat, there should be at least 3 cm Baking on two or more levels Height between the food and the lid. The meat may ex- 2 levels pand. ¡ Baking tins/dishes on 2 wire racks WARNING ‒ Risk of scalding! 3 levels Very hot steam may escape when the lid is opened ¡...
- Page 31 How it works en 27.5 List of foods Recommended settings for a variety of foods, sorted into food categories. Recommended settings for various types of food Food Accessory/cookware Shelf pos- Heating Temperature in Cooking time in ition function °C mins Sponge cake, delicate Ring-shaped tin 150-170 60-80...
- Page 32 en How it works Food Accessory/cookware Shelf pos- Heating Temperature in Cooking time in ition function °C mins Potato gratin, raw ingredients, Ovenproof dish 150-170 60-80 4 cm deep Chicken, 1.3 kg, unstuffed Uncovered cookware 2 200-220 60-70 Small chicken portions, 250 g Uncovered cookware 3 220-230 30-35 each...
- Page 33 How it works en Sear the meat on all sides on the hob at a very high Issue heat. You want to slow ¡ Place the cold duck breast Immediately place the meat into the pre-warmed cook a duck breast. into a pan. cookware in the cooking compartment.
- Page 34 en How it works Food Accessory/cookware Shelf pos- Heating Temperature in Cooking time in ition function °C mins Scones Baking sheet on wire 200-210 8-12 rack Biscuits Baking sheet on wire 140-160 10-25 rack Small cakes 12-cup-tin 25-35 Pavlova Baking sheet on wire 100-110 150-180 rack...
- Page 35 How it works en ¡ For 1.5 kg, the cooking time would therefore be Cooking time range, e.g. 10-15: 95 minutes. ¡ Your food will be ready within the specified range of time (in minutes). Recommended settings for meat Food Accessory/cookware Shelf pos- Heating Temperature in Cooking time in...
-
Page 36: Installation Instructions
en Installation instructions Recommended settings for baking Food Accessory/cookware Shelf pos- Heating Temperature in Cooking time in ition function °C mins Shortbread Baking tray 140-150 25-35 Shortbread Baking tray 140-150 20-30 Shortbread, 2 levels Universal pan 140-150 25-35 Baking tray Shortbread, 3 levels 4+3+1 130-140 35-55... - Page 37 Installation instructions en ▶ Only use adapters and power cords ap- ¡ Proceed in accordance with the installation proved by the manufacturer. sheets for installing accessories. ¡ Fitted units must be heat-resistant up to ATTENTION! 95 °C, and adjacent unit fronts up to Carrying the appliance by the door handle 70 °C.
- Page 38 en Installation instructions 28.4 Installation underneath a hob If the appliance is installed under a hob, the following The minimum worktop thickness a is based on the minimum dimensions must be adhered to (including required minimum clearance . substructure, if applicable). Hob type a raised in mm a flush in mm...
- Page 39 Installation instructions en ¡ Ensure that air exchange is guaranteed in accord- ¡ Contact protection must be guaranteed by the in- ance with the diagram. stallation. ¡ If the display on the appliance remains dark, it has not been connected correctly. Disconnect the appli- ance from the mains and check the connection.
- Page 40 en Installation instructions Screw the appliance into place. Secure the appliance using a suitable screw. Note: The gap between the worktop and the appliance must not be closed by additional battens. 28.11 Removing the appliance Thermal insulation strips must not be fitted to the side Disconnect the appliance from the power supply.
- Page 44 Valid within Great Britain: Imported to Great Britain by BSH Home Appliances Ltd. Grand Union House Old Wolverton Road Wolverton, Milton Keynes MK12 5PT United Kingdom *9001696285* Register your product online neff -home.com 9001696285 BSH Hausgeräte GmbH 030411 Carl-Wery-Straße 34 81739 München, GERMANY...