Table of Contents
Advertisement
Quick Links
Advertisement
Table of Contents

Related Manuals for NEFF N90 C24FS31 0B Series


Summary of Contents for NEFF N90 C24FS31 0B Series
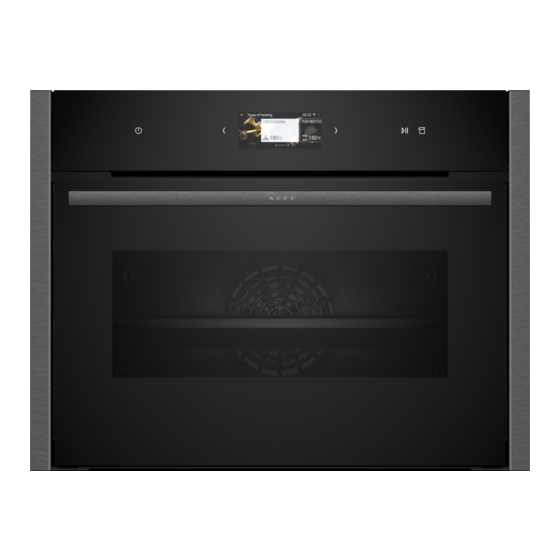
- Page 1 Combi steam oven User manual and installation instructions C24FS31.0B...
-
Page 2: Table Of Contents
en Safety Further information and explanations are available online: Table of contents INSTALLATION INSTRUCTIONS ...... 47 29.1 General installation instructions...... 47 INFORMATION FOR USE Safety .............. 2 Preventing material damage ...... 4 1 Safety Environmental protection and saving en- ergy .............. 5 Observe the following safety instructions. Familiarising yourself with your appliance .. 6 1.1 General information Functions............. 8... -
Page 3: Safety
Safety en Keep children under the age of 8 years away WARNING ‒ Risk of scalding! from the appliance and power cable. The accessible parts of the appliance become hot during operation. 1.4 Safe use ▶ Never touch these hot parts. Always place accessories in the cooking com- ▶... -
Page 4: Preventing Material Damage
en Preventing material damage An ingress of moisture can cause an electric 1.5 Steam shock. Follow these instructions when using a steam ▶ Do not use steam- or high-pressure clean- function. ers to clean the appliance. WARNING ‒ Risk of scalding! If the appliance or the power cord is dam- The water in the water tank may become very aged, this is dangerous. -
Page 5: Environmental Protection And Saving En- Ergy
Environmental protection and saving energy en ▶ Take care not to trap anything in the appliance Using cookware with rust spots may cause corrosion in door. the cooking compartment. Even the smallest spots of Fruit juice dripping from the baking tray leaves stains rust can cause corrosion. -
Page 6: Familiarising Yourself With Your Appliance
en Familiarising yourself with your appliance If the cooking time is relatively long, you can switch Allow frozen food to defrost before cooking. the appliance off 10 minutes before the cooking time ¡ This saves the energy that would otherwise be re- ends. - Page 7 Familiarising yourself with your appliance en Values Values Increase Swipe right on the display with your Decrease Swipe left on the display with your finger finger 4.3 Buttons The buttons are touch-sensitive areas. To select a function, press the corresponding button. Symbol Name On/Off Switch the appliance on or off...
-
Page 8: Functions
en Functions Opening for filling and emptying Handle for removing and inserting 5 Functions The main menu provides an overview of your appliance's functions. Tip: Depending on the appliance type, additional or more comprehensive functions are available to you with the Home Connect app. You can find more information about this in the app. Function Name Types of heating... - Page 9 Functions en Symbol Heating function Temperature Centre-area grill 50 - 275 °C For grilling small amounts of steaks, sausages or bread, and for cooking au gratin. The central area below the grill element becomes hot. Bottom heat 30 - 250 °C For cooking in a bain marie and for baking food for extra time. The heat is emitted from below.
- Page 10 en Accessories Symbol Name Home network Home network not connected → "Home Connect ", Page 23 Home Connect server Home Connect server not connected → "Home Connect ", Page 23 Remote diagnostics Remote diagnostics activated → "Home Connect ", Page 23 New function A new function is available if a red symbol is displayed in the main menu → "Home Connect ", Page 23 Descale reminder Number of operations with steam until the next descaling phase...
- Page 11 You can purchase other accessories from our after- sales service, specialist retailers or online. You will find a comprehensive range of products for your appliance in our brochures and online: www.neff-international.com Tray Slide the tray in with the sloping Accessories vary from one appliance to another. When E.g.
- Page 12 en Before using for the first time 7 Before using for the first time Implement the settings for the initial configuration. Calibrate the appliance. Clean the appliance and accessories. 7.1 Determining the water hardness before switching on the appliance for the first time Malfunctions may occur when using filtered or deminer- Before using the appliance for the first time, ask your alised water.
- Page 13 Basic operation en 7.3 Calibrating and cleaning the appliance ATTENTION! If there is water on the cooking compartment floor You will need to calibrate the appliance and clean the when operating the appliance at temperatures cooking compartment and accessories before using it above 120 °C, this will damage the enamel.
- Page 14 en Steam 8.4 Setting the type of heating and Press again to resume operation. temperature 8.8 Displaying information Press to switch the appliance on. Note: In most cases, you can call up information about Press "Types of heating". Scroll through the types of heating using or . the function that you have just started.
- Page 15 Steam en 9.1 Before using the steam function Insert the full water tank . When doing so, make sure that the water tank clicks into place behind the Before using the steam function each time, make sure retainers . that your appliance is supplied with sufficient water. Filling the water tank WARNING ‒ Risk of fire! Due to the hot surfaces, vapours from flammable li-...
- Page 16 en Steam Use or to select the temperature. Use or to select the temperature. Press to confirm the setting. Press to confirm the setting. Press "Cooking time". Press "Cooking time". Use or to select the duration. Use or to select the cooking time. Press to confirm the setting.
- Page 17 Steam en Switching on added steam Set a suitable type of heating. → "Types of heating and functions for steam boost", Fill the water tank. Page 17 → "Filling the water tank", Page 15 Set a temperature above 120 °C. Press to switch the appliance on. Press "Steam boost".
- Page 18 en Time-setting options Leave the water tank to dry with the lid open. Place the lid on the water tank and push down on it. Insert the water tank and close the control panel. Drying the condensation tray WARNING ‒ Risk of burns! The appliance becomes hot during operation.
-
Page 19: Dishes
Dishes en Press to confirm the setting. Press to confirm the setting. Press "Ready at". Cancelling the cooking time a The time at which your food will be ready will ap- Press . pear on the display. Press "Cooking time". Use the ... - Page 20 en Dishes 11.3 Overview of the dishes Category Food Desserts, Yeast dumplings You can see which individual dishes are available to compote Crème caramel you on the appliance. The dishes depend on the fea- Rice pudding tures of your appliance. Fruit compote The dishes are sorted by category and food.
- Page 21 Favourites en 12 Favourites In the "Favourites", you can save your settings and use If required, you can change the settings. these again. Press to start the operation. Notes Note: ¡ Depending on the appliance type/software status, Observe the instructions for the various functions: you must first download this function to your appli- ¡...
-
Page 22: Basic Settings
en Basic settings Press to start the operation. 14.2 Deactivating the "Rapid heat-up" a Once rapid heating has ended, "Rapid heating" function switches off automatically and a signal sounds. Press . goes out on the display. Press . Place the food in the cooking compartment. 15 ... -
Page 23: Home Connect
Home Connect en Use or to scroll through the basic settings or cat- Appliance in- Display egories. formation Press the required basic setting or category. Appliance in- Display technical information about Press the required basic setting in a category. ‒ formation the appliance Swipe left or right to select the required setting. - Page 24 en Home Connect Basic setting Possible settings Explanation Wi-Fi You can use the Wi-Fi to switch off the network connection for your appliance. When you have connected successfully once, you can deactivate the Wi-Fi and not lose your detailed data. As soon as you activate Wi-Fi again, the appliance connects automatically.
-
Page 25: Cleaning And Servicing
Cleaning and servicing en Note: Please note that the Home Connect functions can only be utilised with the Home Connect app. In- formation on data protection can be retrieved in the Home Connect app. 17 Cleaning and servicing ▶ Do not use hard scouring pads or cleaning To keep your appliance working efficiently for a long sponges. - Page 26 en Cleaning and servicing Cooking compartment Area Suitable cleaning agents Information Enamel surfaces ¡ Hot soapy water Soak any heavily soiled areas and use a brush or steel wool. Leave the appliance door open to dry the cooking compartment ¡ Vinegar water after cleaning it.
-
Page 27: Easy Clean Cleaning Aid
"Easy Clean" cleaning aid en – From the glass cover on the oven lamp Note: Marks may appear on the self-cleaning sur- This prevents stains that cannot be removed. faces. Residues of sugar and egg white in the food Remove any objects from the cooking compartment. are not removed and stick to the surfaces. -
Page 28: Drying
en Drying ¡ Second rinse cycle (approx. 8 - 12 minutes) Press "Descaling" . a The duration appears on the display. You cannot Carry out descaling in full. change the duration of the descaling process. If descaling is interrupted, you can no longer set any Press to start the descaling process. -
Page 29: Rails
Rails en 21 Rails 21.2 Attaching the rails To thoroughly clean the rails and the cooking compart- ment, or to replace the rails, you can remove the rails. Notes ¡ The rails only fit on the right or left. 21.1 Detaching the rails ¡... - Page 30 en Appliance door Press on the right-hand pressure surface until WARNING ‒ Risk of injury! the hook is released. When the hinges are not secured, they can snap shut with great force. ▶ Make sure that the locking levers are always either fully closed or (when detaching the oven door) fully open.
-
Page 31: Appliance Door
Appliance door en Push the condensate tray until the hooks on the Close the appliance door fully . right, left and bottom click into place. a The condensate tray is installed horizontally. 22.2 Attaching the appliance door WARNING ‒ Risk of injury! The hinges on the appliance door move when the door is opened and closed, which could trap your fingers. - Page 32 en Appliance door If necessary, you can remove the condensate Slide the intermediate pane into the left- and right- trough for cleaning. hand retainers . Open the appliance door. ‒ Tilt the condensate trough upwards and remove ‒ Push the intermediate pane upwards until it is in the left- and right-hand retainers ...
-
Page 33: Troubleshooting
Troubleshooting en Push the inner pane upwards until it is in the left- Close the locking levers on the left- and right-hand and right-hand retainers . hinges . Put the door cover into position and push down a The locking levers are closed. The appliance door is on it until you hear it click into place. - Page 34 en Troubleshooting Fault Cause and troubleshooting Appliance does not There has been a power cut. heat up. ▶ Open and close the appliance door once after a power failure. a The appliance is checked and is ready to use. The time is not dis- Basic setting has been changed.
-
Page 35: Disposal
▶ Next time, set lower or higher values. Tip: A lot of other information about the food preparation and corresponding adjustment values can be found in the Home Connect app or on our website www.neff-interna- tional.com. 24 Disposal 24.1 Disposing of old appliance... -
Page 36: Source Software
Directive 2014/53/EU. A detailed Declaration of Conformity can be found on- A detailed RED Declaration of Conformity can be found line at www.neff-home.com/uk among the additional online at www.neff-international.com among the addi- documents on the product page for your appliance. -
Page 37: How It Works
Tip: A lot of other information about the food prepara- tion and corresponding adjustment values can be found in the Home Connect app or on our website www.neff-international.com. Use the CircoTherm hot air heating function. Note: Items that are placed in the appliance on baking 28.1 General cooking tips... - Page 38 en How it works Roasting in uncovered cookware ¡ The perforated steaming tray, size XL, is the best option here. To catch any liquid that drips down, ¡ Use a deep roasting dish. slide the universal pan into the cooking compart- ¡...
- Page 39 How it works en 28.6 List of foods Recommended settings for a variety of foods, sorted into food categories. Recommended settings for various types of food Food Accessory/cook- Height Heating Temperature in Steam Cooking time ware function °C level in mins Fruit tart or cheesecake Springform cake 170-180 60-80...
- Page 40 en How it works Food Accessory/cook- Height Heating Temperature in Steam Cooking time ware function °C level in mins Chicken breast fillet, Perforated steam- 15-25 steaming ing tray Small chicken portions, Wire rack 200-220 Medium 30-45 250 g each Goose, unstuffed, 3 kg Wire rack 160-180 120-150...
- Page 41 How it works en Cover food that you would normally cook in a bain It is sufficient to heat UHT milk to 40 °C. marie with film, e.g. cling film. Mix 150 g of chilled yoghurt into the milk. Use the recommended settings when configuring Pour the mixture into small containers, e.g.
- Page 42 en How it works 28.7 Special cooking methods and other Immediately place the meat into the pre-warmed cookware in the cooking compartment. applications To ensure that the temperature in the cooking com- Information and recommended settings for special partment remains constant, keep the cooking com- cooking methods and other applications, e.g.
- Page 43 How it works en Proving dough Use the recommended settings when configuring the appliance settings. Yeast dough proves more quickly in your appliance The values are guide values only. The temperature than at room temperature and does not dry out. and proving time are dependent on the type and Requirement: The cooking compartment is cold.
- Page 44 en How it works Baking Recommended settings for baking on one level Food Accessory/cook- Height Heating Temperature in Steam in- Cooking time ware function °C tensity in mins Victoria sponge cake 150-160 25-35 20 cm diameter cake tin Rich fruit cake Deep, 23 cm dia- 130-150 150-180 meter tin...
- Page 45 How it works en Food Accessory/cook- Height Heating Temperature in Steam in- Cooking time ware function °C tensity in mins Pork, Belly, 1 kg Wire rack 1. 170-180 1. 50-60 2. 190-200 2. 25-35 Pork, Gammon joint Wire rack 180-200 30+25 Preheat the appliance for 5 minutes. Turn the food occasionally.
- Page 46 en How it works 28.9 Test dishes The information in this section is provided for test institutes to facilitate testing of the appliance in accordance with EN 60350‑1. Baking ¡ The setting values apply to food that is placed into a ¡ Shelf positions when baking on 2 levels: cold cooking compartment.
-
Page 47: Installation Instructions
Installation instructions en Recommended settings for steaming Food Accessory/cook- Height Heating Temperature in Steam in- Cooking time ware function °C tensity in mins Peas, frozen, two con- 3+2+1 tainers Steam containers, XL size Universal pan Broccoli, fresh, 300 g Steam containers, XL size Broccoli, fresh, one con- Steam containers, 10-11... - Page 48 en Installation instructions 29.2 Appliance dimensions You will find the dimensions of the appliance here ¡ For appliances that have a hinged switch panel, make sure that the switch panel does not hit adjacent kitchen units when you open it. 29.3 Installation below a worktop ¡...
- Page 49 Installation instructions en 29.4 Installation underneath a hob If the appliance is installed under a hob, the following The minimum worktop thickness a is based on the minimum dimensions must be adhered to (including required minimum clearance . substructure, if applicable). Hob type a raised in mm a flush in mm...
- Page 50 en Installation instructions ¡ Ensure that air exchange is guaranteed in accord- ¡ Contact protection must be guaranteed by the in- ance with the diagram. stallation. ¡ If the display on the appliance remains dark, it has not been connected correctly. Disconnect the appli- ance from the mains and check the connection.
- Page 51 Installation instructions en Open the appliance door and unscrew the left and 29.10 For handleless kitchens with vertical right-hand panels. bar handle strips: Attach a suitable filling piece in order to cover any sharp edges and to guarantee a safe installation. Close the appliance door. Screw the appliance into place.
- Page 52 Valid within Great Britain: Imported to Great Britain by BSH Home Appliances Ltd. Grand Union House Old Wolverton Road Wolverton, Milton Keynes MK12 5PT United Kingdom *9001697000* Register your product online neff -home.com 9001697000 BSH Hausgeräte GmbH 030414 Carl-Wery-Straße 34 81739 München, GERMANY...