Table of Contents
Advertisement
Quick Links
Advertisement
Table of Contents

Related Manuals for NEFF N90 B64CT73G0B


Summary of Contents for NEFF N90 B64CT73G0B
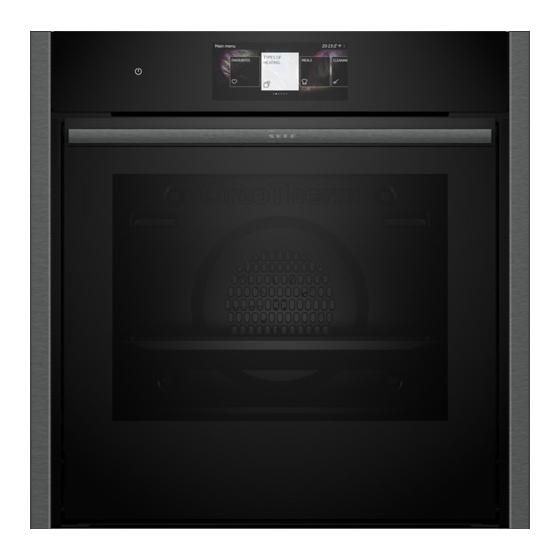
- Page 1 Oven User manual and installation instructions B64CT73G0B...
-
Page 2: Table Of Contents
en Safety Further information and explanations are available online: Table of contents INSTALLATION INSTRUCTIONS ...... 41 29.1 General installation instructions...... 41 INFORMATION FOR USE Safety .............. 2 Preventing material damage ...... 5 1 Safety Environmental protection and saving en- ergy .............. 5 Observe the following safety instructions. Familiarising yourself with your appliance .. 6 1.1 General information Functions............. 7... - Page 3 Safety en Keep children under the age of 8 years away WARNING ‒ Risk of scalding! from the appliance and power cable. The accessible parts of the appliance become hot during operation. 1.4 Safe use ▶ Never touch these hot parts. Always place accessories in the cooking com- ▶...
-
Page 4: Safety
en Safety An ingress of moisture can cause an electric 1.6 Cleaning function shock. WARNING ‒ Risk of fire! ▶ Do not use steam- or high-pressure clean- Loose food remnants, fat and meat juices ers to clean the appliance. may catch fire when the cleaning function is in If the appliance or the power cord is dam- progress. -
Page 5: Preventing Material Damage
Preventing material damage en 2 Preventing material damage ▶ Do not keep moist food in the cooking compartment 2.1 General for a long time with the door closed. ▶ ATTENTION! Do not store food in the cooking compartment. ▶ Take care not to trap anything in the appliance Alcoholic vapours may catch fire in the hot cooking door. -
Page 6: Familiarising Yourself With Your Appliance
en Familiarising yourself with your appliance If the cooking time is relatively long, you can switch Allow frozen food to defrost before cooking. the appliance off 10 minutes before the cooking time ¡ This saves the energy that would otherwise be re- ends. -
Page 7: Functions
Functions en To set values precisely, keep your finger close to the Values required value on the scale until a more precise scale Increase Swipe right on the display with your appears. finger Decrease Swipe left on the display with your finger 4.3 Buttons The buttons are touch-sensitive areas. - Page 8 en Functions Function Name Cleaning ¡ Pyrolytic self-cleaning cleans the cooking compartment almost by itself → "Pyrolytic self-cleaning cleaning function", Page 22 ¡ Easy Clean removes light dirt from the cooking compartment → "Easy Clean cleaning aid", Page 24 ¡ Drying function dries the cooking compartment → "Drying", Page 24 Basic settings Individually adjust the appliance settings → "Basic settings", Page 18...
- Page 9 Accessories en 5.2 Additional options You can find an overview of other options here. To display the options, press Symbol Name Lighting Switch the lighting in the cooking compartment on or off Timer Set the timer Childproof lock Activate the childproof lock Remote start Activate remote start → "Home Connect ", Page 19...
-
Page 10: Accessories
You can purchase other accessories from our after- sales service, specialist retailers or online. You will find a comprehensive range of products for your appliance in our brochures and online: www.neff-international.com Tray Slide the tray in with the sloping Accessories vary from one appliance to another. When E.g. -
Page 11: Before Using For The First Time
Before using for the first time en 7 Before using for the first time Configure the settings for initial start-up. Clean the ap- Press the month. pliance and accessories. Swipe left or right to select the correct month. Press the day. Swipe left or right to select the correct day. - Page 12 en Basic operation 8.3 Residual heat indicator Press the type of heating that you want to use. Adjust the temperature or level, if required. After you have switched off the appliance, the residual Press to start the operation. heat indicator will appear on the display. 8.7 Pausing operation Display Temperature...
-
Page 13: Time-Setting Options
Time-setting options en 9 Time-setting options Your appliance has different time-setting options, with a When the time has elapsed, a signal sounds. which you can control its operation. Press any button to end the audible signal. Changing the cooking time Time-setting option Press ... - Page 14 en Meat probe Note: If you want to continue the operation without a cooking time, cancel the cooking time. → "Cancelling the cooking time", Page 13 10 Meat probe Cook with precision by inserting the meat probe into Thick Insert the meat probe diagonally into the the food and setting a core temperature on the appli- pieces meat from above, pushing it in as far as...
-
Page 15: Meat Probe
Meat probe en 10.3 Core temperatures of different foods 10.4 Setting the oven temperature and core temperature This is where you can find the suggested core temper- atures for different foods. You can set a core temperature of between 30 °C and These suggestions depend on the quality and the size/ 99 °C. - Page 16 en Dishes 11 Dishes 11.3 Overview of the dishes "Dishes" helps you to use your appliance to prepare different dishes by selecting the optimum settings auto- You can see which individual dishes are available to matically. you on the appliance. The dishes depend on the fea- tures of your appliance.
- Page 17 Favourites en The setting options vary depending on the dish. 11.5 Extending the cooking time → "Setting options for the dishes", Page 16 To extend the cooking time, press "Add extra cook- For information about the accessory and shelf posi- ing time". tion, for example, press "Information". Swipe left or right to adjust the settings.
- Page 18 en Rapid heating 14 Rapid heating With the rapid heating function, you can shorten the Set a suitable type of heating and a temperature of heat-up time. at least 100 °C. From 200 °C, the rapid heating function is activated Rapid heating automatically switches off at temper- automatically.
-
Page 19: Dishes
Home Connect en Personalisa- Selection Factory set- Selection tion tings Brand logo ¡ Display Factory set- ¡ Cancel tings ¡ Do not display ¡ Restore Operation after ¡ Main menu Appliance in- Display switch-on ¡ Types of heating formation ¡ Dishes Appliance in- Display technical information about ¡... - Page 20 en Home Connect 16.2 Home Connect settings You can adjust the Home Connect settings and network settings in your appliance's basic settings. Which settings the display shows will depend on whether Home Connect has been set up and whether the appliance is connected to your home network. Basic setting Possible settings Explanation...
-
Page 21: Cleaning And Servicing
Cleaning and servicing en 16.6 Data protection ¡ The current software and hardware version of your appliance. Please see the information on data protection. ¡ Status of any previous reset to factory settings. The first time your appliance is registered on a home This initial registration prepares the Home Connect network connected to the Internet, your appliance will functions for use and is only required when you want to... -
Page 22: Pyrolytic Self-Cleaning Cleaning Function
en "Pyrolytic self-cleaning" cleaning function Area Suitable cleaning agents Information Stainless steel in- ¡ Stainless steel cleaner Discolouration can be removed using stainless steel cleaner. terior door frame Do not use stainless steel care products. Door handle ¡ Hot soapy water To avoid permanent stains, immediately remove any descaling agent that gets onto the surface. - Page 23 "Pyrolytic self-cleaning" cleaning function en 18.1 Preparing the appliance for the The outside of the appliance gets very hot when the cleaning function cleaning function is in progress. ▶ Never touch the appliance door. To achieve a good cleaning result and prevent dam- ▶...
-
Page 24: Easy Clean Cleaning Aid
en "Easy Clean" cleaning aid Note: White residues on the enamel surfaces may Note: While the cleaning function is running, the frame be caused by heavy soiling. These food residues on the inside of the appliance door or other parts of are harmless. The deposits do not compromise the the door that are made of stainless steel become dis- functionality of the appliance. -
Page 25: Rails
Rails en Remove any food remnants from the cooking com- Press "Cleaning". partment. Press "Drying function". Dry the cooking compartment with a sponge. a The duration appears on the display. You cannot Remove limescale marks with a cloth soaked in vin- change the duration of the drying function. - Page 26 en Appliance door 22.1 Detaching the appliance door Insert the coin in the gap in the lock and rotate as far as it will go . Requirements Turn the lock on the left-hand side in a clockwise ‒ ¡ Have a torch ready. direction.
-
Page 27: Appliance Door
Appliance door en ATTENTION! WARNING ‒ Risk of injury! Opening and closing the appliance door when it is The appliance door has a weight of 7–10 kg and in the lock position damages the door hinges. may fall if it is not handled carefully. ▶... - Page 28 en Appliance door Rotate the door handle upwards slightly . 22.3 Removing the door panes To facilitate cleaning, you can remove the door pane. WARNING ‒ Risk of injury! Components inside the appliance door may have sharp edges. ▶ Wear protective gloves. Requirements ¡...
- Page 29 Appliance door en Lift the first and second intermediate panes from be- Tip: When fitting the door panes, make sure that and remove them in the direction of the arrow they are in the original order. . Insert the intermediate pane so that the arrow on the right-hand side is pointing upwards.
-
Page 30: Troubleshooting
en Troubleshooting Push down on the intermediate pane around Carefully lift the inner pane upwards at an angle and slide the retainer in at an angle and push down attach the holder . until it clicks into place. Insert the inner pane with the holder into the opening. - Page 31 Troubleshooting en 23.1 Malfunctions Fault Cause and troubleshooting The appliance is not The circuit breaker in the fuse box has tripped. working. ▶ Check the circuit breaker in the fuse box. There has been a power cut. ▶ Check whether the lighting in your kitchen or other appliances are working. Electronics fault Disconnect the appliance from the power supply for at least 30 seconds by switching off the fuse.
-
Page 32: Disposal
▶ Next time, set lower or higher values. Tip: A lot of other information about the food preparation and corresponding adjustment values can be found in the Home Connect app or on our website www.neff-interna- tional.com. 24 Disposal 24.1 Disposing of old appliance... -
Page 33: Information Regarding Free And Open
Directive 2014/53/EU. A detailed Declaration of Conformity can be found on- A detailed RED Declaration of Conformity can be found line at www.neff-home.com/uk among the additional online at www.neff-international.com among the addi- documents on the product page for your appliance. - Page 34 en How it works 28.2 Baking tips ¡ Turn roasting joints, grilled items or whole fish after approx. ½ to ⅔ of the specified time. ¡ Dark-coloured metal baking tins are most suitable Roasting on the wire rack for baking cakes, bread and other baked goods. ¡...
- Page 35 How it works en Circo-roasting is very well suited to cooking whole 28.4 Cooking instructions for ready meals poultry and fish, as well as meat, e.g. roast pork with ¡ The cooking result greatly depends on the quality of crackling. the food. Pre-browning and irregularities may ¡...
- Page 36 en How it works Food Accessory/cookware Shelf pos- Heating Temperature in Cooking time in ition function °C mins Bread, 1500 g Universal pan 200-210 35-45 Loaf tin Bread, 1500 g Universal pan 1. 210-220 1. 10-15 2. 180-190 2. 40-50 Loaf tin Flatbread Universal pan 250-270 20-25...
- Page 37 How it works en Recommended settings for desserts and compote Food Accessory/cookware Shelf pos- Heating Temperature in Cooking time in ition function °C mins Yoghurt Individual moulds Cooking 35-40 compart- ment floor 28.6 Special cooking methods and other Immediately place the meat into the pre-warmed cookware in the cooking compartment.
- Page 38 en How it works Baking Recommended settings for baking on one level Food Accessory/cookware Shelf pos- Heating Temperature in Cooking time in ition function °C mins Victoria sponge cake 160-170 20-25 20 cm diameter cake Rich fruit cake Deep, 23 cm dia- 140-160 120-180 meter tin Rich fruit cake Deep, 23 cm dia- 130-150...
- Page 39 How it works en Grilling Recommended settings for meat Food Accessory/cookware Shelf pos- Heating Temperature in Cooking time in ition function °C mins Pork, Bacon rashers Wire rack 1. 4-5 2. 3-4 Pork, Sausages, thickness Wire rack 10-20 2-4 cm Pork, Belly Wire rack 200-220 30+25...
- Page 40 en How it works Recommended settings for bakes Food Accessory/cookware Shelf pos- Heating Temperature in Cooking time in ition function °C mins Diced meat, e.g. beef, pork, Covered cookware 100-120 lamb, 500 g meat Diced meat, e.g. beef, pork, Covered cookware 100-120 lamb, 500 g meat Preheat the appliance.
-
Page 41: Installation Instructions
Installation instructions en Food Accessory/cookware Shelf pos- Heating Temperature in Cooking time in ition function °C mins Small cakes, 3 levels 4+3+1 35-45 Baking tray Universal pan Hot water sponge cake Springform cake tin, 160-170 25-35 diameter 26 cm Hot water sponge cake Springform cake tin, 160-170 30-40... - Page 42 en Installation instructions ATTENTION! Carrying the appliance by the door handle could break it. The door handle cannot sup- port the weight of the appliance. ▶ Do not carry or hold the appliance by the door handle. 29.2 Appliance dimensions You will find the dimensions of the appliance here ¡...
- Page 43 Installation instructions en 29.4 Installation underneath a hob If the appliance is installed under a hob, the following The minimum worktop thickness a is based on the minimum dimensions must be adhered to (including required minimum clearance . substructure, if applicable). Hob type a raised in mm a flush in mm...
- Page 44 en Installation instructions ¡ Ensure that air exchange is guaranteed in accord- ¡ Contact protection must be guaranteed by the in- ance with the diagram. stallation. ¡ If the display on the appliance remains dark, it has not been connected correctly. Disconnect the appli- ance from the mains and check the connection.
- Page 45 Installation instructions en Centre the appliance. Screw the appliance into place. There must be an air gap of at least 4 mm between Open the appliance door slightly, then refit the pan- the appliance and adjacent unit fronts. els and screw them in place, first at the top and Open the appliance door slightly and unscrew pan- then at the bottom.
- Page 46 en Installation instructions Pre-drill aluminium profiles to establish a screw con- nection. Secure the appliance using a suitable screw. 29.11 Removing the appliance Disconnect the appliance from the power supply. Open the appliance door slightly and unscrew the left and right-hand panels. Undo the fastening screws.
- Page 48 Valid within Great Britain: Imported to Great Britain by BSH Home Appliances Ltd. Grand Union House Old Wolverton Road Wolverton, Milton Keynes MK12 5PT United Kingdom *9001696320* Register your product online neff -home.com 9001696320 BSH Hausgeräte GmbH 030412 Carl-Wery-Straße 34 81739 München, GERMANY...