Table of Contents
Advertisement
Quick Links
Advertisement
Table of Contents

Related Manuals for NEFF N70 B54CR31N0B


Summary of Contents for NEFF N70 B54CR31N0B
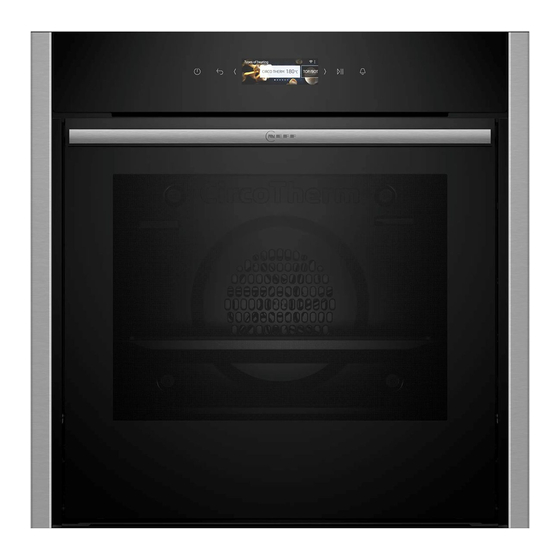
- Page 1 Oven User manual and installation instructions B54CR31.0B...
-
Page 2: Table Of Contents
en Safety Further information and explanations are available online: Table of contents 1 Safety INFORMATION FOR USE Observe the following safety instructions. 1.1 General information Safety .............. 2 ¡ Read this instruction manual carefully. Preventing material damage ...... 4 ¡ Keep the instruction manual and the Environmental protection and saving en- product information safe for future refer- ergy .............. 5... -
Page 3: Safety
Safety en 1.4 Safe use WARNING ‒ Risk of scalding! Always place accessories in the cooking com- The accessible parts of the appliance become partment the right way round. hot during operation. ▶ Never touch these hot parts. → "Accessories", Page 9 ▶ Keep children at a safe distance. WARNING ‒ Risk of fire! Hot steam may escape when you open the Combustible objects that are left in the cook-... -
Page 4: Preventing Material Damage
en Preventing material damage ▶ Call customer services. → Page 28 An ingress of moisture can cause an electric shock. WARNING ‒ Risk of suffocation! ▶ Do not use steam- or high-pressure clean- Children may put packaging material over ers to clean the appliance. their heads or wrap themselves up in it and If the appliance or the power cord is dam- suffocate. -
Page 5: Environmental Protection And Saving En- Ergy
Environmental protection and saving energy en 3 Environmental protection and saving energy 3.1 Disposing of packaging When baking multiple dishes, do so in succession or in parallel. The packaging materials are environmentally compat- ¡ The cooking compartment is heated after baking ible and can be recycled. the first dish. - Page 6 en Familiarising yourself with your appliance Setting values Display → "Display", Page 6 To adjust a setting, touch the appropriate place on the display with your finger. The settings area appears on Buttons the display. Swipe left or right over this settings area on → "Buttons", Page 6 the display with your finger until the required setting is magnified.
-
Page 7: Functions
Functions en Appliance door ATTENTION! Covering the ventilation slots will cause the appliance If you open the appliance door during operation, the to overheat. operation stops. If you close the appliance door, opera- ▶ Do not cover the ventilation slots. tion resumes automatically. To ensure that the appliance cools down more quickly after operation, the cooling fan continues to run for a certain period afterwards. - Page 8 en Functions Symbol Heating function Temperature Full-surface grill 50 - 290 °C For grilling flat items such as steaks, sausages or bread, and for cooking au gratin. The entire area below the grill element becomes hot. Centre-area grill 50 - 290 °C For grilling small amounts of steaks, sausages or bread, and for cooking au gratin.
-
Page 9: Accessories
Accessories en 6 Accessories Use original accessories. These have been made espe- The accessories supplied may differ depending on the cially for your appliance. appliance model. Note: Accessories may become deformed if they get hot. Deformation has no effect on function. As the ac- cessory cools down, it will regain its original shape. -
Page 10: Before Using For The First Time
You will find a comprehensive range of products for your appliance in our brochures and online: www.neff-international.com Accessories vary from one appliance to another. When purchasing accessories, always quote the exact product number (E no.) of your appliance. -
Page 11: Basic Operation
Basic operation en 8 Basic operation 8.1 Switching on the appliance When the food is ready, use to switch the appli- ance off. ATTENTION! If there is water on the cooking compartment floor 8.5 Changing the temperature when operating the appliance at temperatures above You can also change the temperature or level once you 120 °C, this will damage the enamel. -
Page 12: Time-Setting Options
en Time-setting options When the operation has ended, remove the food a The display shows the start time. The appliance is in from the cooking compartment. The appliance auto- standby mode. matically switches off completely after approximately a Once the start time has been reached, the appli- 15 to 20 minutes. -
Page 13: Dishes
Dishes en Use or to change the end time. Press to confirm the setting. Press to confirm the setting. a The end time corresponds to the current time plus Press to confirm the delayed start. the set cooking time. a The operation starts with the set cooking time. Cancelling the "Ready at"... - Page 14 en Favourites 10.4 Setting a dish Add extra cooking → "Extending the cooking time time", Page 14 Press "Dishes". Keep warm → "Keeping a dish warm", Press the required dish. Page 14 Note: The setting options vary depending on the dish. 10.5 Extending the cooking time → "Setting options for the dishes", Page 13 a The settings for the dish appear on the display.
-
Page 15: Favourites
Rapid heating en 13 Rapid heating With the rapid heating function, you can shorten the Set a suitable type of heating and a temperature of heat-up time. at least 100 °C. From 200 °C, the rapid heating function is activated Rapid heating automatically switches off at temper- automatically. -
Page 16: Home Connect
en Home Connect Personalisa- Selection Appliance in- Display tion formation Elapsed cook- ¡ Display Appliance in- Display technical information about ing time formation the appliance ¡ Do not display Regional ¡ All 14.2 Changing basic settings dishes ¡ European dishes ¡ British dishes Press to switch the appliance on. - Page 17 Home Connect en Basic setting Possible settings Explanation Home Connect as- Start the assistant You can connect your appliance to the Home Connect app via sistant Disconnect the Home Connect assistant. Note: If you are using the Home Connect assistant for the first time, only the "Start assistant"...
-
Page 18: Cleaning And Servicing
en Cleaning and servicing 15.6 Data protection ¡ The current software and hardware version of your appliance. Please see the information on data protection. ¡ Status of any previous reset to factory settings. The first time your appliance is registered on a home This initial registration prepares the Home Connect network connected to the Internet, your appliance will functions for use and is only required when you want to... - Page 19 Cleaning and servicing en Area Suitable cleaning agents Information Stainless steel in- ¡ Stainless steel cleaner Discolouration can be removed using stainless steel cleaner. terior door frame Do not use stainless steel care products. Door handle ¡ Hot soapy water To avoid permanent stains, immediately remove any descaling agent that gets onto the surface.
-
Page 20: Drying
en "Easy Clean" cleaning aid This prevents stains that cannot be removed. Note: Marks may appear on the self-cleaning sur- Remove any objects from the cooking compartment. faces. Residues of sugar and egg white in the food The cooking compartment must be empty. are not removed and stick to the surfaces. -
Page 21: Rails
Rails en 18.2 Setting "Drying function" ATTENTION! If there is water on the cooking compartment floor Requirement: → "Drying the cooking compartment", when operating the appliance at temperatures above Page 20 120 °C, this will damage the enamel. Press "Cleaning". ▶ Do not use the appliance if there is water on the Press "Drying function". - Page 22 en Appliance door 20 Appliance door To clean the appliance door thoroughly, you can disas- Hold the screwdriver horizontally and use it to semble the appliance door. push the door lock (black component) on each side of the door upwards as far as it will go ...
- Page 23 Appliance door en Insert the coin in the gap in the lock and rotate as ATTENTION! far as it will go . Opening and closing the appliance door when it is Turn the lock on the left-hand side in a clockwise in the lock position damages the door hinges.
- Page 24 en Appliance door Rotate the door handle upwards slightly . WARNING ‒ Risk of injury! The appliance door has a weight of 7–10 kg and may fall if it is not handled carefully. ▶ Handle the appliance door carefully. The door handle is not suitable for carrying the ap- pliance door.
- Page 25 Appliance door en 20.3 Removing the door panes WARNING ‒ Risk of injury! Scratched glass in the appliance door may develop To facilitate cleaning, you can remove the door pane. into a crack. WARNING ‒ Risk of injury! ▶ Do not use any harsh or abrasive cleaners or Components inside the appliance door may have sharp sharp metal scrapers to clean the glass on the edges.
-
Page 26: Troubleshooting
en Troubleshooting Push down on the intermediate pane around Insert the inner pane into the door cover at an angle slide the retainer in at an angle and push down towards the back . until it clicks into place. Insert the retaining bracket for the inner pane into the opening... -
Page 27: Disposal
▶ Next time, set lower or higher values. Tip: A lot of other information about the food preparation and corresponding adjustment values can be found in the Home Connect app or on our website www.neff-interna- tional.com. 22 Disposal 22.1 Disposing of old appliance Dispose of the appliance in an environmentally friendly manner. -
Page 28: Customer Service
en Customer Service Information about current disposal methods are This appliance is labelled in accord- available from your specialist dealer or local author- ance with European Directive ity. 2012/19/EU concerning used elec- trical and electronic appliances (waste electrical and electronic equip- ment - WEEE). -
Page 29: Declaration Of Conformity
Directive 2014/53/EU. A detailed Declaration of Conformity can be found on- A detailed RED Declaration of Conformity can be found line at www.neff-home.com/uk among the additional online at www.neff-international.com among the addi- documents on the product page for your appliance. - Page 30 en How it works Use the CircoTherm hot air heating function. WARNING ‒ Risk of scalding! Note: Items that are placed in the appliance on baking Very hot steam may escape when the lid is opened trays or in baking tins/dishes at the same time will not after cooking.
- Page 31 How it works en 26.5 List of foods Recommended settings for a variety of foods, sorted into food categories. Recommended settings for various types of food Food Accessory/cookware Shelf pos- Heating Temperature in Cooking time in ition function °C mins Sponge cake, delicate Ring-shaped tin 150-170 60-80...
- Page 32 en How it works Food Accessory/cookware Shelf pos- Heating Temperature in Cooking time in ition function °C mins Potato gratin, raw ingredients, Ovenproof dish 150-170 60-80 4 cm deep Chicken, 1.3 kg, unstuffed Uncovered cookware 2 200-220 60-70 Small chicken portions, 250 g Uncovered cookware 3 220-230 30-35 each...
- Page 33 How it works en Sear the meat on all sides on the hob at a very high Issue heat. You want to slow ¡ Place the cold duck breast Immediately place the meat into the pre-warmed cook a duck breast. into a pan. cookware in the cooking compartment.
- Page 34 en How it works Food Accessory/cookware Shelf pos- Heating Temperature in Cooking time in ition function °C mins Scones Baking sheet on wire 200-210 8-12 rack Biscuits Baking sheet on wire 140-160 10-25 rack Small cakes 12-cup-tin 25-35 Pavlova Baking sheet on wire 100-110 150-180 rack...
- Page 35 How it works en ¡ For 1.5 kg, the cooking time would therefore be Cooking time range, e.g. 10-15: 95 minutes. ¡ Your food will be ready within the specified range of time (in minutes). Recommended settings for meat Food Accessory/cookware Shelf pos- Heating Temperature in Cooking time in...
-
Page 36: Installation Instructions
en Installation instructions Recommended settings for baking Food Accessory/cookware Shelf pos- Heating Temperature in Cooking time in ition function °C mins Shortbread Baking tray 140-150 25-35 Shortbread Baking tray 140-150 20-30 Shortbread, 2 levels Universal pan 140-150 25-35 Baking tray Shortbread, 3 levels 4+3+1 130-140 35-55... - Page 37 Installation instructions en ▶ Only use adapters and power cords ap- ¡ Proceed in accordance with the installation proved by the manufacturer. sheets for installing accessories. ¡ Fitted units must be heat-resistant up to ATTENTION! 95 °C, and adjacent unit fronts up to Carrying the appliance by the door handle 70 °C.
- Page 38 en Installation instructions 27.4 Installation underneath a hob If the appliance is installed under a hob, the following The minimum worktop thickness a is based on the minimum dimensions must be adhered to (including required minimum clearance . substructure, if applicable). Hob type a raised in mm a flush in mm...
- Page 39 Installation instructions en ¡ Ensure that air exchange is guaranteed in accord- ¡ Contact protection must be guaranteed by the in- ance with the diagram. stallation. ¡ If the display on the appliance remains dark, it has not been connected correctly. Disconnect the appli- ance from the mains and check the connection.
- Page 40 en Installation instructions Centre the appliance. Screw the appliance into place. There must be an air gap of at least 4 mm between Open the appliance door slightly, then refit the pan- the appliance and adjacent unit fronts. els and screw them in place, first at the top and Open the appliance door slightly and unscrew pan- then at the bottom.
- Page 41 Installation instructions en Pre-drill aluminium profiles to establish a screw con- nection. Secure the appliance using a suitable screw. 27.11 Removing the appliance Disconnect the appliance from the power supply. Open the appliance door slightly and unscrew the left and right-hand panels. Undo the fastening screws.
- Page 44 Valid within Great Britain: Imported to Great Britain by BSH Home Appliances Ltd. Grand Union House Old Wolverton Road Wolverton, Milton Keynes MK12 5PT United Kingdom *9001696354* Register your product online neff -home.com 9001696354 BSH Hausgeräte GmbH 030411 Carl-Wery-Straße 34 81739 München, GERMANY...