
Related Manuals for Printek PrintMaster 862


Summary of Contents for Printek PrintMaster 862
- Page 1 PrintMaster 860 Series Operator’s Manual © Printek, Inc. 2002 1517 Townline Road Benton Harbor, MI 49022 (800) 368-4636 www.printek.com Part Number 6809 Rev. B...
- Page 2 IBM, Proprinter, and IPDS are registered trademarks of International Business Machines Co.; DEC is a registered trademark of Digital Equipment Corporation; Epson is a registered trademark of Seiko Epson; Printek is a registered trademark of Printek, Inc.; Genicom is a registered trademark of Genicom Corporation;...
- Page 3 No user-serviceable parts inside. Refer service or repairs to a qualified service professional. Use of genuine Printek replacement parts is required to warrant proper, safe operation. Any alteration or modification of this device voids the user warranty and may make the product unsafe to operate.
-
Page 5: Table Of Contents
Installing The Ribbon Cartridge ® Why Use Only Printek Brand Ribbons Loading Paper PrintMaster 860 Single Tractor Model PrintMaster 862 Dual Tractor Model Printer Self-Test DAILY OPERATION Introduction Control Panel Features LCD Display and Online Status Indicator LED Exposed Buttons – Most commonly used functions... - Page 6 Setup Module Installation PRINTER RESET CONDITIONS CONTROL CODE AND ESCAPE SEQUENCE SUMMARIES Genicom 3840 and 3410 Emulation ANSI x3.64 Emulation Epson FX Emulation IBM Proprinter Emulation LA-120/210 Emulation Simple TTY Emulation Printek Emulation ASCII CHARACTER TABLES SPECIFICATIONS GLOSSARY OF TERMS...
-
Page 7: Introduction
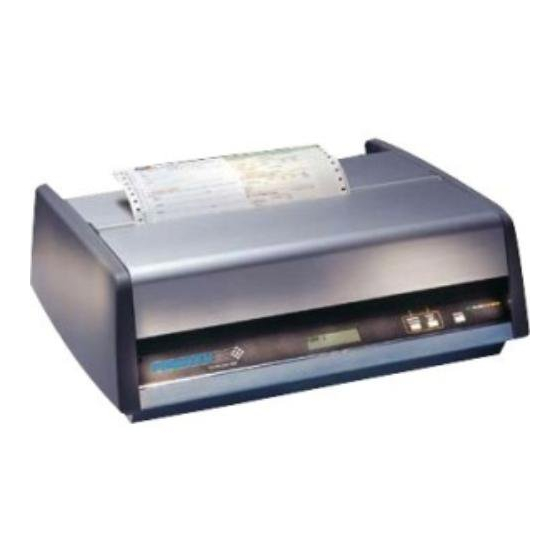
MODELS AND OPTIONS The PrintMaster 860 is a rear feed single tractor path, 85 Column printers. The PrintMaster 862 has both a rear feed tractor path and a bottom feed tractor path. Options available for all models include: Ethernet 10/100BaseT Interface (Internal) -
Page 9: Getting Started
“SPECIFICATIONS” on page 63. Once a site has been selected, the printer should be placed on a countertop, desk or Printek Printstand. The printstand should be located in an area large enough to provide easy access to both the front of the printer and the rear for accessing printed output. -
Page 10: Interface Set Up
Ethernet Interface Connectors on rear of printer Interface Set Up Depending upon which interface is being used to connect the printer to the host computer, some set up may or may not be required. This is true of the standard parallel, serial, or Ethernet. -
Page 11: Installing The Ribbon Cartridge
Printek Brand Ribbon Label The above label on each ribbon can identify Printek brand ribbons. There are many reasons to use only Printek brand ribbons in your PrintMaster 860 Series printer. First of all, using only Printek brand ribbons will automatically extend the printhead warranty to two years instead of one year. - Page 12 Installing a New Ribbon Cartridge Open the ribbon lid at the front of the printer. The printer automatically positions the print head for ribbon loading by moving it away from the platen surface and centering it laterally within the compartment.
-
Page 13: Loading Paper
Configuration” chapter on page 19 and review the “ ” sections. Menu Please refer to the appropriate section below for loading paper in the PrintMaster 860 or PrintMaster 862. PrintMaster 860 Single Tractor Model Loading the Form in the Tractors 1. -
Page 14: Printmaster 862 Dual Tractor Model
1. Open the bottom feed paper door by pulling the top of the door towards you, as shown below. 2. Lift the front of the printer up to access the tractors, as shown below. The printer will remain in this raised position. Open the tractor doors and remove the old form. -
Page 15: Printer Self-Test
3. Feed the paper up through the bottom of the printer with the printed side facing you and position the holes in the edge of the paper over the pins in the left tractor while making sure that the paper will not extend above the top of the tractors. - Page 16 1. Make sure the printer is powered on with ribbon and paper loaded. The test pattern to be printed will use the current form settings and in the PrintMaster 862, the current paper path. Select the desired form settings and paper path before proceeding to the next step.
-
Page 17: Daily Operation
DAILY OPERATION Introduction This chapter describes how to use the “everyday” features of the PrintMaster 860 Series printer. The items covered are: – describes the most commonly used features of the printer’s control Control Panel Features panel. – describes how to insert paper or forms into the tractors and how to Selecting and Loading Forms inform the printer of which forms are “loaded”. -
Page 18: Exposed Buttons - Most Commonly Used Functions
This button also toggles the printer between the on line and off line state. When the printer is on line, it may be printing or may begin printing at any time. To stop the printing or prevent printing from starting, use this button to take the printer off line (see “ONLINE Status Indicator”) above. - Page 19 “HIDDEN” (UNDER LID) Buttons – SETUP AND CONFIGURATION MENU This button is used to set up the various operating parameters of the printer for forms, interfaces, etc. This button is not used on a daily basis. For more information see the chapter on “...
-
Page 20: Selecting And Loading Forms
The form name will be FORM 0 through FORM 9 or the actual name of the form if the name has been set in SETUP. If the desired form is not considered to be “loaded” by the printer, Not Loaded <... -
Page 21: Ejecting And Tearing Off A Form
This is, however, dependent solely upon how the programmer chose to write your particular application software. If your software does position the paper at the top of the next form, the printer will automatically position the form at the tear bar as shown in the following picture. -
Page 22: Aligning Print
Aligning Print When a new form is loaded into the printer for the first time, it may be necessary to adjust where printing begins. If the print position needs to be adjusted, the following discussion will describe how this is accomplished. -
Page 23: Common Error Conditions
MAINTENANCE AND TROUBLESHOOTING Check Paper This error is caused either by running out of paper or by a paper jam. The printer will attempt to determine the cause of a paper problem and accompany the “Check Paper” message with “Paper Jam”, or “Paper Out/Jam”. - Page 24 O P E R A T I O N Finally, place the printer back on line by pressing the ONLINE button. This will automatically load the new form and begin printing. Depending upon how the printer has been set up, the printer may start printing where it left off or it may start at the beginning of the page where the error occurred and reprint the entire page.
-
Page 25: Printer Configuration
The parameters available in these menus usually only need to be set one time, either when the printer is first installed or perhaps when a new form is to be used. These values are stored in nonvolatile memory, which means that they will remain set even if the printer is turned off. Please note that, in an effort to minimize the total number of buttons and provide an uncluttered control panel, most buttons on the PrintMaster 860 Series printers are “context-sensitive”, i.e., their specific function is... -
Page 26: Using The Menu Button
P R I N T E R C O N F I G U R A T I O N After the above message has been shown, the display will change to the first menu available, which is the FORMS MENU as shown below. In this case the display will also show the first submenu, which will be the form that was selected when Setup was pressed. -
Page 27: Forms Menu
Possible Values: Rear, Bottom, Bottom +Rear This item is only available in the PrintMaster 862 and is used to set the tractor path to be used for the currently selected form. Typically, most forms are only loaded in one tractor path and the value will be set to Rear or Bottom. - Page 28 C O N F I G U R A T I O N is set to Bottom +Rear, the printer will automatically switch to the rear path when the bottom path is empty and continue printing until both paths are empty. In this mode, printing must begin on the bottom path.
- Page 29 ” on page 16). Aligning Print Right Margin Font Epson FX FD Draft Speed Normal ) or the Fast Draft ( ) font will be selected when the printer C O N F I G U R A T I O N...
- Page 30 P R I N T E R C O N F I G U R A T I O N Impact Force Normal*, High Possible Values: This item may be used to select High Impact for improved printing on multipart forms that do not otherwise print well on the back copies.
-
Page 31: Interface Menu
In addition to the standard parallel interface and the RS-232C serial interface, which are furnished with the printer, 10/100BaseT Ethernet may also be installed. The Setup items for each interface are described in one of the following sections. - Page 32 Setting this to Yes may decrease performance, but is useful when using the printer with operating systems that try to keep track of which page is currently being printed by the printer. This may also be useful when using serial I/O with systems that do not respond quickly enough to handshake signals.
- Page 33 Possible Values: This item selects the polarity of the busy signal (pin 11 of the RS-232C interface). Busy is set whenever the printer is offline, the serial input buffer is full, or another interface port is currently active. Data Terminal Ready...
-
Page 34: Parallel/Lan Interface Items
Enables or disables the transmission of the XON and XOFF characters from the printer to the host to control data flow to the printer. XOFF will be sent whenever the printer goes offline or the serial buffer is full. XON will be sent when the printer is again ready to receive characters. - Page 35 IP Address Method Auto*, Static Possible Values: This item controls how the optional Ethernet interface card receives its network address. When set to Auto, the Ethernet card will receive its network address from a network DHCP server (typical installation). When set to Static, the user sets the TCP/IP address, Subnet Mask and TCP/IP Gateway address as follows: IP Address 000.000.000.000 …...
-
Page 36: Options Menu
To access the options menu, enter Setup and then press MENU until OPTIONS MENU is displayed OPTIONS MENU Note that the options menu has no submenus. - Page 37 When Reprint Page is selected, the printer will stop printing as soon as the end of paper or a paper jam condition is detected and the printer will go off line. After a new box of forms is loaded, the printer will attempt to reprint the current page from the beginning.
- Page 38 Size option for more information regarding how much data may be retained. When Break Page is selected, the printer will stop printing and go off line as soon as a paper out or paper jam condition is detected. After a new box of forms is loaded, printing will resume where it left off.
- Page 39 Possible Values: In the PrintMaster 862, this item controls the speed of paper in the bottom paper path. When this item is set to Fast, paper motion will take place at 12 inches per second. When set to Normal, this speed is the same as the rear paper path.
-
Page 40: Test Menu
After setting this value, close lid and press ONLINE to begin printing. After printing is completed, the value of this item will automatically return to No. Note that once printing begins, taking the printer off line for any reason (ONLINE button pressed, ribbon lid opened, or a paper fault) will cause printing to be aborted. -
Page 41: Form Construction And Layout Tips
One of the main causes of paper misfeeds is a form that is “tented”. Tenting is a tent-like bulge at the perforation when forms are unfolded from the box. The printer allows a maximum form thickness of 0.025 inches, which a badly tented form may exceed. -
Page 43: Maintenance And Troubleshooting
If your PrintMaster 860 Series printer should require service, please contact the company where you purchased the printer. If you do not know where the printer was purchased, please call 800-368-4636 to obtain the name and number of your nearest Printek Authorized Service Center or to arrange for factory service. -
Page 45: Advanced Setup Features
ADVANCED SETUP FEATURES Security Menu The SECURITY MENU is for Information System managers who want to be able to set up a printer and then “lock out” operator changes to the various menus. This method of security may be set independently for the Align Print, the Forms menu, the Interface menu, or the Options menu. -
Page 47: Using Remote Setup
REMOTE SETUP VIA WINDOWS APPLICATION Printek provides a remote setup program for Windows 95, 98, 2000 and NT users. This provides a convenient method for graphically configuring the printer. Visit www.printek.com to download the free application. - Page 48 TopMargin=0 ... 226 BottomMargin=0 ... 226 CharactersPerInch=10,12,13.3,15,16.74,17.14,20 LeftMargin=0 ... 166 RightMargin=4 ... 170 Font=Epson_FX_FD,Epson_FX_DF,Epson_FX_LQ, PC_English_FD,PC_English_DF,PC_English_LQ, PC_Latin2_FD,PC_Latin2_DF,PC_Latin2_LQ, DEC_LA120_FD,DEC_LA120_DF,DEC_LA120_LQ, EBCDIC_FD,EBCDIC_DF,EBCDIC_LQ, OCR_A_FD,OCR_B_FD DraftSpeed=Normal,Fast ImpactForce=Normal,High Language=USA,France,Germany,England,Denmark, Sweden,Italy,Spain,Japan,Finland Zero=Normal,Slashed Unidirectional=No,Yes [SerialInterface] Emulation=ANSI_X3.64,Epson,IBM_Proprinter, DEC_LA120,TTY,Printek AutoCR=Off,On AutoLF=Off,On HostFFatTOF=No,Yes Characters=Control,Printable MinimumBuffer=No,Yes BaudRate=110,150,300,600,1200,2400, 4800,9600 DataBits=8,7 StopBits=1,2 Parity=None,Even,Odd BusyPolarity=Low,High DTR=Power,Online,Busy...
- Page 49 U S I N G R E M O T E S E T U P XON/XOFF=Off,On ETX/ACK=Off,On [ParallelInterface] Emulation=ANSI_X3.64,Epson,IBM_Proprinter, DEC_LA120,TTY,Printek AutoCR=Off,On AutoLF=Off,On HostFFatTOF=No,Yes Characters=Control,Printable MinimumBuffer=No,Yes [Options] MaxFormAllowed=0 ... 9 AutoScroll=Off,1 ... 15 PaperOutFault=BreakPage,ReprintPage,FinishPage PageSize=0K ... 28K TopOfBarcode+Off,On TopOfOversized=Off,On IngnoreCharacter=Off,On CharToIgnore=0 ...
- Page 50 U S I N G R E M O T E S E T U P...
- Page 51 U S I N G R E M O T E S E T U P [Form1] MovePrintRight=0.20 MovePrintDown=0.33 FormName="INVOICES" Font=Epson_FX_DF [Form2] MovePrintDown=0.25 FormName="REPORTS" LinesPerInch=8 FormLength=68 CharactersPerInch=12 [EndPrintekSetup]...
-
Page 53: Using The Optional Setup Module
4. If a cable was present in step 2, reconnect it to the connector on the rear of the Setup Module. 5. Turn on power to the printer. 6. If this is not the first time the Setup Module has been connected to a printer, the printer will proceed with step 7. - Page 54 After one of the above selections is made, installation is complete, the ONLINE indicator will be turned off and the printer will finish its power up procedure. If you are not sure which button to press, refer to either of the following sections for more information.
- Page 55 Now perform the installation procedure on each of the printers that are to be configured the same as the first. In step 9 be sure to press the LOAD button to copy data to the printer. After the Setup Module is removed, remember to reconnect the serial cable if one was attached.
-
Page 57: Printer Reset Conditions
The following list describes conditions that are assumed whenever power is applied to the printer, changes have been made in MENU, or a reset escape sequence is received (when the printer is operating in an emulation mode that supports such a sequence). -
Page 59: Control Code And Escape Sequence Summaries
CONTROL CODE AND ESCAPE SEQUENCE SUMMARIES Genicom 3840 and 3410 Emulation Bell Backspace Carriage Return Control Sequence Introducer ESC D Line Feed ESC E New Line ESC ESC n Select Software Interface n ESC H Set Horizontal Tab ESC J Set Vertical Tab ESC K Subscript Printing... -
Page 60: Ansi X3.64 Emulation
Set Vertical Tab Stop Epson FX Emulation Bell Backspace Cancel Line Carriage Return Cancel Condensed Mode Deselect Printer Cancel Double-Wide Mode (one line) Delete Character ESC ! n Master Print Mode Select ESC # Cancel MSB Control ESC $ n1 n2... - Page 61 Character Table (Italic vs. Extended) ESC w n Double-High Mode ESC x n Select Draft or Letter Quality End of Text Form Feed Horizontal Tab Line Feed Select Condensed Mode Select Double-Wide Mode (one line) Vertical Tab XOFF Deselect Printer...
-
Page 62: Ibm Proprinter Emulation
120 DPI Graphics ESC N n Set Perforation Skip ESC O Cancel Perforation Skip ESC Q n Deselect Printer ESC R Reset Horiz. and Vertical Tab Stops ESC S n Select Subscript or Superscript Mode ESC SI Select Condensed Mode... -
Page 63: La-120/210 Emulation
Control Sequence Introducer ESC [ n ` Absolute Horizontal Tab ESC [ n a Relative Horizontal Tab ESC [ c Printer Identification ESC [ 0 c Printer Identification ESC [ n d Absolute Vertical Tab ESC [ n e Relative Vertical Tab... -
Page 64: Simple Tty Emulation
Carriage Return ESC ESC n Select Software Interface n End of Text Form Feed Horizontal Tab Line Feed Vertical Tab Printek Emulation Bell Backspace Carriage Return Deselect Printer ESC # m n1 n2 data m DPI Graphics ESC % Line Feed Boundary... -
Page 65: Ascii Character Tables
ASCII CHARACTER TABLES Epson FX Font Character Set PC Font Character Set... - Page 66 A S C I I C H A R A C T E R T A B L E S EBCDIC Font Character Set PC Latin 2 (Slavic) Font Character Set...
- Page 67 A S C I I C H A R A C T E R T A B L E S OCR-A Font Character Set OCR-B Font Character Set...
- Page 68 A S C I I C H A R A C T E R T A B L E S ML Euro (858) ML (850)
-
Page 69: Specifications
SPECIFICATIONS Print Speeds Text Modes Speed Fast Draft Draft Fast Draft High Impact Draft High Impact Letter Quality Optical Quality Graphics Modes Speed (up to) * 8 Wire Graphics 19,200 dps 8 Wire Fast Graphics 25,600 dps 9 Wire Graphics 21,600 dps 9 Wire Fast Graphics 28,800 dps... - Page 70 ANSI X3.64 Epson FX IBM Proprinter DEC LA-120 and LA-210 Simple TTY Printek Basic Bar Code Paper Handling Rear feed or optional bottom feed; zero tear off distance; paper out/paper jam detection; fan fold, continuous forms, edged punched. Paper width: 2.5 to 8.5 inches.
- Page 71 Print Head: 500 million draft equivalent character life. One year limited warranty for defects in materials and/or workmanship. Limited print head warranty may be extended to a two years with the use of only Printek® brand ribbons. Environmental Specifications Power requirements: 100-250 VAC, 50-60 Hz Autoswitching.
-
Page 73: Glossary Of Terms
The column on the current line where the next character will be printed. default Value or configuration that is assumed when the printer is turned on or reset. Draft Font. Dots-per-inch. Generally used to refer to graphics density or resolution. - Page 74 Base eight numbering system. Digits are represented by the characters 0 through 7. Refers to the state of the printer when the ONLINE indicator is not solid green offline and the printer does not respond to the host computer.