
Related Manuals for Plextor PX-320A


Summary of Contents for Plextor PX-320A
- Page 1 Model PX–320A (Internal) Record Your Serial Number For future reference, record the serial number and the TLA code (found on your drive’s label) in the space provided below. TLA/Firmware Revision Number...
- Page 2 Plextor reserves the right to make improvements in the products described in this manual at any time without prior notice. Plextor makes no representation or warranties with respect to the contents hereof and specifically disclaims any implied warranties of merchantability or fitness for any particular purpose.
- Page 3 • Do not open the optical pickup housing. • Obtain service only from Plextor-authorized personnel. LASER INFORMATION These products have been designed and manufactured according to IEC 60825-1 on the Safety of Laser products. This product comes under “Class 1 Laser Products.” A Laser Caution Marking is attached on the top of the internal drive model: “Caution: Invisible laser radiation when open.
- Page 4 This page intentionally left blank.
-
Page 5: Table Of Contents
Table of Contents 1. Getting Started ... 1 About this Manual... 1 Meet Your PlexCombo 20/10/40-12A ... 1 What the PlexCombo 20/10/40-12A Does... 1 Minimum Configuration to Use the PlexCombo 20/10/40-12A ... 2 What You Can Do with the PlexCombo 20/10/40-12A... 2 Save Your Box!... - Page 6 Table of Contents 4. Using Your PlexCombo ... 29 What Media to Use... 29 Tray Loading and Operation ... 30 Handling CD Media ... 30 Cleaning Discs ... 31 Playing Audio CDs ... 31 Playing DVDs ... 33 Writing to CD-R and CD-RW Media... 33 Determining Write Speed from the BUSY Indicator ...
-
Page 7: Getting Started
1. Getting Started Congratulations! Thank you for purchasing the PlexCombo 20/10/40-12A (the model number is PX-320A), a reliable, high-performance CD rewriter, CD recorder, and CD/DVD reader. We appreciate the confidence you have shown in us. Our goal is to put you—and keep you—on the leading edge of CD technology. -
Page 8: Minimum Configuration To Use The Plexcombo 20/10/40-12A
CD-R or CD-RW disc. And Plextor backs up this remarkable drive with a one-year full warranty on parts and labor, and unlimited toll-free tech support. -
Page 9: Save Your Box
What's in the Box What you find in your Plextor box depends on what the company that sold you the box put in—or took out—while the Plextor drive was in their possession. Plextor currently sells its PlexCombo 20/10/40-12A drive in this configuration: •... -
Page 10: Plexcombo Drive Features And Controls
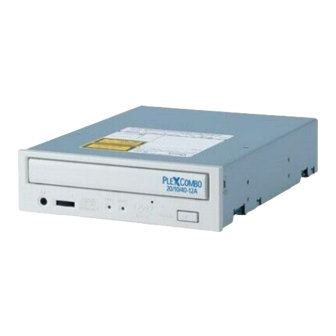
Section 1. Getting Started PlexCombo Drive Features and Controls Before proceeding, become familiar with the controls and features of your PlexCombo drive. Match the parts of your drive to the illustrations below. Front Panel Figure 1: Front Panel of the PlexCombo 20/10/40-12A Drive •... -
Page 11: Rear Panel
Rear Panel Figure 2: Rear Panel of the PlexCombo 20/10/40-12A Internal Drive • Digital audio output connector: Outputs digital stereo signal. For connecting to a sound board that supports Sony/Philips digital interface (SPDIF) or Digital-In. • Analog audio output connector: Outputs analog stereo signal. Use to connect to sound board or audio amplifier. -
Page 12: About Simplicd And Roxio Software
In order to create CD-R and CD-RW discs you will need to have mastering, packet writing, or duplication software installed on your computer system. If you purchased your drive from Plextor, you’ll find two software packages, SimpliCD and Easy CD Creator, that have this software. - Page 13 • Keep your CD and DVD discs free of dirt or other contaminants, by storing them in jewel cases. Use only industry-standard discs. Do not insert dirty, warped, poorly balanced, or cracked discs into the drive. • Do not clean discs using a circular motion. Instead, use a radial motion: start at the center of the disc and proceed to the outer edge.
- Page 14 Section 1. Getting Started This page intentionally left blank PlexCombo 20/10/40-12A Installation and Users Manual...
-
Page 15: Installing Your Plexcombo
2. Installing Your PlexCombo This chapter explains how to physically install your PlexCombo in your computer. The steps you'll need to do are as follows: 1. Turn OFF your computer system. 2. Set the jumper for your new PlexCombo drive, if necessary. 3. -
Page 16: Determine Your Existing Ide Configuration
Section 2. Installing Your PlexCombo CAUTION: Before you attempt to open your computer be sure to properly ground yourself by wearing an anti-static wristband. This will help prevent static damage to your computer system. Figure 3: Removing a Typical Computer's Cover Determine Your Existing IDE Configuration With your computer open, determine the existing IDE configuration. -
Page 17: Set The Drive's Mode Jumper
Section 2. Installing Your PlexCombo Set the Drive’s Mode Jumper You specify your drive's Master or Slave setting before installing it. You do this by changing the position of a jumper on the mode jumper block at the rear of the drive. Your drive ships from our factory with its mode jumper set to operate the PlexCombo as a Master. -
Page 18: Select An Ide Configuration
Section 2. Installing Your PlexCombo Changing Jumper Settings To remove a jumper, pull it off with your fingers or a pair of needle-nose pliers. To install a jumper, push it onto the jumper pins. CAUTION: Ensure power to the drive is OFF before installing or removing jumper. Figure 5: Install the Mode Jumper Across Vertical Pairs of Pins CAUTION: Install the mode jumper across each pin as shown (vertically). - Page 19 Before PlexCombo Installation A Hard disks connected as Master and Slave devices on primary IDE port; CD-ROM connected as Master device on secondary IDE port. NOTE: Configuration A can make it very difficult to write from the CD-ROM to the PlexCombo at 20X using “on-the-fly” copying. System configuration and performance will make a big difference.
- Page 20 Section 2. Installing Your PlexCombo Before PlexCombo Installation B Hard disk connected as Master device, and CD-ROM or DVD-ROM drive connected as Slave on the primary IDE port; nothing connected to secondary IDE port. Figure 7. How to Install the PlexCombo If Your Computer Is Originally Set Up in Configuration B Before PlexCombo Installation C Hard disk connected as Master...
-
Page 21: About Cable Select
• A special CSEL cable for IDE. Figure 10: Using the CSEL Signal to Configure the PlexCombo Drive NOTE: The IDE cable supplied by Plextor does not support CSEL. To use CSEL and Cable Select, you’ll have to purchase another cable. -
Page 22: Identifying Whether Your System Uses Cable Select
Section 2. Installing Your PlexCombo Identifying Whether Your System Uses Cable Select If you are unsure whether or not your system has a Cable Select cable installed, either look at the cable (there will be connectors labeled “Master” and “Slave”) or look at the jumpers on the CD-ROM drive. -
Page 23: Install The Plexcombo Drive
Install the PlexCombo Drive Before proceeding to install the PlexCombo drive in your personal computer, double-check your jumper setting. Record the Serial Number Record the serial number and TLA code of your drive on the inside front cover of this manual. Mount the PlexCombo Drive in the Computer You can mount your internal PlexCombo drive in any available bay. - Page 24 You may need to install another IDE ribbon cable in your computer. You can use the extra IDE cable supplied with your PlexCombo. (Just remember, if you want to use CSEL and Cable Select settings, this Plextor-supplied cable won’t work—you’ll have to purchase a special cable for Cable Select.) Figure 13: Internal IDE Ribbon Cable CAUTION: The length of any IDE cable cannot exceed 18 inches.
- Page 25 The drive can be mounted directly into your computer. Go to step 6. NOTE: Plextor does not provide rails. If you need rails, you can obtain them from the computer manufacturer or from a computer supply retail or mail-order store.
- Page 26 Section 2. Installing Your PlexCombo Figure 15: Installing Mounting Rails (if Needed) 6. Plug one connector of the IDE cable into the IDE connector on the rear panel of the drive before you insert the drive into your computer. ( If the PlexCombo is the only drive connected, you must use one of the end connectors.) Then thread the cable through the front of the open bay and back toward the motherboard.
- Page 27 8. Double-check your work. You must ensure the side of the IDE cable with the red stripe is matched to Pin 1 on the interface board and on the drive. CAUTION: If you have only one IDE drive, make certain that one end of the cable is connected to the IDE connector on the motherboard, and the other end connected to the drive.
-
Page 28: Using Sound Boards And Audio Cables
Use only these screws. CAUTION: Do not mount your drive in your computer using screws other than those supplied by Plextor. You may damage the drive if you insert screws that are too long or the wrong thread type. -
Page 29: Make Sure The Drive Is Recognized
In Windows 2000 or XP, right-click on the My Computer icon and select Properties. Click on the Hardware tab, then click on the Device Manager button. Click the + sign next to the CD-ROM heading and look at the PLEXTOR CD-R PX-320A entry underneath. -
Page 30: Enable Dma
Panel, then double-click on System icon, then click on Device Manager tab. You will see a list of devices in your system. 2. Double-click the CD-ROM icon and choose the PX-320A drive by clicking on it once. Then click on the Properties button and select the Settings tab. You will see the drive properties for the PlexCombo. -
Page 31: Installing And Using Software
CDs, and more. Some of these applications are supplied with your PlexCombo if purchased as a kit from Plextor, while others are available from other vendors. If you have any problems at all, our technical support staff will help you. -
Page 32: Install Applications Software
PC. If you purchased your PlexCombo as part of a Plextor kit and you have a PC, much of the software you need is included. You can also check the compatibility list on the Plextor web site at www.plextor.com, for software that supports the PlexCombo... -
Page 33: Simplicd
SimpliCD SimpliCD from Oak Technologies contains software for mastering and duplication. It has these main applications: • SimpliCD Copy: Lets you make an identical copy of any disc. It makes exact copies of any data, audio or video CD. • SimpliCD Recorder: This component of SimpliCD lets you make CDs containing audio, video and slide shows, including audio discs playable in your car or home stereo. -
Page 34: Other Software
Other Software Besides SimpliCD, Roxio, and PowerDVD, you can use other software with your PlexCombo. A list of various software packages that you can use with your Plextor drive can be found in the Support/Compatibility section of www.plextor.com. Here you’ll find software that supports the PlexCombo under other operating systems. -
Page 35: Using Your Plexcombo
20X or greater; and to achieve 10X RW writing speed you must use high-speed RW media. See “Recommended Media “on page 57 for a list of approved media at the time this manual was printed, and visit the Plextor web site at http://www.plextor.com for an updated list. -
Page 36: Tray Loading And Operation
Section 4. Using Your PlexCombo Tray Loading and Operation To load and unload the tray: 1. While the PlexCombo drive is powered up, push the Eject button on the front panel. The tray drawer slides out in 3–4 seconds. Figure 18: Loading the Tray 2. -
Page 37: Cleaning Discs
Cleaning Discs For proper read and write performance, your CD-R, CD-RW, CD-ROM and DVD- ROM discs must be clean. Trying to record on a dirty disc may result in a failed session and ruin the disc. To clean the disc, wipe the disc using a clean, soft cotton cloth to remove surface dirt such as fingerprints. - Page 38 Section 4. Using Your PlexCombo Figure 20: Connections for Playing Audio Using the Headphone Jack • Sound board audio: This comes from data files that may be present on a disc, such as a WAV, WMA or MP3 files, that are transferred from the CD to your computer via the IDE interface.
-
Page 39: Playing Dvds
CD-RW discs. Drives manufactured before 1998 cannot read CD-RW discs. Plextor CD-ROM drives beginning with the 12/20PleX and newer can read CD-RW discs, including the new, high-speed discs. Determining Write Speed from the BUSY Indicator... -
Page 40: Advantages Of Varirec Technology
Advantages of VariRec Technology This drive is equipped with VariRec (Variable Recording) technology, a feature offered by Plextor that allows you to manually adjust the drive's laser power during the audio recording process. NOTE: In order for you to actually perform the adjustment, VariRec must be supported by the recording software you’re using. -
Page 41: When You Write With Varirec
Section 4. Using Your PlexCombo When You Write with VariRec VariRec writes in either Track-at-Once (TAO) or Disc-at-Once (DAO) mode. It writes CD-DA (digital audio) on CD-R media at 4X speed or 1X speed, rather than at the full speed of the drive. For this reason, audio recording using VariRec takes a bit longer than a standard audio recording. - Page 42 Section 4. Using Your PlexCombo This page intentionally left blank. PlexCombo 20/10/40-12A Installation and Users Manual...
-
Page 43: Maintenance And Troubleshooting
PlexCombo drive. However, we advise that our customers always update drives with the latest available firmware. Before troubleshooting a possible problem with your drive please make sure to visit our web site at www.plextor.com to check if you have the latest firmware. -
Page 44: Troubleshooting
Section 5. Maintenance and Troubleshooting Troubleshooting If you have problems during or right after installation of your PlexCombo drive, use these tips to help find the problem. You can also use these charts to help find problems that develop in existing installations. Start here if you're a PC user. - Page 45 Troubleshooting: General Symptom Possible Causes Wrong cable with jumper set to Cable Select. Cannot eject tray. Tray is locked by mastering software. CD was not properly set into tray and is stuck. Personal Computer does not computer “hangs” support Ultra DMA. or crashes after PlexCombo is installed.
-
Page 46: Troubleshooting: Reading Discs
Section 5. Maintenance and Troubleshooting Troubleshooting: Reading Discs Troubleshooting: Reading Discs Symptom Possible Causes PlexCombo drive Defective DVD, CD- has read errors, ROM, CD-R, or CD-RW may not respond disc. when accessed from My Fingerprint, Computer or contaminants, or Explorer, or scratches on the disc’s cannot run a surface that prevent the... - Page 47 Troubleshooting: Reading Discs Symptom Possible Causes Excessive noise. CD is poorly balanced. Poorly manufactured Excessive discs or discs with vibration. poorly distributed ink on labeling cause Slow read significant vibration at performance. high speeds because they are out of balance. Read errors may also occur.
-
Page 48: Troubleshooting: Writing Cd-R And Cd-Rw Discs
Section 5. Maintenance and Troubleshooting Troubleshooting: Writing CD-R and CD-RW Discs Troubleshooting: Writing CD-R and CD-RW Discs Symptom Possible Causes Writing error Network is being used. occurs. Mouse was moved or Windows screensaver activated while writing. Other applications are running. Power save mode is active. - Page 49 Plextor web site at www.plextor.com. Use CD-R/RW media supported by Plextor. Supported media lists can be found on the Plextor web site at www.plextor.com. Reinsert the disc with the label right side up. CD-R/RW media may be dirty, scratched or damaged.
- Page 50 Section 5. Maintenance and Troubleshooting Troubleshooting: Writing CD-R and CD-RW Discs Symptom Possible Causes CD-R or CD-RW Power connector is not software cannot attached to detect PlexCombo. PlexCombo. IDE cable is not attached to PlexCombo. Drive or IDE bus is not enabled in the computer’s BIOS.
- Page 51 PlexCombo 20/10/40-12A (PX- 320A) drive. Supported software lists can also be found on the Plextor web site at www.plextor.com. If using different authoring software than for the previous writing, errors may occur. Always use the same authoring software.
- Page 52 Re-write using the CD-R/RW media recommended by Plextor. Supported media lists can also be found on the Plextor web site at www.plextor.com. Use the authoring software provided with the PlexCombo. If using other software, ensure that PlexCombo 20/10/40-12A is supported by the software.
- Page 53 Troubleshooting: Writing CD-R and CD-RW Discs Symptom Possible Causes PlexCombo and other IDE CD-ROM drive are connected on the same cable. PlexCombo and hard disk are connected on the same cable. CD-ROM drive used as a source cannot read data fast enough to record at higher speeds, such as 20X and 16X.
-
Page 54: Troubleshooting: Playing Audio Discs
Section 5. Maintenance and Troubleshooting Troubleshooting: Playing Audio Discs Symptom Possible Causes No sound from Sound board volume audio CD, too low. when everything else Mixer settings for appears to be soundboard set too low functioning or muted. normally. Need sound board. Sound board not properly configured. -
Page 55: Troubleshooting For Macintosh Users
• Tools to remove the computer’s cover • The spare jumper shipped with your drive • A blank piece of Plextor-recommended CD-R media (see “Recommended Media” on page 57, or visit our web site) for the CD write/read test • A DVD disc for the DVD random access test PlexCombo 20/10/40-12A Installation and Users Manual Section 5. -
Page 56: Cd Write/Read Test
Section 5. Maintenance and Troubleshooting CD Write/Read Test This tests three functions of the drive: write, random access, and verify. To perform the CD write/read test: 1. Turn the computer’s power OFF, unplug it from its power source, and open the computer to gain access to the rear of the PlexCombo drive. - Page 57 8. While pressing the eject button on the PlexCombo, turn the computer power on. The BUSY indicator blinks green and amber. 9. Insert a blank Plextor-recommended CD-R disc. Be sure to use only CD-R media of the type recommended by Plextor.
-
Page 58: Dvd-Rom Test
Section 5. Maintenance and Troubleshooting 14. If you do not wish to perform the DVD-ROM test, reset the mode jumper at the rear of the PlexCombo to its original setting as noted in Step 4 above. Also, remove the spare jumper you installed. 15. - Page 59 If you discover a problem with the PlexCombo drive, do not attempt to service the drive yourself. Contact us to get an RMA number and take steps to return the drive to Plextor. See “Returns” on page 64 for details. PlexCombo 20/10/40-12A Installation and Users Manual...
- Page 60 Section 5. Maintenance and Troubleshooting This page intentionally left blank. PlexCombo 20/10/40-12A Installation and Users Manual...
-
Page 61: Frequently Asked Questions
“Recommended Media” on page 57 for a list recommended media (including 20X certified media) at the time this manual was printed. The most updated list of supported media can be found on the Plextor web site at www.plextor.com. When can I use CD-RW media? CD-RW media can only be used for writing in ReWritable drives. - Page 62 Section 6. Frequently Asked Questions What causes buffer underrun errors? Recording CDs requires a source device to provide an uninterrupted stream of data. A buffer underrun occurs when the data stream is interrupted. This can occur if: You do not have BURN-Proof enabled in your software or your software does not support this feature.
-
Page 63: Appendix A: Plexcombo Specifications
Operating System Windows XP, Me, 2000, 98, 95; or Macintosh Recommended Media CD-R: 20X To ensure 20X write speed, Plextor recommends using only certified 20X media available from Ricoh, Taiyo Yuden, Mitsui Chemicals, Kodak, Maxell, Fuji (Futalo), Verbatim /Mitsubishi Chemical... - Page 64 Appendix A: PlexCombo Specifications Usable Formats Logical CD Read/Write CD-DA, CD-Extra, CD-ROM Mode-1, CD-ROM XA, Photo-CD, Video-CD, Multisession, CD TEXT, CD+G, UDF, CD-I, CD-ROM Mixed Mode Write Methods Track-at-Once, Disc-at-Once, Session-at-Once, Packet Write (variable and fixed), Multisession Logical DVD Read DVD-ROM, DVD-Video Performance Specifications Read Speed, CD...
- Page 65 Performance Specifications (continued) Error Rate CD-ROM Mode 1: 1 Block/10 CD-ROM Mode 2: 1 Block/10 Data Buffer 2 MB Spindle Motor Brushless Front Panel Eject Eject Button; Manual Emergency Eject; Software Eject DISC Indicator LED Green: CD-ROM loaded Yellow: DVD loaded BUSY Indicator LED Green: Disc load Yellow: Reading disc...
- Page 66 Modes 0-2 ATAPI-5 Command Set Supports CD-ROM commands, including special commands for CD-R and CD-RW. Inquiry string PLEXTOR sp CD-R sp sp sp PX-320A sp sp (where “sp” is one space) Environmental Conditions Operating Temperature 0 to 40 degrees Celsius...
- Page 67 Safety Standards Country/ Region Type Safety Laser Canada Safety Europe Safety Safety Laser Taiwan PlexCombo 20/10/40-12A Installation and Users Manual Appendix A: PlexCombo Specifications Agency Standard UL 1950 FDA 21 CFR FCC 15J-Class B CSA 22.2 No. 950 EN60950/IEC60825 IEC60950 IEC60825-1 EN55024, EN50022 BSMI...
- Page 68 Appendix A: PlexCombo Specifications This page intentionally left blank. PlexCombo 20/10/40-12A Installation and Users Manual...
-
Page 69: Appendix B: Technical Support
• Visit our web site (www.plextor.com) for answers to Frequently Asked Questions. • Send us e-mail at support@plextor.com, or send a fax to the attention of the Technical Support Department at 303-708-0709. Include your telephone number and the hours during which you can be reached. Be as detailed as possible in describing your problem. -
Page 70: Before You E-Mail/Log On/Fax/Call
303-708-0709. Forms are also available on Plextor’s web site, in the Support/Warranty section. Any drive sent to Plextor without an RMA number will not be accepted. Be sure to write the RMA number on the outside of the shipping box. -
Page 71: Appendix C: Helpful Contacts
Creative Digital Research) SONICblue 800-468-5846 541-967-2485 (Formerly Diamond) 408-969-8620 408-969-8621 Pacific 408-542-8150 408-542-8151 Inter 800-706-0510 Connects Plextor Roxio 866-280-7694 303-684-3020 Testa CD 520-529-8636 408-737-3838 Labs ext. 100(TCD) (Oak (Part of Technology) Oak Tech- 408-737-0888 nology) (Oak) PlexCombo 20/10/40-12A Installation and Users Manual... -
Page 72: Contacts For Pc Vendors
Appendix C: Helpful Contacts Contacts for PC Vendors Company http://ibm.com Dell http://dell.com Gateway http://www.gw2k.com Compaq http://compaq.com Hewlett Packard http://www.hp.com/ Intel http://intel.com ASUSTeK Computer http://www.asus.com.tw/ GIGA-BYTE http://www.giga-byte.com/ ABIT http://www.abit-usa.com/ Aopen http://www.aopen.com/ EPOX http://www.epox.com/ SOYO Computers http://www.soyousa.com/ Tekram http://www.tekram.com/ http://www.fic.com.tw/ Micro-Star International http://www.msi.com.tw/ I Will http://www.iwill.com.tw/... -
Page 73: Appendix D: Warranty
In the event this product is found to be defective within the warranty period, PLEXTOR will, at its option, repair or replace the defective unit. - Page 74 Appendix D: Warranty This page intentionally left blank. PlexCombo 20/10/40-12A Installation and Users Manual...
-
Page 75: Index
access time · 58 analog audio output connector · 5, 21, 59 application software · 26 ATAPI setting · 2 ATAPI-5 command set · 1, 60 audio CD-audio · 31 digital · 59 sound board audio · 32 speed of writing · 58 audio cable ·... - Page 76 Index contacts · 65 controls, front-panel · 4, 59 cover panel, bay · 19 CSEL signal · 15 data buffer · 59 device driver · 25 installing · 25 diagnostics · 2, 49 CD write/read test · 50 DVD-ROM test · 52 digital audio output ·...
- Page 77 adjusting with VariRec · 2, 34 optimum · 2 Macintosh playing CD on · 32 troubleshooting · 49 using PlexCombo on · 26 maintenance · 37 master · 10 cable select · 16 setting in BIOS · 23 setting mode jumper · 11 mastering software ·...
- Page 78 Index mastering · 6 obtaining current list · 28 packet writing · 6 PowerDVD · 6, 27 Roxio · 6, 27 Roxio CD Copier · 27, 55 Roxio EasyCD Creator · 27 SimpliCD · 6, 27 SimpliCD Copy · 27 SimpliCD Recorder ·...
- Page 79 CD-DA · 58 data · 58 writing DVD as source · 56 frequently asked questions · 55 limitations on speed · 13 using image · 2 PlexCombo 20/10/40-12A Installation and Users Manual Index VariRec and · 35 writing speed DMA setting · 12 monitoring ·...
- Page 80 Index This page intentionally left blank. PlexCombo 20/10/40-12A Installation and Users Manual...