Advertisement
Quick Links
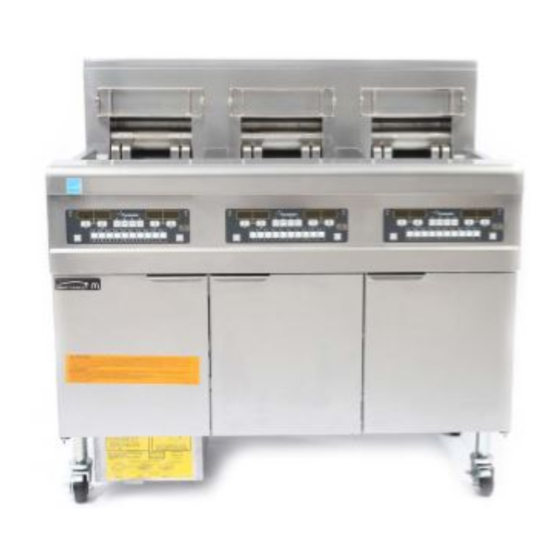
FRYER
Frymaster
Model numbers BIEL14 & BIGL30
MANUAL LOV – Low Oil Volume
Daily maintenance tasks
FR 4 D1
Cleaning fryer
FR 4 D2
Maintenance Filter
Weekly maintenance tasks
FR 4 W1
Clean Behind
Fryer
Bi-weekly maintenance task
FR 4 B1
Calibrate fryer
Monthly maintenance task
FR 4 M1
Calibrate fryer
recovery time
Quarterly maintenance tasks
FR 4 Q1
Deep Clean
FR 4 Q2
High Limit Check
FR 4 Q3
O-Ring inspection
FR 4 Q4
Clean Blower
Annual maintenance tasks
FR 4 Al-T
Servicer inspection
(Electric fryers only)
FR4 A2-T
Service inspection
(Gas fryers only)
APR 2015
*8196987*
Computer model Manual LOV M3000
A. Cook cycle buttons, B. Filter, Temp, Info, Programming and Navigation buttons, C. Product
Buttons, D. ON/OFF
A
D
Model BIEL14
A
B
A. Manual LOV M3000 computer, B. Filter pan
Hazards
These icons alert you to a possible risk of personal injury.
Equipment alerts
Look for this icon to find information about how to avoid damaging the
equipment while doing a procedure.
Tips
Look for this icon to find helpful tips about how to do a procedure.
©McDonald's Corporation · Planned Maintenance Manual · Revised November 2012
FR 4
B
A
D
C
Model BIGL30
A
B
Advertisement

Related Manuals for Frymaster BIEL14


Summary of Contents for Frymaster BIEL14
- Page 1 FRYER FR 4 Frymaster Model numbers BIEL14 & BIGL30 MANUAL LOV – Low Oil Volume Computer model Manual LOV M3000 Daily maintenance tasks A. Cook cycle buttons, B. Filter, Temp, Info, Programming and Navigation buttons, C. Product FR 4 D1 Cleaning fryer Buttons, D.
- Page 2 Daily Cleaning of Fryers Daily FR 4 D1 Removed caramelized oil from fryer and clean element hub. 5 minutes to prepare 15 minutes to complete (5 minutes per pot) Time required Low-volume periods For 24-hour restaurants: overnight or during low- Time of day volume periods Hazard icons...
- Page 3 Clean area behind fryers (continued) Wipe down surfaces. Remove frypot cover and remove basket rack using a fryer’s friend, set aside. Lift Spray a clean, sanitizer- soaked towel with Heavy elements using fryer’s friend. Duty Degreaser solution to thoroughly wipe down all surfaces of the fryer to re- Replace frypot covers and move grease and soil build-...
-
Page 4: Maintenance Filter
Maintenance Filter Daily FR 04 D2 Cleans the vat of crumbs and filters the oil thoroughly to prolong the life of the oil Time required 5 minutes to prepare 10 minutes per vat to complete Time of day During low volume hours. Hazard icons Tools and supplies Gloves, filtering... -
Page 5: Drain Valve
Maintenance Filter (continued) Open the drain valve Washing Computer displays OPEN The controller displays DRAIN VALVE. WASH VAT? alternating Carefully open the drain valve with CONFIRM. Lower the elements and press the and let the oil drain into the filter pan. - Page 6 Maintenance Filter (continued) Close the return valve Polish The controller displays The controller displays POLISH? alternating with CLOSE RETURN VALVE CONFIRM. Press the WHEN VAT FULL button. The controller alternating with CONFIRM. displays POLISHING alternating with the countdown timer while the oil Once the vat is full and is circulated through the filter bubbles appear in the oil,...
- Page 7 Maintenance Filter (continued) Close drain valve Pull-out filter pan Open the door and pull the The controller displays filter pan assembly out. CLOSE DRAIN VALVE. Close the drain valve. The filter pan may be hot! Use protective gloves, or severe burns may result. Remove crumb basket Lift the crumb basket from the filter pan.
- Page 8 Maintenance Filter (continued) Reassemble Reassemble in reverse order, placing the bottom screen into the filter pan first, followed by the filter pad with rough side facing up, hold down ring and the crumb basket. Ensure the filter pan, bottom screen, crumb basket, and the hold down ring are thoroughly dry before placing filter pad into pan as water...
- Page 9 Clean area behind fryers Weekly FR 4 W1 To ensure high-quality fried products and reduce the possibility of a fire near the fryer 5 minutes to prepare 45 minutes to complete Time required After close For 24-hour restaurants: overnight or during low- Time of day volume periods Hazard icons...
- Page 10 Clean area behind fryers (continued) Prepare fryer for cleaning. Scrape area behind fryer. Release the locks on the fryer Use a putty knife to scrape off wheels. all soft grease and hard car- bon from the area behind the If the fryer has a capping fryer.
- Page 11 Clean area behind fryers (continued) Clean area behind fryer. Allow surfaces to dry. Use a nylon pot brush, a hi-lo Allow all fryer, wall, and deck brush, and a bucket of floor surfaces to air dry. hot KAY® SolidSense™ All Purpose Super Concentrate (APSC) solution to scrub all of the areas you scraped in...
- Page 12 Clean area behind fryers (continued) Reinstall fryer filters and grease trough. Lock wheels into place. Rein- stall the fryer filters and the grease trough in the exhaust hood. Turn on gas supply. If the fryer is an electric fryer, skip this step. Turn the manual gas shut-off valve to the on position.
- Page 13 Calibrate fryer Bi-weekly FR 4 B1 To maintain food safety standards 1 minute to prepare 5 minutes to complete, once fryer has reached cooking Time required temperature. Cook temperature should be reached in approximately 45 minutes. At open For 24-hour restaurants: during low-volume periods Time of day Hazard icons Tools and supplies...
- Page 14 Calibrate fryer (continued) Read oil temperature. End calibration check. Insert the fry vat probe of the When you have finished steps pyrometer into the hot oil to 5 through 7 for the vat (in- within 1 inch (2.5 cm) of the cluding both sides of a split- probe’s tip.
- Page 15 Calibrate fryer recovery time Monthly FR 4 M1 To maintain food safety standards for fried products 1 minute to prepare 5 minutes to complete, Time required At open For 24-hour restaurants: in the morning Time of day Hazard icons Tools and supplies Paper and pencil Procedure Turn fryer on.
- Page 16 Refer to troubleshooting guide in Operators manual. Check recovery time again. If Recovery Time is not achieved in the proper time, call the Frymaster Service Hotline for assis- tance at 1-800-551-8633. Recalibrate all remaining fryers. Repeat steps 1 through 5 for all remaining fryers.
-
Page 17: Enter Code
Deep Clean Mode System Quarterly FR 4 Q1 Removes caramelized oil from elements (if electric) and frypot. Time required 5 minutes to prepare 15 minutes to prepare; 60 per pot to complete Time of day This task can be performed one pot at a For 24-hour restaurants: This task can be performed one time. -
Page 18: Deep Clean Mode
Deep Clean Mode (continued) Enter Code. Drain oil from vat. Enter 1-2-3-4 with the Empty Vat: Skip to Step 13. numbered keys Be sure the MSDU (McDonald’s Shortening Disposal Unit or oil removal Scroll to Deep Clean. cart) is in place underneath Press the “Info”... - Page 19 Deep Clean Mode (continued) Replace filter pan. Start Deep Clean Place filter pan with all Computer displays DEEP internal components removed CLEAN alternating with a in the fryer cabinet. countdown timer for one hour. The solution will reach a temperature of 195°F (91°C).
- Page 20 Deep Clean Mode (continued) Scrub inside of vat. Scrub inside of vat. Scrub the side, front, and The computer displays back walls of the vat with the SCRUB VAT COMPLETE? Hi-Temp Pad Holder, pad and alternating with CONFIRM. Kay QSR Fryer Cleanser. Use the Hi-Temp Pad Holder, pad and fryer cleanser to scrub the side, front, back and...
- Page 21 Deep Clean Mode (continued) Rinse Complete Vat, Pan Dry The computer displays Press 1when the vat and RINSE COMPLETE? pan are dry and ready to alternating with CONFIRM. return to service. Press the 1button when the rinse is complete. Insert Pan Close drain valve The computer displays Computer displays CLOSE...
- Page 22 Verify high-limit controls Quarterly FR 4 Q2 If the high-limit is not working properly it could lead to a serious equipment failure and unsafe conditions. Never operate a fryer that has a malfunctioning high-limit. Conduct this test when the fryer will not be needed for one hour and the oil is due to be changed. Discard the oil after completing this test.
- Page 23 Verify high-limit controls (continued) Confirm test choice Once oil cools exit to off. The computer displays HI When the vat cools below LIMIT? alternating with YES 400°F (204°C), press the 2 twice to exit and return to OFF. Dispose of oil. Press key Dispose of the oil after a high Press the key.
- Page 24 Replace filter O-rings Quarterly FR 4 Q3 To keep the fryer’s filter pump in working order 2 minutes to prepare 5 minutes to complete Time required At open; the fryer must be cool For 24-hour restaurants: During a low-volume period Time of day when the fryer can be turned off Hazard icons...
-
Page 25: Clean Combustion Air Blower Assembly
Clean Combustion Air Blower Assembly Quarterly FR 4 Q4 To keep the fryer in working order. Time required 45 minutes per blower to complete. Time of day After hours. For 24-hour restaurants: During a low-volume period when the fryer can be turned off. Hazard icons Tools and supplies Tools supplied by... - Page 26 Annual Inspection (electric fryers only) Annually FR 4 A1-T Frymaster recommends that a Factory Authorized Service Technician inspect this appliance at least annually. This will help ensure the equipment is in safe working order and operating at peak performance. Time required...
- Page 27 Annual Inspection (electric fryers only) (continued) Probe check Verify that the temperature and high-limit probes are properly connected, tightened and functioning properly, and that mounting hardware and probe guards are present and properly installed. Electrical component inspection Verify that component box and contactor box components (i.e.
- Page 28 Annual Inspection (gas fryers only) Annually FR 4 A2-T Frymaster recommends that a Factory Authorized Service Technician inspect this appliance at least annually. This will help ensure the equipment is in safe working order and operating at peak per- formance.
- Page 29 Annual Inspection (gas fryers only) (continued) Adjust combustion air blower, if necessary. If the fryer’s recovery time is less than 2:25 (two minutes, twenty-five seconds) skip this step. If either the multimeter reading or the burner color is not acceptable, adjust the combustion air blower intake plate.