Table of Contents
Advertisement
Available languages
Available languages
Quick Links
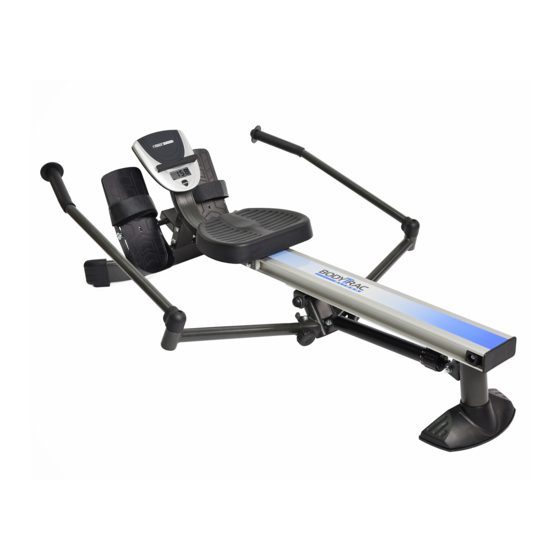
Product May Vary Slightly From Pictured.
CAUTION:
Weight on this product should not exceed 250 lbs.
This Product is Distributed Exclusively by
2040 N Alliance Ave, Springfield, MO 65803
www.staminaproducts.com
Customer Care
1 (800) 375-7520
Owner's
Manual
WARNING
!
Exercise can present a
h e a l t h r i s k . C o n s u l t a
physician before beginning
any exercise program with
this equipment. If you feel
faint or dizzy, immediately
d i s c o n t i n u e u s e o f t h i s
equipment. Serious bodily
i n j u r y c a n o c c u r i f t h i s
equipment is not assembled
and used correctly. Serious
bodily injury can also occur
if all instructions are not
followed. Keep others and
pets away from equipment
when in use. Always make
sure all bolts and nuts are
securely tightened prior to
each use. Follow all safety
instructions in this manual.
When calling for parts or
service, please specify
the following numbers :
Model#: 35-1060A
S/N: _____________
STAMINA PRODUCTS
MADE IN CHINA
©
2020 Stamina Products, Inc.
2020, 12
Advertisement
Chapters
Table of Contents

Related Manuals for Stamina BODYTRAC GLIDER 1060


Summary of Contents for Stamina BODYTRAC GLIDER 1060
- Page 1 Weight on this product should not exceed 250 lbs. This Product is Distributed Exclusively by STAMINA PRODUCTS MADE IN CHINA 2040 N Alliance Ave, Springfield, MO 65803 Customer Care © 2020 Stamina Products, Inc. 1 (800) 375-7520 2020, 12 www.staminaproducts.com...
- Page 2 Quickstart Guide Smart Audio Workouts for Your Rower Go to the App Store on your device or scan the QR Code for quick access. Download the app and get moving! Assembly video included in app. Apple, the Apple logo, iPhone, and iPod touch are trademarks of Apple Inc., registered in the U.S. and other countries. App Store is a service mark of Apple Inc., registered in the U.S.
-
Page 3: Table Of Contents
17. Be careful to maintain your balance while using, mounting, dismounting, or assembling the BodyTrac Glider 1060, loss of balance may result in a fall and bodily injury. 18. Do not use the seat to move the BodyTrac Glider 1060. The Seat will move and the Seat Carriage may pinch your hand or fingers. - Page 4 1 (800) 375-7520 customer.care@staminaproducts.com Hi! From all of us here at Stamina Products, thank you for your purchase. We know that you have big fitness goals in mind and we are here to help you along. Call us, email us, or send us a message on Facebook. Be sure to contact us if you have any questions on your new product.
-
Page 5: Before You Begin
If you have any can improve your physical and mental health. questions or problems with the parts included with your BodyTrac Glider 1060, please do not return Too often, our busy lifestyles limit our time and opportunity to exercise. The BodyTrac Glider the product. -
Page 6: Equipment Warning, Caution & Notice Labels
EQUIPMENT WARNING, CAUTION & NOTICE LABELS This chart is provided to help identify the warning, caution, and notice labels on the BodyTrac Glider 1060. Please take a moment to familiarize yourself with all of the warning, caution, and notice labels. CAUTION LABEL(62) CAUTION For consumer use only. -
Page 7: Hardware Identification Chart
HARDWARE IDENTIFICATION CHART This chart is provided to help identify the fasteners used in the assembly process. Place the washers or the ends of the bolts or screws on the circles to check for the correct diameter. Use the small scale to check the length of the bolts and screws. -
Page 8: Assembly Instructions
ASSEMBLY INSTRUCTIONS Place all parts from the box in a cleared area and position them on the floor in front of you. Remove all packing materials from your area and place them back into the box. Do not dispose of the packing materials until assembly is completed. - Page 9 ASSEMBLY INSTRUCTIONS STEP 4 Insert the Bracket on FRONT STABILIZER(28) into the FRONT SUPPORT(26) and secure with BUTTON HEAD BOLTS(M8x1.25x15mm)(51) and WASHERS(M8)(59). STEP 5 Press the FRONT COVER(24) onto the FRONT SUPPORT(26).
- Page 10 ASSEMBLY INSTRUCTIONS STEP 6 Insert the PEDAL SHAFT(32) through holes located on the FRONT SUPPORT(26). Slide a PEDAL SPACER(33) and a PEDAL CAP(34) onto each end of the PEDAL SHAFT(32). Then secure the PEDAL CAPS(34) with BUTTON HEAD BOLTS(M8x1.25x15mm)(51) and LARGE WASHERS(M8)(36) at both ends of the PEDAL SHAFT(32).
- Page 11 ASSEMBLY INSTRUCTIONS STEP 8 Unfold the HANDLEBARS(17, 18) and the EXTENSION ARMS(14) as shown in the illustration. Attach the EXTENSION ARMS(14) to the PIVOT CONNECTOR(10) with the LOCKING KNOBS(13). STEP 9 Install a AA battery into the METER(37), the battery is not included. See page 13 for detailed battery installation instructions.
- Page 12 ASSEMBLY INSTRUCTIONS STEP 10 Slide the SEAT ASSEMBLY(42, 43) into the CENTER BEAM(1). Attach the SEAT STOPPERS(3) to the back end of the CENTER BEAM(1) with BUTTON HEAD BOLTS(M8x1.25x25mm)(53), WASHERS(M8) (59), and NYLOCK NUTS(M8x1.25)(38). STEP 11 Press the CENTER BEAM CAP(2) into the back end of the CENTER BEAM(1).
-
Page 13: Operational Instructions
OPERATIONAL INSTRUCTIONS USING THE FITNESS METER POWER ON : Seat movement or press the button. POWER OFF : A u t o m a t i c a l l y s h u t s o ff a f t e r f o u r minutes of inactivity. -
Page 14: Maintenance
6. Worn or damaged components must be replaced immediately or the BodyTrac Glider 1060 removed from service until repair is made. 7. Only Stamina Products supplied components should be used to maintain/repair the BodyTrac Glider 1060. 8. Keep your BodyTrac Glider 1060 clean by wiping it off with an absorbent cloth after use. -
Page 15: Storage
1060 for one year or more. 3. Grasp the Front and Rear Stabilizer to move the BodyTrac Glider 1060. Do not use the Seat to move the BodyTrac Glider 1060. The Seat will move and the Seat Carriage may pinch your hand or fingers. -
Page 16: Conditioning Guidelines
CONDITIONING GUIDELINES How you begin your exercise program depends on your physical condition. If you have been inactive for several years or are severely overweight, start slowly and increase your workout time gradually. Increase your workout intensity gradually by monitoring your heart rate while you exercise. Remember to follow these essentials: Have your doctor review your training and diet programs. -
Page 17: Warm-Up And Cool-Down
WARM-UP and COOL-DOWN Warm-Up The purpose of warming up is to prepare your body for exercise and to minimize injuries. Warm up for two to five minutes before strength training or aerobic exercising. Perform activities that raise your heart rate and warm the working muscles. Activities may include brisk walking, jogging, jumping jacks, jump rope, and running in place. -
Page 18: Product Parts Drawing
PRODUCT PARTS DRAWING FRONT BACK... -
Page 19: Parts List
PARTS LIST PART# PART NAME Center Beam Center Beam Cap Seat Stopper Rear Support Stabilizer Cap Stabilizer Pad Threaded Support Plate Handlebar Support Sensor Support Plate Pivot Connector Pivot Bushing Bumper Knob Locking Knob Extension Arm Extension Arm Bushing Large Washer (M12) Left Handlebar Right Handlebar Securing Cap... - Page 20 PARTS LIST PART# PART NAME Screw, Round Head (M4 x 13mm) Screw, Round Head (M5 x 0.8 x 10mm) Bolt, Round Head (M6 x 1 x 15mm) Bolt, Button Head (M8 x 1.25 x 15mm) Bolt, Button Head (M8 x 1.25 x 20mm) Bolt, Button Head (M8 x 1.25 x 25mm) Bolt, Button Head (M8 x 1.25 x 50mm) Bolt, Hex Head (M8 x 1.25 x 30mm)
-
Page 21: Warranty
To implement this limited warranty, send a written notice stating your name, date, and place of purchase and a brief description of the defect along with your receipt to Stamina Products, Inc. 2040 N Alliance Ave, Springfield, Missouri, USA, MO 65803, or email us at customer.care@staminaproducts.com, or call us at 1-800-375-7520. -
Page 22: Notes
NOTES... - Page 23 2040 N Alliance Ave, Springfield, MO 65803 Would you like to recieve email information or special offers from Stamina Products? Register at contact.staminaproducts.com TO REGISTER YOUR PRODUCT To enact your warranty, please register your product by going to register.staminaproducts.com. Please have your product model number (printed on the cover of this owner’s manual) and the serial number (printed on the black and white sticker on your...
- Page 24 Numéro de série : (250 lb). _____________ Ce produit est distribué exclusivement par PRODUITS STAMINA FABRIQUÉ EN CHINE 2040 N Alliance Ave, Springfield, MO 65803 Service à la clientèle © 2020 Stamina Products, Inc. 1 (800) 375-7520 2020, 12 www.staminaproducts.com...
- Page 25 Guide de démarrage rapide Séances d’entraînement audio intelligent pour votre vélo Rendez-vous sur l’App Store de votre appareil ou scannez le code QR pour un accès rapide. Téléchargez l’application et bougez! Vidéo de montage incluse dans l’application. Apple, le logo Apple, l’iPhone et l’iPod touch sont des marques d’Apple Inc. déposées aux États-Unis et dans d’autres pays. App Store est une marque de service d’Apple Inc. déposée aux États-Unis et dans d’autres pays.
- Page 26 1060. Une perte d’équilibre peut entraîner une chute et des blessures corporelles graves. 18. N'utilisez pas le siège pour déplacer le BodyTrac Glider 1060. Le siège se déplace et le chariot du siège peut vous pincer la main ou les doigts.
- Page 27 1 (800) 375-7520 customer.care@staminaproducts.com Salut! De la part de toute l’équipe de Stamina Products, nous vous remercions pour votre achat. Nous savons que vous avez de grands objectifs de remise en forme en tête et nous sommes là pour vous aider. Appelez-nous, écrivez-nous ou envoyez-nous un message sur Facebook. N’hésitez pas à...
-
Page 28: Avant De Commencer
AVANT DE COMMENCER Merci d'avoir choisi le BodyTrac Glider 1060. Nous BodyTrac Glider 1060. sommes très fiers de ce produit de qualité et espérons Vous fournir un produit de qualité est la priorité qu’il vous procurera de nombreuses heures d’exercice absolue de Stamina. -
Page 29: Étiquettes D'avertissement, De Mise En Garde Et De Notification De L'équipement
ÉTIQUETTES D’AVERTISSEMENT, DE MISE EN GARDE ET DE NOTIFICATION DE L’ÉQUIPEMENT Ce tableau vous permet d’identifier les étiquettes d’avertissement, de mise en garde, de notification sur le BodyTrac Glider 1060. Prenez le temps de vous familiariser avec toutes les étiquettes d'avertissement, de mise en garde et de notification. -
Page 30: Tableau D'identification Du Matériel
TABLEAU D’IDENTIFICATION DU MATÉRIEL Ce tableau est fourni pour vous permettre d’identifier les fixations utilisées dans le processus d’assemblage. Placez les rondelles ou les extrémités des boulons ou des vis sur les cercles pour vérifier le bon diamètre. Utilisez la petite échelle pour vérifier la longueur des boulons et des vis. 3/16"... -
Page 31: Instructions De Montage
INSTRUCTIONS DE MONTAGE Placez toutes les pièces de la boîte sur une surface dégagée au sol et devant vous. Retirez tous les matériaux d’emballage de votre zone et remettez-les dans la boîte. Ne jetez pas les matériaux d’emballage tant que le montage n’est pas terminé. - Page 32 INSTRUCTIONS DE MONTAGE ÉTAPE 4 Insérez le support sur le STABILISATEUR AVANT (28) dans le SUPPORT AVANT (26) et fixez-le avec des BOULONS À TÊTE RONDE (M8 x 1,25 x 15 mm) (51) et des RONDELLES (M8) (59). ÉTAPE 5 Appuyez sur le CAPOT AVANT (24) sur le SUPPORT FRONTAL (26).
- Page 33 INSTRUCTIONS DE MONTAGE ÉTAPE 6 Insérez l’ARBRE DE LA PÉDALE (32) à travers les trous situés sur le SUPPORT AVANT (26). Faites glisser une ENTRETOISE DE PÉDALE (33) et un CAPUCHON DE PÉDALE (34) sur chaque extrémité de l'ARBRE DE LA PÉDALE (32). Fixez ensuite les CAPUCHONS DE PÉDALE (34) avec des BOULONS À...
- Page 34 INSTRUCTIONS DE MONTAGE ÉTAPE 8 Dépliez les GUIDONS (17, 18) et les BRAS D'EXTENSION (14) comme indiqué sur l'illustration. Fixez les BRAS D'EXTENSION (14) au CONNECTEUR PIVOTANT (10) avec les BOUTONS DE VERROUILLAGE (13). ÉTAPE 9 Placez une pile AA dans le COMPTEUR (37), la pile n'est pas incluse. Voir page 13 pour les instructions détaillées d’installation de la pile.
- Page 35 INSTRUCTIONS DE MONTAGE ÉTAPE 10 Faites glisser l’ENSEMBLE DU SIÈGE (42, 43) dans la POUTRE CENTRALE (1). Fixez les BUTÉES DE SIÈGE (3) à l’extrémité arrière de la POUTRE CENTRALE (1) à l’aide des BOULONS À TÊTE RONDE (M8 x 1,25 x 25 mm) (53), des RONDELLES (M8) (59) et des CONTRE-ÉCROUS (M8 x 1,25) (38). ÉTAPE 11 Appuyez sur le CAPUCHON DE LA POUTRE CENTRALE (2) dans l'extrémité...
- Page 36 OPERATIONAL INSTRUCTIONS INSTRUCTIONS OPÉRATIONNELLES USING THE FITNESS METER UTILISATION DU COMPTEUR DE FORME PHYSIQUE MISE SOUS Mouvement du siège ou appuyez sur le POWER ON : Seat movement or press the button. TENSION : bouton. POWER OFF : M I S E H O R S A u t o m a t i c a l l y s h u t s o ff a f t e r f o u r S’éteint automatiquement après quatre minutes of inactivity.
-
Page 37: Instructions Opérationnelles
à boucle MAINTENANCE La sécurité et l'intégrité prévues dans le BodyTrac Glider 1060 ne peuvent être maintenues que lorsque le BodyTrac Glider 1060 est régulièrement examiné pour détecter tout dommage et usure. Une attention particulière doit être accordée aux points suivants : 1. - Page 38 3. Saisissez les stabilisateurs avant et arrière pour déplacer le BodyTrac Glider 1060. N'utilisez pas le siège pour déplacer le BodyTrac Glider 1060. Le siège se déplace et le chariot du siège peut vous pincer la main ou les doigts.
-
Page 39: Directives De Conditionnement
DIRECTIVES DE CONDITIONNEMENT La façon dont vous commencez votre programme d’exercices dépend de votre condition physique. Si vous n’avez pas fait d’exercice depuis plusieurs années ou si vous êtes en surpoids, commencez lentement et augmentez progressivement la durée de votre entraînement. Augmentez progressivement l’intensité de votre entraînement en surveillant votre fréquence cardiaque pendant que vous vous entraînez. -
Page 40: Échauffement Et Récupération
ÉCHAUFFEMENT et RÉCUPÉRATION Échauffement Le but de l’échauffement est de préparer votre corps à l’exercice et de minimiser les blessures. Échauffez-vous pendant deux à cinq minutes avant de faire de la musculation ou de l’exercice d’aérobic. Faites des exercices qui augmentent votre fréquence cardiaque et réchauffent les muscles actifs. -
Page 41: Schéma Des Pièces Du Produit
SCHÉMA DES PIÈCES DU PRODUIT AVANT ARRIÈRE... -
Page 42: Liste Des Pièces
LISTE DES PIÈCES N° DE PIÈCE NOM DE LA PIÈCE QTÉ Poutre centrale Capuchon de poutre centrale Butée de siège Support arrière Capuchon de stabilisateur Patin de stabilisateur Plaque de support filetée Support arrière Plaque de support du capteur Connecteur pivotant Manchon pivotant Bouton de pare-chocs Bouton de verrouillage... - Page 43 LISTE DES PIÈCES N° DE PIÈCE NOM DE LA PIÈCE QTÉ Vis, tête ronde (M4 x 13 mm) Vis, tête ronde (M5 x 0,8 x 10 mm) Boulon, tête ronde (M6 x 1 x 15 mm) Boulon, tête ronde (M8 x 1,25 x 15 mm) Boulon, tête ronde (M8 x 1,25 x 20 mm) Boulon, tête ronde (M8 x 1,25 x 25 mm) Boulon, tête ronde (M8 x 1,25 x 50 mm)
-
Page 44: Garantie
MODÈLE 35-1060A GARANTIE Stamina Products, Inc. (« Stamina ») garantit à l’acheteur primitif que ce produit est exempt de tout défaut de matériaux et de fabrication dans des conditions normales d’utilisation, d’entretien, de montage et de fonctionnement conformément aux avertissements/instructions du produit, pendant une période de 90 jours pour les pièces et d’un an pour le cadre, à... -
Page 45: Remarques
REMARQUES... - Page 46 CONTACTER LE SERVICE À LA CLIENTÈLE Pour votre commodité, les représentants du service à la clientèle de Stamina peuvent être contactés par courriel à l’adresse customer. care@staminaproducts.com ou par téléphone au 1-800-375-7520 (aux États-Unis). Nos représentants du service à la clientèle sont disponibles du lundi au jeudi de 7 h 30 à...