Table of Contents
Advertisement
Quick Links
Advertisement
Chapters
Table of Contents

Related Manuals for BMW S 1000 RR 2021


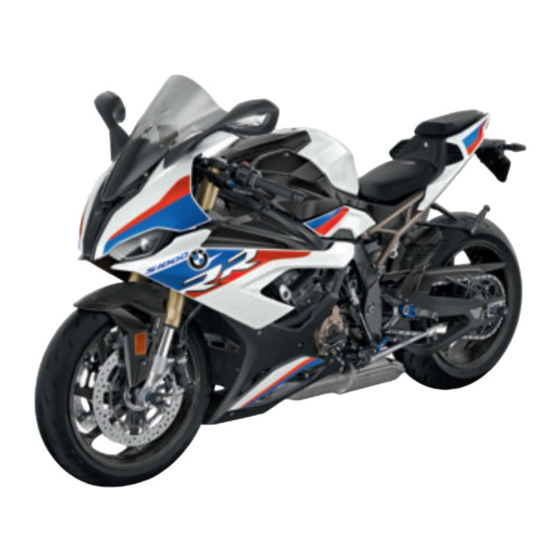
Summary of Contents for BMW S 1000 RR 2021
- Page 1 MOTORRAD RIDER'S MANUAL S 1000 RR MAKE LIFE A RIDE...
- Page 2 Vehicle data Model Vehicle Identification Number Colour code Date of first registration Registration number Dealership details Person to contact in Service department Ms/Mr Phone number Dealership address/phone number (company stamp)
- Page 3 If the time comes to sell your BMW, please remember to hand over this rider's manual to the new owner. It is an important part of the vehicle. We hope you will enjoy riding your BMW and that all your jour- neys will be pleasant and safe BMW Motorrad.
- Page 4 GENERAL STATUS INSTRUCTIONS INDICATORS Overview Indicator and warning Abbreviations and sym- lights bols TFT display in Equipment Pure Ride view Technical data TFT display in Menu Currency view Additional sources of Warning indicators information Certificates and operat- OPERATION ing licences Data memory Ignition switch/steer- Intelligent emergency...
- Page 5 General settings ON THE RACE Bluetooth TRACK My vehicle Status indicators for Navigation racing Media LAPTIMER Telephone Vehicle settings for Display software ver- racing sion RACE PRO riding Display licence in- modes formation Launch Control Pit Lane Limiter ADJUSTMENT Chassis and Mirrors suspension settings Headlight...
- Page 6 ENGINEERING DE- Fuses Diagnostic connector TAILS General notes ACCESSORIES Antilock Brake Sys- tem (ABS) General notes Dynamic Damping Connector for op- Control (DDC) tional accessories Dynamic Traction USB charging socket Control (DTC) Riding mode CARE Dynamic Brake Con- trol Care products Tyre pressure control Washing the vehicle (RDC)
- Page 7 Anti-theft alarm Dimensions Weights Performance figures SERVICE Reporting safety-rel- evant defects BMW Motorrad Service BMW Motorrad Service history BMW Motorrad mo- bility services Maintenance work BMW Service Maintenance sched- Maintenance confirm- ations Service confirmations APPENDIX Declaration of Con- formity Certificate for elec-...
- Page 8 GENERAL INSTRUCTIONS...
-
Page 9: Table Of Contents
OVERVIEW ABBREVIATIONS AND SYMBOLS EQUIPMENT TECHNICAL DATA CURRENCY ADDITIONAL SOURCES OF INFORMATION CERTIFICATES AND OPERATING LICENCES DATA MEMORY INTELLIGENT EMERGENCY CALL SYSTEM... -
Page 10: Overview
When the time comes to sell Indicates the end of your BMW, please remem- a passage relating to ber to hand over this Rider's specific accessories or Manual; it is an important part items of equipment. -
Page 11: Equipment
(OE) your authorised BMW Motorrad offered by BMW and selected retailer or another qualified optional accessories (OA). service partner or specialist This explains why the manual workshop. -
Page 12: Currency
The rider's manual for your turer of the vehicle, for example vehicle, operating and installa- via a separate booklet. tion instructions for accessories and general information about BMW Motorrad, in relation to technology, for example, are... - Page 13 The vehicle owner can also re- companies which collect or quest that a BMW Motorrad process personal data. Retailer or another qualified Vehicle users have the right to service partner or specialist...
- Page 14 GENERAL INSTRUCTIONS dition, component loads, incid- Legal requirements for the ents or errors. disclosure of data This information is generally As part of its legal responsib- used to document the condi- ilities, the manufacturer of the tion of a component, a module, vehicle is obligated to make its a system or the surrounding stored data available to the rel-...
- Page 15 BMW Motorrad Retailer or an- this technical information can other qualified service partner be read out of the vehicle to- or specialist workshop. gether with the vehicle identi- Data input and data transfer fication number.
- Page 16 GENERAL INSTRUCTIONS is stored in the vehicle, the ing system of the mobile end data can be deleted at any device. time. Services This data is transferred to third General parties only if personally re- If the vehicle has a wireless quested within the context of connection, this enables the using online services.
-
Page 17: Intelligent Emergency Call System
Obtaining, processing and us- Principle ing personal data outside of The intelligent emergency call the normal provision of ser- system enables manual or auto- vices requires legal permission, matic emergency calls, for ex- contractual agreement or con- ample in the event of an acci- sent. - Page 18 GENERAL INSTRUCTIONS the European Parliament and of Improving quality the European Council. The data that is transferred in The relevant ordinances and an emergency is also used by directives regulate the pro- the manufacturer of the vehicle tection of natural persons dur- to improve product and service ing the processing of personal quality.
- Page 19 devices are connected directly phone number of the rider, to the vehicle. if available, to enable rapid contact with those involved in Automatic emergency call the accident if required. The system is designed so that, following a sufficiently serious Data storage accident, which is detected by The data for an activated sensors in the vehicle, an emer-...
- Page 20 GENERAL VIEWS...
- Page 21 GENERAL VIEW, LEFT SIDE GENERAL VIEW, RIGHT SIDE UNDER THE RIDER'S SEAT MULTIFUNCTION SWITCH, LEFT MULTIFUNCTION SWITCH, RIGHT MULTIFUNCTION SWITCH, RIGHT INSTRUMENT CLUSTER...
-
Page 22: General View, Left Side
GENERAL VIEWS GENERAL VIEW, LEFT SIDE Rebound-stage damping, Compression-stage front wheel ( 113) damping, rear wheel Spring preload at front 114) wheel ( 109) Spring preload at rear Compression-stage wheel ( 110) damping, front wheel with Dynamic Damping 113) Control (DDC) Adjust the spring preload Adjusting riding height for rear wheel (... - Page 23 Steering damper 108)
-
Page 24: General View, Right Side
GENERAL VIEWS GENERAL VIEW, RIGHT SIDE Brake-fluid reservoir, rear 195) Vehicle identification number (on steering-head bearing) Type plate (on steering- head bearing) Brake-fluid reservoir, front 194) Coolant expansion tank 198) Engine oil level indicator 190) Oil filler opening 191) -
Page 25: Under The Rider's Seat
UNDER THE RIDER'S SEAT Battery ( 216) Toolkit ( 188) USB charging socket 228) Diagnostic connector 221) Fuses ( 220) -
Page 26: Multifunction Switch, Left
GENERAL VIEWS MULTIFUNCTION SWITCH, LEFT Switching off DTC High-beam headlight and headlight flasher ( Cruise control ( Hazard warning lights Adapting DTC ( 151) Turn indicators ( Horn Multi-Controller Controls ( MENU rocker button... -
Page 27: Multifunction Switch, Right
MULTIFUNCTION SWITCH, RIGHT with intelligent emergency call Heated grips ( Riding mode ( Emergency-off switch (kill switch) ( Starter button ( 127) Race start with Launch Control ( 148) SOS button Intelligent emergency call... -
Page 28: Multifunction Switch, Right
GENERAL VIEWS MULTIFUNCTION SWITCH, RIGHT without intelligent emergency call Heated grips ( Riding mode ( Emergency-off switch (kill switch) ( Starter button ( 127) Race start with Launch Control ( 148) -
Page 29: Instrument Cluster
INSTRUMENT CLUSTER Indicator and warning lights ( Shift light ( 132) TFT display ( DWA light-emitting diode Photosensor (for adapting the brightness of the in- strument lighting) - Page 30 STATUS INDICATORS...
- Page 31 INDICATOR AND WARNING LIGHTS TFT DISPLAY IN PURE RIDE VIEW TFT DISPLAY IN MENU VIEW WARNING INDICATORS...
- Page 32 STATUS INDICATORS INDICATOR AND WARNING LIGHTS Turn indicators, left High-beam headlight General warning light Turn indicators, right Warning light, drive mal- function ( DTC ( ABS ( 164)
- Page 33 TFT DISPLAY IN PURE RIDE VIEW Hill Start Control ( 14 Heating stages, handlebar Rev. counter ( grips ( Speedometer Top status line ( Cruise control ( RACE PRO riding mode 147) Speed Limit Info ( Adapting DTC ( 151) Riding mode ( Gear indicator;...
- Page 34 STATUS INDICATORS TFT DISPLAY IN MENU VIEW Hill Start Control ( 13 Heating stages, handlebar Speedometer grips ( Cruise control ( 14 Menu section Speed Limit Info ( Adapting DTC ( 151) RACE PRO riding mode 147) Riding mode ( Top status line ( Gear indicator;...
- Page 35 Green CHECK OK 1: No mes- WARNING INDICATORS sage, optimum values. Mode of presentation White circle with small "i" 2: Warnings are indicated by the Information. corresponding warning lights. Yellow warning triangle 3: Warnings are indicated by the Warning, value not ideal. 'General' warning light showing Red warning triangle 3: in combination with a dialogue...
- Page 36 STATUS INDICATORS ledged by tilting the Multi- White: (---) No valid value Controller to the left. available. Dashes 5 are dis- Check Control messages played instead of a numerical are attached dynamically to value. the pages as additional tabs The assessment of some in the menu My vehicle...
- Page 37 Warnings, overview Indicator and Display text Meaning warning lights is displayed in yel- Voltage of the low. vehicle electrical system too low Vehicle voltage low. lights up is displayed in yel- Voltage of the yellow. low. vehicle electrical system critical Vehicle voltage critical! is displayed in yel-...
- Page 38 STATUS INDICATORS Indicator and Display text Meaning warning lights flashes red. Serious drive mal- Serious fault function ( in the engine control! flashes. lights up Engine control No communica- yellow. failed ( tion with en- gine control. lights up. lights up Engine in emer- Fault in the en- yellow.
- Page 39 Indicator and Display text Meaning warning lights lights up " " Sensor faulty yellow. or system fault lights up Tyre pressure Tyre pressure yellow. control (RDC) check failure! failed ( lights up Battery for tyre RDC sensor bat- yellow. pressure sensor tery weak.
- Page 40 STATUS INDICATORS Indicator and Display text Meaning warning lights lights up. ABS failed lights up ABS Pro failed ABS Pro fail- yellow. ure! lights up. quick- DTC intervention flashes. slow- DTC self-dia- flashes. gnosis not com- pleted ( lights up. DTC switched off Off! Traction con-...
- Page 41 Indicator and Display text Meaning warning lights flashes yellow. Hill Start Control automatically de- activated ( is displayed. Hill Start Control cannot be activ- ated ( The gear indicator Gear not trained flashes. Hazard warning flashes lights system green. is switched on flashes green.
- Page 42 Switch off non-essential con- cialist workshop, preferably an sumers or disconnect them authorised BMW Motorrad re- from the vehicle's electrical tailer. system. If the fault persists or occurs Voltage of the vehicle...
- Page 43 BMW Motorrad re- Light source faulty tailer. lights up yellow. Charging voltage critical The faulty light source is flashes yellow. displayed: is displayed in yellow. High beam faulty! Front left turn in- Battery voltage dicator faulty! critical! Accident Front right turn indic- risk.
- Page 44 Have the fault rectified as Have LED light sources quickly as possible by a spe- completely replaced; consult cialist workshop, preferably an a specialist workshop, authorised BMW Motorrad re- preferably an authorised tailer. BMW Motorrad Retailer. Anti-theft alarm battery weak Possible cause: with anti-theft alarm (DWA) Plug connection disconnected.
- Page 45 Consult a specialist work- nected. shop, preferably an authorised Seek the advice of a special- BMW Motorrad retailer. ist workshop, preferably an DWA can no longer be activ- authorised BMW Motorrad ated or deactivated. Retailer.
- Page 46 Have the fault rectified as Engine! Have it quickly as possible by a spe- checked by a spe- cialist workshop, preferably an cialist workshop. authorised BMW Motorrad re- tailer. It is possible to continue to ride but not recommended.
- Page 47 Have the fault rectified as Engine in emergency- quickly as possible by a spe- operation mode cialist workshop, preferably lights up yellow. an authorised BMW Motorrad Retailer. Fault in the engine Severe fault in the engine control. Onward control journey possible Ride flashes red.
- Page 48 Have the fault rectified as pressure signals until the first quickly as possible by a spe- time the vehicle accelerates to cialist workshop, preferably more than the minimum speed an authorised BMW Motorrad stated below: Retailer. Tyre pressure with tyre pressure control (RDC)
- Page 49 For further information about RDC sensor is not active BMW Motorrad RDC, see the section entitled "Engineering min 30 km/h (The RDC details" ( 181). sensor does not send its Tyre pressure in limit range of signal to the vehicle until...
- Page 50 Risk of accident, degradation shop, preferably an authorised of the vehicle's driving char- BMW Motorrad retailer. acteristics. If you are unsure whether the Adapt your style of riding vehicle can be ridden with the accordingly.
- Page 51 Have the fault rectified by a specialist workshop, min 30 km/h (The RDC preferably an authorised sensor does not send its BMW Motorrad Retailer. signal to the vehicle until Sensor faulty or system fault the vehicle has exceeded a with tyre pressure control minimum speed.)
- Page 52 Seek the advice of a special- Tyre pressure check ist workshop, preferably an failure! Function authorised BMW Motorrad limited. Have it checked Retailer. by a specialist work- Drop sensor defective shop.
- Page 53 Consult a specialist work- cialist workshop. shop, preferably an authorised Possible cause: BMW Motorrad retailer. The emergency call cannot be cannot be made automatically ABS self-diagnosis not or via BMW. completed Observe the information on flashes.
- Page 54 ABS fault message 174). lights up. Have the fault rectified as quickly as possible by a spe- Off! cialist workshop, preferably an authorised BMW Motorrad ABS deactivated. Retailer. ABS failed Possible cause: lights up yellow. The rider has switched off the ABS system.
- Page 55 DTC function Have the fault rectified as is not available until self- quickly as possible by a spe- diagnosis has completed. cialist workshop, preferably an authorised BMW Motorrad re- DTC switched off tailer. lights up. DTC intervention quick-flashes.
- Page 56 177). DTC fault Have the fault rectified as lights up yellow. quickly as possible by a spe- cialist workshop, preferably lights up. an authorised BMW Motorrad Retailer. Traction control DTC restricted failure! Onward lights up yellow. journey possible. Ride carefully to next lights up.
- Page 57 DTC fault ( 177). an authorised BMW Motorrad Have the fault rectified as Retailer. quickly as possible by a spe- The semi-active functionality cialist workshop, preferably is deactivated.
- Page 58 STATUS INDICATORS Possible cause: Hill Start Control active Hill Start Control cannot be ac- shows green. tivated. Fold in side stand. Possible cause: Hill Start Control functions The rider has activated Hill only when the side stands are Start Control ( 184).
- Page 59 If the service is overdue, a yel- shop, preferably an authorised low CC message is displayed. BMW Motorrad Retailer. Exclamation marks also draw attention to the displays for Hazard warning lights system service, service appointment...
- Page 60 Service is overdue because of the driving performance or the date. Have your motorcycle ser- viced regularly by a specialist workshop, preferably by an authorised BMW Motorrad Retailer. The operational and road safety of the motorcycle re- main intact. The motorcycle's value is maintained as best as pos- sible.
- Page 62 OPERATION...
- Page 63 IGNITION SWITCH/STEERING LOCK EMERGENCY-OFF SWITCH (KILL SWITCH) INTELLIGENT EMERGENCY CALL LIGHTING DYNAMIC TRACTION CONTROL (DTC) RIDING MODE CRUISE CONTROL HILL START CONTROL SHIFT LIGHT ANTI-THEFT ALARM (DWA) TYRE PRESSURE CONTROL (RDC) HEATED GRIPS ON-BOARD COMPUTER FRONT AND REAR SEATS...
-
Page 64: Ignition Switch/Steering Lock
OPERATION Switching on ignition IGNITION SWITCH/STEERING LOCK Keys You receive 2 vehicle keys. If a key is lost or mislaid, con- sult the notes on the electronic immobiliser (EWS) ( 59). Ignition switch/steering lock, fuel filler cap lock and lock for the tail-hump cover are all op- Turn the ignition key to posi- erated with the same key. -
Page 65: Emergency-Off Switch (Kill Switch)
If you lose an ignition key, you WARNING can have it barred by your au- Operation of the kill switch thorised BMW Motorrad re- while riding tailer. Risk of fall due to rear wheel If you wish to do this, you will... -
Page 66: Intelligent Emergency Call
TFT display. Even if an emergency call using Manual emergency call BMW is not possible, the sys- Requirement tem may make an emergency An emergency call has call to a public emergency call occurred. - Page 67 Remove helmet. switched on and reacts if a fall After expiry of the timer, a or crash occurs. voice contact to the BMW Call Center is established. Emergency call in the event of a light fall A minor fall or a crash is de- tected.
-
Page 68: Lighting
Emergency call in the event of and stop engine. a severe fall A voice contact connection A severe fall or a crash is de- to the BMW Call Center is tected. established. The emergency call is placed automatically without delay. - Page 69 Side light The side lights switch on auto- matically when the ignition is switched on. The side lights place a strain on the battery. Do not switch the ignition on for longer than absolutely neces- sary. Immediately after switching High-beam headlight and off the ignition, pull switch 1 headlight flasher back and hold it in that posi-...
- Page 70 OPERATION in that position until the park- ing lights come on. Switch the ignition on and off again to switch off the park- ing lights. Operating hazard warning flashers Switch on the ignition ( 58). The hazard warning flash- Push button 1 to the left ers place a strain on the to switch on the left turn battery.
-
Page 71: Dynamic Traction Control (Dtc)
Speed below 30 km/h: After 50 m distance covered. Speed between 30 km/h and 100 km/h: After a speed- dependent distance covered or when the vehicle acceler- ates. Speed above 100 km/h: After five flashes. Press and hold button 1 un- If button 1 is pressed to the til the DTC indicator light right or left slightly longer, the... -
Page 72: Riding Mode
RIDING MODE starts flashing. Using the riding modes Possible DTC system status BMW Motorrad has developed is displayed. operational scenarios for your Release button 1 once the motorcycle from which you can status has changed. - Page 73 with riding modes Pro RACE PRO 1/2/3: riding on race tracks while considering individual settings made by the rider. The respective optimum inter- play of engine characteristics, ABS control and DTC control is provided for each of these The riding mode currently act- scenarios.
-
Page 74: Cruise Control
OPERATION See the section entitled "En- Display when adjusting gineering details" for more in- settings (Speed Limit Info formation on riding dynamics active) control systems such as ABS and DTC. The following steps must be taken to change the riding mode: Close the throttle twistgrip. - Page 75 Setting road speed The vehicle accelerates smoothly. The current speed is main- tained and saved if button 1 is not pushed again. Decelerating Short-push button 1 forward. Adjustment range for cruise control 20...210 km/h Indicator light for cruise Short-push button 1 back. control shows.
-
Page 76: Hill Start Control
OPERATION For safety reasons, cruise Switching off cruise control control is automatically deactivated whenever ABS or DTC intervention occurs. If DTC is deactivated by the rider, cruise control is deactivated as well. Indicator light for cruise con- trol goes out. Resuming former cruising Slide switch 1 to the left. - Page 77 disappears. ATTENTION Alternatively, engage 1st or Failure of Hill Start Control 2nd gear and ride off. Risk of accident Hill Start Control is deac- Apply the brakes manually tivated automatically when to hold the vehicle. the motorcycle pulls away. Hill Start Control is purely disappears as soon as the a comfort system to facil- brake is fully released.
- Page 78 OPERATION shows green. ATTENTION Hill Start Control Pro is activ- Failure of Hill Start Control Risk of accident ated. Apply the brakes manually To switch off Hill Start Con- to hold the vehicle. trol Pro, operate handbrake lever 1 or the footbrake lever The drive-off assistant Hill again.
-
Page 79: Shift Light
Adjusting Hill Start Control SHIFT LIGHT Switching shift light on and with riding modes Pro Switch on the ignition ( 58). Go to the Settings menu. Vehicle settings Select HSC Pro To switch off Hill Start Con- trol Pro, select Hill Start Control Pro is deac- tivated. -
Page 80: Anti-Theft Alarm (Dwa)
The type of off. Activation takes approximately alarm tone can be set by an 30 seconds to complete. authorised BMW Motorrad Turn indicators flash twice. dealer. Confirmation tone sounds If an alarm was triggered while twice (if programmed). -
Page 81: Tyre Pressure Control (Rdc)
DWA deactivating vent the anti-theft alarm (DWA) from being triggered. Switch on the ignition. Turn indicators flash once. : confirmation Arming tone Confirmation tone sounds alarm tone after having once (if programmed). activated/deactivated the DWA Anti-theft alarm (DWA) is de- in addition to flashing turn activated. -
Page 82: On-Board Computer
OPERATION activated only when the engine The 3rd stage is for heating is running. the grips quickly: it is advis- able to switch back to a lower The increase in power stage as soon as the grips are consumption caused by warm. -
Page 83: Front And Rear Seats
Consump. Calling up the trip computer Calling up the on-board com- puter ( 76). Scroll to the right until the menu TRIP COMPUTER screen is displayed. Resetting trip computer Calling up the trip computer Use ignition key 1 to unlock 77). - Page 84 OPERATION Removing rider's seat Use ignition key 1 to unlock lock for passenger seat 2. Push the rider's seat cover 1 Remove passenger seat 2; to forward slightly on the seat do so, unhook fixing 3. cushion surface and expose Remove the ignition key from tab 2.
- Page 85 Position and install bolt 3.
- Page 86 TFT DISPLAY...
- Page 87 GENERAL NOTES PRINCIPLE PURE RIDE VIEW GENERAL SETTINGS BLUETOOTH MY VEHICLE NAVIGATION MEDIA TELEPHONE DISPLAY SOFTWARE VERSION DISPLAY LICENCE INFORMATION...
-
Page 88: General Notes
BMW Motorrad cident Connected app Operate those systems or The BMW Motorrad Connec- devices only when the traffic ted app contains usage and situation allows for it. vehicle information. For some If necessary, stop and oper-... -
Page 89: Principle
Multi-Controller functions e.g. those with iOS Turn the Multi-Controller up: operating systems, the Move the cursor up in lists. Adjust settings. BMW Motorrad Connected App Increase volume. must be opened before use. Turn the Multi-Controller Currency down: The TFT display may be up- Move the cursor down in lists. - Page 90 TFT DISPLAY MENU rocker button functions Operating pointers in the main menu Instructions given by the navigation system are displayed in a dialogue box if menu has Navigation not been called up. Operation of the MENU rocker button is temporarily restricted. Short-press the top section of the MENU button: In Menu view: Change up one...
- Page 91 Operating pointers in Display Pure Ride view submenus Long-press the top section of In addition to the operating the MENU rocker button. pointers in the main menu, Switching functions on and there are additional operating pointers in the submenus. Some menu items have a check box in front of them.
- Page 92 TFT DISPLAY Calling up menu Moving cursor in lists Display Pure Ride view Call up the menu ( 86). To move the cursor down in 85). Short-press the bottom sec- a list, turn Multi-Controller 1 tion of button 2. down until the entry you want The following menus can be is highlighted.
- Page 93 Call up the last menu used puter (e.g. ). The in- TRIP 2 formation can be displayed in In Pure Ride view: press and hold the MENU rocker button. the top status line. with tyre pressure control The last menu used is called up.
- Page 94 Vehicle is connected to a Navigate to Settings compatible mobile device. The Display Status line BMW Motorrad Connected app content is installed on the mobile Switch on the desired dis- device. plays. You can switch between the shows...
-
Page 95: Pure Ride View
ted at the time, if this inform- The colder the engine, the ation is made available by the lower the engine speed at publisher of the map material which the red engine speed in the navigation system. range starts. Navigate to The warmer the engine, the Settings higher the speed at which the... -
Page 96: General Settings
TFT DISPLAY when the side stand is in the Setting clock retracted position. Switch on the ignition ( 58). The range is shown together Navigate to Settings Sys- with a warning once the fuel tem settings Date and reserve has been reached. time Set time After a refuelling stop, range... -
Page 97: Bluetooth
Portuguese BLUETOOTH Turkish Short-range wireless Russian technology Ukrainian Bluetooth is a short-range Chinese wireless technology. Bluetooth Japanese devices are short-range devices Korean Thai transmitting on the license-free ISM band (Industrial, Scientific, Adjusting brightness Medical) between 2.402 GHz Navigate to Settings and 2.480 GHz. - Page 98 On some mobile devices, Rider's helmet e.g. those with iOS Passenger helm. operating systems, the The connection status for mo- BMW Motorrad Connected App bile devices is displayed. must be opened before use. Connect mobile device During the pairing process, the Pairing ( 92).
- Page 99 Follow the instructions on the Select Pair new rider's mobile device. helmet Pair new pas- Confirm that the code and confirm. seng. helmet matches. Helmets are searched for. The connection is established flashes in the bottom and the connection status up- status line during pairing.
-
Page 100: My Vehicle
TFT DISPLAY MY VEHICLE Start screen Check Control display Coolant temperature Range ( Odometer Service display ( Tyre pressure, rear On-board voltage 219) Tyre pressure, front... - Page 101 Operating pointers menu con- My vehicle tains the following screens: MY VEHICLE ON-BOARD COMPUTER TRIP COMPUTER with tyre pressure control (RDC) TYRE PRESSURE SERVICE REQUIREMENTS (if available) CC MESSAGE For more information on tyre Operating pointer 1: pressures and Check Control Indicators showing how far messages, see the section on you can scroll to the left or...
- Page 102 TFT DISPLAY Service requirements When the next service is due within less than a month or within 1000 km, a white Check Control message is displayed.
-
Page 103: Navigation
Entering destination address eration, such as hands-free Connect mobile device telephony) while riding. 92). Call up the BMW Motorrad Connected app and start the WARNING route guidance. Distraction from the road Call up the Navigation and loss of control menu in the TFT display. - Page 104 FAVOURITES Route type displays all the destinations Avoid saved as favourites in the Select desired Route type BMW Motorrad Connec- Switch desired on or Avoid ted app. You cannot use the off. TFT display to add favourites The number of avoidances ac- to the list.
-
Page 105: Media
Shuffle Select Repeat Call up the menu. (current track) or Media BMW Motorrad recom- TELEPHONE mends setting the volume on the mobile end device for Precondition The vehicle is connected to a media and calls to maximum before setting off. -
Page 106: Display Software Version
TFT DISPLAY Telephone calls Telephone data Depending on the mobile device, when pairing ( completes telephone data are automatically sent to the vehicle. : List of contacts Phone book saved on the mobile device : List of calls with Call list the mobile device Call up the : List of favour-... - Page 108 ADJUSTMENT...
- Page 109 MIRRORS HEADLIGHT BRAKES CLUTCH FOOTREST SYSTEM STEERING SPRING PRELOAD DAMPING SWINGING ARM RIDING HEIGHT DDC CALIBRATION...
-
Page 110: Mirrors
MIRRORS the correct headlight Adjusting mirrors beam throw, have the setting checked by a specialist work- shop, preferably an authorised BMW Motorrad dealer. BRAKES Adjusting handbrake lever WARNING Pivot the mirror to the correct Adjusting the handbrake position by pressing gently at lever while riding the edge of the glass. -
Page 111: Clutch
Position 6: Widest span CLUTCH between handlebar grip and Adjusting clutch lever handbrake lever with Billet pack WARNING Adjusting the clutch lever while riding Risk of accident Adjust the clutch lever only when the motorcycle is at a standstill. Turn adjustment lever 1 to the desired position. -
Page 112: Footrest System
ADJUSTMENT with Billet pack Rotor 3 enables foot clear- Turn adjustment lever 1 to ance and foot position to be the desired position. adjusted. Slacken screw 1 in toothed The adjuster is easier to bushing 2 until toothed bush- turn if you push the clutch ing 2 can be eased out of ro- lever forward. - Page 113 rotor is moved one position clockwise, the footrest joint WARNING has to be moved one position Incorrectly adjusted footrest counter-clockwise. as a result of movement of Tighten screw 3. the rotor. Clamping bolt for rider Risk of falling footrest The footrest setting must be adjusted accordingly if the M8 x 25 rotor has moved.
-
Page 114: Steering
ADJUSTMENT STEERING Peg to footbrake lever Adjusting steering damper 10 Nm Adjusting gearshift lever peg WARNING Adjusting the steering Foot clearance can be adjus- damper while riding. ted by repositioning peg 2. Risk of accident Slacken screw 1. Do not attempt to adjust the Peg 2 can be repositioned steering damper unless the along the longitudinal axis. -
Page 115: Spring Preload
Lifting the motorcycle Make sure the ground is level Adjusting spring preload as re- and firm and place the motor- commended by BMW Motorrad cycle on its stand. requires the use of an engine Apply the rider's weight to the lifter. - Page 116 ADJUSTMENT Adjusting spring preload for rear wheel without Dynamic Damping Control (DDC) Make sure the ground is level and firm and place the motor- cycle on its stand. Use the engine lifter to raise the vehicle until the weight is completely off the rear wheel.
- Page 117 Tighten screw 1 to the spe- Load-dependent adjust- cified tightening torque. ment of spring preload Screw in adjusting ring Suspension compression at rear wheel M5 x 16 ±2 mm (Road use with 6 Nm rider 85 kg) Adjusting spring preload for rear wheel with Dynamic Damping Con- trol (DDC)
-
Page 118: Damping
ADJUSTMENT Measure distance D between To reduce compression (in- number plate carrier 1 and crease of spring preload), turn axle 2. screw 1 using toolkit in the Remove the engine lifter. direction A. Make sure the ground is level To increase compression (re- and firm and place the motor- duction of spring preload), cycle on its stand. - Page 119 Adjusting compression-stage Compression stage, ba- damping for front wheel sic setting, front without Dynamic Damping Position 5 (Road use with Control (DDC) rider 85 kg) Adjusting rebound-stage damping for front wheel without Dynamic Damping Control (DDC) Adjust compression-stage damping using the adjusting screw 1 and the yellow scale on the left fork leg.
- Page 120 ADJUSTMENT that mark 2 points to a higher value on the scale. To reduce damping: Use the tool from the on-board toolkit to turn the adjusting screw so that mark 2 points to a lower value on the scale. Rebound stage, basic setting, front To increase damping: Use the Position 5 (Road use with...
-
Page 121: Swinging Arm
1. work is within your capabil- ity, contact a specialist work- shop, preferably an authorised BMW Motorrad retailer. Adjusting swinging arm pivot point Make sure the ground is level and firm and place the motor- cycle on its stand. - Page 122 ADJUSTMENT ATTENTION Vehicle toppling to side Risk of damage to parts if vehicle topples Make sure that the vehicle is secured so that it cannot topple sideways. Remove nut 1 and washer 2. Lift motorcycle with an engine Remove fixing screw 3. lifter or another suitable jack, so that there is no load on the rear wheel swinging arm.
- Page 123 in order to set the desired po- sition. Install fixing screw 1. Positioning of swinging arm pivot point bush in main frame, right M6 x 26.7 5 Nm Install nut 2 and tighten to specified torque. Nut for swinging arm pivot point bush to frame M36 x 0.75...
- Page 124 ADJUSTMENT Tighten lock nuts 3 on left and right to the specified tightening torque. Locknut of the final- drive chain tensioning screw 19 Nm Tighten quick-release axle Install nut 2 with washer 1 nut 1 to the specified tight- and tighten to specified ening torque.
-
Page 125: Riding Height
Measure gap D at traction shop, preferably an authorised strut 1. BMW Motorrad retailer. Traction strut gap di- Adjusting ride height to mension to compensate swinging arm pivot point the swinging arm pivot point... -
Page 126: Ddc Calibration
Dynamic Damping Con- after several attempts, contact trol (DDC) a specialist workshop, prefer- Calibrating DDC ably a BMW Motorrad Partner. Place the motorcycle on the side stand or on a suitable auxiliary stand. Do not sit on the motorcycle during... - Page 128 RIDING...
- Page 129 SAFETY INFORMATION REGULAR CHECK STARTING RUNNING IN SHIFTING GEAR BRAKES PARKING YOUR MOTORCYCLE REFUELLING SECURING MOTORCYCLE FOR TRANSPORTATION...
-
Page 130: Safety Information
Your authorised BMW Motorrad retailer will Adjusting spring preload set- be glad to advise you on the ting and damping to the total correct clothing for every weight. - Page 131 Inhalation of harmful va- a specialist workshop with the pours relevant expertise, preferably an Health hazard authorised BMW Motorrad re- Do not inhale vapours from tailer. operating fluid and plastics. Use the vehicle only out- doors.
- Page 132 RIDING Risk of burning Use only unleaded fuel. Comply with all specified maintenance intervals. CAUTION Engine and exhaust system ATTENTION become very hot when the vehicle is in use Unburned fuel in catalytic Risk of burn injury converter When you park the vehicle Damage to catalytic converter make sure that no-one and Note the points listed for...
-
Page 133: Regular Check
Tampering Always before riding off Check operation of the brake system ( 192). ATTENTION Check operation of the lights Tampering with the motor- and signalling equipment. cycle (e.g. engine manage- Check operation of the clutch ment ECU, throttle valves, 197). clutch) Check the tyre tread depth Damage to the affected parts,... - Page 134 RIDING DTC self-diagnosis is in pro- gress. ( 130) Select neutral or, if a gear is engaged, pull the clutch lever. You cannot start the mo- torcycle with the side stand extended and a gear en- gaged. The engine will switch itself off if you start it with the Press starter button 1.
- Page 135 ABS and DTC. Phase 2 ABS self-diagnosis The 'General' warning light BMW Motorrad Integral ABS changes from red to yellow. performs self-diagnosis to ensure its operability. Self- Phase 3 diagnosis starts automatically...
- Page 136 (The motorcycle has to reach quickly as possible by a spe- a defined minimum speed cialist workshop, preferably with the engine running for an authorised BMW Motorrad the wheel sensors to be Retailer. checked: min 5 km/h) DTC self-diagnosis If an indicator showing an DTC...
-
Page 137: Running In
compensated for by greater RUNNING IN pressure on the brake lever. Engine Until the first running-in WARNING check, vary the throttle opening and engine-speed New brake pads Longer stopping distance, risk range frequently; avoid riding of accident at constant engine speed for Apply the brakes in good prolonged periods. - Page 138 BMW Motorrad recommends Shift light 1 indicates that the disengaging the clutch for engine speed at which the rider shifts in these circumstances.
-
Page 139: Brakes
Remember to pull the ate and vehicle speed reaches clutch at the same time. 20 km/h. BMW Motorrad ABS Pro pre- vents the front wheel from locking up. In the "emergency braking situ- ations" that are trained so fre-... - Page 140 RIDING Descending mountain passes WARNING WARNING Wetness and dirt result in diminished braking effi- Braking mostly with the rear ciency brake on mountain descents Brake fade, destruction of the Risk of accident Apply the brakes lightly brakes due to overheating while riding to remove Use both front and rear wetness and dirt, or...
-
Page 141: Parking Your Motorcycle
to suit the rider's individual accidentally turned during brak- needs and preferences. ing. ABS Pro was not Possibility of a fall not developed to enhance precluded individual braking performance Although ABS Pro and with the motorcycle banked Dynamic Brake Control into corners. -
Page 142: Refuelling
More strain on the side stand information is available from Risk of damage to parts if your authorised BMW Motorrad vehicle topples retailer. Do not sit or lean on the vehicle while it is propped Recommended fuel on the side stand. - Page 143 Refuelling WARNING Fuel is highly flammable Risk of fire and explosion Do not smoke. Never bring a naked flame near the fuel tank. Open protective flap 1. Unlock fuel tank cap 2 by WARNING turning the ignition key clock- Escape of fuel due to heat- wise and pop the cap open.
-
Page 144: Securing Motorcycle For Transportation
RIDING The "usable fuel capacity" specified in the technical data is the quantity that the fuel tank could hold if refilled after it had been run dry and the engine had cut out due to a lack of fuel. Usable fuel capacity ATTENTION approx. - Page 145 suspension should be compressed as tightly as possible front and rear. ATTENTION Trapping of components After transport, position fork Component damage partition 2 and install bolts 1. Do not trap components such as brake lines or cable Fork partition to bottom legs.
- Page 146 ON THE RACE TRACK...
- Page 147 STATUS INDICATORS FOR RACING LAPTIMER VEHICLE SETTINGS FOR RACING RACE PRO RIDING MODES LAUNCH CONTROL PIT LANE LIMITER CHASSIS AND SUSPENSION SETTINGS FOR RACING REMOVING AND INSTALLING MIRRORS REMOVING AND INSTALLING NUMBER-PLATE CAR- RIER M COVER KIT SWITCHING OFF ABS WHEN RIDING ON THE RACE TRACK DEACTIVATING INTELLIGENT EMERGENCY CALL WHEN RIDING ON THE RACE TRACK...
-
Page 148: Status Indicators For Racing
ON THE RACE TRACK STATUS INDICATORS FOR RACING Sport 1 display with riding modes Pro Adapt DTC ( 151). Maximum DTC torque re- duction Current DTC torque re- duction Rev. counter Maximum braking decel- eration Current braking decelera- tion Maximum lean angle Current lean angle Unit for engine speed display: 1000 revolutions... - Page 149 Sport 2 display with riding modes Pro Unit for engine speed Adapt DTC ( 151). display: 1000 revolutions Maximum DTC torque re- per minute duction Operating help Current DTC torque re- duction Rev. counter Difference between the last lap time and refer- ence time or difference between current lap time and reference time...
- Page 150 ON THE RACE TRACK Sport 3 display with riding modes Pro 10 Difference between the Adapt DTC ( 151). last lap time and refer- Maximum DTC torque re- ence time or difference duction between current lap time Current DTC torque re- and reference time duction 11 Unit for engine speed...
-
Page 151: Laptimer
Ending time recording and LAPTIMER managing times Starting timing Requirement Call up the menu and Sport Sport 2 or Sport 3 display is change to the Sport 2 or shown. Sport 3 display. Press down the MENU rocker Start the engine. button. -
Page 152: Vehicle Settings For Racing
ON THE RACE TRACK recorded laps are deleted. This with M GPSLaptrigger : Change of means that other races can Trigger actuation. : Actu- subsequently be timed and Manual ation by headlight flasher. the lap times of those races : Actuation by compared with the best-ever External M GPSLaptrigger. -
Page 153: Race Pro Riding Modes
Configuration menu RACE PRO RIDING MODES with riding modes Pro Configuration for the race track The RACE PRO riding modes allow the chassis and suspension, braking and engine control to be adjusted professionally in detail. This The warning about faulty lights means that individual rider can be suppressed when riding requests, track characteristics... -
Page 154: Launch Control
ON THE RACE TRACK RACE PRO riding mode is activated, RAIN, ROAD and DYNAMIC riding modes are de- activated. Instead, it is possible to switch between the RACE, RACE PRO 1, RACE PRO 2 and RACE PRO 3 riding modes. RACE PRO riding mode deactivated, all pre-defined rid- Select a parameter. - Page 155 Control: 3 starts still Engine speed after ac- avail. tivating Launch Control Operating Launch Control at full throttle 9000 min CAUTION When Launch Control is act- ive engine torque is reduced Launch Control permits max- so that forward propulsion is imum acceleration, so unfa- maximised on the flat with the miliar riding situations can...
-
Page 156: Pit Lane Limiter
ON THE RACE TRACK Allow the clutch to cool. If in third gear or leaning fur- ther than 30°, the shift light Clutch cooling time disappears. The racing start with Launch approx. 3 min (With engine Control is concluded. running) PIT LANE LIMITER approx. -
Page 157: Dtc
Operating Pit Lane Limiter DTC adjustment The DTC controls permissible rear-wheel slip in accordance with your selected riding mode. with riding modes Pro The control can be adjusted in detail in the configuration of the RACE PRO riding modes. Ride in 1st gear. Configuring RACE PRO riding Press and hold down starter modes (... - Page 158 ON THE RACE TRACK WARNING Loss of stability because of rear wheel spinning when DTC control is reduced. Risk of falling Reduce DTC for riding on racing circuits only. Only change DTC control RACE PRO riding mode by one level at a time and is activated, Speed Limit carefully test the effects on...
-
Page 159: Chassis And Suspension Settings For Racing
Control (DDC) the rear wheel no longer turns. Adjust compression-stage Under these circumstances, damping for front wheel BMW Motorrad recommends 113). temporarily switching off DTC. Adjust rebound-stage damping Bear in mind that the rear for front wheel ( 113). -
Page 160: Removing And Installing Mirrors
ON THE RACE TRACK REMOVING AND INSTALLING MIRRORS Removing mirrors ATTENTION Removal of the mirrors Voiding of homologation for riding on public roads Unclip air inlet flap at the top Do not ride on public roads in the direction of arrow and without mirrors and turn remove downwards. - Page 161 Windscreen to air intake at the points where chafing might occur. M5 × 16 Use the M Cover Kit from BMW Motorrad to cover 1 Nm the threaded holes for the Installing mirrors screws so that the parts can Make sure the ground is level subsequently be re-installed.
- Page 162 ON THE RACE TRACK Remove the trim panel fasten- ers. Carefully thread in cable for turn indicators. Place left and right mirrors in Remove screws 1 and 2. the mountings 1. Remove windscreen in the direction of arrow. Install nuts 1 and 2 on the rear of the fairing using the Unclip air inlet flap at the top appropriate torque.
-
Page 163: Removing And Installing Number-Plate Carrier
Install bolts 1 and 2. Windscreen to air intake M5 × 16 1 Nm REMOVING AND INSTALLING NUMBER-PLATE CARRIER Connect connector for right Removing number plate turn indicator 1 and left turn carrier indicator 2. Check operation of the turn ATTENTION indicators. - Page 164 ON THE RACE TRACK Disconnect connector for number plate light 2 and left turn indicator 3. If the license-plate carrier is removed in preparation for a race-track session, the electronics interpret this as a defective light and the corres- ponding warning appears on Remove screws 1 and 2.
- Page 165 BMW Motorrad M Cover Kit. Remove screws 1. Carefully clip in left and right rear trim panels 1, first vertic- ally 2, then horizontally 3.
- Page 166 ON THE RACE TRACK Carefully clip in rear trim Remove screws 1 and 2. Unclip left and right rear trim panel in the direction of panels carefully in the direc- arrow. Install bolts 1 and 2. tion of arrow. with two-up riding package Install the passenger seat 78).
- Page 167 Position number plate car- Work cable for right turn in- rier 1 and carefully thread in dicator 1 into position and cable. secure it in holders 4. Hook in number plate car- Work cables for left turn in- rier 1. dicator 2 and number plate light 3 into position.
-
Page 168: M Cover Kit
ON THE RACE TRACK Connect connector for num- Carefully clip in rear trim ber plate light 2 and left turn panel in the direction of indicator 3. arrow. Install cable strap 1. Install bolts 1 and 2. Check operation of the light with two-up riding package and the turn indicators. - Page 169 After removing the M Cover Kit, the mirrors and number plate carrier must be mounted again. Install the number plate car- rier ( 160). Install the mirrors ( 155). Installing M Cover Kit Install screws 1. Removing M Cover Kit Insert mirror mount cover 1.
-
Page 170: Switching Off Abs When Riding On The Race Track
Switching off ABS function again. Requirement For more information Number plate carrier is re- on brake systems with moved. BMW Motorrad Integral ABS, Switch on the ignition ( 58). see the section entitled You have the option of "Engineering details": Partially integral brakes... -
Page 171: Deactivating Intelligent Emergency Call When Riding On The Race Track
Switching on ABS function DEACTIVATING INTELLIGENT EMERGENCY CALL WHEN RIDING ON THE RACE TRACK with intelligent emergency call Deactivating intelligent emergency call In order to prevent an emer- gency call connection from be- Press button 1 for at least 3 ing established in the event of seconds. - Page 172 ON THE RACE TRACK Installing intelligent emergency call control unit Disconnecting battery from motorcycle ( 217). Removing tail-hump trim panel ( 213). Press intelligent emergency call control unit 1 out of the lock 3 and carefully remove 4 from the holder 2. Remove the insulating tape from connector 2.
-
Page 173: Gearshift-Pattern Reverser
Installing tail-hump trim panel 214). GEARSHIFT-PATTERN RE- VERSER Shift pattern for racing The shift pattern can be re- versed for racing by changing the position of the selector Clean thread 1. rod. Reversing the shift pat- Pull off protective cap 2 and tern means that the gearshift slide on the gearshift rod 4. -
Page 174: Data Recording And 2D Software
ON THE RACE TRACK Install protective cap 5. The gearshift-pattern reverser for racing is set up. DATA RECORDING AND 2D SOFTWARE with M GPSLaptrigger Data recording and 2D software You can receive all the inform- ation and support for dealing with the 2D software, reading out and evaluating recorded driving data under:... - Page 176 ENGINEERING DETAILS...
- Page 177 GENERAL NOTES ANTILOCK BRAKE SYSTEM (ABS) DYNAMIC DAMPING CONTROL (DDC) DYNAMIC TRACTION CONTROL (DTC) RIDING MODE DYNAMIC BRAKE CONTROL TYRE PRESSURE CONTROL (RDC) SHIFT ASSISTANT HILL START CONTROL (HILL START CONTROL)
-
Page 178: General Notes
To find out more about ficients of friction than a clean, engineering, go to: dry asphalt surface. The lower bmw-motorrad.com/technik the coefficient of friction, the longer the braking distance. ANTILOCK BRAKE SYSTEM If the rider increases braking... - Page 179 BMW Motorrad Integral Rear wheel lift ABS assumes an extremely low Where there is a high level of coefficient of friction (gravel, adhesion between the tyres ice, snow) so that the road and road, the front wheel is wheels turn in every conceiv-...
- Page 180 Safety reserves messages can be issued. In addition to problems with The potentially shorter braking the BMW Motorrad ABS Pro, distances which ABS permits exceptional riding conditions must not be used as an excuse can lead to a fault message be- for careless riding.
-
Page 181: Dynamic Damping Control (Ddc)
ABS Pro more uniform across the range of ABS intervention. ABS Pro increases safety, par- ticularly when braking in bends. Advantages for the rider ABS Pro prevents the wheels The advantages of ABS Pro for from locking up, even when the rider are sensitive response the brakes are sharply actu- and high braking and direc-... -
Page 182: Dynamic Traction Control (Dtc)
ENGINEERING DETAILS with riding modes Pro DYNAMIC TRACTION CON- The damping values for the TROL (DTC) front wheel and for the rear How does Dynamic Traction wheel can be adjusted between Control work? 14 levels in the RACE PRO DTC takes the vehicle tilt into menu (level CONFIGURATION accounts, conveniently controls... - Page 183 The BMW Motorrad spin or slip sideways. DTC is unable to control a situ- If the lean angle values are ation of this nature.
-
Page 184: Riding Mode
ENGINEERING DETAILS Torque and throttle response RIDING MODE In RAIN riding mode: Gentle Selection throttle response, reduced To adjust the motorcycle to the torque in low gears. road condition and the desired In ROAD and DYNAMIC riding driving experience, the follow- modes: Optimum throttle re- ing riding modes can be selec- sponse, reduced torque in low... - Page 185 may be slightly reduced accel- In RACE PRO riding modes eration on dry roads. with setting 0: the system is In DYNAMIC riding mode: deactivated. high performance on dry roads. In the event of poor The rear wheel lift-off as- road conditions, optimum sta- sistant is active in the RAIN, bility cannot be guaranteed.
-
Page 186: Dynamic Brake Control
ENGINEERING DETAILS with riding modes Pro DYNAMIC BRAKE CONTROL In RACE PRO riding modes: with riding modes Pro the damper characteristics How Dynamic Brake Control can be adjusted individually. works Mode changes The Dynamic Brake Con- The riding mode can be trol function is active in changed while the vehicle is all riding modes. -
Page 187: Tyre Pressure Control (Rdc)
Behaviour during accidental TYRE PRESSURE CONTROL actuation of the throttle grip (RDC) If the throttle is accidentally with tyre pressure control opened (throttle grip posi- (RDC) tion > 5 %) during emergency Function braking, Dynamic Brake Con- A sensor integrated into each trol ensures the desired brak- tyre measures the air tempera- ing effect by ignoring actu-... - Page 188 ENGINEERING DETAILS ted to a vehicle equipped with for temperature; the reading an RDC control unit. shown by a gauge of this nature is the temperature- Tyre pressure ranges dependent tyre-air pressure. As The RDC control unit distin- a result, the values displayed guishes between three tyre there usually do not correspond pressure ranges matched to...
-
Page 189: Shift Assistant
Shift time is shorter than a Example gearshift with clutch actu- ation. The tyre pressure must be In order for the system increased to the following to identify a request for a value to reach the correct gearshift, the rider has to move tyre pressure: the shift lever from its idle 2.6 bar... -
Page 190: Hill Start Control (Hill Start Control)
ENGINEERING DETAILS motorcycle stationary on an Downshifting incline. Downshifting is assisted until The brake pressure in the maximum rpm for the tar- brake system is dependent on get gear to be selected is the gradient. reached. This prevents over- Effect of an incline on brake revving. - Page 191 for example, slipping due to a blocked rear wheel. Releasing brake when stopping the engine or timeout Hill Start Control is deactivated when the engine is stopped us- ing the emergency-off switch, when the side stand is fol- ded out or after timeout (10 minutes).
- Page 192 MAINTENANCE...
- Page 193 GENERAL NOTES TOOLKIT FRONT-WHEEL STAND REAR-WHEEL STAND ENGINE OIL BRAKE SYSTEM CLUTCH COOLANT TYRES WHEEL RIMS WHEELS CHAIN LIGHTING TRIM PANEL COMPONENTS JUMP-STARTING BATTERY FUSES DIAGNOSTIC CONNECTOR...
-
Page 194: General Notes
If you are in doubt, fasteners on your vehicle are consult a specialist workshop, listed in the section entitled preferably your authorised "Technical data". BMW Motorrad retailer. Microencapsulated screws TOOLKIT The microencapsulation is a chemical thread-locker. An ad- hesive compound creates a se-... -
Page 195: Front-Wheel Stand
Installing front-wheel stand trim panel components. Remove the rider's seat ATTENTION 78). without Dynamic Damp- Use of the BMW Motorrad ing Control (DDC) front wheel stand without Adjust the compression- accompanying use of centre stage damping for front stand or auxiliary stand wheel ( 113). -
Page 196: Rear-Wheel Stand
(the procedure for installation. higher the temperature, the BMW Motorrad offers an aux- higher the oil level) iliary stand suitable for every Engine damage vehicle. Your BMW Motorrad... - Page 197 If the oil level is above the MAX mark: Have the oil level corrected by a specialist workshop, preferably an authorised BMW Motorrad retailer. Topping up engine oil Make sure the ground is level and firm and place the motor- cycle on its stand.
-
Page 198: Brake System
Have the brakes checked ATTENTION by a specialist workshop, Use of insufficient engine oil preferably an authorised or too much engine oil BMW Motorrad Retailer. Engine damage Checking brake pad thickness, Always make sure that the front brakes oil level is correct. - Page 199 From the rear toward brake pads 1. Have the brake pads replaced by a specialist workshop, preferably an authorised BMW Motorrad retailer. Checking brake pad thickness, rear brakes Make sure the ground is level and firm and place the motor- cycle on its stand.
- Page 200 1. Have the brake pads replaced by a specialist workshop, preferably an authorised BMW Motorrad retailer. Checking brake-fluid level, front brakes Make sure the ground is level and firm and hold the motor- cycle upright.
- Page 201 Have the fault rectified as quickly as possible by a spe- Brake fluid, DOT4 cialist workshop, preferably an The brake fluid level may not authorised BMW Motorrad re- drop below the MIN mark. tailer. (Brake-fluid reservoir hori- Checking brake-fluid level,...
- Page 202 Have the fault rectified as Brake fluid, DOT4 quickly as possible by a spe- The brake fluid level may not cialist workshop, preferably an drop below the MIN mark authorised BMW Motorrad re- (Brake-fluid reservoir hori- tailer. zontal)
-
Page 203: Clutch
Have the clutch checked tight against the grip. by a specialist workshop, Pull clutch lever 1 gently until preferably an authorised resistance is perceptible, ob- BMW Motorrad Retailer. serving the clutch play A. Checking clutch-lever play Clutch-lever play Requirement Engine is cold. -
Page 204: Coolant
1. Viewing dir- Consult a specialist workshop, ection: From in front toward preferably an authorised the inside of the right side BMW Motorrad Retailer, panel. should it only be possible to set the correct clutch play by unscrewing further. -
Page 205: Tyres
Top up coolant TYRES Checking tyre pressure WARNING Incorrect tyre pressure Impaired handling charac- teristics of the motorcycle, shorter useful tyre life Always check that the tyre Open cap 1 of the expansion pressures are correct. tank. Top up coolant to the spe- WARNING cified level using a suitable funnel. -
Page 206: Wheel Rims
If applicable, have the tyres preferably by an authorised changed in good time be- BMW Motorrad Retailer. fore they wear to the min- imum tread depth permitted WHEELS by law. Effect of wheel size on... - Page 207 Place the motorcycle with a brake caliper not cor- on an auxiliary stand; rectly secured. BMW Motorrad recommends Remove mounting bolts 3 of you use the BMW Motorrad the left and right brake cal- rear-wheel stand. ipers. Install the rear-wheel stand 190).
- Page 208 Install the front wheel Lift the front of the motor- cycle until the front wheel is clear of the ground, preferably WARNING using a BMW Motorrad front- Use of a non-standard wheel wheel stand. Malfunctions in operation of Install the front-wheel stand ABS and DTC 189).
- Page 209 Lubricate quick-release axle 1. Clamping screws in axle Lubricant holder Tightening sequence: Tighten Optimoly TA screws six times in alternate Raise the front wheel, install sequence quick-release axle 1 and M8 x 35 tighten to specified torque. 19 Nm Quick-release axle in Ease the brake calipers on to threaded bush the brake discs.
- Page 210 Remove the front-wheel stand micro-encapsulated and the auxiliary stand. 8 Nm Removing rear wheel Lift the motorcycle, preferably with a BMW Motorrad rear- wheel stand. Install the rear-wheel stand 190). Slip wooden chocks or sim- ilar under the rear wheel to...
- Page 211 Press the brake caliper 1 Remove quick-release axle 2 against the brake disc 2. and remove adjustment Brake pistons are pushed plate 1. back. Roll the rear wheel as far for- Remove axle nut 1 with ward as possible and disen- washer.
- Page 212 1 to the front and hang preferably an authorised to the side. BMW Motorrad dealer. Roll the rear wheel back until it is clear of the swinging arm. The sprocket and the spacer bushes on left and right are loose fits in the wheel.
- Page 213 to prevent contact with the rear Installation tool wheel or the exhaust system. Silicone spray Install chain sprocket car- rier 1. Roll the rear wheel as far forward as possible and loop chain 1 over the chain sprocket. Roll rear wheel on the support into the swinging arm.
-
Page 214: Chain
800 km Before driving, check that To prolong chain life, the brakes respond without BMW Motorrad recommends delay. the use of BMW Motorrad chain lubricant or: Operate the brake several times until the brake pads are Lubricant bedded. Adjust the chain sag ( 210). - Page 215 Chain deflection a suitable cleaning product, dry it and apply chain lub- 45...50 mm (Motorcycle with ricant. To prolong chain life, no weight applied, supported BMW Motorrad recommends on its side stand) the use of BMW Motorrad chain lubricant or:...
- Page 216 MAINTENANCE Tighten quick-release axle If measured value is outside nut 1 to the specified tight- permitted tolerance: ening torque. Adjust the chain sag ( 210). Rear quick-release axle Adjusting chain sag in swinging arm Make sure the ground is level and firm and place the motor- M24 x 1.5 cycle on its stand.
-
Page 217: Lighting
If an LED light source is faulty, please contact a specialist workshop, preferably Check whether a rivet head 1 an authorised BMW Motorrad has twisted out of line. Retailer. Rivet heads are parallel to the chain centreline 2. -
Page 218: Trim Panel Components
MAINTENANCE TRIM PANEL COMPONENTS Remove the side panel The procedure described here for the right side panel applies by analogy to the left side as well. Make sure the ground is level and firm and place the motor- cycle on its stand. Loosen fairing side panel 1 from grommets 2 and re- move. - Page 219 Install long screws 1. Carefully unclip left and right Install short screws 2. rear trim panel 1, first hori- zontally 2, then vertically 3. Removing tail-hump trim panel with two-up riding package Remove the passenger seat 77). Remove the tail-hump cover 77).
- Page 220 MAINTENANCE Installing tail-hump trim panel Remove short screws 1 and long screws 3 from tail-hump Position tail-hump trim trim panel 2. panel 1 at retaining tab 2. Carefully unclip panels 4 in the direction of arrow. Carefully clip in panels 4 in the direction of arrow to the Lift tail-hump trim panel 1 in tail-hump trim panel 2.
-
Page 221: Jump-Starting
Insert rider's seat 1 into the Carefully clip in rear trim fixing 4 at the front and posi- panel in the direction of tion it. arrow. Push the rider's seat cover 1 Install bolts 1 and 2. forward slightly on the seat with two-up riding package cushion surface and expose Install the passenger seat... -
Page 222: Battery
MAINTENANCE ative terminal of the donor battery, and the other end to ATTENTION the negative terminal of the Contact between crocodile discharged battery. clips of jump leads and Start the engine of the vehicle vehicle with the discharged battery Risk of short-circuit in the usual way;... - Page 223 ATTENTION more than four weeks. Battery not disconnected BMW Motorrad has de- in accordance with correct veloped a float charger procedure specially designed for com- Risk of short-circuit...
- Page 224 MAINTENANCE with M Lightweight battery Connecting battery to motorcycle ATTENTION ATTENTION Battery not disconnected in accordance with correct Battery not connected in ac- procedure cordance with correct pro- Risk of short-circuit cedure Always proceed in compli- Risk of short-circuit ance with the specified dis- Always proceed in compli- connection sequence.
- Page 225 with M Lightweight battery Once the battery is fully charged, disconnect the charger's terminal clips from the battery terminals. The battery has to be recharged at regular intervals in the course of a lengthy period of disuse. See the instructions for caring for your battery.
-
Page 226: Fuses
Never attempt to jumper a circuits checked by a specialist blown fuse. workshop, preferably an au- Always replace a defective thorised BMW Motorrad dealer. fuse with a new fuse of the Install fuse box 1 in the same amperage. holder. -
Page 227: Diagnostic Connector
Anti-theft alarm (DWA) it to be disconnected Ignition switch except in the course of a Diagnostic connector BMW Motorrad service by 7.5 A a specialist workshop or by Multifunction switch, left other authorised persons. Tyre pressure control... - Page 228 MAINTENANCE Install the tail-hump cover 77). Press locks 1. Disengage diagnostic socket 2 from holder 3. The interface to the diagnosis and information system can be connected to the diagnostic connector 2. Securing diagnostic socket Disconnect the interface for the diagnosis and information system.
- Page 230 ACCESSORIES...
- Page 231 GENERAL NOTES CONNECTOR FOR OPTIONAL ACCESSORIES USB CHARGING SOCKET...
- Page 232 ACCESSORIES Your authorised GENERAL NOTES BMW Motorrad retailer can offer expert advice on the CAUTION choice of genuine BMW parts, accessories and other products. Use of other-make products To find out more about ac- Safety risk cessories go to: BMW Motorrad cannot ex- bmw-motorrad.com/equip-...
- Page 233 Underneath the left side panel Under the tail-hump cover without anti-theft alarm (DWA) Plug for optional accessories and racing accessories: Terminating resistor Voltage supply and LIN Connector for DWA and Spring travel sensor for M data logger front forks (racing access- ory) Under the tail-hump cover Under the tail-hump trim...
- Page 234 ACCESSORIES Connecting optional accessories and racing ATTENTION accessories Dirt and damp penetrating Requirement inside open connectors Remove the side panel, rear Malfunctions seat or tail-hump cover, as ap- Reinstall the cap or termin- plicable, to gain access to the ating resistor, as applicable, plugs.
- Page 235 15 minutes after the ignition is switched off, in order to pre- vent overloading of the on- board electrics. BMW Motorrad recommends using the BMW Motorrad pouch for smartphone to protect your smartphone against water and vibration. To prevent dirtying, keep the...
- Page 236 CARE...
- Page 237 CARE PRODUCTS WASHING THE VEHICLE CLEANING EASILY DAMAGED COMPONENTS CARE OF PAINTWORK PAINTWORK PRESERVATION LAYING UP MOTORCYCLE RESTORING MOTORCYCLE TO USE...
-
Page 238: Care Products
ATTENTION WASHING THE VEHICLE Use of unsuitable cleaning BMW Motorrad recommends and care products that you use BMW insect re- Damage to vehicle parts mover to soften and wash off Do not use solvents such insects and stubborn dirt on... -
Page 239: Cleaning Easily Damaged Components
Effect of road salt intensi- hard, scouring surfaces. fied by warm water Clean plastic parts with water Corrosion Use only cold water to wash and BMW plastic care emul- off road salt. sion. This includes in particular:... -
Page 240: Care Of Paintwork
Soften stubborn dirt and insects by covering the Rubber affected areas with a wet cloth. Treat rubber components with water or BMW rubber-care Carbon parts products. Clean Carbon parts with water and a microfibre cloth. ATTENTION... -
Page 241: Paintwork Preservation
BMW Motorrad with low-grade fuel or if the solvent cleaner followed by vehicle is to be out of use for BMW Motorrad gloss polish for a lengthy period of time. More preservation. information is available from Marks on the paintwork are... - Page 242 TECHNICAL DATA...
- Page 243 TROUBLESHOOTING CHART THREADED FASTENERS FUEL ENGINE OIL COOLANT ENGINE CLUTCH TRANSMISSION FINAL DRIVE FRAME CHASSIS AND SUSPENSION BRAKES WHEELS AND TYRES ELECTRICAL SYSTEM ANTI-THEFT ALARM DIMENSIONS WEIGHTS PERFORMANCE FIGURES...
-
Page 244: Troubleshooting Chart
TECHNICAL DATA TROUBLESHOOTING CHART Engine does not start or is difficult to start. Possible cause Rectification Side stand extended and gear Fold in side stand. engaged Gear engaged and clutch not Select neutral or pull the clutch pressed lever. No fuel in tank Refuel ( 137). - Page 245 Active route guidance is not displayed in the TFT display. Possible cause Rectification Navigation from the The BMW Motorrad Connec- BMW Motorrad Connec- ted App is opened on the con- ted App was not transmitted. nected mobile end device prior to departure.
-
Page 246: Threaded Fasteners
TECHNICAL DATA THREADED FASTENERS Frame Value Valid Positioning of swinging arm pivot point bush in main frame, right M6 x 26.7 5 Nm Positioning of swinging arm pivot point bush in main frame, left M6 x 12 8 Nm Swinging arm axle to frame M27 x 1.25 Tightening torque,... - Page 247 Front wheel Value Valid Quick-release axle in threaded bush M24 x 1.5 50 Nm Clamping screws in axle holder M8 x 35 Tightening sequence: Tighten screws six times in alternate se- quence 19 Nm Radial brake caliper on wheel axle clamp M10 x 65 38 Nm Rear wheel...
- Page 248 TECHNICAL DATA Rear wheel Value Valid Screw in adjusting ring M5 x 16 6 Nm without Dynamic Damping Control (DDC) Spring strut at deflec- tion lever M12 x 75 - 10.9 100 Nm micro-encapsulated Clamping bolt at ad- justing strut M6 x 25 8 Nm Mirrors...
- Page 249 Footrest system Value Valid Peg to footbrake lever M6 x 20 10 Nm with Billet micro-encapsulated pack Folding peg M6 x 16 10 Nm with Billet pack Number plate carrier Value Valid on rear frame Number-plate carrier to rear frame M5 x 25, without col- 2 Nm Selector rod to gear-...
-
Page 250: Fuel
TECHNICAL DATA FUEL Recommended fuel grade Premium, unleaded (max. 5 % ethanol, E5) 98 ROZ/RON 93 AKI Alternative fuel grade Premium unleaded (power- and consump- tion-related restrictions) (max 10 % ethanol, E10) 95 ROZ/RON 90 AKI Usable fuel capacity approx. 16.5 l Fuel reserve approx. -
Page 251: Engine Oil
SAE 5W-40, API SJ / JASO MA2, Additives (e.g. molybdenum-based) are not permissible because they can attack coated components of the engine, BMW Motorrad recommends BMW Motorrad ADVANTEC Ultimate oil. Engine oil, quantity for topping max 1.3 l, Difference between MIN and MAX... -
Page 252: Clutch
TECHNICAL DATA Nominal capacity 152 kW, at engine speed: 13500 min with power reduction 79 kW, at engine speed: without Canada export 7250 min with Torque optimized 132 kW, at engine speed: calibration 11500 min with Canada export Torque 113 Nm, at engine speed: 11000 min with power reduction 107 Nm, at engine speed:... -
Page 253: Final Drive
FINAL DRIVE Type of final drive Chain drive Chain deflection 45...50 mm, Motorcycle with no weight applied, supported on its side stand Permissible chain length max 144 mm, measured from the centre of 10 rivets, chain pulled taut Number of teeth, rear-wheel 17:45 drive (Pinion / sprocket) Secondary transmission ratio... -
Page 254: Chassis And Suspension
TECHNICAL DATA CHASSIS AND SUSPENSION Front wheel Type of front suspension Upside-down telescopic forks, diameter 45 mm, spring pre- load, rebound and compres- sion stages adjustable with Dynamic Damping Con- Upside-down telescopic forks, trol (DDC) diameter 45 mm, DDC elec- tronically controlled, spring preload adjustable, shock-ab- sorber damping range elec-... -
Page 255: Brakes
BRAKES Front wheel Type of front brake Twin disc brake, diameter 320 mm, 4piston fixed cal- iper with M carbon wheels Twin disc brake, diameter 320 mm, 4piston fixed cal- iper with M forged wheels Twin disc brake, diameter 320 mm, 4piston fixed cal- iper Brake-pad material, front Sintered metal... -
Page 256: Wheels And Tyres
TECHNICAL DATA WHEELS AND TYRES Recommended tyre combina- Your authorised BMW tions Motorrad retailer will be happy to supply an up-to-date list of the approved wheel/tyre combinations, or you can check the information posted on the bmw-motorrad.com website. Speed category, front/rear... -
Page 257: Electrical System
Tyre pressure Tyre pressure, front 2.5 bar, tyre cold Tyre pressure, rear 2.9 bar, tyre cold ELECTRICAL SYSTEM Fuses Main fuse 40 A, Alternator regulator, isol- ating relay, BCL, BMS-O, ABS, Fuse 1 15 A, DWA, OBD, ignition switch, instrument cluster Fuse 2 7.5 A, Multifunction switch left, RDC control unit, sensor box... -
Page 258: Anti-Theft Alarm
TECHNICAL DATA ANTI-THEFT ALARM Activation time on arming approx. 30 s Alarm duration approx. 26 s DIMENSIONS Length of motorcycle 2073 mm, via rear wheel Height of motorcycle 1151 mm, across mirrors at DIN unladen weight 1155 mm, without mirrors, at DIN unladen weight Width of motorcycle 848 mm, with mirrors... - Page 259 Maximum payload 210 kg with M Package 213.3 kg with Race package 211.7 kg with two-up riding pack- 209.2 kg with M Package 212 kg with M carbon wheels with M Lightweight battery with M Lightweight battery 211.9 kg with two-up riding pack- 211.2 kg with M Lightweight battery with Dynamic Damping Con-...
- Page 260 SERVICE...
- Page 261 REPORTING SAFETY-RELEVANT DEFECTS BMW MOTORRAD SERVICE BMW MOTORRAD SERVICE HISTORY BMW MOTORRAD MOBILITY SERVICES MAINTENANCE WORK BMW SERVICE MAINTENANCE SCHEDULE MAINTENANCE CONFIRMATIONS SERVICE CONFIRMATIONS...
-
Page 262: Reporting Safety-Relevant Defects
However, the NHTSA cannot be- come involved in individual problems between you, your retailer, or BMW of North America, LLC. You can contact the NHTSA by calling the Vehicle Safety hotline on 1–888–327–4236 (teletypewriter TTY for the hearing impaired: 1–800–424–9153) for free, by visiting the website... -
Page 263: Bmw Motorrad Service
In order to help ensure BMW MOTORRAD SERVICE that your BMW is always BMW Motorrad has an in optimum condition, extensive network of retailers BMW Motorrad recommends in place to look after you and compliance with the mainten- your motorcycle in more than ance intervals specified for your 100 countries. -
Page 264: Bmw Motorrad Mobility Services
Riders who cover long dis- SERVICES tances in a year might have to bring in their vehicles for If you have a new BMW mo- service before the next sched- torcycle, you are protected by uled date. It is to allow for... - Page 265 To find out more about service go to: bmw-motorrad.com/service The maintenance tasks neces- sary for your vehicle are set out in the maintenance schedule below:...
-
Page 266: Maintenance Schedule
SERVICE MAINTENANCE SCHEDULE BMW Motorrad running- annually or every in check (including oil 10000 km (whichever change) comes first) BMW Motorrad Service, for the first time after one standard scope year, then every two years Engine-oil change, with filter Check valve clearances... -
Page 267: Maintenance Confirmations
The tasks included in the BMW_Motorrad Service standard scope are listed below. The actual scope of maintenance work applic- able for your vehicle may vary. Performing vehicle test with BMW Motorrad diagnosis system Visual inspection of the brake lines, brake hoses and connec- tions... - Page 268 SERVICE BMW pre-delivery check BMW Running-in Check carried out carried out odometer reading Next service at the latest or, when reached earlier odometer reading Stamp, signature Stamp, signature...
- Page 269 BMW Motorrad service carried out odometer reading Next service at the latest or, when reached earlier odometer reading Work performed BMW Motorrad service Oil change, engine, with filter Checking valve clearance Checking valve timing (cylinder head cover removed) Renewing all spark plugs...
- Page 270 SERVICE BMW Motorrad service carried out odometer reading Next service at the latest or, when reached earlier odometer reading Work performed BMW Motorrad service Oil change, engine, with filter Checking valve clearance Checking valve timing (cylinder head cover removed) Renewing all spark plugs...
- Page 271 BMW Motorrad service carried out odometer reading Next service at the latest or, when reached earlier odometer reading Work performed BMW Motorrad service Oil change, engine, with filter Checking valve clearance Checking valve timing (cylinder head cover removed) Renewing all spark plugs...
- Page 272 SERVICE BMW Motorrad service carried out odometer reading Next service at the latest or, when reached earlier odometer reading Work performed BMW Motorrad service Oil change, engine, with filter Checking valve clearance Checking valve timing (cylinder head cover removed) Renewing all spark plugs...
- Page 273 BMW Motorrad service carried out odometer reading Next service at the latest or, when reached earlier odometer reading Work performed BMW Motorrad service Oil change, engine, with filter Checking valve clearance Checking valve timing (cylinder head cover removed) Renewing all spark plugs...
- Page 274 SERVICE BMW Motorrad service carried out odometer reading Next service at the latest or, when reached earlier odometer reading Work performed BMW Motorrad service Oil change, engine, with filter Checking valve clearance Checking valve timing (cylinder head cover removed) Renewing all spark plugs...
- Page 275 BMW Motorrad service carried out odometer reading Next service at the latest or, when reached earlier odometer reading Work performed BMW Motorrad service Oil change, engine, with filter Checking valve clearance Checking valve timing (cylinder head cover removed) Renewing all spark plugs...
- Page 276 SERVICE BMW Motorrad service carried out odometer reading Next service at the latest or, when reached earlier odometer reading Work performed BMW Motorrad service Oil change, engine, with filter Checking valve clearance Checking valve timing (cylinder head cover removed) Renewing all spark plugs...
- Page 277 BMW Motorrad service carried out odometer reading Next service at the latest or, when reached earlier odometer reading Work performed BMW Motorrad service Oil change, engine, with filter Checking valve clearance Checking valve timing (cylinder head cover removed) Renewing all spark plugs...
- Page 278 SERVICE BMW Motorrad service carried out odometer reading Next service at the latest or, when reached earlier odometer reading Work performed BMW Motorrad service Oil change, engine, with filter Checking valve clearance Checking valve timing (cylinder head cover removed) Renewing all spark plugs...
-
Page 279: Service Confirmations
SERVICE CONFIRMATIONS The table is intended as a record of maintenance and repair work, the installation of optional accessories and, if appropriate, technical campaign work. Work performed odometer Date reading... - Page 280 SERVICE Work performed odometer Date reading...
- Page 282 DECLARATION OF CONFORMITY CERTIFICATE FOR ELECTRONIC IMMOBILISER CERTIFICATE FOR TYRE PRESSURE CONTROL (RDC) CERTIFICATE FOR TFT INSTRUMENT CLUSTER...
- Page 283 DECLARATION OF CON- bmw-motorrad.com/certifica- FORMITY tion Simplified EU Declaration of Conformity under RED (2014/ Keyless Ride HUF5750 53/EU). Technical information Frequency band: 434,42 MHz Transmission Power: 10 mW Manufacturer Huf Hülsbeck & Fürst GmbH & Co. KG Steeger Str. 17, 42551 Vel- bert, Germany Hereby, Huf Hülsbeck &...
- Page 284 Directive 2014/53/EU. The full Output Power: <10 mW e.r.p. text of the EU declaration of conformity is available at the Manufacturer following internet address: Schrader Electronics Ltd. bmw-motorrad.com/certifica- Technology Park, N. Ireland tion BT41 1QS Antrim, United Kingdom Anti-theft alarm (DWA) TXBMWMR...
- Page 285 Hereby, Bury Sp. z o.o. de- bmw-motorrad.com/certifica- clares that the radio equipment tion type WCA Motorrad-Ladesta- ufach is in compliance with Dir- TFT instrument cluster ective 2014/53/EU. The full ICC10in text of the EU declaration of Technical information...
- Page 286 APPENDIX dress: bmw-motorrad.com/certifica- bmw-motorrad.com/certifica- tion tion Intelligent emergency call Mid Range Radar TPM E-CALL EU MRRe14FCR Technical information Technical information Antenna internal: Frequenzy band: 76 - 77 GHz Frequency band: 880 MHz - Nominal radiated power: e.i.r.p. 915 MHz (peak detector): 32 dBm Radiated Power [TRP]: <...
- Page 287 tion...
- Page 288 Declaration of Conformity Radio equipment electronic United Arab Emirates immobiliser (EWS4) For all countries without EU Technical information Frequency Band: 134 kHz (Transponder: TMS37145 / Type DST80, TMS3705 Transponder Base Station IC) Philippiens Output Power: 50 dBµV/m Manufacturer and Address Manufacturer: BECOM Electronics GmbH Address: Technikerstraße 1,...
- Page 289 Indonesia Taiwan 72790/SDPPI/2021 13349 低功 電波 射性電機管 辦法 第十二條 經型式認證合格之低 功率射頻電 機,非經許可,公 司、商號或使用者均不得擅 自變 更頻率、加大功率或變更原設計 之特性及 功能。第十四條 低功 Dilarang melakukan perubahan 率射頻電機之使用不 得影響飛航 Spesifikasi yang dapat 安全及干擾合法通信;經發現有 Menimbulkan gangguan fisik 干 擾現象時,應立即停用,並改 dan/atau elektromagnetik 善至無干擾時方 得繼續使用。 前 terhadap lingkungan sekitarnya 項合法通信,指依電信法規定作...
- Page 290 United States (USA) Canada Contains FCC ID: Contains IC: ODE-MREWS5012 10430A-MREWS5012 FCC § 15.19 Labelling This device complies with part 15 requirements of the FCC Rules and Industry This device complies with part Canada license-exempt RSS 15 of the FCC Rules and Industry standard(s).
- Page 291 Certification Tire Pressure Control (TPC) FCC ID: MRXBC54MA4 FCC ID: MRXBC5A4 IC: 2546A-BC54MA4 IC: 2546A-BC5A4 This device complies with Part 15 Le présent appareil est conforme of the FCC Rules and with aux CNR d'Industrie Canada Industry Canada license-exempt applicables aux appareils radio RSS standard(s).
- Page 292 Declaration of Conformity Radio equipment TFT instrument Argentina cluster For all Countries without EU C-24711 Technical information Brazil BT operating frq. Range: Este equipamento opera em 2402 – 2480 MHz caráter secundário, isto é, não BT version: 4.2 (no BTLE) tem direito a proteção contra BT output power: <...
- Page 293 Mexico Le présent appareil est conforme La operación de este equipo está aux CNR d'Industrie Canada sujeta a las siguientes dos applicables aux appareils radio condiciones: exempts de licence. L'exploitation (1) es posible que este equipo o est autorisée aux deux conditions dispositivo no cause interferencia suivantes : (1) l'appareil ne doit perjudicial y...
- Page 294 Thailand เครื ่ อ งโทรคมนาคมและอุ ป กรณ์ น้ ี มี ค วามสอดคล้ อ งตามข้ อ กํ า หนดของ กทช. (This telecommunication equipments is in compliance with NTC requirements) United States (USA) This device complies with Industry Canada’s licence-exempt RSSs and part 15 of the FCC Rules.
- Page 296 INDEX Brake fluid Abbreviations and symbols, 4 Checking fluid level, front, 194 Engineering details, 172 Checking fluid level, rear, 195 Self-diagnosis, 129 Reservoir, front, 18 Status indicators, 47 Reservoir, rear, 18 Accessories Brake pads Connector for optional checking front, 192 accessories, 226 checking rear, 193 general notes, 226...
- Page 297 Clock DTC, 20 adjusting, 90 Customising controls, 151 Clutch Engineering details, 176 Adjusting handlebar Indicator and warning levers, 105 light, 49 Adjusting play, 197 operating, 65 Checking function, 197 Self-diagnosis, 130 Checking play, 197 switching off, 65 Technical data, 246 switching on, 66 Coolant DWA, 39...
- Page 298 INDEX Technical data, 245 TFT display, 27, 28 Warning light, drive Under the rider's seat, 19 malfunction, 40 Engine oil Hazard warning flashers Checking fill level, 190 Control, 20, 21, 22 Filler neck, 18 operating, 62 Fill-level indicator, 18 Headlight Technical data, 245 Headlight beam throw, 104 topping up, 191...
- Page 299 Instrument cluster Maintenance Ambient-light brightness general notes, 188 sensor, 23 Maintenance schedule, 260 Overview, 23 Maintenance confirma- tions, 261 Jump-starting, 215 Maintenance intervals, 258 Media operating, 99 Keys, 58 Menu calling up, 86 Laptimer Mirrors adjusting, 145 adjusting, 104 Ending timing, 145 Removing and installing, 154 operating, 145 Mobility services, 258...
- Page 300 INDEX Riding mode Pairing, 92 adjusting, 66 Parking, 135 Control, 21, 22 Parking light, 63 Engineering details, 178 Phone Running in, 131 operating, 99 Pit Lane Limiter, 151 Safety instructions adjust, 150 for brakes, 133 Pit-lane speed limiter for riding, 124 Maximum rpm, setting, 150 Seats operating, 151...
- Page 301 Status line, top TFT display, 23 adjusting, 87, 88 Control, 20 operating, 86, 87 steering damper adjusting, 108 Overview, 27, 28 Selecting reading, 83 Steering damper, 16 Toolkit Steering lock Contents, 188 Locking, 58 Position on the vehicle, 19 Swinging arm Torques, 240 Adjusting swinging arm pivot Traction control, 176...
- Page 302 INDEX Removing front wheel, 201 Value Removing rear wheel, 204 Display, 29 Technical data, 250 Vehicle Identification Number Windscreen Position on the vehicle, 18 Adjuster, 18 Warning indicator lights, 40 ABS, 47 Anti-theft alarm, 39 Coolant temperature, 39 Drop sensor, 46 DTC, 49 DWA, 39 Engine control unit, 41...
- Page 303 Errors and omissions excepted. © 2021 Bayerische Motoren Werke Aktiengesellschaft 80788 Munich, Germany Not to be reproduced by any means whatsoever, wholly or in part, without the written per- mission of BMW Motorrad, After Sales. Original rider’s manual, printed in Germany.
- Page 304 4 l Tyre pressure Tyre pressure, front 2.5 bar, tyre cold Tyre pressure, rear 2.9 bar, tyre cold For further information on all aspects of your vehicle, visit: bmw-motorrad.com Order No.: 01 40 7 107 111 *01407107111* 04.2021, 3rd edition, 01...