Table of Contents
Advertisement
Available languages
Available languages
Quick Links
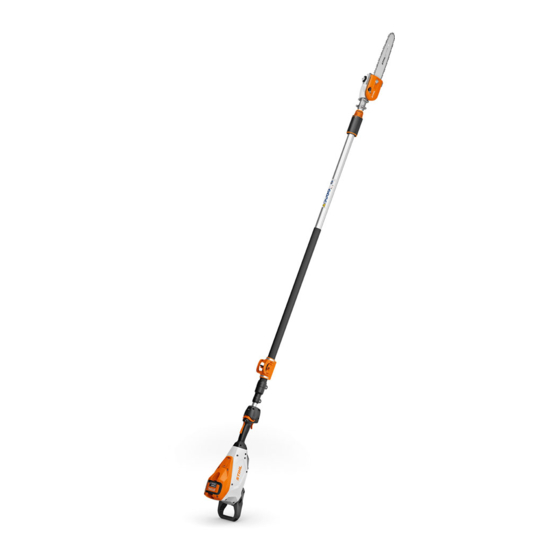
STIHL HTA 135 Pole Pruner
Owners Instruction Manual
WARNING
Read Instruction Manual thoroughly before use and
follow all safety precautions – improper use can cause
serious or fatal injury.
ADVERTENCIA
Antes de usar la máquina lea y siga todas las precauciones
de seguridad dadas en el manual de instrucciones – el uso
incorrecto puede causar lesiones graves o mortales.
Instruction Manual
Manual de instrucciones
Advertisement
Chapters
Table of Contents

Related Manuals for Stihl HTA 135


Summary of Contents for Stihl HTA 135
- Page 1 STIHL HTA 135 Pole Pruner Owners Instruction Manual Instruction Manual Manual de instrucciones WARNING ADVERTENCIA Read Instruction Manual thoroughly before use and Antes de usar la máquina lea y siga todas las precauciones follow all safety precautions – improper use can cause de seguridad dadas en el manual de instrucciones –...
- Page 2 Instruction Manual 1 - 54 Manual de instrucciones 55 - 113...
-
Page 3: Table Of Contents
Main Parts ......... . 4 12.1 STIHL AP Battery ........25 3.1 STIHL HTA 135 Pole Pruner and Battery . - Page 4 25.1 STIHL HTA 135 ........
-
Page 5: Introduction
Thank you for your purchase. The information contained in this manual will help you receive maximum performance and NOTICE satisfaction from your STIHL pole pruner and, if followed, reduce the risk of injury from its use. Indicates a risk of property damage, including damage to the machine or its individual components. -
Page 6: Main Parts
3 Main Parts Pole pruner shaft. 3 Clamping Nut For adjusting the length of the drive tube. STIHL HTA 135 Pole Pruner and Battery 4 Chain Sprocket Drives the saw chain. 5 Side Chain Tensioner Permits precise adjustment of saw chain tension. -
Page 7: Safety Symbols On The Products
English 4 Safety Symbols on the Products 16 Push Button 4 Safety Symbols on the Products Activates the battery's LEDs. 17 Locking Levers Secure the battery in the battery compartment. Pole Pruner 18 Battery Compartment The following safety symbols are found on the pole pruner. Holds the battery. -
Page 8: Battery
Read and follow all safety precautions in the 5 General Power Tool Safety Warnings battery's instruction manual and the manual for the STIHL tool powered by this battery. Improper use can lead to serious or fatal personal injury or Introduction property damage. -
Page 9: Electrical Safety
English 5 General Power Tool Safety Warnings Electrical Safety c) Prevent unintentional starting. Ensure the switch is in the off-position before connecting to power source and/or a) Power tool plugs must match the outlet. Never modify the battery pack, picking up or carrying the tool. Carrying plug in any way. -
Page 10: Battery Tool Use And Care
English 5 General Power Tool Safety Warnings e) Maintain power tools and accessories. Check for e) Do not use a battery pack or tool that is damaged or misalignment or binding of moving parts, breakage of modified. Damaged or modified batteries may exhibit parts and any other condition that may affect the power unpredictable behaviour resulting in fire/explosion or risk tool's operation. -
Page 11: Important Safety Instructions
English 6 IMPORTANT SAFETY INSTRUCTIONS ■ This power tool may be powered by a STIHL AP series 6 IMPORTANT SAFETY battery. Alternatively, it may be powered by a STIHL AR INSTRUCTIONS series backpack battery in combination with an AP Adapter. -
Page 12: Personal Protective Equipment
ANSI Z87 "+". physician and device manufacturer before operating this pole pruner. – To reduce the risk of injury to your face, STIHL recommends that you also wear a face shield or face screen over your goggles or protective glasses. -
Page 13: Pole Pruner
Only attachments supplied by STIHL or chain is not moving. To reduce the risk of such injuries: expressly approved by STIHL for use with this specific – Keep hands, feet and other parts of your body away model are recommended. -
Page 14: Using The Pole Pruner
– Read and follow the instructions on kickback and performance requirements. Use of parts that are not other reactive forces, @ 7. authorized or approved by STIHL may cause serious or fatal injury or property damage. – Select the shortest bar that will meet your cutting needs. - Page 15 – If your pole pruner or any part is damaged or does not function properly, take it to your authorized 6.5.2 Holding and Controlling the Pole Pruner STIHL servicing dealer. Do not use the pole pruner WARNING until the problem has been corrected. ■ Before inserting the battery: ■...
- Page 16 English 6 IMPORTANT SAFETY INSTRUCTIONS difficult to prevent the bar and chain from bouncing along ■ a limb. To reduce the risk of serious or fatal injury to the operator or bystanders from loss of control: – Never attempt to operate the pole pruner with one hand.
- Page 17 English 6 IMPORTANT SAFETY INSTRUCTIONS ■ Working above shoulder height can be tiring. To reduce ■ To reduce the risk of injury to bystanders and the risk of injury from fatigue: unauthorized users: – Never hold the machine with your rear hand on the –...
- Page 18 – Do not use waste oil to lubricate the bar and chain of cannot be kept at or near background levels, always your STIHL pole pruner. wear a respirator that is approved by NIOSH and rated for worksite-specific conditions. Follow the 6.5.4...
- Page 19 – Switch off the motor immediately and remove the damaged, stop work immediately and take your pole battery. pruner to an authorized STIHL servicing dealer for ■ Contacting foreign objects while sawing might cause the inspection, repair or maintenance. chain to break or be thrown, or cause the pole pruner to ■...
- Page 20 English 6 IMPORTANT SAFETY INSTRUCTIONS ■ ■ max 60° ■ To reduce the risk of severe or even fatal injury from ■ To reduce the risk of severe or fatal personal injury from falling objects: loss of control when cutting wood under tension: –...
-
Page 21: Kickback And Other Reactive Forces
English 7 Kickback and Other Reactive Forces – Pull-in – Maintain a clearance of at least 50 ft. (15 m) between the pole – Pushback pruner (including any branches it is contacting) and any Kickback electrical line carrying live current. 7.2.1 Kickback –... -
Page 22: Pull-In
English 8 Battery Safety WARNING Pull-in ■ Pushback occurs when the chain on the top of the bar is suddenly stopped or significantly slowed when it is pinched, caught or encounters a foreign object in the wood. The reaction of the chain may drive the pole pruner rapidly straight back toward the operator. - Page 23 ■ Use of STIHL AR or AP series batteries for any purpose ■ To reduce the risk of personal injury and property damage other than powering STIHL products could be extremely in the event the battery emits smoke, an unusual smell or dangerous.
-
Page 24: Maintenance, Repair And Storage
– If fluid gets into your eye(s): do not rub. Rinse water – STIHL recommends that all repair work be over the open eye(s) for at least 15 minutes and performed by authorized STIHL servicing dealers. seek medical attention. -
Page 25: Before Starting Work
English 10 Before Starting Work ■ Use of parts that are not authorized or approved by STIHL ► Tension the chain, @ 14.7. may cause serious or fatal injury or property damage. ► Fill the chain oil tank, @ 14.8.2. -
Page 26: Charging
► Disconnect the power supply cord from the electrical A battery is not fully charged when it ships from the factory. outlet when the charger is not in use for extended periods STIHL recommends that you fully charge the battery before of time. using it the first time. -
Page 27: Led Diagnostics And Acoustic Signals
If three LEDs flash red when you activate the trigger switch: the power tool has an electrical malfunction. Do not operate the power tool. Have it checked by an authorized STIHL ► Push the battery (2) into the charger (3) until it stops. -
Page 28: Stihl Ar Backpack Battery
If three LEDs flash red when you activate the trigger switch: the power tool has an electrical malfunction. Do not operate the power tool. Have it checked by an authorized STIHL servicing dealer before use or storage. For troubleshooting information, @ 24. -
Page 29: Stihl Ar Backpack Battery
English 13 STIHL AR Backpack Battery 13 STIHL AR Backpack Battery 13.1 Positioning and Adjusting the Connecting Cord WARNING To reduce the risk of injury from tripping or losing control of the power tool, always secure the connecting cord through the backpack guides and with the hook and eye fasteners as described below. -
Page 30: Assembling The Pole Pruner
English 14 Assembling the Pole Pruner ► Fasten the chest strap (1) and adjust it so that it fits comfortably but securely across your chest. ► Remove the cap (1) from the square end of the drive tube (2). ► Adjust the length of the drive tube to a = 3.9 in. (10 cm), ►... -
Page 31: Mounting The Motor Housing
English 14 Assembling the Pole Pruner ► If the gearbox cannot be pushed onto the drive tube up to ► Remove the cap (11) from the round end of the drive mark b: tube (2). ► Remove the chain sprocket cover (6) by turning the ►... -
Page 32: Mounting The Harness Clip
Never operate your pole pruner without a properly mounted guide bar and chain, @ 6.5. Use only guide bar and chain combinations expressly recommended or approved by STIHL, @ 6.4. WARNING The chain has many sharp cutters. If they contact your flesh, ►... - Page 33 ► Make sure that the cutters in the groove on the top side of with the housing. the guide bar face the tip of the bar. STIHL chains are manufactured with arrows on the tie straps to help the ► Turn the nut clockwise until the chain sprocket cover is operator determine the proper direction of the chain.
-
Page 34: Tensioning The Chain
English 14 Assembling the Pole Pruner ► Remove the chain sprocket cover. ► Turn the side chain tensioner (2) clockwise to tighten the chain. ► Turn the side chain tensioner counterclockwise until it The chain is properly adjusted when the distance between stops and the chain is loose. - Page 35 ► For automatic and reliable lubrication of the chain and guide bar, use only an environmentally compatible quality chain and bar lubricant. STIHL recommends using rapidly ► Flip up the grip and press the cap down firmly (1). biodegradable STIHL BioPlus.
-
Page 36: Inserting And Removing The Battery
► Fold the grip flush with the top of the cap and check for Since a new battery is not fully charged, STIHL recommends tightness. that you fully charge the battery before using it the first time, @ 11. -
Page 37: Switching The Pole Pruner On And Off
English 16 Switching the Pole Pruner On and Off ► Depress and hold the trigger switch lockout (1). NOTICE ► While holding the trigger switch lockout, push the retaining latch (2) forward with your thumb and release it. Avoid exposing the battery to excessive heat or prolonged The LED glows. -
Page 38: Checking The Pole Pruner
The pole pruner should switch on. If it does not, take the pole pruner to an authorized STIHL servicing dealer to be repaired before use. ► Release the trigger switch. -
Page 39: During Operation
► Confirm that the drive tube is fixed in place. mechanism is not functioning. Take the pole pruner to an authorized STIHL servicing dealer to be repaired before ► If the drive tube still can be moved: Lock the drive tube by use. -
Page 40: Limbing
English 18 During Operation ► To allow branches to free fall, always cut the lower branches first. Cross-cut ► Adjust the length of the shoulder strap (1) so that the carabiner (2) is about a hand’s width below the top of your hip. -
Page 41: After Finishing Work
English 19 After Finishing Work Cutting thick branches ► Slide a chain scabbard over the guide bar so that it covers the entire guide bar. ► If the battery or pole pruner became wet during operation, allow them to dry separately and completely before charging or storing. -
Page 42: Battery
@ 8. Normally, no further conditions have to be met by the user in order to transport STIHL batteries by road to the power tool's WARNING operating site. Check and comply with any special Extreme temperatures can damage the battery and may also regulations that may apply to your situation. -
Page 43: Cleaning
@ 9. Users of this pole pruner should carry (3) with a brush, a slightly dampened cloth or resin out only the cleaning described in this manual. solvent, such as STIHL Resin Remover & Lubricant. Do not use detergents. To clean the pole pruner and battery: ►... -
Page 44: Cleaning The Air Filter
@ 9. Carry out only the maintenance operations described in this manual. There are no user-authorized repairs. STIHL recommends that repair work be performed by authorized STIHL servicing dealers. Proper maintenance of the pole pruner includes the following activities: ►... -
Page 45: Inspecting And Maintaining The Guide Bar
► Periodically remove any metal burrs that develop along the guide bar with a flat file or a STIHL guide bar dressing tool. ► Replace the guide bar if the burrs cannot be filed or if the guide bar becomes damaged. - Page 46 An improperly filed chain can be very dangerous. It can increase the potential for reactive forces, including kickback, ► Check the height of the depth gauge (1) with a STIHL file and also increase the magnitude of those reactive forces.
- Page 47 STIHL recommends having your chain sharpened by an kickback and other reactive forces. authorized STIHL servicing dealer to reduce the risk of ► Clamp the guide bar if necessary to make filing easier. severe or fatal injury from an improperly sharpened chain.
- Page 48 English 23 Inspection and Maintenance A depth gauge that is too low will increase the kickback tendency of the pole pruner and can increase kickback forces. A depth gauge that is too high will prevent the cutter from entering the workpiece and will lead to poor cutting performance.
-
Page 49: Troubleshooting Guide
► Reinsert the battery, @ 15.1. 1 LED flashes Battery has low ► Charge the battery, @ 11. green. charge. STIHL AR only: Additionally, four long beeps are emitted. 1 LED glows Battery too hot / too ► Allow the battery to warm up or cool down gradually at red. - Page 50 Run-time is too short. Battery not fully ► Charge the battery, @ 11. charged. Useful life of battery ► Have the battery checked by an authorized STIHL servicing has been reached or dealer. exceeded. During sawing, the The chain is dull or ►...
-
Page 51: Specifications
AR series batteries, see the product information Power symbol on the retaining latch. accompanying your battery. For technical information regarding the STIHL AL 101, 300 Engage the clamping nut and 500 series chargers, see the product information accompanying your charger. -
Page 52: Engineering Improvements
If the operating characteristics or the appearance of your machine differs from those described in this manual, please contact your STIHL dealer or the STIHL distributor in your area for assistance. 25.7 FCC 15 Compliance Statement This device complies with part 15 of the FCC Rules. -
Page 53: Combinations Of Guide Bars And Saw Chains
(25 cm) Light 04 3610) The listed guide bars are green-labeled reduced kickback STIHL guide bars. The listed chains are green-labeled low kickback STIHL chains Since new bar/chain combinations may be developed after publication of this manual, ask your authorized STIHL servicing dealer for the latest STIHL recommendations. -
Page 54: Approved Harness Combinations
The following harnesses are available for your pole pruner: 28.1 Genuine STIHL Replacement Parts Shoulder Strap STIHL recommends the use of genuine STIHL replacement parts. Genuine STIHL parts can be identified by the STIHL part number, the logo and, in some cases, by the STIHL parts symbol . -
Page 55: Battery Recycling
United States and Canada. ROCK BOSS #3,400,477; and ® STIHL Cutquik #3,400,476) The RBRC seal indicates that STIHL has prepaid for battery ® ® recycling. RBRC has a toll free phone number (1-800-822- AutoCut STIHL DUROMATIC 8837) that connects you to information on battery recycling ®... -
Page 56: Addresses
STIHL Territory™ STIHL Injection This listing of trademarks is subject to change. Any unauthorized use of these trademarks without the express written consent of ANDREAS STIHL AG & Co. KG, Waiblingen is strictly prohibited. 32 Addresses 32.1 STIHL Incorporated STIHL Incorporated 536 Viking Drive P.O. - Page 57 4.1 Podador de varilla ........59 12.1 Batería AP de STIHL ......81 4.2 Batería .
- Page 58 18.1 Ajuste de la longitud del tubo de mando ... . 95 26.1 STIHL HTA 135 ........110 18.2 Alineación de la pinza para arnés .
-
Page 59: Introducción
Palabras identificadoras manual le ayudará a obtener el máximo rendimiento y la mayor satisfacción de su podador de varilla de STIHL, y a Este manual contiene información sobre seguridad a la que reducir el riesgo de lesiones que supone su uso, si respeta usted debe prestar especial atención. -
Page 60: Componentes Importantes
Eje del podador de varilla. 3 Tuerca de sujeción Para ajustar la longitud del tubo de mando. Podadora de pértiga y batería STIHL HTA 135 4 Piñón de la cadena Impulsa la cadena de aserrado. 5 Tensor lateral de la cadena Permite ajustar con precisión la tensión de la cadena de... -
Page 61: Símbolos De Seguridad En Los Productos
español / EE.UU 4 Símbolos de seguridad en los productos 15 Batería 4 Símbolos de seguridad en los Suministra energía eléctrica al motor. productos 16 Pulsador Activa los LED de la batería. Podador de varilla 17 Palancas de bloqueo En el podador de varilla se pueden ver los siguientes Fijan la batería en su compartimiento. -
Page 62: Batería
5 Advertencias generales de seguridad STIHL que utiliza esta batería. El uso para herramientas motorizadas inadecuado puede provocar lesiones personales graves o mortales o daños a la propiedad. -
Page 63: Seguridad En La Zona De Trabajo
español / EE.UU 5 Advertencias generales de seguridad para herramientas motorizadas Seguridad en la zona de trabajo f) Si resulta ineludible el uso de una herramienta motorizada en un lugar húmedo, utilice un suministro de energía a) Mantenga la zona de trabajo limpia y bien iluminada. El eléctrica con dispositivo de corriente residual (RCD) o con desorden y la oscuridad favorecen los accidentes. -
Page 64: Uso Y Cuidado De La Herramienta Motorizada
español / EE.UU 5 Advertencias generales de seguridad para herramientas motorizadas g) Si cuenta con dispositivos para la conexión de equipos envíe la herramienta eléctrica a reparación antes de extractores y recogedores de polvo, asegúrese de que usarla. Muchos accidentes se deben a un mantenimiento estos están conectados y de que se usan debidamente. -
Page 65: Mantenimiento
■ Antes de comenzar cualquier trabajo de desramado, asegúrese de que todos los cortes necesarios se pueden Mantenimiento completar usando la carga que queda en la batería STIHL a) El mantenimiento de su herramienta motorizada deberá de la serie AP o AR. Si tiene dudas: realizarlo siempre un técnico calificado, utilizando piezas... -
Page 66: Operador
■ Esta herramienta motorizada puede alimentarse con una ■ No se conocen todos los factores que contribuyen a la batería de la serie STIHL AP. Como alternativa, se puede enfermedad de los dedos blancos. El clima frío, el alimentar con una batería tipo mochila de la serie consumo de tabaco y las enfermedades o afecciones STIHL AR combinada con un adaptador AP. -
Page 67: Equipos De Protección Personal
ANSI Z87 "+". utilizar este podador de varilla. – Para reducir el riesgo de lesionarse la cara, STIHL le recomienda que use también una careta o un Equipos de protección personal... - Page 68 ■ Aunque determinados accesorios no autorizados podrían encajar en su podador de varilla STIHL, su uso puede resultar extremadamente peligroso. Le recomendamos 0458-698-8621-A...
-
Page 69: Uso Del Podador De Varilla
– Nunca corte si la cadena está floja. Si la cadena se afloja durante el corte, apague el motor y retire la ■ Las piezas de repuesto auténticas de STIHL están batería del podador de varilla antes de apretar la diseñadas específicamente para su podador de varilla, y... - Page 70 – Asegúrese de mantener la espada y la cadena a su concesionario de servicio STIHL autorizado. No alejadas de su persona y de cualquier otro tipo de use el podador de varilla hasta que el problema se obstáculo u objeto, incluido el suelo.
- Page 71 español / EE.UU 6 INSTRUCCIONES IMPORTANTES DE SEGURIDAD ■ Para sujetar con firmeza y controlar correctamente el cadena reboten contra una rama. Para reducir el riesgo de podador de varilla: lesiones graves o mortales para el operador o los presentes por la pérdida de control: –...
- Page 72 español / EE.UU 6 INSTRUCCIONES IMPORTANTES DE SEGURIDAD – Si tiene un podador de varilla con tubo ajustable, ■ Su podador de varilla es una máquina diseñada para ser alargue el tubo solo lo necesario para llevar a cabo manejada por una sola persona. el trabajo previsto, pero nunca corte directamente –...
- Page 73 – Trabaje siempre con una cadena debidamente – No use aceite usado para lubricar la espada ni la afilada que produzca virutas de madera en vez de cadena de su podador de varilla STIHL. polvo fino. 0458-698-8621-A...
- Page 74 ■ El contacto con objetos extraños durante el serrado concesionario de servicio STIHL autorizado para puede provocar que la cadena se rompa o salga que lo revisen, lo reparen o lo mantengan.
- Page 75 español / EE.UU 6 INSTRUCCIONES IMPORTANTES DE SEGURIDAD ■ Si un árbol está podrido, puede romperse y caer hacia el – En cuanto la rama recortada empiece a caer, operador mientras este intenta cortarlo. Para reducir el apártese y manténgase a una distancia adecuada. riesgo de lesiones provocadas por la caída de residuos, –...
-
Page 76: Contragolpe Y Otras Fuerzas Reactivas
español / EE.UU 7 Contragolpe y otras fuerzas reactivas La electricidad también puede conducirse por las ramas ■ Las grandes fuerzas que se emplean para cortar madera de un árbol, especialmente si estas están húmedas. Para pueden cambiar de sentido y volverse contra el operador. reducir el riesgo de electrocución: Si la cadena de aserrado en movimiento pierde velocidad o se detiene repentinamente al tocar un objeto sólido,... -
Page 77: Contragolpe
español / EE.UU 7 Contragolpe y otras fuerzas reactivas Contragolpe Tirón 7.2.1 Contragolpe ADVERTENCIA ADVERTENCIA ■ El tirón se produce cuando la cadena en la parte inferior de la espada se detiene repentinamente o se ralentiza de ■ El contragolpe se puede producir cuando la cadena en forma significativa porque está... -
Page 78: Rechazo
AR o AP de STIHL con esta herramienta motorizada. ■ El rechazo se produce cuando la cadena de la parte ■ La utilización de baterías de las series AR o AP de STIHL superior de la espada se detiene repentinamente o se... - Page 79 AR 1000, 2000, 3000 de – Nunca introduzca objetos en las ranuras de STIHL con la funda para lluvia antes de ventilación de la batería. empezar a trabajar. ■ Las temperaturas extremas pueden hacer que la batería –...
-
Page 80: Mantenimiento, Reparación Y Almacenamiento
– En caso de contacto accidental, limpie inmediatamente y a fondo la zona afectada con un – STIHL le recomienda que encargue la realización de jabón suave y agua. los trabajos de reparación a un concesionario de servicio STIHL autorizado. -
Page 81: Antes De Empezar A Trabajar
10 Antes de empezar a trabajar ■ El uso de piezas no autorizadas o no aprobadas por STIHL puede provocar lesiones graves o mortales, así como daños materiales. 10.1 Preparación del podador de varilla para el – Para llevar a cabo tareas de reparación o... -
Page 82: Carga
La batería no se suministra completamente cargada de fábrica. STIHL le recomienda que cargue la batería por Para preparar el cargador para el funcionamiento: completo antes de usarla por primera vez. -
Page 83: Diagnóstico Por Led Y Señales Acústicas
El adaptador AP se puede retirar del no esté usando el cargador. cargador. ► Para cargar las baterías de la gama AP de STIHL, utilice ► Desenchufe el cordón eléctrico del tomacorriente cuando siempre cargadores STIHL AL 101, AL 300 o AL 500 el cargador no se vaya a usar durante un periodo auténticos. -
Page 84: Batería De Mochila Stihl Ar
Si tres LED destellan en rojo cuando activa el gatillo, la herramienta motorizada tiene un defecto eléctrico. No utilice la herramienta motorizada. Solicite a un concesionario de servicio STIHL autorizado que la revise antes de usarlo. Para información de localización de averías, @ 24. 12.1.3 Estado de carga Los LED en la batería también muestran el estado de carga... -
Page 85: Batería De Mochila Stihl Ar
No utilice la herramienta motorizada. Solicite a un concesionario de 13 Batería de mochila STIHL AR servicio STIHL autorizado que la revise antes de usarlo. Para información de localización de averías, @ 24. 12.2.3 Estado de carga 13.1 Colocación y ajuste del cordón de conexión... -
Page 86: Colocación Del Arnés
/ EE.UU 13 Batería de mochila STIHL AR ADVERTENCIA Coloque el cordón de manera que se impida que entre en contacto con el accesorio de corte/trabajo o que se enganche en algún objeto, lo cual podría hacerle perder el equilibrio o el control de la herramienta motorizada y dar por resultado lesiones personales graves y daños a la... -
Page 87: Montaje Del Podador De Varilla
español / EE.UU 14 Montaje del podador de varilla ► Abroche la tira para el pecho (1) y ajústela de modo que quede cómoda pero segura por su pecho. ► Retire la tapa (1) del extremo cuadrado del tubo de mando (2). -
Page 88: Montaje De La Carcasa Del Motor
español / EE.UU 14 Montaje del podador de varilla ► Si la caja de engranajes no se puede encajar en el tubo ► Retire la tapa (11) del extremo redondo del tubo de de mando hasta la marca b: mando (2). ►... -
Page 89: Accesorio De Corte
español / EE.UU 14 Montaje del podador de varilla 14.3 Accesorio de corte ADVERTENCIA Si no se utilizan los componentes correspondientes, el accesorio de corte se dañará de manera permanente después de un período breve de uso, y la cadena podría descarrilarse y causar lesiones personales graves o fatales. -
Page 90: Montaje Y Retiro De La Espada Y La Cadena De
@ 6.4. Use punta de la espada. Las cadenas de STIHL llevan de guantes de trabajo resistentes siempre que monte o fábrica unas flechas en las correas que ayudan al manipule de cualquier modo la cadena, @ 6.3. -
Page 91: Tensado De La Cadena
español / EE.UU 14 Montaje del podador de varilla 14.7 Tensado de la cadena ADVERTENCIA Para reducir el riesgo de lesiones personales provocadas por un descarrilamiento de la cadena, compruebe con frecuencia la tensión de la cadena, @ 6.5. A las temperaturas de funcionamiento, la cadena se dilata y se comba. -
Page 92: Lubricación De La Cadena De Aserrado Y De La
► Una vez que la cadena esté tensada correctamente, para el medio natural. STIHL recomienda usar el aceite levante la punta de la espada y apriete la tuerca para STIHL BioPlus, que se biodegrada rápidamente. -
Page 93: Colocación Y Extracción De La Batería
español / EE.UU 15 Colocación y extracción de la batería. ► Levante el mango de la parte superior de la tapa de modo que quede a un ángulo de 90°. Inserte la tapa en la abertura del tanque de aceite de la cadena de modo que la marca de posición exterior (1) quede alineada con el símbolo "abierto"... -
Page 94: Extracción De La Batería
útil de la batería. Las baterías nuevas no están completamente cargadas. Por eso, STIHL recomienda cargarlas por completo antes de usarlas por primera vez, @ 11. 16 Encendido y apagado del podador de varilla 15.2 Extracción de la batería... -
Page 95: Apagado
español / EE.UU 16 Encendido y apagado del podador de varilla 16.2 Apagado ► Mantenga una posición erguida. ► Sujete y maneje el podador de varilla siempre agarrando ADVERTENCIA con una mano firmemente el mango de control y con la otra mano, el mango delantero. -
Page 96: Revisión Del Podador De Varilla
índice. El podador de varilla debería encenderse. Si no se enciende, lleve el podador de varilla a un concesionario de servicio STIHL autorizado para que lo reparen antes de utilizarlo. ► Suelte el gatillo. -
Page 97: Durante El Funcionamiento
► Si aún no se ve aceite de lubricación de la cadena, será porque el mecanismo de lubricación no funciona correctamente. Lleve el podador de varilla a un concesionario de servicio STIHL autorizado para que lo reparen antes de utilizarlo. ► Desbloquee el tubo de mando (2) girando la tuerca de sujeción (1) media vuelta en dirección al símbolo... -
Page 98: Colocación Y Ajuste De La Correa Para El Hombro
español / EE.UU 18 Durante el funcionamiento ► Presione la pinza para arnés (1) y desplácela por la ► Enganche el mosquetón (1) a la pinza del arnés (2) del empuñadura flexible (2) hasta alcanzar las siguientes podador de varilla. dimensiones: –... -
Page 99: Después De Completar El Trabajo
español / EE.UU 19 Después de completar el trabajo Corte de distensión 19 Después de completar el trabajo 19.1 Preparativos para el transporte o el almacenamiento ADVERTENCIA Para reducir el riesgo de lesiones provocadas por una activación accidental o por un uso no autorizado, apague el podador de varilla y retire la batería antes de transportar el podador o de posarlo en el suelo. -
Page 100: Transporte Del Podador De Varilla Y De La Batería
► Si transporta la batería en un vehículo, asegúrela junto con su contenedor para prevenir vuelcos, impactos y daños. Las baterías STIHL cumplen con los requisitos establecidos ► Coloque la funda de la cadena por la espada de modo que en el Manual de las Naciones Unidas la cubra por completo. -
Page 101: Almacenamiento Del Podador De Varilla Y De La
► Limpie la espada y rocíela con un disolvente de resinas, a una temperatura ambiente de entre 50 °F y 68 °F (10 °C como el lubricante y eliminador de resinas STIHL. y 20 °C), con un nivel de carga de entre el 40 % y el 60 % (2 LED verdes iluminados). -
Page 102: Limpieza De La Espada Y De La Cadena De
► Limpie los componentes de polímero del podador de paño ligeramente húmedo o con un disolvente de resinas, varilla con un paño ligeramente húmedo. No use como el lubricante y eliminador de resinas STIHL. No use detergentes ni disolventes. Estos productos pueden detergentes. -
Page 103: Inspección Y Mantenimiento
► Limpiar el filtro de aire cada 50 horas de funcionamiento. piñón de la cadena. ► Inspeccionar periódicamente el piñón de la cadena y STIHL recomienda el uso de piñones de cadena originales solicitar a un concesionario de servicio STIHL autorizado de STIHL. -
Page 104: Inspección, Mantenimiento Y Afilado De La
@ 25.3. como el lubricante y eliminador de resinas STIHL. No use ► Mida la anchura de la ranura de la espada usando la detergentes. - Page 105 ► Apague el podador de varilla y quítele la batería. La cadena de STIHL se ha fabricado con unas marcas de desgaste pensadas para ayudar al operador a saber cuándo el desgaste es excesivo. Las marcas de desgaste que se muestran arriba (1 - 4) deben verse en todo momento.
- Page 106 Normalmente, dos o tres pasadas de la lima son suficientes para un reafilado simple. Retire un poco de STIHL le recomienda que lleve su cadena a afilar a un material con cada pasada. concesionario de servicio STIHL autorizado, para reducir el Un afilado con alturas o ángulos distintos o no...
- Page 107 español / EE.UU 23 Inspección y mantenimiento riesgo de lesiones graves. Mantenga siempre la Para rebajar correctamente el calibre de profundidad: distancia (a) adecuada entre el calibre de profundidad y la ► Coloque en la cadena el calibre de limado apropiado para parte superior del cortador.
-
Page 108: Guía De Solución De Problemas
► Vuelva a colocar la batería, @ 15.1. 1 LED destella La batería tiene poca ► Cargue la batería, @ 11. en verde. carga. Solo STIHL AR: además, se emiten cuatro pitidos largos. 1 LED se La batería está ► Espere a que la batería se caliente o se enfríe ilumina en rojo. - Page 109 ► Cargue la batería, @ 11. funcionamiento es completamente demasiado corto. cargada. Se alcanzó o se ► Lleve la batería a un concesionario de servicio STIHL superó la vida útil de autorizado para que la revisen. la batería. Durante el serrado, La cadena está roma ►...
-
Page 110: Especificaciones
Vatio Si necesita información técnica sobre los cargadores de las Vatio-hora series AL 101, 300 y 500 de STIHL, consulte la información Corriente alterna de producto adjunta con su cargador. IPX4 Protección contra pulverización y salpicaduras Las baterías, los cargadores y otros accesorios se venden... -
Page 111: Mejoramientos Técnicos
El sello RBRC indica que STIHL ha pagado por indica al usuario que intente corregir la interferencia por adelantado por el reciclaje de la batería. -
Page 112: Combinaciones De Espadas Y Cadenas De
(1,1 mm) (25 cm) Light 04 Las espadas mencionadas son espadas de contragolpe reducido con etiqueta verde de STIHL. Las cadenas mencionadas son cadenas de bajo contragolpe con etiqueta verde de STIHL. Puesto que existe la posibilidad de que se hayan desarrollado nuevas combinaciones de espada/cadena tras la publicación de este manual, le recomendamos que... -
Page 113: Combinaciones De Arnés Aprobadas
STIHL recomienda el uso de piezas de repuesto originales de pértiga: de STIHL. Es posible identificar las piezas originales de STIHL por el número de pieza STIHL, el logotipo de Correa para el hombro y, en ciertos casos, el símbolo de piezas STIHL. -
Page 114: Reciclado De Las Baterías
Estados Unidos y Canadá. ® ROCK BOSS #3,400,477; y #3,400,476) ® El sello de la RBRC indica que STIHL ya aportó dinero para STIHL Cutquik el reciclado de la batería. El sello de la RBRC lleva impreso ® ® AutoCut STIHL DUROMATIC un número telefónico gratuito (1-800-822-8837) que le... -
Page 115: Direcciones
Injection Esta lista de marcas comerciales está sujeta a cambios. Queda terminantemente prohibido todo uso de estas marcas comerciales sin el consentimiento expreso por escrito de ANDREAS STIHL AG & Co. KG, Waiblingen. 32 Direcciones 32.1 STIHL Incorporated STIHL Incorporated 536 Viking Drive P.O. - Page 116 State of California contienen productos químicos considerados to cause cancer, birth defects or other por el Estado de California como causantes reproductive harm. de cáncer, defectos de nacimiento u otra toxicidad reproductora. 0458-698-8621-A englisch / spanisch USA www.stihl.com *04586988621A* 0458-698-8621-A...