Table of Contents
Advertisement
Quick Links
Advertisement
Table of Contents

Related Manuals for Korg Pa5X


Summary of Contents for Korg Pa5X
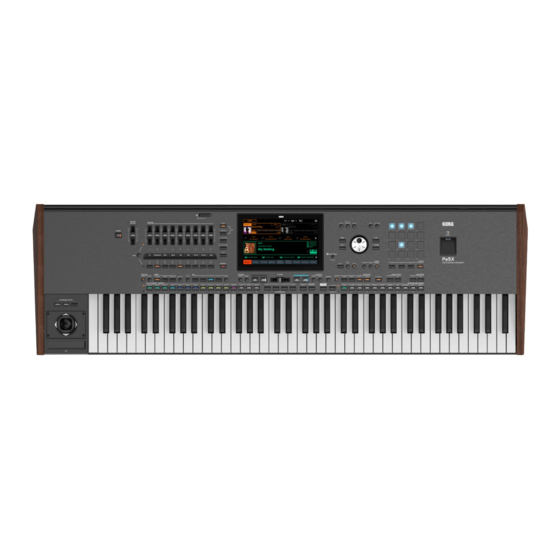
- Page 1 Pa5X PERFOR MANCE GUIDE...
- Page 2 Important safety instructions Read these instructions. Unplug this apparatus during lightning storms ▪ ▪ or when unused for long periods of time. Keep these instructions. ▪ Refer all servicing to qualified service per- ▪ Heed all warnings. ▪ sonnel. Servicing is required when the appa- Follow all instructions.
- Page 3 WARNING – Do not ingest bat- tery, chemical burn hazard. This product contains a coin/button cell battery. If the coin/button cell battery is swallowed it can cause severe internal burns in just 2 hours and can lead to death. Keep new and used batteries away from chil- dren.
- Page 4 Windows are registered trademarks of Automatic power-off Microsoft Corporation. Waves MaxxAudio® is a To avoid wasting power, Pa5X will by default trademark of Waves Audio Ltd. All other trade- automatically enter standby mode after two marks or registered trademarks are the property hours not using it (playing, pressing buttons or of their respective holders.
-
Page 5: Table Of Contents
|iii Contents PLAY Let’s start! Introduction The front panel The control panel The rear panel Connecting the pedals Connecting the audio outputs Powering up Choosing the Musical Resources The Select window Display Hold The Player and the Tracks Saving the musical resources Playing the Sounds The Keyboard Sets... - Page 6 iv| Playing the Styles The Styles Playing the Styles Setting the Style play controls Playing the Pads The Pads Playing the Pads Customizing the Pad set Playing the Chord Sequences The Chord Sequences Playing the Chord Sequences Playing the Songs The Songs Playing the Songs Playing a list of songs (Jukebox)
- Page 7 The Matrix Using the Matrix Programming the Matrix CUSTOMIZE The Mixer The Mixer Saving the Mixer settings Digital Drawbars The Digital Drawbars Editing the Digital Drawbars Microphone Input Connecting a microphone Shaping the microphone input Talking with your audience Using the microphone effects and harmonization Line Audio Inputs Connecting a line audio device...
- Page 8 vi| APPENDIX Video connections Connecting an external display Installing the options Assembling the music stand Replacing the clock battery Installing a microSD card Solutions, Specs Troubleshooting Specifications...
-
Page 11: Let's Start
Let’s start! -
Page 12: Introduction
Robust and reliable, Pa5X is excellent as a live instrument, but it is also a powerful creative tool in studio, helping you in writing songs or soundtracks, while generat- ing a produced sound that makes the perfect demo or ready-to-use media music. - Page 13 And the Vocal Remover will let you sing along with any MP3 Song. There is more, much more, and we invite you to explore Pa5X in depth. Pa5X is the most evocative, powerful, easy-to-use complete Professional Arranger ever pro-...
- Page 14 4| Let’sstart! Before starting to play… What’s in the box After you get your Pa5X, please check that all the listed items are included in the package. If any of them is missing, please contact your KORG dealer immediately. Pa5X >...
- Page 15 You can download the most up-to-date operating system from our web site (www.korg.com/us/support/download/). Please, read the instructions sup- plied with the operating system. You can see which version of the operating system is installed in your Pa5X by going to the File...
-
Page 16: The Front Panel
6| Let’sstart! The front panel The front panel is where you can find the instrument’s controls. Slide guide for the music stand and PaAS amplification system Headphones Keyboard... - Page 17 Connect a pair of headphones to this output. You can use headphones with an impedance of 16-200 Ohms (50 Ohms suggested). Music stand A music stand is included with your Pa5X (see page 408 for instructions on how to assemble it). PaAS amplification system You can install the (optional) PaAS amplification system.
-
Page 18: The Control Panel
8| Let’sstart! The control panel The control panel is the part of the front panel where you can find the instrument’s controls. Tempo area Sliders and Navigation and buttons area Display data entry area The Matrix Players area Style, Marker and Pad Sounds area control area Sliders and buttons... - Page 19 Thecontrolpanel |9 Display Use this touchscreen display to interact with the instrument. The display can be tilted for optimal visualization. There are controls around the display, to help you select the various elements. Navigation and data entry area Use these controls to go through the menus, pages and parameters, and change the value of the selected parameter.
- Page 20 10| Let’sstart! Sounds area Sounds are what you can play on the keyboard. Here you can choose combina- tions of Sounds saved as Keyboard Sets in a dedicated library. (See Playing the Sounds on page 49). Styles, Pads and Markers area Styles supply the automatic accompaniment with a virtual band.
- Page 21 Thecontrolpanel |11 Players area Styles and Songs can be played back by the two onboard Players. You can assign different elements to each Player, to have another Style or Song ready to play. You can mix the two Players with the X-FADER. (See Playing the Styles on page 111 and...
- Page 22 12| Let’sstart! The Matrix You can use this programmable matrix of big, easy accessible keys to trigger ele- ments and functions. (See The Matrix on page 293). USB connector Use this socket to connect an USB memory device, like an USB pendrive, or other musical instruments to be used as controllers.
-
Page 23: The Rear Panel
Therearpanel |13 The rear panel The rear panel is where you can find the various connections. Guide for the music stand and PaAS amplification system Connectors Power connector Audio inputs Use these connectors to connect a microphone, a guitar or another musical in- strument. - Page 24 MIDI ports Use these ports to connect Pa5X to external controllers (master keyboard, MIDI guitar, wind controller, MIDI accordion, MIDI pedalboard…), to a series of expand- ers, or to a computer with a MIDI interface.
- Page 25 (HOST1-R, HOST2-R). Another HOST socket (HOST-F) is available on the front panel. Video out Connect Pa5X to a TV or video monitor, to read lyrics and chords on a bigger dis- play. (See Video connections on page 403).
- Page 26 16| Let’sstart! Power connector Use this socket to plug in the supplied IEC power cable. Plug the other end of the cable to an AC power outlet. Be sure to use a compatible plug. Never force the plug into the socket! WARNING: Connect the plug to an AC socket of matching voltage! Please read the safety information at the beginning of this manual.
-
Page 27: Connecting The Pedals
PEDAL > DAMPER connector to connect a damper pedal, like the (op- tional) KORG PS-1, PS-3 or DS-1H. The DS-1H pedal supports all the nuances of half-pedaling on some acoustic piano sounds. You can experiment how it works by gradually pressing it down, and gradually releasing it, while playing the... - Page 28 18| Let’sstart! What if the pedals do not behave correctly? If needed, you might have to calibrate the pedals to use their full range of values, without any ‘dead spot’. Also, this procedure allows to choose a pedal’s polarity, in case you are using a pedal working in reverse. Go to the Settings >...
- Page 29 Connectingthepedals |19 When the following dialog appears, release the pedal. Touch the lower (now highlighted) button in the display to confirm the mini- mum value. Check if the pedal is working properly. In case it isn’t, repeat the pro- cedure. Press the EXIT button to return to the previous page.
-
Page 30: Connecting The Audio Outputs
Where possible, use all balanced connections, to reduce the risk of noise (hum) occurring in the audio signal. Pa5X’s AUDIO OUT Mixer’s/Amplification’s LINE IN (2 x 6.35 mm / 1/4” balanced jacks) (2 x 6.35 mm / 1/4” balanced jacks) Pa5X’s AUDIO OUT... - Page 31 When using a home audio amplifier, connect the other end of the cable to the CD, LINE IN or TAPE/AUX input of your audio system. Don’t use the PHONO inputs of your audio system! Pa5X’s AUDIO OUT Home amplification systems’s LINE/AUX IN (2 x 6.35 mm / 1/4” unbalanced jacks)
-
Page 32: Powering Up
22| Let’sstart! Powering up Turning the instrument on Connecting the power cable Plug the supplied power cable into the POWER socket on the back of the instru- ment, and the cable plug into a wall power socket. When the cable is connected, the instrument is in standby. WARNING: When the instrument is in standby, it is still connected to the power line. - Page 33 Poweringup |23 Tilting the display For optimal visibility under any seating position, the display’s tilt angle can be adjusted. Lifting the display Press the UNLOCK button to unlatch the display. Keep the UNLOCK button pressed, and lift the display. Open the safety bracket by detaching it from the top back of the display.
- Page 34 24| Let’sstart! While still keeping the UNLOCK button pressed, adjust the tilt angle, and fix the bracket to one of the stops in the bottom of the display housing. CAUTION: Do not apply excessive pressure, or you risk to break it! Release the UNLOCK button to fix the display to the current position.
- Page 35 Poweringup |25 Closing the display Keep the UNLOCK button pressed, and lift the display. Lift the safety bracket, and put it back to the closed position. Still keeping the UNLOCK button pressed, accompany the display down to its housing. Release the UNLOCK button, and gently press the center of the top border of the display to lock it in the initial position.
- Page 36 26| Let’sstart! Adjusting the display brightness The display brightness can be adjusted to match the ambient’s light. Keep the SHIFT and MENU buttons pressed, and use the DIAL to adjust the > display brightness. You can also adjust the display (and the strip display) brightness in the Settings >...
- Page 37 Poweringup |27 Listening to the Demo Songs You can listen to some songs we prepared, to let you understand what this instru- ment can do. Access the Demo mode ▪ Press the DEMO buttons together. > Listen to all the Demo Songs ▪...
- Page 38 28| Let’sstart!
- Page 39 Choosing the Musical Resources...
-
Page 40: 30| Choosingthemusicalresources
30| ChoosingtheMusicalResources The Select window Opening a Select window When you press the STYLE, SONG, or one of the KEYBOARD SET LIBRARY but- tons, the corresponding Select window appears. Select window can also be opened by touching the name of the corresponding element (Style, Song, Keyboard Set, Voice or Guitar Pres et…) in the display. - Page 41 TheSelectwindow |31 For example, this is the Select window (in Tile View mode) when browsing for a Keyboard Set: Groups Type Selected Keyboard Set Upper level (folders Current patch Pages Current directory corresponding to Categories) (individual elements) If you are lost while browsing though the data, you can return to the folder con- taining the selected element by touching the Locate ( ...
- Page 42 32| ChoosingtheMusicalResources The Select window in detail Here are the separate sections of a Select window. Tile View or List View You can see the content of a Select window as Tiles or as a List. To choose the View mode, select or deselect the Show as List option in the page menu ( ...
- Page 43 TheSelectwindow |33 List View mode you see the musical resources as a list. > Groups Type Selected element List (drives, folders or files) Current path Title bar title bar, showing the type of element you are going to select on the left, and selected element on the right.
- Page 44 The groups ▪ group stripe, where you can select from Factory elements (supplied by KORG), User elements (your own custom elements in the internal memory), and Drives (custom elements read directly from an external storage device, including removable ones). Group...
- Page 45 TheSelectwindow |35 Files from the Factory or User banks ▪ If you are choosing from the Factory User banks, you will find the elements organized in categories (shown as folders). While in Tile View mode, choose a different category by touching one of the >...
- Page 46 36| ChoosingtheMusicalResources Files from the Drives ▪ If you are choosing from the Drives, choose one of the available storage devices (drives). While in Tile View mode, touch the Root button to see the list of the drives, > choose a drive in the left side of the display, then browse through the folders inside the...
- Page 47 > choose a drive from the list, then browse through the folders inside the selected drive. Drives – Touch to see their content Drive Meaning KORGDISK Storagespaceinsidetheinternaldrive(separatefromtheUserarea) SDUSER Storagespaceinsidethe(optional)SDcard USBF StoragedeviceconnectedtothefrontUSBHOSTport USBR1 StoragedeviceconnectedtotherearUSBHOST1port USBR2 StoragedeviceconnectedtotherearUSBHOST2port...
- Page 48 38| ChoosingtheMusicalResources The Tile View Upper level (containing drive or folder) ▪ While in Tile View mode, you can see two directory levels at the same time. The upper level, in the left side of the display, usually containing a list of drives fold- ers.
- Page 49 TheSelectwindow |39 Lower level (current directory) ▪ lower level, showing the current directory, usually containing individual ele- ments contained in the folder you touched in the first level. You can immediately select an element by touching it. Under the elements, you can see the page number selector.
- Page 50 40| ChoosingtheMusicalResources With Keyboard Sets, you can repeatedly press the same button in the KEYBOARD SET LIBRARY section to cycle through the pages. lower level shows the current directory, and may also contain folders. If so, touch one of the folders to see its content. The content of the lower level will be moved to the...
- Page 51 TheSelectwindow |41 The List View Going though the directory levels ▪ While in List View mode, you can see the current directory as a list of files and folders. You can open a folder by touching it. You can go to the parent folder by touching the button, or to the top level by touching the Root...
- Page 52 42| ChoosingtheMusicalResources Changing the order of the list ▪ Reorder the items according to a different sorting criterion by touching the > corresponding label on top of the list. By touching the label again, the order of the items will switch between >...
-
Page 53: Display Hold
DisplayHold |43 Display Hold You may prefer to leave a Select window open after you have done your choice, maybe to continue trying other elements in that window. Or, you may prefer to let it automatically close after you have completed your choice. This depends on the Display Hold parameter. -
Page 54: The Player And The Tracks
44| ChoosingtheMusicalResources The Player and the Tracks Styles, Songs and the Players You can play a Style or a Song with either Player 1 or Player 2. Therefore, if you want, you can assign a Style or Song to one of the Players, and have the other player be ready for the next musical selection. - Page 55 ThePlayerandtheTracks |45 Keyboard, Style, Song and Pad tracks The Sounds are assigned to Keyboard, Style, Song, or Pad tracks. You can see eight of them at a time in the display. Which track is shown can be seen in the track’s label at the bottom of the page. By touching the TRACK SELECT button next to the tracks, you can switch to a...
-
Page 56: Saving The Musical Resources
46| ChoosingtheMusicalResources Saving the musical resources Pa5X allows you to edit most of its data. Changes can then be saved into the User area of the internal memory (never the Factory area, that is protected), or in the Settings area. Saving the Settings... - Page 57 Savingthemusicalresources |47 Saving changes to Keyboard Sets, Styles, MIDI Songs and Pads When you do some changes to the sounds, the effects and the various parameters of a Keyboard Set, a Style, a MIDI Song or a Pad, you can save them by choosing the corresponding Save command from the...
- Page 58 48| ChoosingtheMusicalResources Saving changes to Mic, Guitar and MIDI Presets When you do some changes to a Mic, Guitar or MIDI Preset, you can save them by choosing the corresponding Save command from the page menu ( ), while in one of their edit pages.
-
Page 59: Playing The Sounds
Playing the Sounds... -
Page 60: The Keyboard Sets
Keyboard Sets are what you play on the keyboard. They can be individual sounds, or rich ensembles of timbres split or layered across the keyboard. Individual timbres are called the Sounds. Pa5X contains timbres from any in- strumental family (pianos, strings, synthesizers…). A set of Sounds playing to-... - Page 61 TheKeyboardSets |51 Choosing your preferred Keyboard Set Choosing the ‘My Setting’ Keyboard Set Press the MY SETTING button to choose your preferred sounds. > The My Setting Keyboard Set My Setting is a special Keyboard Set, where you can save your preferred set- tings for things like sounds and effects to be played on the keyboard, and programming for control sliders, buttons, and the assignable switches.
- Page 62 52| PlayingtheSounds Choosing a Keyboard Set from the library Keyboard Sets are contained in a dedicated library, that you can access from the control panel or from the display. Open the Select window from the control panel ▪ Use the CATEGORY/FAVORITE button to choose the type of Keyboard Set you want to select.
- Page 63 TheKeyboardSets |53 Open the Select window from the display ▪ Go to the Home > Main page. When turning the instrument on, you are already in the Main page. If you are not in the Main page, press the EXIT button in the control panel. Touch the name of the selected Keyboard Set.
- Page 64 54| PlayingtheSounds As soon as you press the button or touch the display, the Keyboard Set Select window appears. Groups Type Selected Keyboard Set Upper level (folders Current path Pages Current directory corresponding to Categories) (Keyboard Sets) You can switch between Tile View List View mode by using the...
- Page 65 TheKeyboardSets |55 Choose a Keyboard Set ▪ To choose one of the available groups from which to choose a Keyboard Set, touch the buttons in the second line at the top of the window. Group Meaning Factory KeyboardSetsincludedatthefactory,thatcan’tbemodifiedoroverwrit- ten. User InternalmemoryareawhereyoucansaveneworeditedKeyboardSets,or whereyoucancopyKeyboardSetsfromanexternalstoragedevice.
- Page 66 Root button to see the list of the drives, > choose a drive from the list, then browse through the folders inside the selected drive. Drive Meaning KORGDISK Storagespaceinsidetheinternaldrive(separatefromtheUserarea) SDUSER Storagespaceinsidethe(optional)SDcard USBF StoragedeviceconnectedtothefrontUSBHOSTport USBR1 StoragedeviceconnectedtotherearUSBHOST1port USBR2 StoragedeviceconnectedtotherearUSBHOST2port...
- Page 67 TheKeyboardSets |57 Tile View mode, if you are choosing from the Factory User banks, you will find the Keyboard Sets organized in categories (shown as folders). If you want to choose a different category, touch one of the category folders in the left side of the Keyboard Set Select window.
- Page 68 58| PlayingtheSounds If the selected category folder contains more elements than the ones that can be seen in a page, choose the other pages. You can repeatedly press the same button in the KEYBOARD SET LIBRARY section to cycle through the pages. List View mode, pressing the same button...
- Page 69 TheKeyboardSets |59 Digital Drawbars You will notice that some Keyboard Sets in the Organ group of the library con- tain the ‘DWB’ abbreviation in their name. These Keyboard Sets contain Digital Drawbars Sounds, that are simulations of electro-mechanical organs of the past. When you choose one of them, choose the DRAWBARS mode in the...
- Page 70 60| PlayingtheSounds Choosing a Keyboard Set from a Style or a SongBook Entry There are four matched Keyboard Sets in each Style or SongBook Entry, fine- tuned for the containing Style or SongBook Entry. You can choose them from the control panel or from the display. Choosing a Keyboard Set from the control panel Press one of the buttons in the KEYBOARD SET...
- Page 71 TheKeyboardSets |61 Letting the Style choose Keyboard Set #1 When choosing a Style or SongBook Entry, the Keyboard Set may be automatically recalled depending on the status of the Style to Keyboard Set function. Access the Style to Keyboard Set function from the control panel ▪...
- Page 72 62| PlayingtheSounds Turn the Style to Keyboard Set function on of off ▪ Repeatedly press (or touch) the Style to Keyboard Set switch to set the func- > tion. Style to Keyboard Meaning Set indicator Stylesdon’tselectaKeyboardSet. WhenchoosingaStyle,KeyboardSet#1isautomaticallyselected. Blinking ChoosingaVariationautomaticallyrecallsthecorrespondingKeyboard Set(1–4)insidetheStyle.Forexample,chooseVariation2,andKeyboard Set2willbeautomaticallyrecalled;chooseVariation3,andKeyboardSet 3willbeautomaticallyrecalled.
- Page 73 TheKeyboardSets |63 Playing and controlling the sound Playing the keyboard The instrument’s keyboard is like a piano keyboard. Just play it! With some Sounds, you can press the keys while they are already down, and the sound might vary (for example, you might hear more vibrato). Using the pedals Pedals do different things depending on how they are programmed.
- Page 74 64| PlayingtheSounds Using the Matrix Matrix of programmable buttons can do several different things (triggering Pads, Chords Sequences, Track Play/Mute, etc.). Press one of the four preset buttons under the Matrix to choose a set of functions. Touch one or more of the Matrix buttons to select the corresponding function.
-
Page 75: Customizing The Keyboard Sets
CustomizingtheKeyboardSets |65 Customizing the Keyboard Sets Playing different Sounds with the left and right hand Splitting the keyboard Split the keyboard into a Lower (left hand) and Upper (right hand) part ▪ Press the SPLIT button on the control panel to light up its indicator. The key- >... - Page 76 66| PlayingtheSounds You can see the Sounds assigned to each part in the Home > Keys page. Remove the split and play the Upper Sounds over the full keyboard range ▪ Press the SPLIT button again to turn its indicator off. The Upper Sounds will >...
- Page 77 CustomizingtheKeyboardSets |67 Changing the local split point You can choose a different point where the keyboard divides into an Upper and a Lower part. This is called the split point. Change the local split point from the control panel ▪ While in the Home >...
- Page 78 68| PlayingtheSounds Save the local split point ▪ The local split point can be saved into a Keyboard Set. Each Keyboard Set associ- ated to a Style or SongBook Entry can have a different split point. Save the changes to a User Keyboard Set. >...
- Page 79 CustomizingtheKeyboardSets |69 ‘Global’ and ‘local’ split point You can choose a ‘global’ split point that is not changed when choosing a differ- ent Keyboard Set. Or you can choose a ‘local’ split point that is better suited to the individual Keyboard Set, and can change when selecting it. The current ‘lo- cal’...
- Page 80 70| PlayingtheSounds Playing two or three Sounds at the same time You can play up to three layered Sounds on the keyboard. This is useful to add, for example, a layer of strings or synth pads to a grand piano sound. The Sounds will be assigned to the Upper part of the keyboard.
- Page 81 CustomizingtheKeyboardSets |71 Turn the selected Sound on or off from the display ▪ Go to the Home > Keys page. Sounds with icons in solid colors are in play, while dimmed ones are in mute. Sound in Mute Sound in Play If the Sound you want to mute is in play, touch the icon of the Sound category to set it to mute.
- Page 82 72| PlayingtheSounds Choosing different Sounds You can assign different Sounds to the keyboard. The new combination of Sounds can then be saved into a User Keyboard Set. You can follow the same procedure when choosing Sounds for the other combina- tions of Sounds (Style and MIDI Song tracks, that can be saved into the current User Style or a MIDI Song).
- Page 83 CustomizingtheKeyboardSets |73 Open the Select window from the display ▪ While in the Home > Keys page, touch the name of the Sound you want to > change. While in the Home > Control page, touch the Select button corresponding to >...
- Page 84 To choose one of the available types of Sound, touch the buttons at the top of the window. Type of Sound Meaning Factory StandardPa5XSounds,thatcan’tbemodifiedoroverwritten.Thesearethe richest,mostmodernSoundsofthewholecollection. Legacy Legacy Sounds, allowing for greater compatibility with older Pa-Series instruments. GM/XG SoundsallowingforfullcompatibilitywithMIDISongsbasedonGeneral MIDIandXGSoundsandDrumKits. User InternalmemoryareawhereyoucanloadnewSoundsandDrumKitsfrom...
- Page 85 CustomizingtheKeyboardSets |75 Tile View mode, if you want to choose a different category, touch one of the category folders in the left side of the Sound Select window. The Sounds contained in the selected folder appear in the right side of the window.
- Page 86 76| PlayingtheSounds HINT:Whenawindowdoesnotclosebyitself,itmeanstheDisplay Holdoptionis turnedon.SeeDisplay Holdonpage43. In the end, you will see the name of the selected Sound in the dedicated area of Keys page. Save the assigned Sounds ▪ Save the changes to a User Keyboard Set. > Using the Sound’s own effects When chosing a Sound, you can also enable the Use IFX and/or...
- Page 87 CustomizingtheKeyboardSets |77 Transposing the Upper Sounds to a different octave All Upper Sounds can be transposed to an upper or lower octave using the UPPER OCTAVE - and + buttons. The current octave transposition is shown in the status bar. Upper Octave Transpose Transpose the Upper Sounds one octave up ▪...
- Page 88 78| PlayingtheSounds Using the Ensemble to add harmony There are several types of Ensemble, but with most of them what you play with your right hand will be harmonized with the chords you play with your left hand. Turning the Ensemble on or off Turn the Ensemble function on ▪...
- Page 89 CustomizingtheKeyboardSets |79 Choosing an Ensemble type Select a different harmonization style ▪ Go to the Home > Menu > Keyboard/Ensemble > Ensemble page. As an alternative, keep the SHIFT button pressed, and press the ENSEMBLE but- ton to open the Ensemble page.
- Page 90 80| PlayingtheSounds Use the Type parameter to choose an Ensemble type for each of the Upper Sounds. Ensemble type Meaning Duet Addsasinglenotetothemelody. Close Addsaclosed-positionchordtothemelody. Open1 Addsanopen-positionchordtothemelody. Open2 Astheabove,butwithadifferentchordshape. Block Blockharmonization–verytypicalofjazzmusic. PowerEnsemble Addsafifthandanoctavetothemelody,asheardinhardrock. ThirdUP Thisoptionaddsathirdoverthemelodynote(dependingontherecognized chord). FourthsLO Typicalofjazz,thisoptionaddstwoperfectfourthsunderthemelody. FourthsUP Astheabove,butwithnotesaddedoverthemelody. Fifths Thisaddstwofifthsbelowtheoriginalnote. Octave Addsanoctavetothemelody.
- Page 91 CustomizingtheKeyboardSets |81 Use the Auto Split parameter to assign a different musical role to each of the Upper Sounds. Auto Split How it works TopNote IfmorethanasingleUpperSoundisinplay,thelastuppermostnoteisas- signedtoUpper1,whiletheotherUpperSounds,ifavailable,playtheother chordnotes. TopRetrigger Iftheuppermostnoteisreleased,whileothernotesarestillplaying,theup- permostnoteisretriggeredandassignedtoUpper1. Top&Bottom IfalltheUpperSoundsareinplay,thelastuppermostnoteisassignedto Note Upper1,thelastlowermostnoteisassignedtoUpper3,whileUpper2plays theotherchordnotes. Top&Bottom Iftheuppermostnoteisreleased,whileothernotesarestillplaying,theup- Retrigger permostnoteisretriggeredandassignedtoUpper1.Whenthelowermost noteisreleased,whileothernotesarestillplaying,thelowermostnoteis retriggeredandassignedtoUpper3.
-
Page 92: The Favorite Keyboard Sets
82| PlayingtheSounds The Favorite Keyboard Sets Choosing a Favorite Keyboard Set Favorite Keyboard Sets are a selection of your preferred Keyboard Sets, that can be accessed by pressing a single button in the KEYBOARD SET LIBRARY section. To select the Favorite Keyboard Sets, first light up the FAVORITE indicator by pressing the... - Page 93 TheFavoriteKeyboardSets |83 Creating a list of Favorite Keyboard Sets You can create your own list of Favorite Keyboard Sets. Go to the Settings > Menu > Controllers > Keyboard Set Favorites page. Each of the items in this page corresponds to one of the FAVORITE buttons in the KEYBOARD SET LIBRARY...
- Page 94 84| PlayingtheSounds Touch the Browse (…) button next to the Favorite you want to replace. The Keyboard Set Select window will appear. Browse through the drives and folders, and choose the desired Keyboard Set. If you want to remove an assigned Keyboard Set from one of the buttons, touch the Delete ( ...
-
Page 95: Volume And Control
Volume and Control... -
Page 96: Adjusting The Volume
86| VolumeandControl Adjusting the volume The Master Volume The general volume control, adjusting the output volume for the headphones, the main outputs and the integrated speakers (if in- stalled) is the MASTER VOLUME slider. CAUTION: Set the volume to a comfortable level. A level too high can damage your hearing! Move the slider up to increase the output level. - Page 97 Adjustingthevolume |87 The X-Fader X-FADER (short for ‘crossfader’) allows for mixing the two Players. Assign a Style or Song to each of the Players ▪ Either use the STYLE SONG button in the PLAYER 1 PLAYER 2 sections, > or touch the name of the Style or Song in the display.
- Page 98 88| VolumeandControl Stop the Players ▪ Press the PLAY/STOP ( ) button to stop the corresponding Player. If you > are playing a Song, it will pause at the current position. Press the STOP/GO TO START ( ) button to stop the corresponding Player. >...
-
Page 99: The Control Section
TheControlsection |89 The Control section The individual volume levels and buttons The sliders and the buttons in the CONTROL section are always accessible, which- ever the page you are in. Sliders Control mode View sliders/buttons Buttons mode buttons on the right allow for choosing different sets of programming for the sliders and the buttons. - Page 100 90| VolumeandControl Adjusting the levels from the control panel CONTROL section can work in one of five modes. Each mode controls a par- ticular set of elements or groups of elements. Press one of the mode buttons on the right of the CONTROL section to choose one of the modes.
- Page 101 TheControlsection |91 Adjusting the levels from the display You can see and access the CONTROL section from the Control pane. Go to the Home > Control page. This mirrors the CONTROL section on the control panel. Choose the control mode with the mode buttons on the right side of the page.
- Page 102 92| VolumeandControl Drag the virtual slider whose level you want to change. As an alternative, use the DIAL UP/DOWN controls to change the volume level of the selected channel. Touch the button whose function you want to turn on/off.
- Page 103 TheControlsection |93 Adjusting the levels from the Mixer pane For individual adjustment of each Sound’s volume level and pan, you can switch to the Mixer pane. Go to the Home > Mixer page. Touch the TRACK SELECT button next to the tracks, to switch to a different group of eight tracks.
- Page 104 94| VolumeandControl Switching to the full Mixer page While in the Home > Mixer page, you can quickly switch to the full Mixer page, and adjust the individual levels of the Sounds. Touch the Mixer button to switch to the Home > Menu > Mixer > Main page.
- Page 105 TheControlsection |95 The Control modes in detail Each control mode gives access to a particular set of elements or groups of ele- ments. The Main control mode Main mode controls groups of sounds, like the Keyboard, the Players, and the audio inputs. It also includes switches for the Drum&Bass and the Manual Bass functions (that can be used with the Styles).
- Page 106 96| VolumeandControl The Keyboard/Pad control mode Keyboard/Pad mode controls the volume of the individual Pads and Keyboard Sounds. It also controls the Keyboard Sounds as a whole. A set of switches lets you open the Select window to choose the Pads and the Keyboard Sounds. It also includes a switch for the Manual Bass function.
- Page 107 TheControlsection |97 The Style control mode Style mode controls the volume of the individual Style Sounds, when a Style is playing or selected to play. It also controls the Keyboard Sounds as a whole. You can mute each of the Style Sounds. You can turn the Metronome on/off. Access this mode by pressing the STYLE/SONG mode button in the...
- Page 108 98| VolumeandControl The Song control mode Song mode controls the volume of the individual MIDI Song Sounds, when a MIDI Song is playing or selected to play. It also controls the Keyboard Sounds as a whole. You can mute each of the Song Sounds. You can turn the Metronome on/off.
- Page 109 TheControlsection |99 Slider controls the level of… Button mutes… Tracks 01-08 Track1 MIDISongTrack01 Mute MIDISongTrack01 Track2 MIDISongTrack02 Mute MIDISongTrack02 Track3 MIDISongTrack03 Mute MIDISongTrack03 Track4 MIDISongTrack04 Mute MIDISongTrack04 Track5 MIDISongTrack05 Mute MIDISongTrack05 Track6 MIDISongTrack06 Mute MIDISongTrack06 Track7 MIDISongTrack07 Mute MIDISongTrack07 Track8 MIDISongTrack08 Mute MIDISongTrack08 Tracks 09-16...
- Page 110 100| VolumeandControl The Easy Edit control mode Easy Edit mode controls the most important parameters of the Upper Sounds. The changes are an offset relative to the saved values. If you want to quick edit all the other Sounds, you can go to the Home >...
- Page 111 TheControlsection |101 The Drawbars control mode When a Drawbar Sound is assigned to the keyboard, you can control the drawbars with the sliders in the Drawbars mode. Access this mode by pressing the EASY EDIT/DWB mode button in the CONTROL section when a Digital Drawbars Sound is selected. If you press the EASY EDIT/DWB button a second time, you get access to the...
- Page 112 102| VolumeandControl The User control mode User mode controls the parameters you assign to the sliders and buttons. This programming is unique and automatically saved in the Settings. Access this mode by pressing the USER mode button in the CONTROL section. To program the set of controls, go to the Settings >...
-
Page 113: Tempo And Metronome
|103 Tempo and Metronome... -
Page 114: Tempo
104| TempoandMetronome Tempo Setting the Tempo value While an optimal Tempo value is saved with each Style or Song, you can freely adjust it at your will. This will also set the Tempo for the Metronome. Adjusting the Tempo value from the control panel Use the TEMPO controls to adjust the Tempo value (or the speed of the MP3... - Page 115 Tempo |105 Adjusting the Tempo value from the display If it is not highlighted, touch the Tempo value in the display. Use the DIAL UP/DOWN controls to adjust the Tempo value. As an alternative, touch the Tempo field again to open the numeric keypad, and enter the Tempo value as a number.
- Page 116 106| TempoandMetronome Other Tempo operations ‘Tapping’ the Tempo value You can ‘tap’ (beat) the Tempo value of a Style or MIDI Song. While no Style or MIDI Song is playing, beat the Tempo on the RESET/TAP > button. Beat as many times as indicated by the Meter numerator (for example, three times in 3/4).
- Page 117 Tempo |107 Locking the Tempo value You can prevent the Tempo value from automatically changing when choosing a different Style or MIDI Song. MP3 Songs are not affected by this ‘lock’, and will always play at the recorded Tempo. You are free to continue setting the Tempo manually, including beating the Tempo with the Tap Tempo function.
-
Page 118: Metronome
108| TempoandMetronome Metronome Turning the metronome on and off Turning the metronome on Be sure the CONTROL mode is including the METRO command. The Style/ Song mode includes it, as well as the default User programming. Press the METRO button to turn its indicator on. The Metronome window will open, and the metronome will start playing, beating the current Tempo. - Page 119 Metronome |109 Setting the meter, accent and volume Setting the meter You can mark the beginning of the measure, by setting the meter and accent. Press the METRO button to open the Metronome window. Use the Meter parameter to choose the meter (time signature). Use the Accent parameter to choose the accent.
- Page 120 110| TempoandMetronome Playing with the metronome While the metronome it turned on, you can start a Player. The metronome will play at the same tempo of the Player. It will get the same tempo of the current Player. When you stop the Player by pressing the STOP/GO TO START ( ...
-
Page 121: Playing The Styles
|111 Playing the Styles... -
Page 122: The Styles
Accompaniment parts Accompaniment parts are like the members of a band. With Pa5X you get five pitched instrument players (for example guitar, piano, strings, synthesizers), a bass player, a percussion player, and a drum player. - Page 123 TheStyles |113 Choosing the Styles You can play a Style with either Player 1 or Player 2. If you want, you can assign a Style to each of the players, and have the other player be ready for the next musical selection. You can also mix Styles and Songs with the different Players. HINT:YoucanletthePlayersautomaticallychooseaStyleatstartup.Tochoose...
- Page 124 114| PlayingtheStyles Open the Select window from the display ▪ Go to the Home > Main page. When turning the instrument on, you are already in the Main page. If you are not in the Main page, press the EXIT button in the control panel. Touch the name of the Style (or Song) in the display.
- Page 125 TheStyles |115 As soon as you touch the display, the Style Select window appears. Groups Type Selected Style (or Song) Upper level (folders Current path Pages Current directory corresponding to Categories) (Styles) You can switch between Tile View List View mode by using the Show as List option in the page menu ( ...
- Page 126 116| PlayingtheStyles Choose a Style ▪ To choose one of the available groups from which to choose a Style, touch the buttons in the second line at the top of the window. Group Meaning Factory Stylesincludedatthefactory,thatcan’tbemodifiedoroverwritten. User InternalmemoryareawhereyoucansaveneworeditedStyles,orwhere youcancopyStylesfromanexternalstoragedevice. Drives Stylesaccessedfromanexternalstoragedevice.Youcanorganizethem freely,asiftheywereordinaryfiles.
- Page 127 Root button to see the list of the drives, > choose a drive from the list, then browse through the folders inside the selected drive. Drive Meaning KORGDISK Storagespaceinsidetheinternaldrive(separatefromtheUserarea) SDUSER Storagespaceinsidethe(optional)SDcard USBF StoragedeviceconnectedtothefrontUSBHOSTport USBR1 StoragedeviceconnectedtotherearUSBHOST1port USBR2 StoragedeviceconnectedtotherearUSBHOST2port...
- Page 128 118| PlayingtheStyles Tile View mode, if you are choosing from the Factory User banks, you will find the Styles organized in categories (shown as folders). If you want to choose a different category, touch one of the category folders in the left side of the Style Select window.
- Page 129 TheStyles |119 If you want to close the Select window (and it does not close by itself), press EXIT button. HINT:Whenawindowdoesnotclosebyitself,itmeanstheDisplay Holdparameter isturnedon.SeeDisplay Holdonpage43. In the end, you will see the name of the selected Style in the dedicated area of Main page.
- Page 130 120| PlayingtheStyles Selecting a Keyboard Set with the Style The Style’s Keyboard Sets With each Style (and SongBook Entry) four Keyboard Sets are assigned to the KEYBOARD SET section under the X-FADER. You can also choose them from the Keyboard Set area of the Main page.
- Page 131 TheStyles |121 Turning the Style to Keyboard Set function on or off Choosing a Style might also automatically select the first Keyboard Set in the KEYBOARD SET section under the X-FADER. This depends on the status of the Style to Keyboard Set function.
- Page 132 122| PlayingtheStyles Turn the Style to Keyboard Set function on of off ▪ Repeatedly press (or touch) the Style to Keyboard Set switch to set the func- > tion. Style to Keyboard Meaning Set indicator Stylesdon’tselectaKeyboardSet. WhenchoosingaStyle,KeyboardSet#1isautomaticallyselected. Blinking ChoosingaVariationautomaticallyrecallsthecorrespondingKeyboard Set(1–4)insidetheStyle.Forexample,chooseVariation#2,andKeyboard Set#2willbeautomaticallyrecalled;chooseVariation#3,andKeyboard Set#3willbeautomaticallyrecalled.
- Page 133 TheStyles |123 Programming the Style to Keyboard Set function You can program how the Style to Keyboard Set button works. Go to the Settings > Menu > Preferences > Style page. As an alternative, keep the SHIFT button pressed and press the PLAYER 1 >...
-
Page 134: Playing The Styles
124| PlayingtheStyles Playing the Styles Starting and stopping the Styles You can manually start and stop the automatic accompaniment, by using the con- trols in the PLAYER 1 PLAYER 2 section. Stop Play/Stop Set the right mix ▪ Move the X-FADER fully toward the Player you want to listen to. - Page 135 PlayingtheStyles |125 Start the accompaniment ▪ Press the PLAY/STOP ( ) button. Play some chords with your left hand, while playing a melody with your right hand. While the accompaniment is playing, please note the various indicators in the display. Selected Style Element Recognized chord File path In Play: Remaining measures...
- Page 136 126| PlayingtheStyles Automatic start and stop You can let the Players automatically start or stop by just playing the keyboard in the chord recognition area, without having to press the PLAY/STOP ( ) button. This leaves your hands free for playing. This will work with either a Style or a Song assigned to the Player.
- Page 137 PlayingtheStyles |127 Make the Player stop automatically (Synchro Stop) ▪ Press the SYNCHRO > START button again to turn it off, and leave only the SYNCHRO > STOP indicator lit. Press the PLAY/STOP ( ) button to start the Player, then play a chord and keep the keys pressed.
- Page 138 128| PlayingtheStyles Choosing the Style Elements from the control panel You can use the buttons in the STYLE ELEMENT / MARKER section on the con- trol panel to choose the Style Elements. With a Style assigned to the current Player, the indicator on the left of the buttons will show that the Style Elements can be selected.
- Page 139 PlayingtheStyles |129 Verse Chorus Choosing a Variation to play a Variations can be used for verses, choruses, bridges or specials. To choose the right Variation for your verse, please note that Variations are of growing ‘density’ and ‘loudness’. This means that Variation 1 will be the ‘sparsest’...
- Page 140 If you want, choose a different Variation before the end of the Fill. Automatically selecting a Fill ▪ If you like, you can let Pa5X automatically select a Fill when you choose a Variation. Press the AUTO FILL button to light up its indicator.
- Page 141 PlayingtheStyles |131 Programming the Auto Fill You can program how the Auto Fill works. Go to the Settings > Menu > Preferences > Style page. As an alternative, keep the SHIFT button pressed and press the PLAYER > STYLE button to open the Style page.
- Page 142 132| PlayingtheStyles Break Choosing a A break introduces a short pause in your song, creating a suspension and a sense of surprise. Style Element Suggested use Break One-measurebreak When the Variation is nearing its end, press the BREAK button to play a short >...
- Page 143 PlayingtheStyles |133 Looping sections If you feel that an Intro, a Fill, a Break or Ending should last longer than the re- corded pattern, you can let it enter a cycling loop. Set a Style Element to loop ▪ Press twice the button of the Intro, Fill, Break or Ending to loop. >...
- Page 144 134| PlayingtheStyles Choosing the Style Elements from the display You can select the Style Elements from the Style Elements page on the display. This page allows for some different ways of working. STYLE ELEMENT buttons on the control panel let you quickly access the >...
- Page 145 PlayingtheStyles |135 Select a Style Element in the current Player ▪ While the Style Elements of the current Player appear in the display, touch > one of them to select it. This is the equivalent of the STYLE ELEMENT buttons on the control panel. Pre-select a Style Element in the other Player ▪...
- Page 146 136| PlayingtheStyles Fade In/Out Using the Fade button You can use the FADE button to start and/or stop your playing with a smooth fade-in or out. Fade in ▪ While the Style is not playing, press the FADE button to light up its indicator >...
-
Page 147: Setting The Style Play Controls
SettingtheStyleplaycontrols |137 Setting the Style play controls Choosing where to play chords (Chord Scan area) You can play chords with your left or right hand separately, or with both hands. You can choose the recognition area, depending on the song you are playing and your preferred playing style. - Page 148 138| PlayingtheStyles Make chords be recognized when played with your right hand ▪ Press the CHORD > UPPER button to turn its indicator on. Always play three or more notes to let the arranger recognize a chord. Make chords be recognized when played with both hands ▪...
- Page 149 SettingtheStyleplaycontrols |139 Choosing how to play chords (Chord Recognition mode) You can play chords in the simplest (even simplified), or the most sophisticate way. It’s at you how chords have to be played to be recognized. Go to the Settings > Menu > Preferences > Style page.
- Page 150 140| PlayingtheStyles Chord Recognition How to play chords Advanced WhentheSPLITindicatoristurnedon,playoneormorenotesfora chordtoberecognized.Ifyouplayasinglenote,a‘root+8 ’willbe played.Ifyouplayafifth,a‘root+5th’chordwillbeplayed. When the SPLIT indicator is turned off, play at least three notes to composeachord. Withthismode,youcanplayrootlessandslashchords,oftenusedin jazz,fusionormodernpop.Youdon’talwaysneedtoplaytherootnote, thatwouldotherwisedoublethenotealreadyplayedbythebassist. Press the EXIT button to return to the previous page.
- Page 151 SettingtheStyleplaycontrols |141 Keeping a chord in memory by pressing the Damper pedal You can choose to keep the recognized chord in memory while the Damper pedal is kept pressed. In this case, you can freely play any chord on the keyboard, and the Style will continue to play the ‘latched’...
- Page 152 142| PlayingtheStyles Holding chords and Lower notes (Memory) Using the Memory function You can keep the chords and/or Lower notes in memory even after raising your hand from the keyboard. How this function works depends on the settings of the Memory Mode parameter (see below).
- Page 153 SettingtheStyleplaycontrols |143 Use the Memory Mode parameter to choose the way the MEMORY button works. Memory Mode Meaning Chord WhentheMEMORYindicatorison,recognizedchordsareheldeven whenraisingyourhandfromthekeyboard.Whentheindicatorisoff, chordsareresetwhenraisingyourhand. Chord+Lower WhentheMEMORYindicatorison,recognizedchordsandtheLower Soundarehelduntilthenextnoteorchordisplayed.Whentheindicator isoff,boththechord(thereforetheaccompaniment)andLowerSound arecutwhenraisingthehandfromthekeyboard. FixedArr.+Lower WhentheMEMORYindicatorison,recognizedchordsandtheLower Soundarehelduntilthenextnoteorchordisplayed.Whentheindicator isoff,theLowerSoundiscutwhenraisingthehandfromthekeyboard, whilethechordisheld(theaccompanimentwillcontinuetoplay).
- Page 154 144| PlayingtheStyles Bass inversion and slash chords The arranger recognizes chords by analyzing all the notes you play in the chord recognition area, and evaluating their function in a chord. You can, however, al- ways force the lowest (leftmost) note of the chord to be considered as something special, for example the chord’s root of a slash chord (such as ‘C/E’...
- Page 155 SettingtheStyleplaycontrols |145 Playing a manual bass line You can play the Bass Sound with your left hand, freeing it from the automatic accompaniment. This function is assigned to CONTROL > BUTTON #9 when in MAIN mode. As per factory programming, it is also assigned to CONTROL >...
- Page 156 146| PlayingtheStyles Turn the Manual Bass function off ▪ Use the Manual Bass switch to deactivate the function. > HINT:YoucanturnManualBassonandchoosetheUpperChordScanmode.This way,youcansendchordstotheStylewithyourrighthand,whileplayingthebass freelywithyourlefthand.
- Page 157 SettingtheStyleplaycontrols |147 Controlling the Style with dynamics You can play stronger than a set velocity value to trigger a Style control. Go to the Settings > Menu > Preferences > Style page. As an alternative, keep the SHIFT button pressed and press the PLAYER >...
- Page 158 148| PlayingtheStyles Playing a Bass & Lower Backing You can play a sparser manual accompaniment, where the chord you play with your left hand is split between the Bass (chord root) and Lower (the remaining notes) Sounds. This function is assigned to CONTROL >...
- Page 159 SettingtheStyleplaycontrols |149 Turn the Bass & Lower Backing function on/off from the Settings ▪ Go to the Settings > Menu > Preferences > Style page. As an alternative, keep the SHIFT button pressed and press the PLAYER > STYLE button to open the Style page.
- Page 160 150| PlayingtheStyles Adjusting the volume of the grouped Style Sounds You can set a global volume setting for the grouped Style Sounds. Being global, this will not change when choosing a different Style. To avoid abrupt changes in the volume level of the Style Sounds during a show, we moved the volume settings to a safer area than the Home page.
- Page 161 SettingtheStyleplaycontrols |151 If you like, you can finely mix the various groups. For example, if you prefer Drums and Bass to be more prominent to let them have more ‘punch’, you can lower the grouped Style Sounds to leave more room to the rhythm section. If you wish to permanently mute a group, just move its volume to zero.
- Page 162 152| PlayingtheStyles Choosing a Fill Mode for each Fill/Break The Fill Mode parameters allow for automatically choosing a Variation at the end of each Fill, after having pressed one of the FILL BREAK buttons. These set- tings can be saved to a Style or a SongBook Entry, so you can have a different Fill Mode configuration for each Style or Song in a SongBook Entry.
- Page 163 SettingtheStyleplaycontrols |153 Auto Fill and Fill Mode Auto Fill Fill Mode can interact, by doing strictly related things: When the Auto Fill is enabled (AUTO FILL indicator on), you can choose a > Variation by pressing one of the VARIATION buttons. This will automatically select a Fill, then the chosen Variation.
- Page 164 154| PlayingtheStyles...
-
Page 165: Playing The Pads
|155 Playing the Pads... -
Page 166: The Pads
156| PlayingthePads The Pads What is a Pad? Pads are single-track hits (One Shot type) or cycling sequences (Loop type), that you can instantly play with the dedicated PADS buttons, or with the MATRIX buttons. A maximum of four Pads can play at the same time in a Player. Loop-type Pads play in time with the Style or the MIDI Song. -
Page 167: Playing The Pads
PlayingthePads |157 Playing the Pads Playing the Pads Starting and stopping the Pads You can play up to four Pads at the same time, by using the dedicated PADS but- tons, or the assigned MATRIX buttons. Pads of the One Shot type automatically stop at the end of the sequence. Pads of the Loop type continue cycling until you don’t stop them. - Page 168 158| PlayingthePads Changing Tempo Pads are always synchronized to the Tempo of the selected Player. Change the Player’s Tempo, and the Pads’ Tempo will change accordingly.
-
Page 169: Customizing The Pad Set
CustomizingthePadset |159 Customizing the Pad Choosing the individual Pads Every Factory and User Style, as well as each SongBook Entry, has its own four Pads. You can save a new combination of Pads into a User Style or SongBook Entry. Choosing the Pads Open the Select window from the Home >... - Page 170 160| PlayingthePads Touch the name of the Pad you want to change to open the Select window. Open the Select window from the Pads edit page ▪ Go to the Home > Menu > Pads page. Touch the name of the Pad you want to change to open the Select window.
- Page 171 CustomizingthePadset |161 Choose a Pad ▪ Browse through the Pads in the Pad Select window. Groups Type Selected Pad Upper level (folders Current path Pages Current directory (Pads) corresponding to Categories) You can switch between Tile View List View mode by using the Show as List option in the page menu ( ...
- Page 172 162| PlayingthePads If you are choosing from the Drives, choose one of the available storage de- vices (drives). While in Tile View mode, touch the Root button to see the list of the drives, > choose a drive in the left side of the display, then browse through the folders inside the selected drive.
- Page 173 Root button to see the list of the drives, > choose a drive from the list, then browse through the folders inside the selected drive. Drive Meaning KORGDISK Storagespaceinsidetheinternaldrive(separatefromtheUserarea) SDUSER Storagespaceinsidethe(optional)SDcard USBF StoragedeviceconnectedtothefrontUSBHOSTport USBR1 StoragedeviceconnectedtotherearUSBHOST1port USBR2 StoragedeviceconnectedtotherearUSBHOST2port...
- Page 174 164| PlayingthePads Tile View mode, if you are choosing from the Factory User banks, you will find the Pads organized in categories (shown as folders). If you want to choose a different category, touch one of the category folders in the left side of the Select window.
- Page 175 CustomizingthePadset |165 Pads can be of Loop-type ( ) One Shot-type ( ). Loop-type Pads One Shot-type Pads If you are lost while browsing though the data, you can return to the folder containing the selected element by touching the Locate ( ) button.
- Page 176 166| PlayingthePads Saving the assigned Pads Save a User Style or a SongBook Entry. >...
- Page 177 CustomizingthePadset |167 Locking the Pads If you prefer to keep the current combination of Pads, without letting a Style or SongBook Entry recall the memorized one, lock it. Go to the Home > Main page, and close the Pads padlock. >...
- Page 178 168| PlayingthePads Mixing the Pads Editing the Pad parameters Access the Pads page ▪ Go to the Home > Menu > Pads page. > Adjust the volume and pan ▪ Use the Volume parameter (vertical sliders) to set the level of each Pad. >...
- Page 179 CustomizingthePadset |169 Adjust the send level to the master effects ▪ Use the Master FX parameters to adjust the amount of the signal sent to the > FX 1, 2 and 3 Master effects (FX Group A). The Master Effects are the ones of the Style the Pads are linked to. Equalize the sound ▪...
- Page 180 170| ...
-
Page 181: Playing The Chord Sequences
|171 Playing the Chord Sequences... - Page 182 172| PlayingtheChordSequences The Chord Sequences Chord Sequences and the Styles You can record a Chord Sequence, that will play the chords for you. This will be useful, for example, when you have to play a repeated sequence, and prefer to use your left hand to play a solo on the keyboard, or to select the DNC control- lers.
- Page 183 TheChordSequences |173 You can also enable the Chord Sequence by using the Start Seq button in the Home > Chords pane. colored frame around the Start Seq button shows the status of the Chord Sequences. Chord Seq frame Meaning ChordSequencenotavailableornotactivatedforplaying. Flashing ChordSequenceavailableandreadytoplayinthecorrespondingPlayer...
- Page 184 174| PlayingtheChordSequences When you enable the Chord Sequence, the list of chords appears in the Home > Chords pane. A Chord Sequence can be recalled by the Style or SongBook Entry, or chosen from the library. If it isn’t, load it, as described below.
- Page 185 TheChordSequences |175 Choosing a Chord Sequence Choosing a Chord Sequence from the library Chord Sequences are contained in a dedicated library, that you can access from Home > Chords page. Be sure the CHORDS > SEQUENCE indicator on the control panel is show- ing the color of the Player (orange or blue), so that you can see the loaded Chord Sequence.
- Page 186 176| PlayingtheChordSequences As soon as you touch the display, the Chord Sequence Select window appears. Groups Type Selected Pad Upper level (folders Current path Pages Current directory (Chord corresponding to Categories) Sequences) You can switch between Tile View List View mode by using the Show as List option in the page menu ( ...
- Page 187 TheChordSequences |177 If you are choosing from the Drives, choose one of the available storage de- vices (drives). While in Tile View mode, touch the Root button to see the list of the drives, > choose a drive in the left side of the display, then browse through the folders inside the selected drive.
- Page 188 Root button to see the list of the drives, > choose a drive from the list, then browse through the folders inside the selected drive. Drive Meaning KORGDISK Storagespaceinsidetheinternaldrive(separatefromtheUserarea) SDUSER Storagespaceinsidethe(optional)SDcard USBF StoragedeviceconnectedtothefrontUSBHOSTport USBR1 StoragedeviceconnectedtotherearUSBHOST1port USBR2 StoragedeviceconnectedtotherearUSBHOST2port...
- Page 189 TheChordSequences |179 While in Tile View mode, if you are choosing from the Factory User banks, you will find the Chord Sequences organized in categories (shown as folders). If you want to choose a different category, touch one of the category folders in the left side of the Chord Sequence Select window.
- Page 190 180| PlayingtheChordSequences If you want to close the Select window (and it does not close by itself), press EXIT button. HINT:Whenawindowdoesnotclosebyitself,itmeanstheDisplay Holdisturned on.SeeDisplay Holdonpage43. In the end, you will see the name of the selected Chord Sequence in the dedicated area of the Main page.
- Page 191 TheChordSequences |181 If the sequence is very long, you can touch the Expand ( ) button to see more chords. You can make the pane go back to the reduced size by touching the Collapse ( ) button. Chord Sequences automatically selected by a Style or a SongBook Entry When choosing a Style or a SongBook Entry containing a Chord Sequence, this is automatically recalled.
- Page 192 182| PlayingtheChordSequences Locking the Chord Sequence If you prefer to keep the current Chord Sequence, without letting a Style or SongBook Entry recall the memorized one, lock it. Go to the Home > Chords page, and close the Chord Sequence padlock. >...
-
Page 193: Playing The Chord Sequences
PlayingtheChordSequences |183 Playing the Chord Sequences Starting and stopping a Chord Sequence If a Chord Sequence is available but not activated, the CHORD > SEQUENCE indicator will appear white. If it is off, load a Chord Sequence as shown above. Enable the Chord Sequence by pressing the CHORD >... - Page 194 184| PlayingtheChordSequences...
-
Page 195: Playing The Songs
|185 Playing the Songs... -
Page 196: The Songs
MIDI Songs’ technical name is Standard MIDI File, often abbreviated as SMF. The filename extension is .mid. The Standard MIDI File is the industry standard format for songs, and is used by Pa5X as the native file format when playing or recording MIDI Songs. - Page 197 TheSongs |187 Choosing the Songs Choosing a Song Songs can be either MIDI or MP3 Songs. You can play a Song with either Player 1 or Player 2. If you want, you can assign a Song to each of the players, and have the other player be ready for the next musical selection.
- Page 198 188| PlayingtheSongs Open the Select window from the display ▪ Go to the Home > Main page. When turning the instrument on, you are already in the Main page. If you are not in the Main page, press the EXIT button in the control panel. Touch the name of the Song (or Style) in the display.
- Page 199 TheSongs |189 As soon as you touch the display, the Song Select window appears. Type Selected Song (or Style) Upper level (drives or folders Current path Pages Current directory (Songs or inside the selected drive) folders inside the drive or folder selected in the upper level) You can switch between Tile View...
- Page 200 190| PlayingtheSongs Choose a Song ▪ Choose one of the available storage devices (drives). While in Tile View mode, touch the Root button to see the list of the drives, > choose a drive in the left side of the display, then browse through the folders inside the selected drive.
- Page 201 Root button to see the list of the drives, > choose a drive from the list, then browse through the folders inside the selected drive. Drive Meaning KORGDISK Userstoragespaceinsidetheinternaldrive SDUSER Userstoragespaceinsidethe(optional)SDcard USBF StoragedeviceconnectedtothefrontUSBHOSTport USBR1 StoragedeviceconnectedtotherearUSBHOST1port USBR2 StoragedeviceconnectedtotherearUSBHOST2port...
- Page 202 192| PlayingtheSongs Select the folder containing the Song. In Tile View mode, its content will ap- pear in the right side of the window, and the containing folder will be moved to the left side. Selected folder Folder content Browse through the folders. If you want to close the current folder and go up one level, touch the button.
- Page 203 TheSongs |193 Tile View mode, the Songs contained in the selected folder will appear in the right side of the window. If you are lost while browsing though the data, you can return to the folder containing the selected element by touching the Locate ( ...
- Page 204 194| PlayingtheSongs HINT:Whenawindowdoesnotclosebyitself,itmeanstheDisplay Holdparameter isturnedon.SeeDisplay Holdonpage43. In the end, you will see the name of the selected Song in the dedicated area of Main page. If you want, repeat the same procedure to assign a Song (or Style) to the other Player.
-
Page 205: Playing The Songs
PlayingtheSongs |195 Playing the Songs Starting, stopping and controlling the Songs You can start a single Song, or mix two Song, or Songs and Styles, with the two Players. Set the right mix ▪ Move the X-FADER slider fully to the left to only listen to Player 1, fully to the >... - Page 206 196| PlayingtheSongs Start the Player ▪ Press the PLAY/STOP ( ) button in the section dedicate to the Player you > want to start. Stop/ Play/Stop Go to Start While the Song is playing, please note the various indicators in the display. With a MIDI Song:...
- Page 207 PlayingtheSongs |197 Fast Forward the Song ▪ Touch the FAST FORWARD ( ) button once to jump to the next measure > (MIDI Song) or to the next second (MP3 Song). As an alternative, use the FFW>> button in the USER mode of the CONTROL >...
- Page 208 198| PlayingtheSongs Start and stop both Players at the same time ▪ You can start both Players at the same time, and mix them with the X-FADER while playing. Keep the SHIFT button pressed, and press any of the two PLAY/STOP >...
- Page 209 PlayingtheSongs |199 Fade In/Out Using the Fade control You can use the FADE button to start and/or stop a Song with a smooth fade-in or out. Fade in ▪ While the Song is not playing, press the FADE button to light up its indicator >...
- Page 210 200| PlayingtheSongs Playing the Keyboard Sounds along with the Song Play along with the Song ▪ While the Song is playing, play the keyboard. > Choose different Sounds from the Keyboard Set Library ▪ Choose a different Keyboard Set from the KEYBOARD SET LIBRARY sec- >...
- Page 211 PlayingtheSongs |201 Transpose the Songs to play in an easier key With Songs in a difficult key, you may want to transpose them to an easier key. You can choose to only apply transposition to the Songs, without transposing the keyboard. Activate transposition only for the Songs ▪...
-
Page 212: Playing A List Of Songs (Jukebox)
202| PlayingtheSongs Playing a list of songs (Jukebox) The Jukebox list The Jukebox list is a list of songs, that you can use as a playlist to quickly select all the songs of your show, or as a random list of songs for the background music. Creating a Jukebox list from a folder You can quickly convert all the Songs contained in a folder into a Jukebox list. - Page 213 Playingalistofsongs(Jukebox) |203 Song Select window will appear. You can switch between Tile View List View mode by using the Show as List option in the page menu ( ). Browse through the files and folders, until you find the folder containing the Songs to play, and open it.
- Page 214 204| PlayingtheSongs Go to the Home > Jukebox page to see the newly created list. If you want to save the list, choose the Save Jukebox List command from the page menu ( ). Play the Jukebox list ▪ You can immediately play the list of Songs from the selected folder. Start and stop the Songs by pressing the PLAY/STOP ( ...
- Page 215 Playingalistofsongs(Jukebox) |205 Creating a Jukebox list from different folders You can choose MIDI or MP3 Songs from any folder. This is useful to create a playlist for a show, without having to look around for the individual Songs in their respective folders. Creating a Jukebox list Go to the Home >...
- Page 216 206| PlayingtheSongs If a list of Songs already exists (because you selected an existing Jukebox file), and you want to start over from scratch, touch the Delete All button to delete all from the list. Otherwise, you can simply edit the existing list. Touch the Append Insert...
- Page 217 Playingalistofsongs(Jukebox) |207 Repeat the above procedure and continue adding Songs to the list, until you have a full playlist for a show or session. In the end, touch the Collapse ( ) button to collapse the pane again. Editing the Jukebox list Rearrange the Songs in the list ▪...
- Page 218 208| PlayingtheSongs Saving the Jukebox list While in the Jukebox pane, choose the Save Jukebox List command from the page menu ( ), to open the Save Jukebox List dialog. While in the Save Jukebox List dialog, touch the Text Edit ( ) button if you want to assign the Jukebox file a new name.
- Page 219 Playingalistofsongs(Jukebox) |209 Playing back the Jukebox list Instead of single Songs, you can assign a Jukebox file to Player 1. Opening a Jukebox list Open the Song Select window from the control panel ▪ Press the SONG button in the PLAYER 1 section.
- Page 220 210| PlayingtheSongs Playing the Jukebox list Start the Jukebox list ▪ While in the Home > Main page, touch the Jukebox tab to see the list of Songs contained inside the selected Jukebox list. Touch the name of the Song you want to start from. Start and stop the Songs by pressing the PLAY/STOP ( ...
- Page 221 Playingalistofsongs(Jukebox) |211 Move through the Songs ▪ There are various ways to move through the Songs. Touch in the list the Song you want to play. > Jump to the next Song in the list by touching the Next Song button in the >...
-
Page 222: The Special Tracks (Melody, Drum & Bass)
212| PlayingtheSongs The special tracks (Melody, Drum & Bass) Muting the melody or singer’s voice You can mute the melody of the MIDI Song, or remove the singer’s voice from an MP3 Song, if you are going to play or sing live. This will avoid overlapping your playing or singing with the internal Sounds or the voice recorded in the MP3 Song. - Page 223 Thespecialtracks(Melody,Drum&Bass) |213 Playing Drum & Bass You can define two MIDI Song’s tracks as the Drum and Bass tracks. These tracks will play when selecting the Drum&Bass function, that you can assign to a switch, Control button or footswitch. Please note that programming an assignable switch will tie this function to a par- ticular Keyboard Set or SongBook Entry.
- Page 224 214| PlayingtheSongs Programming the switches for the special tracks Programming an assignable switch You can assign the Melody/Voice Remover and/or Drum&Bass Mode functions to an assignable switch. Go to the Home > Menu > Switches page. As an alternative, keep the SHIFT button pressed, and press the ASSIGNABLE SWITCH...
- Page 225 Thespecialtracks(Melody,Drum&Bass) |215 Programming a footswitch You can assign the Melody/Voice Remover and/or Drum&Bass Mode functions to a footswitch. Go to the Settings > Menu > Controllers > Foot page. Assign the Melody/Voice Remover function to the Pedal/Footswitch param- eters corresponding to the footswitch connected to the instrument. The changes will be automatically saved to the global settings.
- Page 227 |217 Lyrics, Chords, Markers, Score...
-
Page 228: 218| Lyrics,Chords,Markers,Score
218| Lyrics,Chords,Markers,Score Lyrics and chords Choosing one of the Players While in the Lyrics, Score Markers page, you can touch either the Player 1 > Player 2 button in the title bar to select the corresponding Player. During playback, move the X-FADER slider to mix the two Players. - Page 229 Lyricsandchords |219 Reading the lyrics and chords contained in a Song Lyrics and chords may be contained in a MIDI Songs as Lyrics MIDI events. This is the best way to use them, since synchronization with the Song is automatic. Reading lyrics and chords Open the Lyrics page ▪...
- Page 230 220| Lyrics,Chords,Markers,Score 220| Lyrics,Chords,Markers,Score Read the lyrics ▪ While the Song is playing, lyrics contained in a MIDI or MP3 Song will auto- > matically scroll in the display, in time with the music. Lyrics at the current position will be highlighted. Exit from the Lyrics page ▪...
- Page 231 Lyricsandchords |221 Lyricsandchords |221 Showing/hiding chords You can show or hide the chord symbols that might be included as Lyrics events in the MIDI Songs. Use the Chord checkbox in the Lyrics page. Select the Chord checkbox to see the chord symbols. Chord symbols (if any) >...
- Page 232 222| Lyrics,Chords,Markers,Score Songs transposed, but not the Chord symbols ▪ Select the Song checkbox. Leave the Score checkbox not selected.
- Page 233 Lyricsandchords |223 Reading the lyrics and chords loaded as a text file Lyrics and chords may be loaded as a text (TXT) file, either as a file having the same name of the Style or Song, linked from a SongBook Entry, or by loading it on-the-fly.
- Page 234 224| Lyrics,Chords,Markers,Score On-the-fly loading of Lyrics and chords from an external text file When no lyrics or chords are contained or associated to the Style or Song, you can load a text (TXT) file after having chosen a Style or Song. Load a TXT file on-the-fly ▪...
- Page 235 Lyricsandchords |225 Manually scrolling the text If the text has been linked or loaded as a text (TXT) file, it will not scroll auto- matically while the Song is playing back. You can manually scroll it in one of the following ways. Scroll the text on the display ▪...
- Page 236 If this is not possible, please choose one of the following text encod- ings when saving the file, being sure it is matching the language selected in Pa5X. Choosing a codeset for your text file is always recommended, being an added safety.
- Page 237 Lyricsandchords |227 Setting the language on Pa5X To correctly read text on your Pa5X, be sure to set the Language parameter to your language. Go to the Settings > Menu > General Controls > Interface page. Use the Language pop-up menu to select one of the available languages.
- Page 238 228| Lyrics,Chords,Markers,Score Editing the TXT file on a Windows PC Launch Notepad++. Open the original TXT file. Choose File > New to open a new tabbed window containing the new TXT file. Choose Encoding > Character sets > [Your Language] > [Encoding].
- Page 239 Lyricsandchords |229 Editing the TXT file on a Mac Launch BBEdit. Open the original TXT file. In the status bar (in the lower part of the window) find the Document Text Encoding parameter (it usually defaults to Unicode UTF-8). Click it to open the popup menu, and choose Unicode (UTF-8, with BOM).
- Page 240 230| Lyrics,Chords,Markers,Score Formatting text for the Pa-Series instruments While in a text editor, text files must be formatted with non-proportional fonts (like Courier, Courier New, Letter Gothic, Lucida Sans, Menlo, Monaco, Vera Sans, or any other monospaced font). Up to 41 characters can fit a single line of text when using the smaller font size in the Pa, 24 when using the bigger font size.
-
Page 241: The Markers
Choosing the Markers from the display The Markers allow for jumping to a saved point in a MIDI Song. Song Marker events contained in a MIDI Song can be read by Pa5X. You can also create your own Markers. You can select the Markers from the... - Page 242 232| Lyrics,Chords,Markers,Score Access the Markers page ▪ Assign a MIDI Song to one or both Players. Press the MARKER button on the right of the display to open the Markers window. Beat indicator Selected Player Keyboard Sets (from the latest Style or SongBook Entry) When accessing this page, the current Player appears selected on top of the page.
- Page 243 TheMarkers |233 Select a Marker in the current Player ▪ While the Markers of the current Player appear in the display, touch one of > them to select it. At the beginning of the next measure, the Song will jump to the saved position.
- Page 244 234| Lyrics,Chords,Markers,Score Choosing the Markers from the control panel You can use the buttons in the MARKER section on the control panel to choose the Markers. The lower indicator on the left of the buttons will show that the Markers can be selected. The buttons corresponding to the Markers are shown in the Markers page.
- Page 245 TheMarkers |235 Creating and editing markers You can add your own Markers to a MIDI Song, then save them into the MIDI Song. Open the Markers page ▪ While a MIDI Song is assigned to the current Player, press the MARKER but- >...
- Page 246 236| Lyrics,Chords,Markers,Score Do the same for any of the following Markers. Stop the Player by pressing the PLAY/STOP ( ) button. Delete Markers ▪ Touch the Marker to be deleted in the Markers list. Touch the Delete button to delete the selected Marker. Save the Markers (as described below).
- Page 247 TheMarkers |237 While in the Edit Marker window, edit the position and name of the selected Marker. Touch the button to save the Marker. Save the Markers in the MIDI Song ▪ Press the EXIT button to exit from the Markers page.
- Page 248 238| Lyrics,Chords,Markers,Score Looping a Song section You can use the Markers to repeat a passage you need practicing. Start the Player. When you reach the beginning of the point you need practicing, touch the button to create a first Marker. Usually, you will create the marker one or two measures before the actual start- ing point.
-
Page 249: The Score
TheScore |239 The Score Reading the music score With MIDI Songs, you can have a music score of one of the tracks. This will let you read the score on the display or an external monitor (if connected). Intelligent display of the score Score generation is smart enough to ‘clean-up’... - Page 250 240| Lyrics,Chords,Markers,Score Displaying the music score Show the music score ▪ Choose a MIDI Song to play with the selected Player. Press the SCORE button to open the Score page. A score of the selected track will be generated. Depending on the content of the track, notes, chords and lyrics are shown in the staff.
- Page 251 TheScore |241 Choose the clef ▪ Choose a different clef by using the Clef pop-up menu. > Usually, the correct clef is automatically assigned by the score generator. Clef Meaning Treble StandardTrebleclef. Treble+8 Trebleclefwithtranspositiononeoctaveupper. Treble-8 Trebleclefwithtranspositiononeoctavelower. Bass StandardBassclef. Bass-8 Bassclefwithtranspositiononeoctavelower. Exit from the Score page ▪...
- Page 252 242| Lyrics,Chords,Markers,Score Showing lyrics, chords, note names Read the Lyrics ▪ Touch the Lyrics button to make the lyrics (if available) appear or disappear. > Read the chords ▪ Touch the Chord button to make the chord symbols (if available) appear or >...
- Page 253 TheScore |243 Music score and transposition When using the TRANSPOSE buttons, the music score and chord symbols in the Score page may be transposed in various ways. To decide if and how they are transposed, go to the Settings > Menu > Tuning > Transpose Control page, and be sure one of the following settings is selected.
- Page 254 244| ...
-
Page 255: The Songbook
|245 The SongBook... -
Page 256: Using The Songbook
You can add your own Entries to the SongBook, as well as edit the existing ones. KORG already supplies some hundred Entries as standard. You can assign four Keyboard Sets, four Pads and a Chord Sequence to each Entry. You can replace Sounds and Effects. - Page 257 UsingtheSongBook |247 Choosing the SongBook Entries Choosing the SongBook Entries from the Book list A large database is already included with the instrument. You may browse through this database and choose a SongBook Entry. Choose a SongBook Entry ▪ Press the BOOK button in the SONGBOOK...
- Page 258 248| TheSongBook After choosing the Entry, its name will appear just under the title bar (Player 1 or Entry), just above the name of the associated Style or Song. The name of the Entry in the list will appear highlighted. Name of the selected Entry (Player 1) Selected Entry Linked Style or Song (Player 1) The linked Style and/or Song will be recalled.
- Page 259 UsingtheSongBook |249 Identifying the Entries by type The icons in the Type column will help you identify the Entry. Type Meaning Style-basedEntry.Whenchosen,itwillselectaStyle. MIDISong-basedEntry.Whenchosen,itwillselectaSong. MP3Song-basedEntry.Whenchosen,itwillselectaSong.
- Page 260 250| TheSongBook Playing the SongBook Entries You can play the selected Entry by using the same Player controls you would use to play a Style or a Song. Here is a recap. Play and pause the Style or Song ▪ Press the PLAY/STOP ( ...
- Page 261 UsingtheSongBook |251 Sorting and filtering the SongBook Entries Sorting by label/column On top of the list you can find some labels, each one corresponding to a column of data. Depending on the view preferences, you can see a set chosen between Type, Name, Artist, Genre, Key, BPM, Meter, Number.
- Page 262 252| TheSongBook Filtering the Entries When you are looking for a particular artist, genre or other categories, you may ‘filter’ the list to only see the type of Entries you are looking for. The more da- tabase fields (or ‘tags’) are filled in an Entry, the more accurate filtering will be. Please note that you can also find items inside the SongBook database by press- ing the SEARCH...
- Page 263 UsingtheSongBook |253 Edit the filter criteria and activate the filters ▪ Touch the Text Edit ( ) button next to the field you want to edit, to open the virtual keyboard and type the text string you are looking for. For example, you may want to find all songs containing the word ‘love’ in the title (in any position in the string).
- Page 264 254| TheSongBook Delete the filter criteria you don’t need ▪ Touch the Clear button to delete the text string or reset the parameter to a > default value. Touch the Clear All button to reset all filter criteria. > Confirm the filters ▪...
- Page 265 UsingtheSongBook |255 Choosing the SongBook Entries by Song Number You can select a SongBook Entry by entering its unique Song ID Number. Numbers associated with each Entry can be programmed in any of the SongBook Entry edit pages. (See Editing the Song Selection Number on page 265 for more informa- tion).
-
Page 266: Quick Creation Of A New Songbook Entry
256| TheSongBook Quick creation of a new SongBook Entry Preparing the SongBook Entry You can save a snapshot of the current status of the instrument in a new SongBook Entry, to be included into the SongBook database. Choose the Style or Song ▪... - Page 267 QuickcreationofanewSongBookEntry |257 Saving the SongBook Entry You can quickly save the settings into a new SongBook Entry. Keep the BOOK button pressed for about one second to create a new SongBook Entry. The Save SongBook Entry dialog will appear. As an alternative, go to one of the SongBook pages, and choose the Save Book Entry command from the...
-
Page 268: Editing The Songbook
258| TheSongBook Editing the SongBook Editing the SongBook Entries Choosing an existing SongBook Entry Choose a SongBook Entry from the SongBook > Book page… > … or from the SongBook > Set List page (here shown in List View mode). >... - Page 269 EditingtheSongBook |259 Choosing the Sounds and the Effects You can exit the SongBook, and repeat the same operations done to create a new SongBook Entry (see Preparing the SongBook Entry above). In particular, you can choose a different Keyboard Set from the library, or choose different Keyboard Sounds, Effects, and all the settings for the Sounds and save them into a new Keyboard Set.
- Page 270 260| TheSongBook Choosing the Style or Song With each SongBook Entry, a reference to a Style or Song is saved. When editing an Entry, you can change it with a different Style or Song. Choose the SongBook Entry to be edited. Go to the SongBook >...
- Page 271 EditingtheSongBook |261 Choosing the Keyboard Sets With each SongBook Entry, four Keyboard Sets are saved. When editing an Entry, you can replace the older Keyboard Sets with new ones. Set the starting point ▪ Choose the SongBook Entry to be edited. >...
- Page 272 262| TheSongBook Use the checkbox to decide if you want to save all the Keyboard Sets (up to four), or just one. Meaning The four Keyboard Sets contained in the KEYBOARD SET buttons under the X-FADERwillbesavedintheSongBookEntry. OnlytheselectedKeyboardSetwillbesavedintothetargetbutton. If you deselected the checkbox, choose a single Keyboard Set location to save the Keyboard Sounds to the selected Keyboard Set inside the SongBook...
- Page 273 EditingtheSongBook |263 Choosing the Mic Preset and Guitar Preset With each SongBook Entry are saved references to a Mic Preset and a Guitar Preset. When editing an Entry, you can replace them. Choose the SongBook Entry to be edited, then go to the SongBook >...
- Page 274 264| TheSongBook Choosing the Chord Sequence A SongBook Entry may contain a Chord Sequence, to have a sequence or chords good for the song ready. Choose the SongBook Entry to be edited, then go to the SongBook > Entry Edit > Mic/Gtr/ChordSeq page.
- Page 275 EditingtheSongBook |265 As an alternative, go to the Home > Menu > Pads page. Touch the names of the Pads to choose up to four Pads. Press the BOOK button to return to the SongBook pages. Editing the Song Selection Number Each SongBook Entry can have a unique ID number (up to 9,999).
- Page 276 266| TheSongBook Editing the database tags The SongBook is a database. You can add to each SongBook Entry special archival data, or tags, that will later help in retrieving specific types of songs by using the SongBook > Book > Filter function.
- Page 277 EditingtheSongBook |267 Edit the SongBook Entry’s database tags. Style-based Entry MID-based Entry MP3-based Entry Genre MusicgenreassociatedwiththeEntry. Artist NameoftheartistofthesongassociatedwiththeEntry. KeyInfo OriginalkeyoftheEntry.ThefirstfieldistheRoot,thesecondoneistheMajor/ minormode. Tempo Entry’sTempo.Thismaychange,ifaTempoChangeeventisincludedwithin theassociatedresource. YoucanmanuallychangethisvaluebyusingtheTEMPObuttonsonthecontrol panel.AnychangewillonlybeshownaftersavingtheEntry. OriginalTempoofthe OriginalstartingTempo Alwayszero(original Style. oftheMIDfile. TempooftheMP3Song). MeterInfo Entry’sMeter(or‘TimeSignature’).Thismaychange,ifaMeterChangeeventis includedwithintheassociatedresource. Master Entry’sMasterTransposevalue.WhentheEntryisselected,theMaster Transpose Transposeofthewholeinstrumentisautomaticallychanged(unlessitisnot locked).TheMasterTransposevaluesavedintheSongBookEntryoverrides anyMasterTransposesettingcontainedintheassociatedresource. YoucanmanuallychangethisvaluebyusingtheTRANSPOSEbuttonsonthe...
- Page 278 268| TheSongBook Linking a text file to the SongBook Entry You can add Lyrics to any Entry as a linked TXT file. Since there is no automatic synchronization between this type of Lyrics and the associated Style or Song, you will have to scroll them manually (as explained in Reading the lyrics and chords loaded as a text file on page 223).
- Page 279 EditingtheSongBook |269 Unlink the TXT file ▪ While in the same page, touch the Delete ( ) button. > As an alternative, touch the name of the TXT file to open the file selector > again, and choose the Unload current command from the page menu ( ...
- Page 280 270| TheSongBook If you selected a Song-based Entry: Adding notes to a SongBook Entry You can add written notes to the entry. Choose the SongBook Entry to be edited. Go to the SongBook > Entry Edit > Info page. Touch the Text Edit ( ...
- Page 281 EditingtheSongBook |271 Saving the SongBook Entry You can save your edits over a new or existing SongBook Entry. Choose the Save Book Entry command from the page menu ( ). The Save SongBook Entry dialog will appear. Choose whether you want to create a new Entry (New SongBook Entry), or overwrite the one you just edited (Rename/Overwrite).
-
Page 282: Managing The Songbook Entries
272| TheSongBook Managing the SongBook Entries Selecting the SongBook Entries Multiple selection of SongBook Entries While in the Book page of the SongBook, you can select several Entries at the same time before executing an operation. Set the Select mode ▪ While in Book page, use the... - Page 283 ManagingtheSongBookEntries |273 Select multiple Entries separately ▪ Touch the Select Mode button to choose the SHIFT function. Select the first Entry to be selected. Press and keep the SHIFT button pressed. Select a second Entry to be selected. While keeping the SHIFT button pressed, continue selecting the other Entries to be selected.
- Page 284 274| TheSongBook Deselect the Entries ▪ To deselect one or more Entries, without deselecting everything, keep SHIFT > pressed and touch the items to be deselected. To deselect everything, select any other Entry. All selected Entries will be > deselected. Selected and active SongBook Entries In the Book Set List...
- Page 285 ManagingtheSongBookEntries |275 Deleting the SongBook Entries While in the SongBook > Book page, select the song (or songs) to be deleted. Choose the Delete Book Entry/Entries command from the page menu ( ), then confirm. Deleting all the SongBook Entries and Set Lists You may want to create you own Book list, after removing all the existing Entries and Set Lists.
-
Page 286: Using The Set Lists
276| TheSongBook Using the Set Lists What are the Set Lists? Set Lists are selections from the full Book list. They allow for smaller, custom- ized lists, suitable for a single gig or your own music preferences. We already included some sample lists, that you can use for your own shows. Choosing the Tile or List View Set Lists can be used in Tile View or in List View. - Page 287 UsingtheSetLists |277 Playing a Set List from the Tile View Tile View shows the selected Set List as a set of songs assigned to the LIST buttons in the display. Choose the Set List ▪ Go to the SongBook > Set List page.
- Page 288 278| TheSongBook Choose a SongBook Entry ▪ Be sure you are in the SongBook > Set List page. Touch one of the tiles in the display, to choose the corresponding song. The selected song will appear highlighted. Play the Set List ▪...
- Page 289 UsingtheSetLists |279 Playing a Set List from the List View List View shows the selected Set List as a plain list of songs. Choose the Set List ▪ Press the SET LIST button to open the SongBook > Set List page. Be sure you are in List View, otherwise choose the...
- Page 290 280| TheSongBook Touch the name of the Entry you want to choose. The selected song will ap- pear highlighted. Play the Set List ▪ Use the PLAY/STOP ( ) button to start and stop playback of the selected > Style or Song. Use the standard Player controls to start, pause or stop the Styles or Songs.
-
Page 291: Editing The Set Lists
EditingtheSetLists |281 Editing the Set Lists Creating a new Set List Creating or editing a Set List Go to the SongBook > Set List page, then choose the New Set List command > from the page menu ( ). A new, blank list will be created and automatically selected. - Page 292 282| TheSongBook Editing the Set Lists You can add, delete or reorder items from a Set List. The name of a modified Set List shows an asterisk (*) after the name. Selecting a Set List for editing Go to the SongBook > Set List page.
- Page 293 EditingtheSetLists |283 Adding songs to the selected Set List Go to the SongBook > Book page. Browse through the songs in your SongBook database. When you see the song you are looking for, touch it. If you want to select mul- tiple songs at the same time, keep the SHIFT button pressed, and select the songs.
- Page 294 284| TheSongBook Rearranging the songs in the list If the order of the songs added to the list is not the desired one, rearrange them. This can be done while in List View. Go to the SongBook > Set List page, and choose the Set List you want to edit. Touch the song you want to move.
- Page 295 EditingtheSetLists |285 Saving a Set List While in the SongBook > Set List page, choose the Save Set List command from the page menu ( ) to open the Save List dialog. Choose the Rename/Overwrite option to save over the selected Set List. If you prefer to create a new Set List, choose the New List option instead.
-
Page 296: Exporting The Book And Set Lists As A Text File
286| TheSongBook Exporting the Book and Set Lists as a text file A list of the songs contained inside the Book and Set Lists can be exported, to be used as the playlist of the show. While you are in the SongBook >... - Page 297 ExportingtheBookandSetListsasatextfile |287 Use the Device pop-up menu to choose a device where to save the list as a TXT file. The file will be saved in the device’s root. You may change the name of the list. Touch the Text Edit ( ) icon to open virtual keyboard...
-
Page 298: Using The Songbook With A Tablet Or Personal Computer
SongBook Entries can be remotely selected via MIDI. In addition, MIDI messages can be sent via MIDI when choosing a SongBook Entry. This is useful to synchro- nize Pa5X to a digital music sheet reader (for example, a dedicate app running on a tablet). - Page 299 ). Selecting the SongBook Entries via MIDI At this point, Pa5X must receive on the special Control channel the NRPN Control Change messages #99 (MSB, with value 2) and #98 (LSB, with value 64) in fast succession, as an initialization string. This string must be sent only once, unless another NRPN control is sent on the same MIDI channel before selecting a differ- ent SongBook Entry.
- Page 300 290| TheSongBook The following examples show some typical situations. Send the following string to select SongBook Entry #77: > Initialization string (CC#99, 98) Thousands and hundreds (00xx) Tens and units (xx77) Send the following string to select SongBook Entry #100: > Initialization string (CC#99, 98) Thousands and hundreds (01xx) Tens and units (xx00)
- Page 301 UsingtheSongBookwithatabletorpersonalcomputer |291 Sending MIDI messages when selecting SongBook Entries When the special Control channel is assigned to one of the MIDI OUT channels, MIDI messages are sent on this channel when choosing a SongBook Entry. The messages sent when selecting a SongBook Entry are the following (as seen in the previous section): An initialization string, made of the NRPN Control Change messages #99 >...
- Page 302 292| TheSongBook...
-
Page 303: The Matrix
|293 The Matrix... -
Page 304: Using The Matrix
294| TheMatrix Using the Matrix Matrix lets you create up to three sets of Matrix Pads, that you can quickly se- lect by choosing one of the Matrix Presets 1-3. It also offers a set of Mute controls. The Pads are illuminated according to the color of the current Player (orange for Player 1, blue for Player 2). - Page 305 UsingtheMatrix |295 Using the Matrix Pads from the display While in the Home page, touch the Matrix tab to open the corresponding pane. Touch one of the Pads 1-3 buttons to activate the corresponding set of Pads. Touch one of the Matrix Pads to trigger the corresponding Pad.
- Page 306 296| TheMatrix Using the Matrix Mute buttons from the control panel While in any of the Home pages, press the Matrix Preset 4 button under the Matrix Pads, to select the Matrix Mute buttons. Press one of the Matrix Pads to enable the corresponding Mute. Press it again to unmute the corresponding track.
- Page 307 UsingtheMatrix |297 Using the Matrix Mute buttons from the display While in the Home page, touch the Matrix tab to open the corresponding pane. Matrix Mute with a Style selected Matrix Mute with a MIDI Song selected Touch the Pads 4 button to activate the Matrix Mute buttons.
-
Page 308: Programming The Matrix
298| TheMatrix Programming the Matrix While the Mute set is fixed, you can program the three Matrix Pad sets. While in the Home page, touch the Matrix tab to open the corresponding pane. Choose one of the Pads 1-3 sets. - Page 309 ProgrammingtheMatrix |299 Touch the Expand ( ) button to see the Expanded view of the Matrix pane. Touch the Edit button to put the set in edit mode.
- Page 310 300| TheMatrix While in edit, you can touch one of the Matrix Pads to open the Pad Select window. Select the to be assigned to the selected Matrix Pad, then press the EXIT button to return to the Matrix pane. If you want to remove one of the Pads, touch the Delete ( ...
- Page 311 ProgrammingtheMatrix |301 Touch the Collapse ( ) button to return to the Normal view of the Matrix pane. Changes to your programming will be saved automatically as global settings. In case you want to restore the original factory settings, use the Factory Restore command you can find in the File >...
- Page 312 302| TheMatrix...
-
Page 315: The Mixer
|305 The Mixer... -
Page 316: The Mixer
306| TheMixer The Mixer Mixing all the sound sources Pa5X includes a powerful digital mixer. Here, all the internally generated sounds and effects, together with the external audio sources, can be controlled, mixed and routed. The mixer settings can then be saved into the Keyboard Sets, the Songs, the Styles, the Pads or the SongBook Entries. - Page 317 TheMixer |307 Checking which Sounds are playing In the lowest area of various pages, an indicator shows which Sounds are playing. This lets you see the source of the audio signal. When mixing, you can mute or solo the various channels, and see each Sound’s contribution to the overall mix. Color Sound Green...
- Page 318 308| TheMixer Adjusting the Volume from the control panel Use the mode buttons in the CONTROL section to select the groups of Sounds to control. By default, the MAIN group is selected, where you can control the audio inputs, the voice effects, and entire groups of Sounds with a single slider. These are the main audio sources of the instrument.
- Page 319 TheMixer |309 To see which function is assigned to each slider or button, check the strip display under the sliders. Press the VIEW button on the left to alternate between the sliders and the buttons. Use the sliders to adjust the volume. Volume Meaning 0…127...
- Page 320 310| TheMixer Adjusting the Volume from the Home page Mixing from the Home > Control pane Control pane of the Home page contains a selection of mixing controls. Here, you can quickly balance the volume of the Sounds and mute/unmute them. Go to the Home >...
- Page 321 TheMixer |311 To see which function is assigned to each slider or button, check the legends under the sliders. Use the virtual sliders to adjust the volume. Volume Meaning 0…127 VolumelevelinMIDIvalues...
- Page 322 312| TheMixer Mixing from the Home > Mixer pane For individual adjustment of each Sound’s volume level and pan, you can switch to the Mixer pane. Go to the Home > Mixer pane. Touch the TRACK SELECT button next to the tracks, to switch to a different group of eight tracks.
- Page 323 TheMixer |313 Mixing from the Mixer/FX page Mixer/FX edit section is the internal digital mixer of the instrument. Go to the Home > Menu > Mixer/FX > Main page. You can also access this section from the Style/Song Edit > Menu. You can jump to this page by touching the Mixer ( ...
- Page 324 314| TheMixer Touch the TRACK SELECT button to switch between the Sounds of the Keyboard and Pads, and the ones of the Style or the MIDI Song. Use the vertical sliders to adjust the Volume. Use the horizontal sliders to adjust the Pan (short for ‘panorama’, that is the Sound’s position in the stereo field).
- Page 325 TheMixer |315 Soloing and muting the Sounds You can solo or mute the Sounds. Soloing can be useful to check how something sounds in isolation. Muting can be used to remove a Sound from a mix, either to check the final effect, or to replace it with a live player. Muting from the control panel Use the mode buttons...
- Page 326 316| TheMixer To see which function is assigned to each slider or button, check the strip display under the sliders. Press the VIEW button to alternate between the sliders and the buttons. Use the buttons to mute/unmute the corresponding track’s Sound.
- Page 327 TheMixer |317 Muting from the Home > Control pane Go to the Home > Control pane. By default, the Main group is selected, and this mode doesn’t contain Sound mute controls. If you want to control the Sounds of the Style or the MIDI Song, touch the Style/Song mode button.
- Page 328 318| TheMixer Soloing and muting from the Home > Mixer pane Go to the Home > Mixer pane. Touch the TRACK SELECT button next to the tracks, to switch to a different group of eight tracks. Which one are displayed depends on the current elements (Keyboard Sounds, Pads, Style, Song).
- Page 329 TheMixer |319 Soloing and muting from the Mixer/FX section Go to the Home > Menu > Mixer/FX > Main page. You can reach this page by touching the Mixer ( ) button in the Home > Control pane. You can also access this section from the Style/Song Edit >...
- Page 330 320| TheMixer Viewing and choosing the Sounds Home > Mixer pane, and the Mixer/FX > Main page also allows for choosing Sounds for the Keyboard, Pads, Style and MIDI Songs. Go to one of the Mixer pages: Home > Mixer pane. >...
- Page 331 TheMixer |321 Under the name of the Sound, you can see the corresponding MIDI Program Change combo (Bank Select MSB, Banck Select LSB, Program Change).
- Page 332 322| TheMixer Equalizing the Sounds Pa5X includes three-band channel equalization (EQ) on each individual mixer channel. Each Sound can be individually equalized. The equalizer is a powerful tool to shape your sound. Be careful not to overdo, since excessive boost can overload the audio outputs and distort the sound.
- Page 333 TheMixer |323 Enabling or disabling the EQ Each Channel EQ can be turned on or off. This can also be useful to check its ef- fect while editing. Go to the Home > Menu > Mixer/FX > EQ page. You can also access this sec- tion from the Style/Song Edit >...
- Page 334 324| TheMixer Adjusting the EQ input sensitivity Extreme equalization gains can overload the audio path and lead to distortion. You can, however, trim down the input to avoid overloading. Go to the Home > Menu > Mixer/FX > EQ page. You can also access this sec- tion from the Style/Song Edit >...
- Page 335 TheMixer |325 Resetting the EQ You can reset the EQ to the default (that is, ‘flat’) status. Go to the Home > Menu > Mixer/FX > EQ page. You can also access this sec- tion from the Style/Song Edit > Menu. Touch the gear ( ...
-
Page 336: Saving The Mixer Settings
326| TheMixer Saving the Mixer settings You can save the mixer settings into a User Keyboard Set, Pad, Style, a MIDI Song or a SongBook Entry. Choose the Save Keyboard Set (to Library/Style) command from the page > menu ( ) to save the settings to a User Keyboard Set. - Page 337 |327 Digital Drawbars...
-
Page 338: 328| Digitaldrawbars
328| DigitalDrawbars The Digital Drawbars What are the Digital Drawbars? Digital Drawbars are special Sounds emulating the classic tonewheel organs. Settings for the Digital Drawbars are memorized in a Keyboard Set, a Style or a MIDI Song, and may be considered the equivalent of an organ’s preset. A single Digital Drawbars Sound can be assigned to the keyboard, and only one to the Style. - Page 339 TheDigitalDrawbars |329 Choosing Digital Drawbars Sounds By choosing a Keyboard Set Open the Keyboard Set Select window. Open the Organ category, and choose a Keyboard Set whose name begins with the ‘DWB’ (Drawbars) abbreviation. You can switch between Tile View List View mode by using the Show as List option in the...
- Page 340 330| DigitalDrawbars By choosing a Sound Open the Sound Select window. Open the Organ category, and choose the DRAWBARS Sound. You can switch between Tile View List View mode by using the Show as List option in the page menu ( ).
- Page 341 TheDigitalDrawbars |331 Controlling the Digital Drawbars Controlling the drawbars from the control panel Select a Digital Drawbars Sound, or a Keyboard Set marked as DWB. Press the EASY EDIT/DWB button in the CONTROL section of the control panel to select the Drawbars (DWB) mode.
- Page 342 332| DigitalDrawbars Controlling the drawbars from the display Select a Digital Drawbars Sound, or a Keyboard Set marked as DWB. Go to the Home > Control pane, and select the Drawbars mode from the side tabs. Use the virtual sliders and the buttons in the display to change the drawbars registration and enable or disable the various features.
- Page 343 TheDigitalDrawbars |333 Changing the drawbars registration Drawbars registration is the combination of the drawbars positions, and affects the harmonic content of the organ sound. To adjust the position of the corresponding drawbars: Use the CONTROL sliders on the control panel. > Drag the virtual sliders in the display.
- Page 344 334| DigitalDrawbars Turning the switches on/off To enable or disable the sound parameters, or to trigger the controls, do as fol- lows. Use the CONTROL buttons on the control panel. > Use the soft buttons in the display. > Please note that Vibrato/Chorus, Overdrive, Brake and Rotary Slow/Fast con- trols will be only working if the following Insert FXs are recalled and enabled for the Digital Drawbars Sound: Organ Vibrato/Chorus, CX-3 Amp, one of the Rotary Speakers.
- Page 345 TheDigitalDrawbars |335 Leakage ▪ Leakage increases the bleed of signal between adjacent tonewheels, with signal from other tonewheel entering an unwanted pickup. This makes the sound ‘dirtier’, but also richer. You can turn it on or off. Key On and Key Off ▪...
-
Page 346: Editing The Digital Drawbars
336| DigitalDrawbars Editing the Digital Drawbars Digital Drawbars and the effects When editing a Digital Drawbar Organ, we suggest you start from one of the sup- plied Keyboard Sets and use the effect routing we created for you. If you prefer to create an entirely new set, please remember that some insert ef- fects must be activated on the same track of the DRAWBARS Sound. - Page 347 EditingtheDigitalDrawbars |337 Accessing the Digital Drawbars Edit page Accessing the edit page from the control panel Choose a Keyboard Set containing a Digital Drawbars Sound, or a Digital Drawbars Sound. Press the EASY EDIT/DWB button in the CONTROL section of the control panel, then press it a second time to access editing.
- Page 348 338| DigitalDrawbars Editing the Digital Drawbars parameters Editing the parameters Digital Drawbars Edit page lets you edit in depth the various parameters of the organ’s sound. Please note that Vibrato/Chorus, Overdrive, Brake and Rotary Slow/Fast con- trols will be only working if the following Insert FXs are recalled and enabled for the Digital Drawbars Sound: Organ Vibrato/Chorus, CX-3 Amp, one of the Rotary Speakers.
- Page 349 EditingtheDigitalDrawbars |339 Vibrato/Chorus This effect simulates the vibrato and chorus circuitry (also called the Vibrato Scanner) of a vintage organ. Parameters Meaning On/Off UsethisswitchtoenableordisableVibrato/Chorus. V1,V2,V3 Selectsoneofthevariationsofvibrato. C1,C2,C3 Selectsoneofthevariationsofchorus. Custom Allowsyourownprogrammingoftheparameters.
- Page 350 340| DigitalDrawbars Amplifier This is a detailed model of the amp of a classic tone-wheel organ, producing a warm, fat tone. With the addition of the 3-band EQ, this amp simulation will allow you to create a very versatile distortion. Please note that these parameters can only be accessed if the CX-3 Amp effect is selected.
- Page 351 EditingtheDigitalDrawbars |341 Percussion Percussion adds a percussive sound to the attack segment of the organ sound. Parameters Meaning On/Off Usethisswitchtoenableordisablethepercussion. Volume Volume level of the percussive sound. Soft makes percussion less perceivable. Decay Decayspeedofthepercussivesound(FastorSlow). Harmonic SelectsapercussionharmonicbetweentheSecondandThirdone. Mode If All, the percussive attack is played on all notes of a chord. If 1st, the percussiveattackisplayedonlyonthefirstnoteofachordoragroupof...
- Page 352 342| DigitalDrawbars Noise Here you can enable/disable and set the level of Leakage, Key On Off. Noise Meaning On/Off Usetheseswitchestoenableordisablethecorrespondingeffect. Leakage SetsthelevelofLeakage,increasingthebleedofsignalbetweenadjacent tonewheels,withsignalfromothertonewheelenteringanunwantedpickup. Thismakesthesound‘dirtier’,butalsoricher. KeyOn Set the level of the click noise produced by the organ keyboard when pressed(KeyOn)orreleased(KeyOff). KeyOff Rotor The Rotary Speaker’s rotation speed, and the balance between horn and rotor, can be edited.
- Page 353 EditingtheDigitalDrawbars |343 Drawbars Drag the drawbars to create the raw sound of the tonewheels. Each drawbar corre- sponds to an organ’s stop, corresponding to a harmonic, as in the following table. Pull a drawbar out to increase its volume, push it in to reduce it. Stop Meaning 16’...
- Page 354 344| ...
-
Page 355: Microphone Input
|345 Microphone Input... -
Page 356: Connecting A Microphone
346| MicrophoneInput Connecting a microphone WARNING: Lower the master volume! Before connecting or disconnecting something to one of the audio inputs, lower Master Volume to zero. Preventing from doing it may damage the speakers and cause harm to your hearing! - Page 357 Connecting and activating the microphone Microphone types There are two main types of microphones that you can connect to your Pa5X: dynamic and condenser. Dynamic microphones don’t require powering. They are usually conceived for live use, and have a narrow cardioid or hypercardioid pattern for better rejec- tion of stage noise.
- Page 358 348| MicrophoneInput Turning on/off the microphone channel Press the MAIN button in the CONTROL section. Check in the strip display the functions assigned to the buttons. If they are not shown, press the VIEW button in the CONTROL section to see them. BUTTON #1 (Mic On/Off) to turn the microphone channel on or off.
- Page 359 When disconnecting a microphone from the XLR jack, the phantom power is au- tomatically turned off. Phantom power is also automatically turned off each time you turn the Pa5X off. As an alternative, you can go to the Settings > Menu > Audio/Video > Audio In...
- Page 360 350| MicrophoneInput Adjusting the level of the microphone Adjusting the microphone input gain After having connected a microphone, adjust the input gain, to be sure it will not distort. Preparation before starting adjusting the gain ▪ Press the MAIN button in the CONTROL section.
- Page 361 Connectingamicrophone |351 Adjust the gain ▪ Use the GAIN knob next to the MIC INPUT connector to adjust the input gain (from +20 to +55 dB). Sing into the microphone. Check the input level in the Settings > Menu > Mic Setup > EQ/Dynamics page.
- Page 362 352| MicrophoneInput Adjusting the microphone volume The microphone can be quickly turned on or off, and its volume in the mix ad- justed, right from the control panel or from the main page. Be sure the channel is turned on. Be sure the selected CONTROL mode is MAIN.
-
Page 363: Shaping The Microphone Input
Shapingthemicrophoneinput |353 Shaping the microphone input Choosing a global Mic Preset You can choose a global Mic Preset that will be automatically selected when turn- ing the instrument on. Go to the Settings > Menu > Mic Setup > Setup page. Touch the name of the selected Global Mic Preset to open the... - Page 364 354| MicrophoneInput Choose one of the presets. For more details, see Choosing a Mic Preset page 364. Press the EXIT button to close the Select window and confirm your selection.
- Page 365 Muting the lead voice When the lead voice is muted, you will only listen to the harmony voices and ef- fects. You will sing in the choir generated by Pa5X. While in the Settings > Menu > Mic Setup > Setup page, use the Lead >...
- Page 366 356| MicrophoneInput Setting the Pitch Bend range You can set the bending range (in semitones) applied to the harmony voices after receiving a Pitch Bend message. While in the Settings > Menu > Mic Setup > Setup page, use the Pitch Bend >...
- Page 367 Shapingthemicrophoneinput |357 Adding EQ, compression and gate to the lead voice You can program equalization, compression and gate for the lead voice. Go to the Settings > Menu > Mic Setup > EQ/Dynamics page. > Programming the Equalizer Use the Equalizer to make the sound brighter or darker, reduce sibilance or boom- iness, give more body to the voice.
- Page 368 358| MicrophoneInput The two High EQ bands boost or cut all frequencies below or above the frequencies set by the Frequency (Hz) controls. They can be set either as Bell- or Shelving-shaped curves by using the Bell buttons. EQ Shape Meaning BellOn(Bell) Bell-shapecurve,allowingfordetailedcorrectionofaspecificrange...
- Page 369 Shapingthemicrophoneinput |359 Applied appropriately, the difference between loud and soft is reduced without killing the interesting dynamics in your performance. Threshold control sets the singing level at and above which the amount of gain reduction (compression) specified by the Ratio control will occur. The range is 0 dB to -40 dB: 0 dB being the loudest input signal the Voice Processor can accept without distortion and -40 dB being a very quiet signal.
- Page 370 360| MicrophoneInput Use the Threshold knob (ranging from 0 to 100) to define the minimum singing level you need to reach in order for the Gate to open and let your voice sound. The factory default setting is very sensitive to allow a wide range of singing levels but it may also allow more nearby instrumental sounds through when you are not singing.
-
Page 371: Talking With Your Audience
Talkingwithyouraudience |361 Talking with your audience Soloing your voice (TalkOver) During a show, you can lower the background music, so that you can be clearly heard by your audience. Activating the TalkOver from the Home page Go to the Home > Mic & Guitar pane. - Page 372 362| MicrophoneInput Activating the TalkOver from the Settings page Go to the Settings > Menu > Mic Setup > Setup page to set the TalkOver parameters. Use the On/Off button to turn the TalkOver function on/off. Activating the TalkOver from a switch You can assign the Mic TalkOver function to a CONTROL button, an...
- Page 373 Talkingwithyouraudience |363 Setting the TalkOver mode and level Go to the Settings > Menu > Mic Setup > Setup page to set the TalkOver parameters. While in this page, use the Mode > Auto checkbox to choose between Manual and Auto TalkOver. When in Auto mode, TalkOver will be automatically engaged when the Players...
-
Page 374: Using The Microphone Effects And Harmonization
364| MicrophoneInput Using the microphone effects and harmonization The Mic Presets The Mic effects can be saved into a Preset. You can then select the saved presets, by choosing them from the library. A preset is also automatically selected when choosing a different SongBook Entry. Choosing a Mic Preset Choosing a Mic Preset from the library Go to the... - Page 375 Usingthemicrophoneeffectsandharmonization |365 Touch the name of the Mic Preset to open the Mic Preset Select window. Groups Type Selected Mic Preset Upper level (folders Current path Pages Current directory corresponding to Categories) (Mic Presets) You can switch between Tile View List View mode by using the Show as List option in the...
- Page 376 366| MicrophoneInput You can choose a different category. If you are in Tile View mode, touch one of the category folders in the left side > of the Mic Preset Select window. If not all the category folders can be seen in the current page, scroll through the page numbers to access the other folders.
- Page 377 Usingthemicrophoneeffectsandharmonization |367 If you are in List View mode, touch the Root button to see the list of the cat- > egories, then choose a category from the list. The Mic Presets contained in the selected folder appear in the right side of the window.
- Page 378 368| MicrophoneInput the pages are more than the ones that can be contained in the list, use the left/ right arrows to scroll them in the display. If you are lost while browsing though the data, you can return to the folder containing the selected element by touching the Locate ( ...
- Page 379 Usingthemicrophoneeffectsandharmonization |369 Choosing a Mic Preset with a SongBook Entry When choosing a SongBook Entry, the Mic Preset might change. This will happen if the Global Settings checkbox in the Home > Mic & Guitar pane is not selected. The status of this parameter is saved in the SongBook Entry. If it is turned on, the global Mic Preset will be used.
- Page 380 370| MicrophoneInput Mic Presets Chord 1 Gospel3(Female) HighChoir+Doubl Chord(Harm.Off) CloseChoir LowChoir+Doubl 1Up+Autopitch 1VoiceUp Simple2ndVoice Doubler+Octave AnotherBrick 2VoiceUp 2OctavesOnly OctaveChild 3VoiceUp CathedralChoir Shift OctaveMale 2VoiceDown 2VoicesUp+Echo OperaOctaveUp OctaveFemale Full1-2Up/1Down OperaOctaveDown Panning+Delay Full2-2Up/2Down Note MixedOctaves DistortedVoice FullChoir1 NotesNatural CrazyChoir ChorusVoice FullChoir2 NotesNat.Female UnisonChoir WahVox 1VoiceUp+Echo NotesNat.Male...
- Page 381 Usingthemicrophoneeffectsandharmonization |371 Correcting your voice intonation The Autopich is optimized to produce corrective pitch correction as well as obvi- ous effects made popular by a number of artists. Choosing a Mic Preset with autopitch All the Mic Presets include Autopitch. You may have to turn it on. Turning autopitch on or off Touch the Autopitch...
- Page 382 372| MicrophoneInput Harmonizing your voice Harmonization adds a choir of voices to your lead voice. Choosing a Mic Preset with harmony voices Choose a Mic Preset containing the desired harmony type, as described in > the previous pages. By default, these are some useful presets to test harmonization: Mic Preset Harmonization Type Chord(Harm.Off)
- Page 383 Usingthemicrophoneeffectsandharmonization |373 Turning harmonization on or off Press the MAIN button in the CONTROL section. Check in the strip display the functions assigned to the buttons. If they are not shown, press the VIEW button in the CONTROL section to see them. BUTTON #2 (Mic Harmony On/Off) to turn on/off the Harmony effect.
- Page 384 374| MicrophoneInput Adjusting the harmonization level SLIDER #2 (Harmony/Double) to adjust the harmony voices level. > As an alternative, use the Harmony/Double control you can find in the Home > Control page (with the Main view mode selected).
- Page 385 Usingthemicrophoneeffectsandharmonization |375 Playing harmony Play the keyboard. Depending on the chosen harmonization type, you will play chords or separate melody lines. Sing along with the chords and melody lines you play on the keyboard. Where do chords and notes come from? Each Mic Preset contains settings to choose the source of the chords or notes.
- Page 386 376| MicrophoneInput Doubling your voice Doubling adds a second, subtly modified voice to your lead voice, making it thicker and stronger. Choosing a Mic Preset with doubling Choose a Mic Preset containing the desired doubling type, as described in > the previous pages. Turning doubling on or off Press the MAIN...
- Page 387 Usingthemicrophoneeffectsandharmonization |377 Using the effects Effects can add modulation, ambience, improve or transform your lead voice and the added voices. Effect module Meaning Filter Steepfiltersemulatingthesoundofradios,phonesanddevicesthatgener- allydegradetheaudiosignal. Subtlethickeningofthevoice.Thiseffectdoesafaithfuljobofemulating classicdetune,chorus,flangerandthickeningsounds. Delay Delayeffect.Thedelayissimilartoanecho,andcanhaveshortorlong repetitionsdependingontheselectedMicPreset. Reverb Reverbeffect.Thisaddsambiencetothevoices,smoothingandblending them. Choosing a Mic Preset with the desired effects Choose a Mic Preset containing the desired effects, as described in the previ-...
- Page 388 378| MicrophoneInput Adjusting the effects level SLIDER #3 (Mic FX) to adjust the effects level. > As an alternative, use the Mic FX control you can find in the Home > Control page (with the Main view mode selected).
-
Page 389: Line Audio Inputs
|379 Line Audio Inputs... -
Page 390: Connecting A Line Audio Device
380| LineAudioInputs Connecting a line audio device WARNING: Lower the master volume! Before connecting or disconnecting something to one of the audio inputs, lower Master Volume to zero. Preventing from doing it may damage the speakers and cause harm to your hearing! - Page 391 Connectingalineaudiodevice |381 Connecting the line audio device Use the LINE INPUT connectors to receive audio from an external device. These inputs are all line-level. Do not directly connect guitars, microphones or power amplifiers. WARNING: Connecting a power amplifier to these inputs will damage the instru- ment! Use the LINE 1 >...
- Page 392 382| LineAudioInputs Turning the line channel on/off Be sure the selected CONTROL mode is MAIN. BUTTON #5 (Line On/Off) to turn the line input channel on or off. Please note that, for safety reasons, the input is always switched off when turning the instrument on.
- Page 393 Connectingalineaudiodevice |383 Routing the line input to one of the audio outputs By default, the line input is sent to the main Left and Right audio outputs. You can change the output routing to send it to any other output pair. Go to the Settings >...
- Page 394 384| LineAudioInputs Adjusting the line channel volume The line input can be quickly turned on or off, and its volume in the mix adjusted, right from the control panel or from the main page. Be sure the Line channel is turned on. Be sure the selected CONTROL mode is MAIN.
-
Page 397: Recording Audio
|387 Recording Audio... -
Page 398: Recording Mp3 Songs
388| RecordingAudio Recording MP3 Songs Recording an MP3 Song Prepare for recording ▪ Either choose a Style or Song, if you want to record them in the new Song. > You can choose either MIDI or MP3 Songs. Choose a Keyboard Set to assign Sounds to the keyboard. - Page 399 RecordingMP3Songs |389 Choose the Audio Rec option to access the MP3 Record page. Set the recording parameters ▪ Use the Quality pop-up menu to choose the preferred MP3 audio quality. > The higher the sound quality, the larger the MP3 file that will be generated. Please note that MP3 files recorded with lower sampling rates might not sound as good as expected.
- Page 400 390| RecordingAudio Record the MP3 Song ▪ Touch the button in the display to start recording. button will change to STOP, and the indicator will start flashing in the top left corner of the display. Start playing your song. During recording, use the MP3 Record dialog to check the Time,...
- Page 401 RecordingMP3Songs |391 What can you record into an MP3 Song? Everything you sing in the microphone, play with the guitar or play on the key- board; what is generated by the Styles and the MIDI or MP3 Songs performed by the Players; the events generated by the Pads effects – everything will be recorded.
- Page 402 392| RecordingAudio Saving the MP3 Song After having stopped recording, the MP3 Record dialog will allow you to choose a location for saving the MP3 file. Touch the Text Edit ( ) button to give the MP3 file a name. Touch the name of the disk to select a storage device...
-
Page 403: Recording The Chord Sequences
|393 Recording the Chord Sequences... -
Page 404: Recording Chord Sequences
394| RecordingtheChordSequences Recording Chord Sequences You can record a Chord Sequence, that can then be saved to the dedicated library or in the selected User Style. The new Chord Sequence can then be used with any other Style. Please note that recording a new sequence will delete the exiting one (if any). Prepare recording ▪... - Page 405 RecordingChordSequences |395 At this point, you can start recording in one of two ways: If the SYNCHRO START indicator is turned off, play the first chord of the > sequence, and keep it held. Then press the PLAY/STOP ( button to start recording.
-
Page 406: Saving A Chord Sequence
396| RecordingtheChordSequences Saving a Chord Sequence You can save your Chord Sequences into the dedicated library, or as the Chord Sequences inside a User Style. Saving Chord Sequences to the library The library is where you organize the Chord Sequences by type and category, independently from a Style or SongBook Entry. - Page 407 SavingaChordSequence |397 Save Chord Sequence dialog will appear. If the selected Style is a Factory one, and you can’t save on it, you will only be allowed to save into the Chord Sequence Library. Chord Sequence file path Chord Sequence name Touch to open the Select window and choose a target...
- Page 408 398| RecordingtheChordSequences Save to a different location ▪ If you want to save to a different folder, touch the To (target location) button in the Save Chord Sequence dialog, and open the Save To window. You can switch between Tile View List View mode by using the Show as List...
- Page 409 SavingaChordSequence |399 To save a new file, don’t touch any of the Chord Sequences in the folder (shown in the right side of the window). On the contrary, if you want to overwrite one of the existing elements, touch it. Press the EXIT button to close the Save To...
- Page 410 400| ...
- Page 413 |403 Video connections...
-
Page 414: 404| Videoconnections
404| Videoconnections Connecting an external display You can connect Pa5X to a TV or video monitor, to read lyrics and chords with your fellow musicians or the audience. Use the VIDEO > HDMI connector to connect Pa5X to a TV set or video monitor. - Page 415 Connectinganexternaldisplay |405 Go to the Video Out page ▪ If it is off, turn the instrument on. Go to the Settings > Menu > Audio/Video > Video Out page. Check if the monitor is recognized ▪ When the monitor is recognized, its name appears in the Monitor line.
- Page 416 406| Videoconnections Set the colors ▪ In the same page, use the Colors menu to choose the preferred set of colors > for the lyrics and the background. Colors Meaning 1...5 Colorset.Trythemtofindtheoneyoufeelmostcomfortablewith. Choose what to display ▪ In the same page, use the Mode menu to choose what to show in the video >...
-
Page 417: Installing The Options
|407 Installing the options... -
Page 418: Assembling The Music Stand
Assembling the music stand without the amplification bar installed Insert the music stand into the dedicated guide on the back of Pa5X, as shown in the illustration. Freely adjust the music stand, by sliding it to the left or the right of the stan-... - Page 419 Assemblingthemusicstand |409 Assembling the music stand with the amplification bar installed When the (optional) PaAS amplification system is installed, make the music > stand rest over the nylon supports in front of the PaAS, as shown in the illustra- tion.
-
Page 420: Replacing The Clock Battery
Precautions Installation of the battery is done at the user’s own risk. KORG will assume > no responsibility for any data loss, damage or injury resulting from its improper installation or use. - Page 421 Replacingtheclockbattery |411 Installation For installation, you will need a cross-point screwdriver (not supplied). Disconnect the instrument from the AC power. From the back of the instrument, use a cross-point screwdriver to unscrew the fixing screw (a). ⓐ ⓑ Remove the cover (b) of the expansion slot by making it rotate from the top, and keep it apart.
- Page 422 412| Installingtheoptions By pulling the attached tab (c), remove the exhausted battery (d) from the battery slot, being very careful not to let it fall inside the instrument. If the tab is not preset, use your fingernail to slightly lift and extract the battery. ⓒ...
- Page 423 Replacingtheclockbattery |413 Replace the cover (b) to the original position, making the plastic flaps in its lower side slip under the metal casing of the instrument, as shown in the illustra- tion. ⓑ Rotate the cover (b) of the expansion slot so that its upper side fit the back of the instrument.
- Page 424 414| Installingtheoptions Attach the cover to the back of the instrument by fastening the fixing screw (a) with the cross-point screwdriver. ⓐ When the installation is finished, connect the power cord, and switch the in- strument on again. Go to the Settings >...
-
Page 425: Installing A Microsd Card
FAT32 Format utility. Precautions Installation of the microSD card is done at the user’s own risk. KORG will as- > sume no responsibility for any data loss, damage or injury resulting from its im- proper installation or use. - Page 426 416| Installingtheoptions Installation For installation, you will need a cross-point screwdriver (not supplied). Disconnect the instrument from the AC plug. From the back of the instrument, use a cross-point screwdriver to unscrew the fixing screw (a). ⓐ ⓑ Remove the cover (b) of the expansion slot by making it rotate from the top, and keep it apart.
- Page 427 InstallingamicroSDcard |417 If a card is already inserted in one of the slots, remove it. Push on the upper (c) or lower (d) microSD card already installed in the slot to unlock it, and remove it, being very careful not to let it fall inside the instrument. Note: The upper slot (c) is high-speed, while the lower one (d) is normal speed.
- Page 428 418| Installingtheoptions Replace the cover (b) to the original position, making the plastic flaps in its lower side slip under the metal casing of the instrument, as shown in the illustra- tion. ⓑ Rotate the cover (b) of the expansion slot so that its upper side fit the back of the instrument.
- Page 429 InstallingamicroSDcard |419 Attach the cover to the back of the instrument by fastening the fixing screw (a) with the cross-point screwdriver. ⓐ When the installation is finished, connect the power cord, and switch the in- strument on again. Access the microSD card as any other external storage device among the Drives.
- Page 430 420| Installingtheoptions...
-
Page 431: Solutions, Specs
|421 Solutions, Specs... -
Page 432: Troubleshooting
422| Solutions,Specs Troubleshooting In case of problems, please check the following list to find a solution. Problem Solution General problems Powerdoesnotturnon Makesurethat(1)thepowercableispluggedintotheoutlet, (2)thecableispluggedintotheconnectoronthebackofthe instrument,(3)andisnotdamaged,(4)therearenoproblems withthemains. IsthePOWERindicatorturnedon? Ifthepowerstilldoesnotturnon,contactyourdealerorthe nearestKORGServiceCenter. Powerdoesnotturnoff PressthePOWERbuttonagainandkeepitpressedforafew seconds.Attheend,thebutton’sindicatorwillturnoff,andthe instrumentwillbesettostandby. Nosound IstheMASTERVOLUMEslidersettoapositionotherthan‘0’? IsajackinsertedintotheHEADPHONESconnector?Unplugit. Checktheconnectionstoyourampormixer. Makesurethatallthecomponentsoftheamplifyingsystem areturnedon. IstheLocalControlparametersettooff(intheSettings>MIDI >GeneralControlspage)?Turniton. IstheAttackparametervalueoftheselectedSoundtoohigh?... - Page 433 Troubleshooting |423 Problem Solution TheselectedStyleorSong MakesurethattheClockparameterissettoInternal(inthe cannotstart Settings>MIDI>GeneralControlspage).Ifyouareusingthe MIDIClockofanotherdevice(likeasequencer),youmustset theMIDIClockparametertoMIDIorUSB,andmakesurethat theexternaldevicetransmitsMIDIClockdata. DoesnotrespondtoMIDI MakesurethattheMIDIorUSBcableisconnectedcorrectly. messages MakesurethattheexternaldeviceistransmittingthroughMIDI channelsenabledtoreceiveinPa5X. MakesurethattheMIDIINFiltersdonotpreventthereception ofmessages. Percussiveinstrumentsare MakesurethattheDrumtrackissettoDrummode(intheHome notplayedcorrectly >TrackControl>Modepage)andtheexternaldevicehasnot transpositionapplied. Abackgroundnoisecan CheckiftheselectedKeyboardSet,StyleorSongdidrecall beheardafterselectinga theeffect‘StereoAnalogRecord’,simulatingthenoiseofaold KeyboardSet,StyleorSong vinylrecording. File related problems Cannotformatadevice CheckiftheUSBcableiscorrectlyconnected. CheckiftheUSBdeviceiscorrectlypowered. Checkifthedeviceisinsertedcorrectly. Checkifthedriveorcardisprotected.Unprotectit. Cannotsavedatatoadevice Checkifthedeviceiscorrectlyformatted. Checkifthedeviceisinsertedcorrectly. Checkifthedriveorcardisprotected.Unprotectit.
-
Page 434: Specifications
424| Solutions,Specs Specifications KORG Pa5X Features Keyboard Pa5X61:61keys(C2–C7)Semi–weightedkeyswithAftertouch Pa5X76:76keys(E1–G7)Semi–weightedkeyswithAftertouch Pa5X88:88keys(A0–C8)HammeractionwithAftertouch Case Aluminumcasewithwoodensidepanels Display 8”WidecapacitivecolorTouchView™TFTdisplay,800x480resolution OperatingSystem UpgradableOperatingSystem SoundGenerator EDS-X(EnhancedDefinitionSynthesis-eXpanded) Multimodefilterswithresonance,3-bandEQforeachtrack Polyphony 160Voices,160Oscillators Effects KeyboardTracks:3InsertEffect;3MasterEffects Style/Song:10InsertEffects;3MasterEffects FinalMasteringEffects:Waves|MaxxAudio®Suite MicProcessor MicProcessorTechnologybyShiftAudio MicSetup:Compressor,EQ,Gate Four-partHarmonizer,Doubler,Filter,Mod,Delay,Reverb,AutoPitch GuitarProcessor Guitarrack(4effect-slots)withstompboxandampsimulation Sounds/DrumKits Factory:Morethan2,200FactorySounds FivemultilayerStereoAcousticPianoswithDamper/BodyResonance, GM/XGSoundSets,morethan130DrumKitsincludingAmbientDrums andRoundRobin-basedDrumKits UserArea:768Sounds,384DrumKits Digital Drawbars: 9 Footages, Percussion, Key On/Off, Leakage,... - Page 435 Specifications |425 KORG Pa5X Features KeyboardSets Factory:Morethan500FactoryKeyboardSets,freelyprogrammable CombinesfourKeyboardSounds,plusEffectsandsettings Libraryaccessiblefromfront-panelbuttons “MySetting”specialKeyboardSet Players PatentedXDSCrossfadeDualPlayerwithX-FaderBalancecontrol CrossfadingbetweenSongsand/orStyles Styles Factory:Morethan600FactoryStyles,freelyprogrammable EightStyleTracks,4KeyboardSetsand4PadsperStyle;Programmable Sounds,EffectsandStyleparameters GuitarMode2,ParallelandFixedNTT(NoteTranspositionTable) StyleRecordandEventEdit StyleElements:3Intros,4Variations,4Fills,1Break,3Endings StyleControls:Play/Stop,SynchroStart,SynchroStop,TapTempo/ Reset,AutoFill,Memory,BassInversion,ManualBass,Bass&Lower Backing,Drum&Bass,IndividualStyleTracksMute,StyletoKeyboard ChordSequencer Factory:Morethan200ChordSequences ChordSequenceRecorder/Player ChordSequencescanbesavedtoStyleandSongBookEntries Songs PatentedXDSCrossfadeDualPlayerwithX-FaderBalancecontrol Supportedformats:MID,KAR,MP3+Lyrics,MP3+G Lyrics,Score,andChorddatacanbedisplayedonscreen,oronexternal videomonitor MarkerswithAdd,Delete,Edit,LoopandAutoScrollfunctions Jukeboxfunction Full-featured,16-trackSequencer,SongEdit MP3Player/ DoubleMP3PlayerandMP3Recorder Recorder RecordsMP3files,includingStyles,MIDISongs,MP3Songs,Keyboard Sounds,Pads,Matrix,Microphone,Guitar,Effects Transpose(+6/-5semitones),TempoChange(±30%) VocalRemover...
- Page 436 426| Solutions,Specs KORG Pa5X Features Pads Factory:Morethan400Pads FourAssignablePads+StopButtons PadRecordfunction ControlSection 9AssignableSliders,9AssignableButtons,StripDisplay;4Preset+1 Usersettings MatrixSection 16MatrixPads,4Presetbuttons Style/SongControls Play/Stop,GoToStart,StyleSelect,SongSelect,Xfader,Tempo+/-, TempoLock,TapTempo/Reset,SynchroStart,SynchroStop,FadeIn/ Out,ChordScan(Lower,Upper),ChordSequence,Memory,AutoFill GeneralControls Master Volume, Octave Transpose, Master Transpose, Dial, Up/+, Down/-,Joystick(Pitch+Modulation),Ribbon,3AssignableSwitches, Search, Shift, Keyboard Sounds On/Off, Split, Ensemble, Rec/Edit, Menu,Exit ScaleControls On-screenQuarterToneandArabicScale,memorizedintheKeyboard Sets;Presetsassignabletoanybuttonorfootswitch ControlInputs DamperPedal;supportshalf-pedalingwiththeoptionalKORGDS-1H...
- Page 437 Specifications |427 KORG Pa5X Features Dimensions Pa5X-88:1,262.0x396.4x146.0mm/49.68”x15.60”x5.74” (WxDxH) Pa5X-76:1,233.1x374.3x126.8mm/48.54”x14.73”x4.99” (withoutmusicstand, displayfullylowered) Pa5X-61:1,021.1x374.3x126.8mm/40.20”x14.73”x4.99” PaAS(optional):980x180x140mm/38.58”x7.08”x5.51” Weight Pa5X-88:20.1kg/44.31lbs Pa5X-76:17.4kg/38.36lbs Pa5X-61:15.1kg/33.29lbs PaAS(optional):5.70kg/12.56lbs Accessories ACPowerCable,MusicStand,QuickGuidemanual Options PaASAmplificationSystem ST-SV1-BKKeyboardStand EXP-2FootController,XVP-10andXVP-20Expression/VolumePedals DS-1HDamperPedal(supportshalf-pedaling) PS-1PedalSwitch,PS-3PedalSwitch VOXV860VolumePedal Appearance and specifications are subject to change without notice due to con- tinuous product development and improvement.
- Page 438 428| ...
- Page 439 DECLARATION OF CONFORMITY (FOR USA) performances may occur. A deterioration that Responsible Party: KORG USA INC. might arise can be a sound signal emitted. This will stop when the electromagnetic dis- Address: 316 SOUTH SERVICE ROAD, MELVILLE turbance ceases.
- Page 440 Address KORG ITALY SpA Via Cagiata, 85 60027 Osimo (AN) Italy www.korg.com © KORG ITALY 2022. ALL RIGHTS RESERVED PART NUMBER: MAN0010162 (E4)