
Related Manuals for Endress+Hauser CleanFit P CPA 472


Summary of Contents for Endress+Hauser CleanFit P CPA 472
- Page 1 CleanFit P CPA 472 BA 223C/07/en/03.00 No. 51502647 Retractable Assembly for Measuring pH/Redox Operating Instructions...
-
Page 3: Table Of Contents
CleanFit P CPA 472 Table of Contents Table of Contents Safety Operation ...... -
Page 4: Safety
• Measuring point faults may only be repaired by authorised and trained personnel. • If faults cannot be repaired, the assembly must be taken out of service and secured against unintentional start-up. • Repairs may only be carried out by the manufacturer or by the Endress+Hauser ser- vice organisation. Endress+Hauser... -
Page 5: Operational Safety
• Inspect screw unions, valves and pipes for leaks or damage on a regular basis. Return If the assembly has to be repaired, please return it cleaned to the Endress+Hauser sa- les centre responsible. Please use the original packaging. Endress+Hauser... -
Page 6: Identification
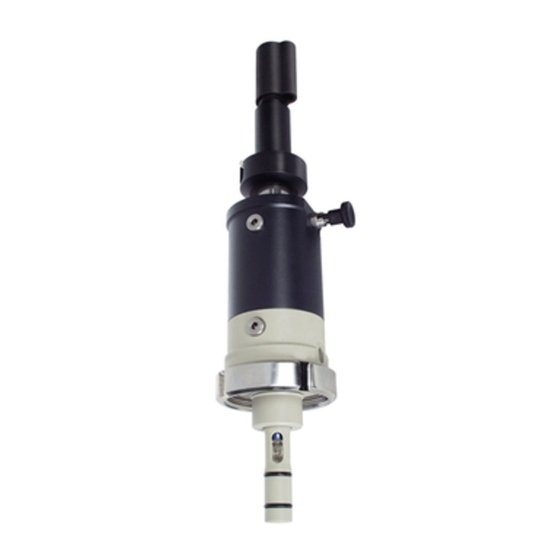
CleanFit P CPA 472 2 Identification Identification Equipment name 2.1.1 Nameplate The assembly variant is recognisable from the order code on the nameplate. Abb. 2.1: Nameplate of CleanFit P CPA 472 Endress+Hauser... - Page 7 CleanFit P CPA 472 2 Identification 2.1.2 Product structure Drive and limit switches Manual drive (not modifiable to pneumatic) Pneumatics without limit switch (retrofittable) Pneumatics with 2 pneumatic limit switches Special design to customer specifications Electrode holder seal Standard version...
-
Page 8: Scope Of Supply
The following items are included in the delivery: • CleanFit P CPA 472 assembly • Operating Instructions BA 223C/07/en In case of any queries please contact your supplier or the Endress+Hauser sales centre responsible (see back page of this Operating Instructionsmanual). Registered trademark ®... -
Page 9: Installation
3. Installing the assembly (see Chapter 3.3). Measuring system A full measuring system comprises: • Retractable assembly CleanFit P CPA 472 • 1 pH combination electrode (120 or 225 mm) • pH/redox measuring transmitter, e.g. Mycom CPM 152, MyPro CPM 431, Liquisys M CPM 223/253 •... -
Page 10: Installation Conditions
CleanFit P CPA 472 3 Installation Installation conditions 3.2.1 Dimensions Abb. 3.2: (left): Dimensions of CPA 472, short version (for electrode length of 120 mm) Abb. 3.3: (right): Dimensions of CPA 472, long version (for electrode length of 225 mm) - Page 11 CleanFit P CPA 472 3 Installation Abb. 3.4: Dimensions of CPA 472, short version, with 225 mm liquid KCl electrode CeraLiquid P CPS 41 (with hose connection for refilling with KCl) Endress+Hauser...
- Page 12 CleanFit P CPA 472 3 Installation 3.2.2 Installation location/position The CPA 472 assembly is designed for installation on tanks or pipes. Suitable connections must be available. Hinweis! It is imperative to maintain an installation angle of min. 15°. Abb. 3.5: Installation examples: The minimum installation angle is 15° to the horizontal.
-
Page 13: Installation
CleanFit P CPA 472 3 Installation Installation Abb. 3.7: Overview of mounting parts of CPA 472 3.3.1 Installing the electrode Hinweis! • Before installing a new electrode, make sure that the electrode shaft is fitted with O- ring B and thrust collar A and that the protection cap is removed. - Page 14 CleanFit P CPA 472 3 Installation Gel electrode 1. Pull lifting tube completely into assembly (in »Maintenance« position, see Fig. 3.7) 2. Turn stop bolt lock through 90° so that plastic grooves are located above the recesses. 3. Turn lifting tube clockwise until stop bolt lock engages.
- Page 15 CleanFit P CPA 472 3 Installation KCl electrode 1. Pull lifting tube fully into assembly (in »Maintenance« position, see Fig. 3.7) 2. Turn stop bolt lock through 90° so that plastic grooves are located above the recesses. 3. Turn lifting tube clockwise until stop bolt lock engages.
- Page 16 CleanFit P CPA 472 3 Installation 3.3.2 Water connection (only on version with rinse connection) Connect the water supply to the rinse connections with internal thread provided (see Fig. 3.7). One connection is for the water inlet, the other is the water outlet. Make sure that the discharge is free and pressureless.
- Page 17 CleanFit P CPA 472 3 Installation 3.3.4 Connecting the pneumatic limit switch (only when equipped accordingly) Abb. 3.13: Pneumatic limit switch (1 = input, 2= output) The lower limit switches are for the »Measurement« function and the upper switches for the »Maintenance«...
- Page 18 G 1¼ external thread, Tri-Clamp 2", flange DN 50, flange ANSI 2", NPT 1" external thread, grooved nut Rd 78 Abb. 3.15: Existing process connections for the CleanFit P CPA 472 assembly The immersion depth is specified in each case (long assembly version in brackets)
-
Page 19: Operation
CleanFit P CPA 472 4 Operation Operation The assembly stop bolt lock arrests the lifting tube. Its operation is described in the two figures below: Abb. 4.1: Release stop bolt lock: Remove stop bolt and turn through 90° so that the plastic grooves rest on the metal edge. -
Page 20: Cpa 472 In Pneumatic Mode
CleanFit P CPA 472 4 Operation »Maintenance« process • Release stop bolt lock catch. • Pull lifting tube completely into assembly (in »Maintenance« position, see Fig. 3.7) • Arrest electrode holder in this position with the stop bolt lock. • Carry out maintenance work (see Chapter 5) CPA 472 in pneumatic mode Operating the pneumatic version depends on the control fitted. -
Page 21: Maintenance
CleanFit P CPA 472 5 Maintenance Maintenance Warnung! Risk of injury! Before starting maintenance work on the assembly, make sure that the process line and the tank are depressurised, empty and rinsed. Move the assembly to the »Maintenance« position and arrest it using the stop bolt lock (see Fig. 4.2). -
Page 22: Calibration
CleanFit P CPA 472 5 Maintenance Selecting cleaning agents The selection of cleaning agent depends on the type of fouling. The most frequent fou- ling and the associated cleaning agents are listed in the table below: Type of contamination Cleaning agent... - Page 23 CleanFit P CPA 472 5 Maintenance Calibration with electrode removed Hinweis! • The calibration times depend on the process conditions and the measuring medium. • Do not allow electrodes to stand in distilled water. • Do not allow electrodes to stand dry.
-
Page 24: Repairs
CleanFit P CPA 472 5 Maintenance Repairs The CPA 472 retractable assembly largely requires very little maintenance. The follo- wing repair work is needed to ensure reliable operation: • Replace damaged assembly parts. • Keep O-rings and sealing surfaces on the assembly free of dirt. -
Page 25: Accessories
CleanFit P CPA 472 6 Accessories Accessories Endress+Hauser offers the following accessories specially designed for the CPA 472 retractable assemblies: Connection accessories • Weld-on connections G1¼ internal thread, PP; Order No.: 51502809 G1¼ internal thread, PVDF; Order No: 51502810 Rd 78 external thread, PP; Order No: 51502811 Rd 78 external thread, PVDF;... -
Page 26: Control Of Retractable Assembly During Cleaning / Calibration
CleanFit P CPA 472 6 Accessories Control of retractable assembly during cleaning / calibration • Autoclean CPC 20 Automatic cleaning control for CleanFit retractable assemblies. Control cabinet with pneumatic valves, switches for position feedback signal, terminal strip for status sig- nals. -
Page 27: Technical Data
CleanFit P CPA 472 7 Technical Data Technical Data General specifications Manufacturer Endress+Hauser Product name CleanFit P CPA 472 Ambient conditions Ambient temperature (nominal operating conditions) > 0°C! Process conditions Process temperature range 0 ... 90°C (dependent on selected material and pro-... - Page 28 CleanFit P CPA 472 7 Technical Data Pressure-temperature chart Abb. 7.1: Pressure-temperature chart for the assembly CPA 472 Subject to modifications. Endress+Hauser...
- Page 29 CleanFit P CPA 472 Index Index Manual mode ....... 17 Measurement, manual mode .
- Page 31 Tel. +55 (11) 50313455, Fax (11) 50313067 Tel. +60 (3) 7334848, Fax (3) 7338800 Belorgsintez Poland Canada Pakistan Minsk Endress+Hauser Polska Sp. z o.o. Endress+Hauser (Canada) Ltd. Speedy Automation Tel. +375 (172) 263166, Fax (172) 263111 Raszyn Karachi Burlington / Ontario Belgium / Luxembourg Tel.