Table of Contents
Advertisement
Installation Instructions
Low Leak Economizer
Precedent™ Packaged Rooftop Units
6 to 25 Tons with Symbio™
Model Number:
FIAECON102*
FIAECON103*
FIAECON203*
Only qualified personnel should install and service the equipment. The installation, starting up, and servicing of
heating, ventilating, and air-conditioning equipment can be hazardous and requires specific knowledge and training.
Improperly installed, adjusted or altered equipment by an unqualified person could result in death or serious injury.
When working on the equipment, observe all precautions in the literature and on the tags, stickers, and labels that are
attached to the equipment.
November 2022
Used With:
Downflow - T/YS*072-150
Downflow - T/YS*180-300, W/D/G*150-300
Horizontal - T/YS*180-300, W/D/G*150-300
ACC-SVN264B-EN
SAFETY WARNING
Advertisement
Table of Contents

Related Manuals for Trane FIAECON102 Series


Summary of Contents for Trane FIAECON102 Series
- Page 1 Installation Instructions Low Leak Economizer Precedent™ Packaged Rooftop Units 6 to 25 Tons with Symbio™ Model Number: Used With: FIAECON102* Downflow - T/YS*072-150 FIAECON103* Downflow - T/YS*180-300, W/D/G*150-300 FIAECON203* Horizontal - T/YS*180-300, W/D/G*150-300 SAFETY WARNING Only qualified personnel should install and service the equipment. The installation, starting up, and servicing of heating, ventilating, and air-conditioning equipment can be hazardous and requires specific knowledge and training.
- Page 2 When working with or around hazardous chemicals, these compounds have the same potential impact to the ALWAYS refer to the appropriate SDS and OSHA/GHS environment. Trane advocates the responsible handling of all (Global Harmonized System of Classification and refrigerants-including industry replacements for CFCs and Labeling of Chemicals) guidelines for information on HCFCs such as saturated or unsaturated HFCs and HCFCs.
- Page 3 Copyright This document and the information in it are the property of Trane, and may not be used or reproduced in whole or in part without written permission. Trane reserves the right to revise this publication at any time, and to make changes to its content without obligation to notify any person of such revision or change.
-
Page 4: Table Of Contents
Table of Contents General Information - FIAECON102* ..5 Inspection ......5 Parts List . -
Page 5: General Information - Fiaecon102
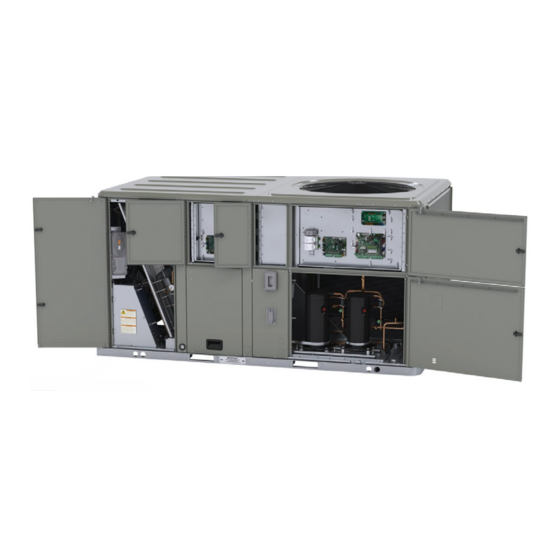
General Information - FIAECON102* This section covers installation of low leak economizers for 6 to 12.5 ton downflow units in the B and C cabinet (digit 39 = B,C). Inspection 1. Unpack all components of the kit. 2. Check carefully for shipping damage. If any damage is found, report it immediately, and file a claim against the transportation company. -
Page 6: Installation - Fiaecon102
Installation - FIAECON102* Table 2. Parts list WARNING Item Description Hazardous Voltage! Unit - seal between economizer and unit Failure to disconnect power before servicing could Top of economizer - seal between economizer and top of unit or result in death or serious injury. Disconnect all electric between economizer and top filler panel power, including remote disconnects before servicing. -
Page 7: Powered Exhaust
Installation - FIAECON102* 8. Verify wire harness is clear of gears, doors, and any sharp Figure 4. Barometric relief hood edges of metal. 9. Hook up electrical as described in literature Filler Panel ACC-SVN57*-EN. Hood Triangle Figure 6. Powered exhaust Hood Top FA Hood Front Support... -
Page 8: Economizer Wiring
Installation - FIAECON102* Minimum Position Setting Important: Verify holes in copper tube are facing down. Unit will not sense smoke if holes are not facing down. 1. Apply power to the unit. 2. Using Service Test mode, through the Symbio™ 700 or Figure 8. -
Page 9: General Information - Fiaecon103
General Information - FIAECON103* This section covers installation of low leak economizers for 6. Notify the carrier’s terminal of damage immediately by 12.5 to 25 ton downflow units in the D cabinet (digit 39 = D). phone and by mail. Request an immediate joint inspection of the damage by the carrier and the consignee. - Page 10 Field only parts (Carton B): Outside air block-off Return air block-off, back subassembly Return air block-off, front subassembly Controls harness Field supplied part: Tube sealant - Trane recommends Sikaflex 221 (SEL00439) (a) These parts are already installed in the factory installed option. ACC-SVN264B-EN...
-
Page 11: Installation - Fiaecon103
Installation - FIAECON103* Figure 12. Unpacked damper assembly with carton A CAUTION and B Heavy Object! Failure to follow instructions below could result in Outside Air Damper severe injury and equipment damage. Economizer Carton A weighs over 50 pounds and should be installed by two people. - Page 12 Installation - FIAECON103* Figure 14. Outdoor air damper assembly installation Figure 17. Outside air block-off panel installation Outdoor Air Damper Assembly Outdoor Air Damper Assembly Secure To Return Duct Flange 6. Refer to the barometric relief accessory literature (ACC-SVN156*-EN) and install the barometric block-off panels and gasket.
- Page 13 Installation - FIAECON103* 11. Attach the rear filter angle bracket to the unit with four Figure 19. Actuator harness routing screws along the bottom of the damper assembly. The surface between the two parts has gasket pre-installed on Route Actuator Controls Harness the bracket.
- Page 14 Installation - FIAECON103* Figure 22. Diverter panel installation to end panel Figure 24. Back panel and barometric relief parts Horizontal Return Block-off Panel Unit End Panel Barometric Relief Assembly Diverter Panel Note: The back panel will be replaced with the barometric 18.
-
Page 15: General Information - Fiaecon203
• Identification label • Installation instructions Left hood panel Outside air block-off Filter side angle bracket Controls harness Filter rear angle bracket Field supplied part: Hood front support bracket Tube sealant - Trane recommends Sikaflex 221 (SEL00439) Filter top support bracket ACC-SVN264B-EN... -
Page 16: Installation - Fiaecon203
Installation - FIAECON203* Note: Horizontal duct conversion kit is needed for this CAUTION installation and is not included in the low leak economizer assembly. Heavy Object! 1. Remove the unit end panel and both (front and rear) fresh Failure to follow instructions below could result in air access panels from the unit and set them aside. - Page 17 Installation - FIAECON203* 8. Attach the rear filter angle bracket to the unit with four Figure 28. Harness routing screws along the bottom of the damper assembly. The surface between the two parts has gasket pre-installed on the bracket. 9. Attach the filter side angle brackets to both triangle hood panels using two screws each.
- Page 18 Installation - FIAECON203* 16. Install the access panel on the front of the unit. Figure 31. Diverter panel installation 17. Using field supplied silicone sealant, seal all seams, cracks and gaps around the back panel and vertical edge of the hood panels.
-
Page 19: Differential Dry Bulb
Differential Dry Bulb Parts List Figure 35. Wire harness routing Table 5. Parts list Description Control harness Temperature sensor Differential Control Harness Bushing Molded grommet Wire tie Installation instructions Pop-in Ties For Wire Routing Installation 1. Insert the molded grommet into the barometric relief block-off panel. - Page 20 For more information, please visit trane.com or americanstandardair.com. Trane and American Standard have a policy of continuous product and product data improvement and reserve the right to change design and specifications without notice. We are committed to using environmentally conscious print practices.