
Related Manuals for Jet XACTA Fence II Homeshop 30/52


Summary of Contents for Jet XACTA Fence II Homeshop 30/52
- Page 1 Owner's Manual XACTA Fence II Homeshop 30/52 ® 427 New Sanford Road LaVergne, Tennessee 37086 Part No. M-708928Z Ph.: 800-274-6848 Revision D1 03/2019 www.jettools.com Copyright © 2015 JET...
-
Page 2: Warranty And Service
JET sells through distributors only. The specifications listed in JET printed materials and on official JET website are given as general information and are not binding. JET reserves the right to effect at any time, without prior notice, those alterations to parts, fittings, and accessory equipment which they may deem necessary for any reason ®... -
Page 3: Table Of Contents
Parts for the XACTA Fence II Homeshop 30/52 Leg Assembly ..............15 The specifications in this manual are given as general information and are not binding. JET reserves the right to effect, at any time and without prior notice, changes or alterations to parts, fittings, and accessory... -
Page 4: Warnings
5. Do not use this Table Saw on which the XACTA Fence II is used for other than its intended use. If used for other purposes, JET disclaims any real or implied warranty and holds itself harmless from any injury that may result from that use. - Page 5 26. Turn off the machine before cleaning. Use a brush or compressed air to remove chips or debris — do not use your hands. 27. Do not stand on the machine. Serious injury could occur if the machine tips over. 28.
-
Page 6: Unpacking
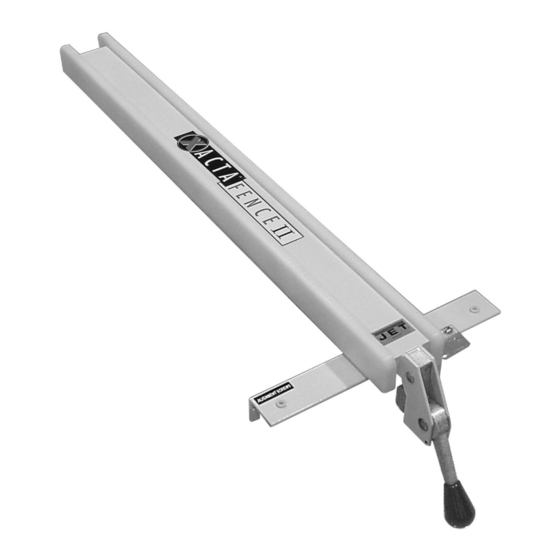
Unpacking Open shipping cartons and check that all parts are intact. Report any damage immediately to your distributor. Read the instruction manual thoroughly assembly, alignment, maintenance instructions. Contents of the Shipping Containers Box One: 1 XACTA Fence II 1 Lock Lever Knob Box Two: 1 Front Rail 1 Back Rail... -
Page 7: Installation
Adjustable square Hammer (or rubber mallet) Straight edge The following instructions are for installing the XACTA Fence II and Rail System on JET Models JWCS-10 and JWTS-10 series table saws. Front Rail Installation Referring to Figures 1: 1. With a 5/16” drill bit, drill out the two threaded holes on the table front (C). -
Page 8: Back Rail Installation
Back Rail Installation 1. Locate the back rail which is 1-1/2" x 1-1/2" with holes running along one side only. The height of the back rail when attached to the saw is not critical. 2. Align the holes in the back rail to the holes in the table top, as shown in Figure 4. - Page 9 3. Tap down the extension table at various points along its edge where it meets the saw table, until it is level with the saw table (Figure 7). As one part of the edge becomes level with the table, tighten the clamp on that side. Then move to the other side and repeat, until the full length of the edge is level with the saw table.
-
Page 10: Guide Tube
Guide Tube Referring to Figure 11: The guide tube (A) is placed on top of the front rail (B) and is mounted with the scale facing toward the operator. 1. Align the holes in the bottom of the guide tube (A) with the holes in the front rail (B). 2. -
Page 11: Fence Adjustments
Fence Adjustments Note: Fence adjustments should be performed in the order given. Leveling Fence to the Saw Table Figure 14 1. Place the fence on the table and lock it. 2. View the fence from the left side of the saw (Figure 14). -
Page 12: 90 To The Table Adjustment
5. Measure the distance between the saw blade and the inside of the fence. The XACTA Fence II Homeshop 30/52 Fence and 6. Adjust the cursor (C, Fig. 17) to read the Rail System can be installed on a non-JET table distance just measured and tighten the cursor saw. -
Page 13: Parts
Having the Model Number and Serial Number of your machine available when you call will allow us to serve you quickly and accurately. Parts for XACTA Fence II Homeshop 30/52 Fence Assembly Index No. Part No. -
Page 14: Parts For Xacta Fence Ii Homeshop 30/52 Rail Assembly
Parts for XACTA Fence II Homeshop 30/52 Rail Assembly Index No. Part No. Description Size ....708929Z ....XACTA 30” Homeshop Rail Set (includes #1-11) ............708952Z ....XACTA 52” Homeshop Rail Set (includes #1-11) ........1 ....HF2-201 ....Front Fence Rail - Standard ..............1 .... -
Page 15: Parts For The Xacta Fence Ii Homeshop 30/52 Leg Assembly
Parts for the XACTA Fence II Homeshop 30/52 Leg Assembly Index No. Part No. Description Size 1 ....XF2-301 ....Leg ......................2 2 ....TS-0561031 ..... Hex Nut ..............3/8”-16......2 3 ....XF2-303 ....Adjusting Foot ..................2 4 .... - Page 16 427 New Sanford Road LaVergne, Tennessee 37086 Phone: 800-274-6848 www.jettools.com...