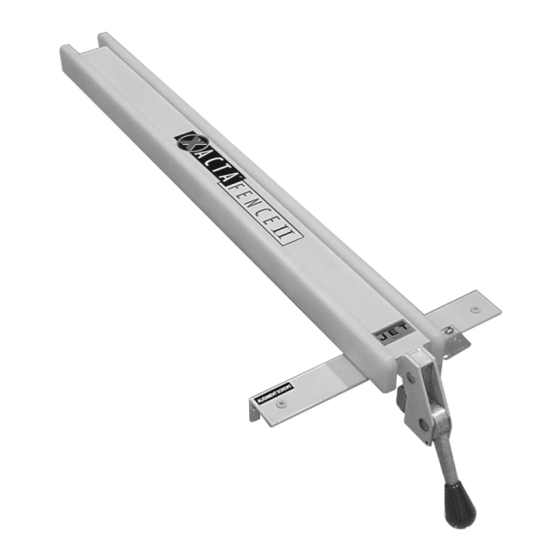
Summary of Contents for Jet JWCS-10
- Page 1 This Manual is Bookmarked Owner's Manual ® XACTA Fence II Homeshop 30/52 WMH TOOL GROUP 2420 Vantage Drive Elgin, Illinois 60123 Part No. M-708928Z Ph.: 800-274-6848 Revision B 03/06 www.wmhtoolgroup.com Copyright © WMH Tool Group...
-
Page 2: Warranty And Service
WARRANTY AND SERVICE WMH Tool Group, Inc., warrants every product it sells. If one of our tools needs service or repair, one of our Authorized Service Centers located throughout the United States can give you quick service. In most cases, any of these WMH Tool Group Authorized Service Centers can authorize warranty repair, assist you in obtaining parts, or ®... -
Page 3: Table Of Contents
90° to the Table Adjustment ... 12 Cursor Adjustment ... 12 Clamping Pressure Adjustment ... 11 Rail Installation on a non-JET Table Saw ... 12 Trouble-Shooting for XACTA Fence II Homeshop 30/52... 12 Parts ... 13 Ordering Replacement Parts... 13 Parts for XACTA Fence II Homeshop 30/52 Fence Assembly ... -
Page 4: Warnings
Table Saw, do not use until proper training and knowledge have been obtained. 5. Do not use this Table Saw on which the XACTA Fence II is used for other than its intended use. If used for other purposes, WMH Tool Group disclaims any real or implied warranty and holds itself harmless from any injury that may result from that use. - Page 5 The right tool will do the job better and safer. 26. Use recommended accessories; improper accessories may be hazardous. 27. Maintain tools with care. Keep saw blades sharp and clean for the best and safest performance. Follow instructions for lubricating and changing accessories.
-
Page 6: Unpacking
Unpacking Open shipping cartons and check that all parts are intact. Report any damage immediately to your distributor. Read the instruction manual thoroughly assembly, alignment, instructions. Contents of the Shipping Containers Box One: 1 XACTA Fence II 1 Lock Lever Knob Box Two: 1 Front Rail 1 Back Rail... -
Page 7: Installation
Straight edge The following instructions are for installing the XACTA Fence II and Rail System on JET Models JWCS-10 and JWTS-10 series table saws. Front Rail Installation Referring to Figures 1: 1. With a 5/16” drill bit, drill out the two threaded holes on the table front (C). -
Page 8: Back Rail Installation
2. Align the holes in the back rail to the holes in the table top, as shown in Figure 4. 3. Secure the back rail to the holes in the saw table with four 1/4-20x 1-1/2 hex cap screws, eight 1/4 flat washers, four 1/4 lock washers, and four 1/4 hex nuts as shown in Figure 5. - Page 9 3. Tap down the extension table at various points along its edge where it meets the saw table, until it is level with the saw table (Figure 7). As one part of the edge becomes level with the table, tighten the clamp on that side. Then move to the other side and repeat, until the full length of the edge is level with the saw table.
-
Page 10: Guide Tube
XACTA Fence II as shown in Figure 12. The lock lever has three functional positions as shown in Figure 13: • The upright position permits mounting and removal of fence from the saw. • The unlock position permits easy fence positioning. •... -
Page 11: Fence Adjustments
Leveling Fence to the Saw Table 1. Place the fence on the table and lock it. 2. View the fence from the left side of the saw (Figure 14). Look for the space between the table and the fence bottom to be equal along the entire length of the fence (A, B, Fig. -
Page 12: 90° To The Table Adjustment
90° to the Table Adjustment 1. Place the fence on the saw table and lock it. 2. Place a square (A, Fig. 17) on the table next to the fence. The fence should be 90° to the table. 3. If adjustment is necessary, unlock the fence, and turn one of the two nylon adjustment screws (B, Fig. -
Page 13: Parts
Parts Ordering Replacement Parts To order parts or reach our service department, call 1-800-274-6848 between 7:30 a.m. and 5:30 p.m. (CST), Monday through Friday. Having the Model Number and Serial Number of your machine available when you call will allow us to serve you quickly and accurately. Parts for XACTA Fence II Homeshop 30/52 Fence Assembly Index No. -
Page 14: Parts For Xacta Fence Ii Homeshop 30/52 Rail Assembly
Index No. Part No. 1 ...HF2-201 ...Front Fence Rail - Standard..1 ...HF2-201A...Front Fence Rail - Long Table ..1 2 ...TS-0050071 ...Hex Head Cap Screw (30" Table)... 1/4”-20 x 1-1/2” ... 12 ...TS-0050071 ...Hex Head Cap Screw (52" Table)... 1/4”-20 x 1-1/2” ... 14 3 ...TS-0680021 ...Flat Washer (30"... -
Page 15: Parts For The Xacta Fence Ii Homeshop 30/52 Leg Assembly
Parts for the XACTA Fence II Homeshop 30/52 Leg Assembly Index No. Part No. Description Size 1 ...XF2-301 ...Leg ..2 2 ...TS-0561031 ...Hex Nut ... 3/8”-16... 2 3 ...XF2-303 ...Adjusting foot ..2 4 ...TS-1533052 ...Machine Screw ... M5×16... 8 Appendix –... - Page 16 WMH Tool Group 2420 Vantage Drive Elgin, Illinois 60123 Phone: 800-274-6848 www.wmhtoolgroup.com...


