
Related Manuals for Samsung AC BNJDCH Series


Summary of Contents for Samsung AC BNJDCH Series
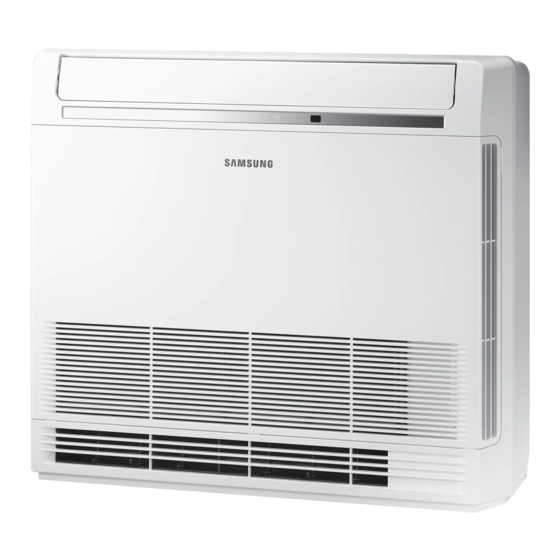
- Page 1 Air conditioner Installation manual BNJDCH • Thank you for purchasing this Samsung air conditioner. • Before operating this unit, please read this manual carefully and retain it for future reference.
-
Page 2: Table Of Contents
Contents Safety Information Installation Procedure Step 1 Checking and preparing accessories Step 2 Choosing the installation location Step 3 Installing the unit Step 4 Purging inert gas from the indoor unit Step 5 Connecting the assembly pipes to the refrigerant pipes Step 6 Cutting and flaring the pipes Step 7 Performing the gas leak test Step 8 Insulating the refrigerant pipes... -
Page 3: Safety Information
• This manual explains how to install an indoor unit with a split system with two SAMSUNG units. The use of other types of units with different control systems may damage the units and invalidate the warranty. The manufacturer shall not be responsible for damages arising from the use of non compliant units. - Page 4 Safety Information Installing the unit Power supply line, fuse or circuit breaker WARNING WARNING IMPORTANT: When installing the unit, always remember to connect first the refrigerant tubes, then the electrical lines. • Always make sure that the power supply is compliant with •...
-
Page 5: Installation Procedure
CAUTION Do not install the air conditioner in following places. • A location where there is mineral oil or arsenic acid. Resin, Make sure that you earth the cables. flame, or accessories may drop or water may leak. The heat exchanger capacity may decrease or the air conditioner may •... -
Page 6: Step 2 Choosing The Installation Location
Installation Procedure Step 2 Choosing the installation location Indoor unit installation requirement • This unit has to be installed as floor type only. General requirements for installation location • There must be no obstacles near the air inlet and outlet. •... - Page 7 Indoor unit dimensions Unit:inch(mm) 7 .83(199) 1. 1 8(30) 3.78(96) 0.63(16) 1.89(48) 28.35(720) 2.56(65) 3.50(89) Model Name AC009/012BNJDCH AC015/018BNJDCH Ø1/4(6.35) Liquid pipe connection inch (mm) Ø3/8(9.52) Ø1/2(12.70) Gas pipe connection inch (mm) Drainpipe connection inch (mm) ID : Ø0.47(12) ; OD : Ø0.71(18) Power supply connection inch (mm) •...
-
Page 8: Step 3 Installing The Unit
Installation Procedure Step 3 Installing the unit 4 The body front should be opened to connect pipes. Remove the 4 screws on the front of the unit and then pull 1 When you install the indoor with side-pipe connection, please the lower section of the unit out as shown below. -
Page 9: Step 4 Purging Inert Gas From The Indoor Unit
7 Hanging the indoor unit on the Bracket Hanger, then fix the Step 5 Connecting the assembly pipes to Indoor Unit by using 4 Screws. the refrigerant pipes • Case 1. Installing on the floor: You must secure the unit to There are two refrigerant pipes of different diameters : the wall using 4 screws to ensure that the unit does not fall. -
Page 10: Step 6 Cutting And Flaring The Pipes
Installation Procedure 2 Use insulation that is thick enough to cover the refrigerant Step 6 Cutting and flaring the pipes pipe to prevent condensate water on the outside of pipe and Make sure that you have the required tools available. (pipe cutter, to ensure system efficiency. -
Page 11: Step 7 Performing The Gas Leak Test
5 Check that the flaring is correct, referring to the illustrations Step 8 Insulating the refrigerant pipes below for examples of incorrect flaring. Once you have checked that there are no leaks in the system, you can insulate the piping and hose. To avoid condensation problems, place Acrylonitrile Butadien Rubber separately around each refrigerant pipe. - Page 12 Installation Procedure 3 Finish wrapping insulating tape around the rest of the pipes 5 Select the insulation of the refrigerant pipe. leading to the outdoor unit. • Insulate the gas side and liquid side pipe, noting the 4 The pipes and electrical cables connecting the indoor unit insulation thickness that must differ according to the pipe with the outdoor unit must be fixed to the wall with suitable size.
-
Page 13: Step 9 Installing The Drain Hose And Drain Pipe
Step 9 Installing the drain hose and drain 6-ways for drain hose and drain pipe connection pipe When installing the drain hose for the indoor unit, check if condensation draining is adequate. When passing the drain hose through the 2.56 inch hole drilled in the wall, check the (65mm) following:... -
Page 14: Step 11 Connecting The Power And Communication Cables
Installation Procedure Step 11 Connecting the power and Indoor power supply communication cables Power supply Max/Min(V) Indoor power cable CAUTION ±10% 208 to 230V, 60 Hz 3 wires • Always remember to connect the refrigerant pipes before Communication cable performing the electric connections. When disconnecting the system, always disconnect the electric cables before disconnecting the refrigerant pipes. -
Page 15: Step 12 Optional: Extending The Power Cable
Step 12 Optional: Extending the power 3 Insert both sides of core wire of the power cable into the connection sleeve. cable • Method 1: Push the core wire into the sleeve from both sides. 1 Prepare a compressor and the following tools. •... - Page 16 Installation Procedure 6 Wrap it with the insulation tape twice or more and position your contraction tube in the middle of the insulation tape. Method 2 Method 1 Insulation tape Insulation tape 1.57 inch (40 mm) 1.38 inch (35 mm) 7 After tube contraction work is completed, wrap it with the insulation tape to finish.
-
Page 17: Step 13 Optional : Setting The Emergency Temperature Output (Eto) Function
Step 13 Optional : Setting the Emergency Temperature Output (ETO) function Emergency Temperature Output (ETO) function (for the multi system, this function is not supported.) CAUTION • In order to deploy the ETO function, the MIM-B14, an external contact interface module, must be installed in each indoor unit. –... - Page 18 Installation Procedure [Main] [Sub] ETO operation specifications 1 Main indoor unit – Based on the external contact control settings, the main indoor unit decides whether to generate output when an error (indoor unit stop) occurs. – Based on the ETO settings, the main indoor unit decides whether to generate output according to the temperature and time conditions.
-
Page 19: Step 14 Setting The Indoor Unit Addresses And The Installation Options
Step 14 Setting the indoor unit addresses and the installation options • Set the indoor unit address and installation option with a wireless remote controller. Options and address can also be modified using wired controllers or service software. You cannot set both the indoor unit addresses and the installation options at the same time. - Page 20 Installation Procedure Take the steps presented in the following table: Option setting Status 1 Setting SEG2, SEG3 option Press Low Fan button to enter SEG2 value. Press High Fan button to enter SEG3 value. Each time you press the button, will be selected in rotation.
- Page 21 Option setting Status 9 Setting SEG11, SEG12 option Press Low Fan button to enter SEG11 value. Press High Fan button to enter SEG12 value. Each time you press the button, will be selected in rotation. SEG11 SEG12 10 Setting Auto mode Press Mode button to be changed to Auto mode in the OFF status.
- Page 22 Installation Procedure Option setting Status 17 Setting SEG21, SEG22 option Press Low Fan button to enter SEG21 value. Press High Fan button to enter SEG22 value. Each time you press the button, will be selected in rotation. SEG21 SEG22 18 Setting Heat mode Press Mode button to be changed to Heat mode in the OFF status.
- Page 23 Setting the indoor unit addresses Option No. for an indoor unit address: 0AXXXX-1XXXXX-2XXXXX-3XXXXX Before installing an indoor unit, be sure to set an address for the indoor unit by taking the following steps: 1 Make sure that the power is supplied to the indoor unit. If the indoor unit is not plugged in, it must include a power supply. 2 Set an address for each indoor unit using the remote control, according to your air conditioning system plan, by referring to the following table and by following the steps in Common steps for setting the addresses and options on page 19.
- Page 24 Installation Procedure Example) If you want to set as "MAIN: 3, CHANNEL: 1, RMC: B", SEG1 SEG2 SEG3 SEG4 SEG5 SEG6 SEG7 SEG8 SEG9 SEG10 SEG11 SEG12 assign option codes except SEG 1, 7 which are page options. Setting the installation options in a batch Installation option No.
- Page 25 Option SEG7 SEG8 SEG9 SEG10 SEG11 SEG12 Function Page Indication Details Reserved Reserved Reserved Reserved Reserved Indication and details Option SEG13 SEG14 SEG15 SEG16 SEG17 SEG18 Setting the output of Function Page Use of external control Buzzer control Maximum filter usage time extermal control Indication Details...
- Page 26 Installation Procedure Changing the addresses and options individually Example) If you want to set as "MAIN : 3, CHANNEL : 1, RMC : B", Option SEG1 SEG2 SEG3 SEG4 SEG5 SEG6 The tens’ digit of an The unit digit of an The option mode you Explanation PAGE...
-
Page 27: Appendix
Troubleshooting • If an error occurs during the operation, one or more LED flickers and the operation is stopped except the LED. • If you re-operate the air conditioner, it operates normally at first, then detect an error again. LED Display Abnormal condition Error code Error on indoor temperature sensor (Short or Open)