
Related Manuals for Samsung AC BNNDCH Series


Summary of Contents for Samsung AC BNNDCH Series
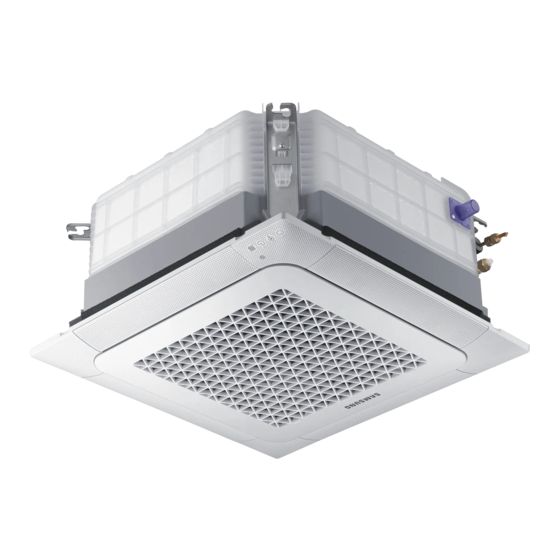
- Page 1 Air conditioner Installation manual AC***BNNDCH • Thank you for purchasing this Samsung air conditioner. • Before operating this unit, please read this manual carefully and retain it for future reference.
-
Page 2: Table Of Contents
Contents Safety Information Installation Procedure Step 1 Checking and preparing accessories Step 2 Choosing the installation location Step 3 Optional: Insulating the body of the indoor unit Step 4 Installing the indoor unit Step 5 Purging inert gas from the indoor unit Step 6 Cutting and flaring the pipes Step 7 Connecting the assembly pipes to the refrigerant pipes Step 8 Performing the gas leak test... -
Page 3: Safety Information
• The packing material and exhaust batteries • This manual explains how to install an indoor of the remote controller(optional) must be unit with a split system with two SAMSUNG disposed of in accordance with current laws. units. The use of other types of units with... - Page 4 Safety Information • The air conditioner contains a refrigerant • After completing the installation, always that has to be disposed of as special waste. carry out a functional test and provide At the end of its life cycle, the air conditioner the instructions on how to operate the air must be disposed of in authorized centres conditioner to the user.
- Page 5 CAUTION Power supply line, fuse or circuit breaker Make sure that you earth the cables. • Do not connect the earth wire to the gas pipe, WARNING water pipe, lighting rod or telephone wire. If earthing is not complete, electric shock or fire •...
-
Page 6: Installation Procedure
Installation Procedure Step 1 Checking and preparing Step 2 Choosing the installation accessories location The following accessories are supplied with the indoor unit. The type and uantity may differ, Installation location requirements depending on the specifications. • There must be no obstacles near the air inlet and outlet. - Page 7 Unit:inch(mm) (Celling opening) 22.83~23.03(580~585) 24.41(600) (Suspension position) 19.69(500) 22.5(0.89) 22.64(575) 22.5(0.89) 11.81(300) 22.5(0.89) 22.64(575) 22.5(0.89) 7.87(200) 6.50(165) 9.80(249) Sub duct connection 10.59(269) The sub duct hole is not applicable to the Wind-Free models Model AC009BNNDCH AC012BNNDCH AC018BNNDCH Net dimension inch(mm) 22.64X22.64X9.84 (575X575X250) (W ×...
-
Page 8: Step 3 Optional: Insulating The Body Of The Indoor Unit
Installation Procedure Spacing requirements or more 59.1(1500) 0.67(17) or more 59.1(1500) 0.79(20) Obstruction Step 3 Optional: Insulating the body Unit:inch (mm) of the indoor unit AC009BNNDCH If you install a cassette type indoor unit on the ceiling Model AC012BNNDCH when temperature is over 80.6 °F(27 °C) and humidity is AC018BNNDCH over 80%, you must apply an extra 0.39 inch(10 mm) thick polyethylene insulation or a similar type of insulation to the... -
Page 9: Step 4 Installing The Indoor Unit
Step 4 Installing the indoor unit CAUTION • Make sure that the ceiling is strong enough to support 1 Place the pattern sheet on the ceiling at the spot the weight of the indoor unit. Before hanging the unit, where you want to install the indoor unit. test the strength of each attached suspension bolt. -
Page 10: Step 5 Purging Inert Gas From The Indoor Unit
Installation Procedure Step 5 Purging inert gas from the 3 To prevent any gas from leaking out, remove all burrs at the cut edge of the pipe, using a reamer. indoor unit 4 Slide a flare nut on to the pipe and flare the pipe. The indoor unit comes with nitrogen gas (inert gas) charged at the factory. -
Page 11: Step 7 Connecting The Assembly Pipes To The Refrigerant Pipes
Step 7 Connecting the assembly pipes to Outer Diameter Torque the refrigerant pipes inch N•m lbf.ft There are two refrigerant pipes of different diameters : Ø6.35 14 to 18 10.3 to 13.3 • A smaller one for the li uid refrigerant. Ø9.52 34 to 42 25.1 to 31.0... -
Page 12: Step 8 Performing The Gas Leak Test
Installation Procedure Step 8 Performing the gas leak test CAUTION Pressure check the refrigerant system using high • Be sure to wrap insulation tightly without any gaps. pressure nitrogen in order to detect basic refrigerant 3 Finish wrapping insulating tape around the rest of the leaks. -
Page 13: Step 10 Installing The Drain Hose And Drain Pipe
Insulation type (heating/cooling) Pipe size Pipe Standard [Less than 86°F(30°C), 85%] High humidity [Over 86°F(30°C), 85%] Remarks inch(mm) EPDM, NBR Ø1/4(6.35) to Ø3/8(9.52) Li uid pipe Ø1/2(12.70) to 13 t 13 t Ø3/4(19.05) The internal temperature Ø1/4(6.35) 13 t 19 t is higher than 248°F(120°C). - Page 14 Installation Procedure • If it is necessary to increase the height of the • Install horizontally. drain pipe, install the drain pipe straight within 11.81 inch(300mm) from the drain hose port. If it is Be horizontal raised higher than 21.65 inch(550mm), there may be water leaks.
-
Page 15: Step 11 Performing The Drainage Test
Step 11 Performing the drainage test b When the electric cable connection is completed • Turn on the indoor unit and outdoor unit. 1 Do a leak test at the connection part of the flexible • Operate in the Cool mode. hose and the drian pipe: CAUTION a Connect a general hose to the connection part of... -
Page 16: Step 12 Connecting The Power And Communication Cables
Installation Procedure Step 12 Connecting the power and The indoor unit is powered through the outdoor unit by means of a H05RN-F connection cable (or a more power communication cables model), with insulation in synthetic rubber and a jacket in polychloroprene (neoprene), in accordance with the re uirements specified in the standard EN 60335-2-40. -
Page 17: Step 13 Optional: Extending The Power Cable
Step 13 Optional: Extending the power Tightening torque lbf·ft (kgf • cm) cable M3.5 0.58 to 0.87 (8.0 to 12.0) 1 Prepare the following tools. 0.87 to 1.30 (12.0 to 18.0) • Power supply cords of parts of appliances for outdoor Tools Spec Shape... - Page 18 Installation Procedure 3 Insert both sides of core wire of the power cable into 6 Wrap it with the insulation tape twice or more and the connection sleeve. position your contraction tube in the middle of the insulation tape. • Method 1: Push the core wire into the sleeve from both sides.
-
Page 19: Step 14 Optional : Setting The Emergency Temperature Output (Eto) Function
Step 14 optional : Setting the Emergency Temperature Output (ETO) function Emergency Temperature Output (ETO) function (for the multi system, this function is not supported.) CAUTION • In order to deploy the ETO function, the MIM-B14, an external contact interface module, must be installed in each indoor unit. - Page 20 Installation Procedure [Main] [Sub] ETO operation specifications 1 Main indoor unit – Based on the external contact control settings, the main indoor unit decides whether to generate output when an error (indoor unit stop) occurs. – Based on the ETO settings, the main indoor unit decides whether to generate output according to the temperature and time conditions.
-
Page 21: Step 15 Optional : Led Display Indicator Specifications When Checking Wi-Fi Easy Setup And Wi-Fi Status
Step 15. Optional : LED Display indicator specifications when checking Wi-Fi Easy Setup and Wi-Fi status (This feature can be used when installing single Wi-fi kit) The AR-EH04U wireless remote controller can be used for Easy Setup, checking internet connection status and connecting or disconnecting Wi-Fi. - Page 22 Installation Procedure LED Display Power/ Timed Clean Defrost 4way Cassette Remarks Measure Stop on/off filter AP entry All LED lights are on Check device All LED lights flash Registering All LED lights flash one after devices another Easy Setup All LED lights flash for 3 Connected seconds All LED lights turn off, and...
-
Page 23: Step 16 Setting The Indoor Unit Addresses And The Installation Options
Step 16 Setting the indoor unit CAUTION addresses and the installation options • The total number of available options are 24: SEG1 to SEG24. You cannot set both the indoor unit addresses and the installation options at the same time. •... - Page 24 Installation Procedure Take the steps presented in the following table: Steps Remote control display 1 Set the SEG2 and SEG3 values: a Set the SEG2 value by pressing the (Low Fan) button repeatedly until the value you want to set appears on the remote control display. SEG2 b Set the SEG3 value by pressing the (High Fan) button repeatedly until the...
- Page 25 Steps Remote control display 6 Press the (Mode) button. Fan and On appear on the remote control display. 7 Set the SEG9 and SEG10 values: a Set the SEG9 value by pressing the (Low Fan) button repeatedly until the value you want to set appears on the remote control display. SEG9 b Set the SEG10 value by pressing the (High Fan) button repeatedly until the...
- Page 26 Installation Procedure Steps Remote control display 11 Set the SEG14 and SEG15 values: a Set the SEG14 value by pressing the (Low Fan) button repeatedly until the value you want to set appears on the remote control display. SEG14 b Set the SEG15 value by pressing the (High Fan) button repeatedly until the value you want to set appears on the remote control display.
- Page 27 Steps Remote control display 16 Press the (Mode) button. Fan and Off appear on the remote control display. 17 Set the SEG21 and SEG22 values: a Set the SEG21 value by pressing the (Low Fan) button repeatedly until the value you want to set appears on the remote control display. SEG21 b Set the SEG22 value by pressing the (High Fan) button repeatedly until the...
- Page 28 Installation Procedure 3 Check whether the option values that you have set are correct by pressing the (Mode) button repeatedly [SEG2, SEG3] [SEG4, SEG5] [SEG6, SEG8] [SEG9, SEG10] [SEG14 , SEG15] [SEG16 , SEG17] [SEG18 , SEG20] [SEG11 , SEG12] [SEG21 , SEG22] [SEG23, SEG24] 4 Save the option values into the indoor unit:...
- Page 29 Setting the indoor unit addresses Option No. for an indoor unit address: 0AXXXX-1XXXXX-2XXXXX-3XXXXX Before installing an indoor unit, be sure to set an address for the indoor unit by taking the following steps: 1 Make sure that the power is supplied to the indoor unit.
- Page 30 Installation Procedure Setting the installation options in a batch Installation option No. for an indoor unit address: 02XXXX-1XXXXX-2XXXXX-3XXXXX 1 Make sure that the power is supplied to the indoor unit. If the indoor unit is not plugged in, it must include a power supply.
- Page 31 Option SEG7 SEG8 SEG9 SEG10 SEG11 SEG12 Dew removal operation in Wind-Free mode/Wind-Free mode Function Page Use of drain pump Wind-free fan speed in Auto cleaning/Smart Comfort in Auto mode Details Wind-Free Dew removal Smart Indication Details Indication Details Indication Details Indication mode...
- Page 32 Installation Procedure Option SEG19 SEG20 SEG21 SEG22 Individual control with Heating setting Function Page remote control compensation Indication Details Indication Details Indication Details 0 or 1 Indoor 1 Disuse Reserved Indication Indoor 2 3.6 F (2 C) and details Indoor 3 9 F (5 C) Indoor 4 SEG23...
- Page 33 • 5) SEG20 If you set the Individual control with remote control option to a value other than 0 to 4, it is automatically set to 0 (Indoor 1) • 6) SEG21 Default value of Heating setting compensation is 9°F(5 ). •...
-
Page 34: Appendix
Appendix Troubleshooting LED lamp display Operation Defrost Timer Filter Abnormal conditions Remarks Power reset Error of temperature sensor in the indoor unit (Open/ Short) Error of heat exchanger sensor in the indoor unit (Open/Short) Error of fan motor in the indoor unit Error of the outdoor temperature sensor Error of the condensor temperature sensor Error of the discharge temperature sensor... - Page 35 Memo English...