
Related Manuals for La Crosse Technology WS-8001U


Summary of Contents for La Crosse Technology WS-8001U
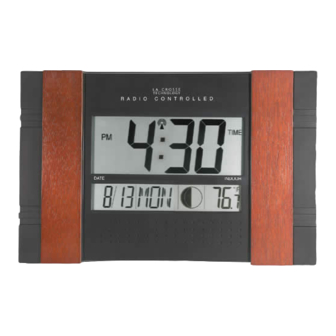
- Page 1 WS-8001U Radio Controlled Moon Phase Clock Instruction Manual Ρ Α ∆ Ι Ο Χ Ο Ν Τ Ρ Ο Λ Λ Ε ∆...
-
Page 2: Table Of Contents
Topic Inventory of Contents/ Additional Equipment About WWVB Quick Set-Up Guide Detailed Set-Up Guide Battery Installation Program Mode Function Buttons Time Zone Setting DST (Daylight Saving Time) Setting Language Selection Time Setting Calendar Setting 12/24-Hour Setting Selecting °F or °C Features &... -
Page 3: Inventory Of Contents/ Additional Equipment
2) Wait 10 minutes for WWVB reception. 3) If there is no WWVB reception, manually set the time and date (instructions in the Program Mode). 4) Program the settings. 5) Mount the WS-8001U in a suitable location, where WWVB signals can be received. -
Page 4: Detailed Set-Up Guide
BATTERY INSTALLATION Note: To avoid start-up problems make sure that the batteries do not spring free. A) MOON PHASE CLOCK 1) Remove the battery cover, located on the backside of the unit and directly below the function buttons. 2) Observe the correct polarity, and install 2 AA batteries. -
Page 5: Program Mode
To enter the Program Mode hold down the “SET” button for 2 seconds, until “-5EST” flashes in the Date LCD. The Program Mode is laid out in a manner that allows you to program each function separately, or you can follow the instructions entirely to program the Moon Phase Clock. -
Page 6: Dst (Daylight Saving Time) Setting
Note: The DST default is “On”, meaning that the WWVB will automatically change the time according to Daylight Saving Time in the spring and fall. For areas that do not recognize DST changes (Arizona and parts of Indiana) turn the DST “OFF”. 1) Hold down the “SET”... -
Page 7: Calendar Setting
Note: When the WWVB signal is found, that date will over-ride the manually set date. 1) Hold down the “SET” button for 2 seconds (the selected time zone will flash), press the “SET” button 5 more times, until the default year “00” flashes in the date LCD. -
Page 8: Features & Operations
CHANGING DISPLAY MODE (DAY, SECONDS, AND TEMPERATURE) There are three possible display modes to view the day, seconds, and temperature. The month&date/weekday/moon phase/indoor temperature is the default. To change the display: 1) Press the “+” button. The display should now show the month&date/weekday/moon phase/seconds. -
Page 9: Moon Phase
1) While the alarm is sounding, press the “SNOOZE” button to activate the snooze function. The alarm “sound” icon and “SNOOZE” icon (to the right of the time) will flash. The duration of the snooze function is 10 minutes, then the alarm will resume. D) SUSPENDING ALARM 1) While the alarm is sounding or the SNOOZE is active, press the “ALARM”... -
Page 10: Mounting
Hanging Holes Function Buttons Foldout Table Stands There are two possible ways to mount the Moon Phase Clock: • use of the foldout table stands, or • wall mounting. FOLDOUT TABLE STANDS The Foldout table stand legs are located on the backside, at the lower corners, and on both sides of the battery cover. -
Page 11: Maintenance & Care
• Extreme temperatures, vibrations, and shock should be avoided to prevent damage to the units. • Clean displays and units with a soft, damp cloth. Do not use solvents or scouring agents—they may mark and damage the displays and casings. •... -
Page 12: Troubleshooting
Problem: The LCD is faint. Solution: 1) Replace the batteries. Problem: “OFL” appears in the LCD. Solution: 1) Move unit to an area with warmer or cooler surrounding temperature. Current surrounding temperatures are outside measuring range. Problem: No reception of WWVB signal. Solution: 1) It may help reception to face the front of the Moon Phase Clock in the general direction of Ft. -
Page 13: Warranty Information
WARRANTY INFORMATION La Crosse Technology provides a 1-year warranty on this Moon Phase Clock. Contact La Crosse Technology immediately upon discovery of any defects covered by this warranty. Before sending the Moon Phase Clock in for repairs, contact La Crosse Technology. The Moon Phase Clock will be repaired or replaced with the same or similar model.