Fisher & Paykel 5 Series User Manual
Over the range microwave oven
Hide thumbs
Also See for 5 Series:
- User manual (40 pages) ,
- Installation manual (28 pages) ,
- Quick reference manual (2 pages)
Table of Contents
Advertisement
Available languages
Available languages
Quick Links
Advertisement
Chapters
Table of Contents

Related Manuals for Fisher & Paykel 5 Series


Summary of Contents for Fisher & Paykel 5 Series
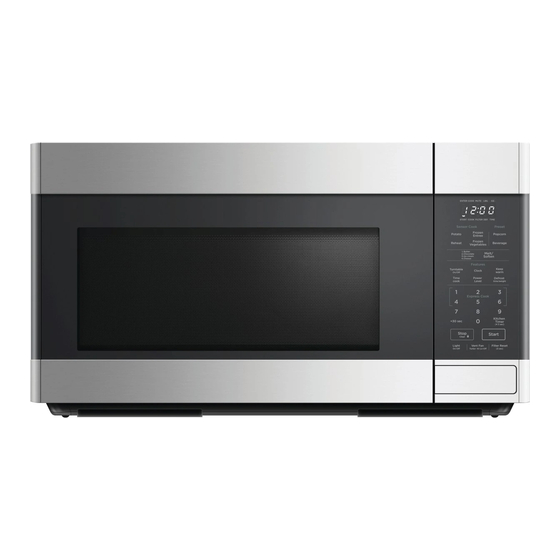
- Page 1 OVER THE RANGE MICROWAVE OVEN MOH30SS1 USER GUIDE...
-
Page 3: Table Of Contents
CONTENTS Precautions to avoid possible exposure to excessive microwave energy Important safety instructions Grounding instructions Specifications Installation First use Control panel To set power level Setting the clock Delay start Defrosting Cooking options Sensor cooking Functions Care and cleaning Before you call for service Troubleshooting Cooking guide Parts &... -
Page 4: Precautions To Avoid Possible Exposure To Excessive Microwave Energy
PRECAUTIONS TO AVOID POSSIBLE EXPOSURE TO EXCESSIVE MICROWAVE ENERGY (a) Do not attempt to operate this oven with the door open since open- door operation can result in harmful exposure to microwave energy. It is important not to defeat or tamper with the safety interlocks. (b) Do not place any object between the oven front face and the door or allow soil or cleaner residue to accumulate on sealing surfaces. -
Page 5: Important Safety Instructions
IMPORTANT SAFETY INSTRUCTIONS When using electrical appliances, basic safety precautions should be followed, including the following: WARNING-To reduce the risk of burns, electric shock, fire, injury to persons or exposure to excessive microwave energy: Read all instructions before using the appliance. 2. - Page 6 IMPORTANT SAFETY INSTRUCTIONS c) If materials inside the oven ignite, keep oven door closed, turn oven off, and disconnect the power cord, or shut off power at the fuse or circuit breaker panel. d) Do not use the cavity for storage purposes. Do not leave paper products, cooking utensils, or food in the cavity when not in use.
-
Page 7: Grounding Instructions
GROUNDING INSTRUCTIONS This appliance must be grounded. In the event of an electrical short circuit, the grounding plug reduces the risk of electric shock by providing an escape wire for electric current. This appliance is equipped with a cord having a grounding wire with a grounding plug. - Page 8 FEDERAL COMMUNICATIONS COMMISSION RADIO FREQUENCY INTERFERENCE STATEMENT WARNING: This equipment generates and uses ISM frequency energy and if not installed and used properly, that is in strict accordance with the manufacturer’s instructions, may cause interference to radio and television reception. It has been type-tested and found to comply with limits for an ISM Equipment pursuant to part 18 of FCC Rules, which are designed to provide reasonable protection against such interference in a residential installation.
-
Page 9: Specifications
SPECIFICATIONS Power Supply 120V AC, 13.5 AMPS, 60Hz single phase with grounding Input Power 1500 W Microwave Energy Output 950 W Frequency 2,450 MHz Outside Dimensions (W x H x D) 29.9" x 16.3" x 15.9" / 760 mm x 414 mm x 404 mm Cavity Dimensions (W x H x D) 20.6"... -
Page 10: Installation
INSTALLATION Examine the oven after unpacking Unpack the oven, remove all packaging material and examine the oven for any damage such as dents on the interior or exterior of the oven, broken door latches, cracks in the door, or a door that is not lined up correctly. Checking the parts Carefully unpack your microwave oven, and make sure you’ve received all the parts shown below. - Page 11 INSTALLATION Power supply Check your local power source. This microwave oven requires a current of approximately 13.5 amperes, 120Volts, 60Hz and a grounded outlet. a) A short power-supply cord is provided to reduce the risks of the user becoming entangled in or tripping over a longer cord. b) Longer cord sets or extension cords are available and may be used if care is exercised in their use.
- Page 12 INSTALLATION In the event of a gas leak (propane gas, LP gas, etc.), ventilate the room immediately. Do not touch the microwave, power cord, or plug. Do not use a ventilating fan. A spark may result in an explosion or fire. Take care that the door or any of the other parts do not come into contact with your body while cooking or just after cooking.
-
Page 13: First Use
FIRST USE DOOR LATCHES 11 GREASE FILTERS WINDOW with METAL SHIELD - Screen 12 HANDLE FILTERS - Use to insert Grease allows cooking to be viewed while Filters. keeping microwaves confined in oven. 13 VENTILATION MOTOR - Your microwave MODEL NUMBER PLATE - Located on oven is designed for adaptation to the the front wall of the microwave oven. - Page 14 FIRST USE This section includes useful information about oven operation. Plug power supply cord into a standard 3-pronged 15 Amps 120V AC 60Hz power outlet. After placing the food in a suitable container, open the oven door and put it on the glass tray.
-
Page 15: Control Panel
CONTROL PANEL The Touch Control Panel allows you to set the oven controls with the press of a finger. It’s designed to be easy to use and understand. Each time a pad is pressed, a BEEP will sound. When STOP/CLEAR pad is pressed during oven operation, the oven will stop, however, all programmed information is retained. - Page 16 CONTROL PANEL DISPLAY - Displays time of day, time or power level being used, cooking mode and instructions. FROZEN ENTREE - Press this pad to cook Frozen Entree. POTATO - Press this pad to cook Potato. The microwave oven sensor will automatically adjust the cooking time to the type and amount of food.
-
Page 17: To Set Power Level
TO SET POWER LEVEL The power level is set by pressing the POWER LEVEL pad and number pad. If you wish to use a different power level, press the POWER LEVEL pad before pressing START pad. Enter the power level desired by pressing the appropriate number pad. The chart shows the display, the power level and the percentage of power. -
Page 18: Setting The Clock
SETTING THE CLOCK When the oven is first plugged in, the display will show “ : 0” and a tone will sound. If the AC power ever goes off, the display show “ : 0” when the power comes back on. Press the CLOCK pad. -
Page 19: Delay Start
DELAY START HOW TO USE TO DELAY THE START OF COOKING Press KITCHEN TIMER pad. The ENTER, TIME indicators blink and “ : 0” is displayed. 60:00 Press the amount of time you want to delay. Time Press TIME COOK pad to program the desired cooking time cook for food to be cooked. -
Page 20: Defrosting
DEFROSTING TIME DEFROSTING When TIME DEFROST is selected, the automatic cycle divides the defrosting time into periods of alternating defrost and stand times by cycling on and off. Press DEFROST pad once. The DEF indicator lights and ENTER, TIME indicators blink, “ : 0”... -
Page 21: Cooking Options
COOKING OPTIONS MELT/SOFTEN The MELT/SOFTEN feature can be used to melt or soften butter, chocolate, ice cream and cheese. Melt/ Press MELT/SOFTEN pad once for butter, twice for Soften chocolate, three times for ice cream, four times for cheese. Start Press START pad. - Page 22 COOKING OPTIONS Press number pads for power level (0~10). PL-5 The display will show PL-0 ~ PL10. Press START pad. If you skip steps 3 and 4 the power will automatically be 100%. Start Note: Your oven can be programmed for 99 minutes 99 seconds.
- Page 23 COOKING OPTIONS When you press START pad, the DEF and COOK indicators come on to confirm the power levels selected. The DEF indicator starts blinking to show you that the oven is in TIME DEFROST mode. The display counts down the time remaining in TIME DEFROST mode. When the oven beeps, turn over, break apart and/or redistribute the food.
- Page 24 COOKING OPTIONS +30 SEC +30 SEC allows you to reheat for 30 seconds at 100% (full power) by simply pressing the +30 SEC pad. By repeatedly pressing the +30 SEC pad, you can also extend reheating time to 99 minutes 99 seconds by 30 second increments. +30 SEC cannot be used while the sensor is detecting the vapor emitted from the food during sensor cooking such as Potato, Frozen Entree, Frozen Vegetables or Sensor Reheat.
- Page 25 COOKING OPTIONS Caution: If prepackaged popcorn is of a different weight than the recommended weight, do not use the popcorn pad. Follow the manufacturer’s instruction. DO NOT leave the microwave oven unattended while popping corn. When popping commercially packaged popcorn, remove the rack from the oven. Do not place the bag of microwave popcorn on the rack or under the rack.
- Page 26 COOKING OPTIONS METAL RACK The metal rack gives you extra space when cooking in more than one container at the same time. The rack allows several foods to be cooked or reheated at one time. However, for the best cooking and reheating, use TURNTABLE ON function and cook with SENSOR COOK modes without the rack.
-
Page 27: Sensor Cooking
SENSOR COOKING SENSOR OPERATIONS Sensor is a semi-conductor device that detects the vapor emitted from the food as it heats. The sensor adjusts the cooking time and power level for various food and quantities and you don’t need to enter the weight or quantity of the food. The Sensor Cook categories are designed to detect the increasing humidity released by the food during the cooking process. - Page 28 SENSOR COOKING How to use sensor cooking Press POTATO pad. Potato When you press POTATO pad, “SCPO” is displayed. Press START pad. Start When the sensor detects the vapor emitted from the food, the remainder of cooking time will appear. Press FROZEN ENTREE pad.
-
Page 29: Functions
FUNCTIONS TURNTABLE ON/OFF For best cooking result, the turntable should be on. However the turntable can be turned off so that it does not rotate when extra large dishes are used. Press the TURNTABLE ON/OFF pad. Turntable On/Off The options are displayed for 2 seconds. This option is not available in sensor cook, one touch cook, defrost and melt/soften modes. - Page 30 FUNCTIONS MUTE Audible signals are available to guide you when setting and using your oven. To mute, press KITCHEN TIMER pad for 3 seconds. The MUTE indicator lights. To sound on, press KITCHEN TIMER pad for 3 seconds. A beep sounds and the MUTE indicator will turn off.
- Page 31 FUNCTIONS CHILD SAFETY LOCK Child safety lock feature may lock the control panel to prevent the oven from being accidentally started or used by children. To lock, press and hold STOP/CLEAR pad for 3 seconds. A beep sounds and “Loc” will be displayed for 3 seconds. To unlock, press and hold STOP/CLEAR pad for 3 seconds.
-
Page 32: Care And Cleaning
CARE AND CLEANING WARNING: The oven should be cleaned regularly and any food deposits removed. Failure to maintain the oven in a clean condition could lead to deterioration of the surface that could adversely affect the life of the appliance and possibly result in a hazardous situation. MICROWAVE OVEN INTERIOR The oven interior should be cleaned after each use with a damp cloth to keep it free from grease and soil buildup. - Page 33 CARE AND CLEANING CONTROL PANEL Wipe with a damp cloth. Dry. Do not spray cleaners directly on panel. Spray cleaners on cloth and then wipe. WAVEGUIDE COVER The waveguide cover is located on the right side wall of the oven cavity. It is made from mica so requires special care.
- Page 34 CARE AND CLEANING LIGHT REPLACEMENT Cooktop Light To prevent injury, wear gloves when replacing the cooktop light. Unplug the oven or turn off the power at the main power supply. Remove the screw from the light cover and lower the cover until it stops.
- Page 35 CARE AND CLEANING INSTALL/REPLACE CHARCOAL FILTER Charcoal Filter If your oven is vented inside, the charcoal filter should be replaced every 6 months. Unplug the oven or turn off the power at the main power supply. Remove the grille air mounting screws (3) and open the door.
-
Page 36: Before You Call For Service
BEFORE YOU CALL FOR SERVICE Check the following to be sure a service call is necessary: If nothing on the oven operates: Check for a blown circuit fuse or a tripped main circuit breaker. Check if oven is properly connected to electric circuit in the house. Check that controls are set properly. - Page 37 BEFORE YOU CALL FOR SERVICE If food is overcooked: Check recipe to ensure all directions (amount, time, and power levels) were correctly followed. The initial temperature of food may have been higher than normal. If arcing (sparks) occur: Ensure microwave-safe dishes were used. Do not use wire twist-ties.
-
Page 38: Troubleshooting
TROUBLESHOOTING Q : I accidentally ran my microwave oven without any food in it. Is it damaged? A : ALWAYS ENSURE FOOD IS PLACED IN THE MICROWAVE CAVITY BEFORE OPERATING. Accidentally running the oven for a few seconds without food should not cause damage. - Page 39 TROUBLESHOOTING cooker. Q : Does microwave energy pass through the viewing screen in the door? A : No. The metal screen bounces back the energy to the oven cavity. The holes are made to allow light to pass through. They do not let microwave energy pass through. Q : Can I operate my microwave oven without the turntable or turn the turntable over to hold a large dish? A : No.
-
Page 40: Cooking Guide
COOKING GUIDE COOKWARE GUIDE Only use cookware that are suitable for use in microwave ovens. To cook food in the microwave oven, the microwaves must be able to penetrate the food, without being reflected or absorbed by the dish used. Care must therefore be taken choosing the cookware. - Page 41 COOKING GUIDE USE YOUR MICROWAVE OVEN SAFELY Food Never use your microwave oven for home canning. The oven is not designed for proper home canning. Improperly canned food may spoil and be dangerous to consume. Always use the minimum recipe cooking time. It is better to undercook rather than overcook foods.
- Page 42 COOKING GUIDE Density Porous airy foods heat more quickly than dense heavy foods. Cling Film Cling film helps keep the food moist and the trapped steam assists in speeding up cooking times. Pierce before cooking to allow excess steam to escape. Always take care when removing cling film from a dish as the build-up of steam will be very hot.
- Page 43 COOKING GUIDE DEFROSTING GUIDE Do not defrost covered meat. Covering might allow cooking to take place. Always remove outer wrap and tray. Use only containers that are microwave-safe. Begin defrosting whole poultry breast-side-down. Begin defrosting roasts fat-side-down. The shape of the package alters the defrosting time. Shallow rectangular shapes defrost more quickly than a deep block.
- Page 44 COOKING GUIDE DEFROSTING STANDING ITEM & WEIGHT SPECIAL TECHNIQUES TIME TIME FISH & SEAFOOD • Whole Fish 6 - 8 min. 15 - 20 min. Turn over after half the time. 1 lb / 450 g • Fish Fillets 8 - 10 min. 15 - 20 min.
- Page 45 COOKING GUIDE REHEAT CHART Baby food particularly needs to be checked carefully before serving to prevent burns. When heating pre-packaged ready-cooked foods, always follow the pack instructions carefully. If you freeze foods which were bought from the fresh or chilled counters, remember that they should be thoroughly thawed before following the heating instructions on the packed.
- Page 46 COOKING GUIDE VEGETABLE CHART Use a suitable glass pyrex® bowl with lid. Add 2 - 3 tpsp. (30-45 ml) cold water for every lb (250 g) unless another water quantity is recommended - see table. Cook covered for ⁄ the minimum time - see table. Continue cooking to get the result you prefer.
- Page 47 COOKING GUIDE Frozen Vegetable Chart ITEM WEIGHT COOKING TIME SPECIAL INSTRUCTION Spinach 0.3 lb / 125 g 2 - 3 min. Add 1 tbsp (15 ml) cold water. Broccoli ⁄ lb / 250 g 4 - 5 min. Add 2 tbsp (30 ml) cold water. Peas ⁄...
-
Page 48: Parts & Accessories
PARTS & ACCESSORIES For replacement parts contact Fisher & Paykel Customer Care. ITEM REFERENCE NUMBER Charcoal filters 792987 Aluminium filters 792988 Oven lights 792989 Cooktop lights 792990... - Page 49 US CA LIMITED WARRANTY LIMITED WARRANTY When you purchase any new Fisher & Paykel product for personal or consumer use you automatically receive a two year limited warranty covering parts and labor for servicing within the 48 mainland United States, Hawaii, Washington DC and Canada. In Alaska the limited warranty is the same except that you must pay to ship the product to the service shop or the service technician’s travel to your home.
- Page 50 US CA LIMITED WARRANTY This warranty does not cover: A Service calls that are not related to any defect in the product. The cost of a service call will be charged if the problem is not found to be a defect of the product. For example: Correct faulty installation of the product.
-
Page 51: Limited Warranty
US CA LIMITED WARRANTY Commercial use If you are using the product in a commercial setting (any use other than a single family dwelling), we agree to repair or replace, without cost to you for parts only, any defective parts. Our liability for these repairs expires ONE YEAR from the date of original purchase. - Page 53 FOUR À MICRO-ONDES MONTÉ AU DESSUS D’UNE CUISINIÈRE MOH30SS1 MODE D’EMPLOI...
- Page 55 TABLA DE CONTENIDO Précautions pour éviter le risque d’une exposition aux micro-ondes Instructions de sécurité importantes Instructions de mise à la terre =Caractéristiques techniques Guide d’installation Première utilisation Panneau de contrôle Pour régler le niveau de puissance Réglage de l’horloge Départ différé...
-
Page 56: Précautions Pour Éviter Le Risque D'une Exposition Aux Micro-Ondes
PRÉCAUTIONS POUR ÉVITER LE RISQUE D’UNE EXPOSITION AUX MICRO-ONDES (a) Ne pas essayer de faire fonctionner ce four lorsque que la porte est ouverte, car le fonctionnement avec la porte ouverte pourrait entraîner une exposition dangereuse aux micro-ondes. Il est important que le système de fermeture de sûreté... -
Page 57: Instructions De Sécurité Importantes
INSTRUCTIONS DE SÉCURITÉ IMPORTANTES Lorsque vous utilisez des appareils électriques, des précautions de base doivent être respectées, dont les suivantes : AVERTISSEMENT - Afin de réduire les risques de brûlures, d’électrocution, d’incendie, de blessures ou de surexposition à l’énergie des micro-ondes : Lisez toutes les instructions avant d’utiliser l’appareil. - Page 58 INSTRUCTIONS DE SÉCURITÉ IMPORTANTES b) Retirez des sacs de papier ou de plastique les attaches contenant un fil métallique avant de mettre le sac dans le four. c) Si des matières s’enflamment à l’intérieur du four, gardez la porte du four fermée, éteignez le four et débranchez le cordon d’alimentation ou coupez le courant au panneau de disjoncteurs ou de fusibles.
- Page 59 INSTRUCTIONS DE SÉCURITÉ IMPORTANTES 23. Convient à une utilisation au-dessus des cuisinières électriques et au gaz jusqu’à 30 pouces de largeur. 24. N’utilisez pas ce four à des fins commerciales. Il est conçu pour une utilisation domestique seulement. 25. Lorsque vous flambez des aliments sous la hotte, activez le ventilateur. Gardez la zone sous la hotte adéquatement ventilée en tout temps.
-
Page 60: Instructions De Miseà La Terre
INSTRUCTIONS DE MISE À LA TERRE Cet appareil doit être mis à la terre. Dans l’éventualité d’un court-circuit électrique, la mise à la terre réduit le risque d’électrocution en fournissant un fil de sortie pour le courant électrique. Cet appareil est équipé d’un cordon avec fil de mise à... - Page 61 ÉNONCÉ DE LA COMMISSION FÉDÉRALE DES COMMUNICATIONS SUR L’INTERFÉRENCE AVEC LES FRÉQUENCES RADIO AVERTISSEMENT : Cet équipement produit et utilise de l’énergie des bandes de fréquences ISM (industrielles, scientifiques et médicales); s’il n’est pas installé et utilisé correctement, c’est-à-dire rigoureusement selon les instructions du fabricant, il est susceptible de causer de l’interférence à...
-
Page 62: Caractéristiques Techniques
CARACTÉRISTIQUES TECHNIQUES Alimentation électrique 120 V CA, 13,5 AMPS, 60 Hz, monophasée avec mise à la terre Puissance d’entrée 1 500 W Micro-ondes Énergie produite 950 W Fréquence 2 450 MHz Dimensions extérieures (LA x H x P) 760 mm x 414 mm x 404 mm / 29,9 po x 16,3 po x 15,9 po Dimensions de l’enceinte (LA x H x P) 523 mm x 254 mm x 378 mm / 20,6 po x 10,0 po x 14,9 po Volume de l’enceinte du four... -
Page 63: Guide D'installation
GUIDE D’INSTALLATION Examinez le four après l’avoir déballé Déballez le four, retirez tout le matériel d’emballage et examinez le four à la recherche de dommages, comme des bosses à l’extérieur ou à l’intérieur du four, des loquets de porte brisés, des fissures dans la porte ou un mauvais alignement de la porte. Vérification des pièces Déballez soigneusement votre four à... - Page 64 GUIDE D’INSTALLATION lessive, un couvre-four, des chandelles ou cigarettes allumées, de la vaisselle, des produits chimiques, des objets en métal, etc.) sur l’appareil. Ceci pourrait entraîner des risques d’électrocution, d’incendie, de problèmes avec le produit et de blessures. Alimentation électrique Vérifiez votre alimentation électrique locale.
- Page 65 GUIDE D’INSTALLATION AVERTISSEMENTS très importants concernant l’utilisation Si le four à micro-ondes est inondé, veuillez communiquer le centre de réparation le plus près. Négliger de le faire pourrait entraîner un risque d’électrocution ou d’incendie. Lisez et respectez spécifiquement les « Précautions pour éviter une possible surexposition à...
-
Page 66: Première Utilisation
PREMIÈRE UTILISATION LOQUETS DE PORTE 10 LAMPE DE LA HOTTE FENÊTRE avec TREILLIS MÉTALLIQUE 11 FILTRES À GRAISSE - Le treillis métallique permet de voir la 12 POIGNÉE POUR FILTRE - Pour l’accès cuisson tout en empêchant les micro- aux filtres à graisse. ondes de s’échapper. - Page 67 PREMIÈRE UTILISATION Cette section comprend des renseignements utiles sur l’utilisation du four. Branchez le cordon d’alimentation dans une prise de courant standard à trois orifices avec un courant alternatif de 120 V, 15 A et 60 Hz. Après avoir placé la nourriture dans un contenant adéquat, ouvrez la porte du four et placez le contenant sur le plateau de verre.
-
Page 68: Panneau De Contrôle
PANNEAU DE CONTRÔLE Le Panneau de commande tactile vous permet d’utiliser les commandes du four d’une simple pression du doigt. Il est conçu pour être facile à utiliser et à comprendre. Chaque fois que l’on appuie sur une touche, un signal sonore (BIP) est émis. Lorsque l’on appuie sur la touche STOP/CLEAR pendant que le four est en fonction, le four arrête;... - Page 69 PANNEAU DE CONTRÔLE ÉCRAN D’AFFICHAGE - Affiche l’heure, le temps ou le niveau de puissance utilisé, le mode de cuisson et les instructions. FROZEN ENTREE (repas congelé) - Appuyez sur cette touche pour réchauffer un repas congelé. Le capteur du four à micro-ondes règle automatiquement le temps de cuisson selon le type et la quantité...
- Page 70 PANNEAU DE CONTRÔLE 19 STOP/CLEAR (arrêt/effacer) - Lorsqu’enfoncée une fois, cette touche interrompt le fonctionnement du four. Lorsqu’enfoncée une deuxième fois, le four est réinitialisé et tous les réglages sont effacés (sauf l’heure). De plus, tenez cette touche enfoncée pendant 3 secondes pour activer la fonction de verrouillage sécuritaire pour les enfants.
-
Page 71: Pour Régler Le Niveau De Puissance
POUR RÉGLER LE NIVEAU DE PUISSANCE Le niveau de puissance se règle en appuyant sur la touche POWER LEVEL et sur un chiffre. Si vous souhaitez utiliser un niveau de puissance différent, appuyez sur la touche POWER LEVEL avant d’appuyer sur START. Entrez le niveau de puissance désiré en appuyant sur la touche de chiffre appropriée. -
Page 72: Réglage De L'horloge
RÉGLAGE DE L’HORLOGE Lorsque l’on branche le four, l’affichage initial indique « : 0 » et un signal sonore est émis. Si l’alimentation électrique est coupée, l’affichage indiquera « : 0 » lorsque le courant sera rétabli. Appuyez sur la touche CLOCK. L’horloge adopte un système Clock d’affichage à... -
Page 73: Départ Différé
DÉPART DIFFÉRÉ COMMENT UTILISER LA MINUTERIE POUR RETARDER LE MODE CUISSON Appuyez sur la touche KITCHEN TIMER. Les témoins ENTER et TIME clignotent et « : 0 » s’affiche. « : 0 » est affiché. L’écran affiche votre choix. 60:00 Inscrivez la durée (temps) souhaitée pour le délai. -
Page 74: Décongélation
DÉCONGÉLATION DÉCONGÉLATION MINUTÉE Lorsque la Décongélation minutée (TIME DEFROST) est choisie, le cycle automatique divise le temps de décongélation en périodes de décongélation et de repos en activant et en désactivant l’émission de micro-ondes. Appuyez une fois sur la touche DEFROST. Le témoin DEF s’allume, les témoins ENTER et TIME clignotent et «... -
Page 75: Options De Cuisson
OPTIONS DE CUISSON MELT/SOFTEN (FONDRE ET RAMOLLIR) La fonction MELT/SOFTEN (Fondre/Ramollir) peut être utilisée pour faire fondre ou ramollir le beurre, le chocolat, la crème glacée et les fromages. Appuyez sur la touche MELT/SOFTEN une fois pour le Melt/ beurre, deux fois pour le chocolat, trois fois pour la crème Soften glacée et quatre fois pour le fromage. - Page 76 OPTIONS DE CUISSON Appuyez sur les touches de chiffre pour entrer le niveau de PL-5 puissance (0 à 10). L’écran affiche de PL-0 à PL10. Appuyez sur la touche START. Si vous sautez les étapes 3 et 4, le niveau 100 % de puissance est automatique. Start Remarque : Votre four peut être programmé...
- Page 77 OPTIONS DE CUISSON Lorsque vous appuyez sur la touche START, les témoins DEF et COOK s’allument pour confirmer les niveaux de puissance choisis. Le témoin DEF commence à clignoter pour indiquer que le four est en mode de Décongélation minutée (Time Defrost). L’écran affiche le temps qui s’écoule en mode Décongélation minutée.
- Page 78 OPTIONS DE CUISSON +30 SEC La touche « +30 SEC » vous permet de réchauffer pendant 30 secondes à 100 % (puissance maximale) en appuyant simplement sur la touche « +30 SEC ». En appuyant plusieurs fois sur la touche « +30 SEC », vous pouvez prolonger le temps de cuisson par bonds de 30 secondes jusqu’à...
- Page 79 OPTIONS DE CUISSON Ne faites pas chauffer les grains non éclatés une 2e fois et ne réutilisez pas le sac. Ne laissez pas le four sans surveillance lorsque vous faites éclater des grains de maïs. Mise en garde : Si l’emballage de maïs soufflé ne correspond pas aux poids proposés, n’utilisez pas la touche POPCORN.
- Page 80 OPTIONS DE CUISSON GRILLE MÉTALLIQUE La grille métallique crée un espace supplémentaire permettant d’utiliser plus d’un contenant à la fois. La grille permet de faire cuire ou chauffer plusieurs plats ou aliments en même temps. Cependant, pour cuire ou réchauffer de façon optimale, il est préférable d’utiliser la fonction de PLAQUE TOURNANTE et les modes de CUISSON AVEC CAPTEUR sans grille.
-
Page 81: Cuisson Par Capteur
CUISSON PAR CAPTEUR OPÉRATIONS AVEC CAPTEUR Le capteur est un dispositif à semi-conducteur qui détecte la vapeur émise par les aliments qui sont chauffés. Le capteur règle le temps et la puissance de la cuisson pour divers aliments et différentes quantités; vous n’avez pas à indiquer le poids ou la quantité de nourriture. - Page 82 CUISSON PAR CAPTEUR Papier ciré : Recouvrez le plat complètement et repliez le papier en excès sous le plat pour le maintenir en place. Si le plat est plus large que le papier, faites chevaucher deux feuilles sur une distance d’au moins 2,5 cm pour recouvrir le plat. Retirez le recouvrement avec précaution, en faisant en sorte que la vapeur ne s’échappe pas dans votre direction.
- Page 83 CUISSON PAR CAPTEUR TABLEAU DE CUISSON AVEC CAPTEUR RESSIONS SUR AFFICHAGE POIDS COMMENTAIRES LA TOUCHE Potato SCPO 225 à 680 g Avant la cuisson, percer 5 à 6 fois les patates avec une fourchette. (8 à 24 oz) Placer les patates sur la plaque tournante. Frozen SCFE 225 à...
-
Page 84: Les Fonctions
LES FONCTIONS TURNTABLE ON/OFF (ACTIVER ET DÉSACTIVER LA PLAQUE TOURNANTE) Pour une cuisson plus efficace, la plaque tournante devrait être activée. Cependant, la plaque tournante peut être désactivée pour éviter qu’elle tourne lorsque des plats très grands sont utilisés. Appuyez sur la touche TURNTABLE ON-OFF. Turntable On/Off Les options sont affichées pendant deux secondes. - Page 85 LES FONCTIONS LAMPE DE LA HOTTE Vous pouvez contrôler la lampe en appuyant sur la touche LIGHT. Appuyez sur la touche LIGHT une fois pour allumer la lampe ou deux fois pour l’éteindre. Light Les options sont affichées pendant deux secondes. On/Off S’il n’y a aucune intervention d’un utilisateur pendant 10 heures, la lampe de la hotte et le ventilateur s’éteignent automatiquement pour...
- Page 86 LES FONCTIONS Pour annuler le mode d’économie d’énergie, répétez simplement la procédure pendant que l’affichage est actif. Le mode d’économie d’énergie est annulé et un signal sonore est émis. Le four est disponible pour un usage normal. VERROUILLAGE SÉCURITAIRE POUR LES ENFANTS La fonction de verrouillage sécuritaire pour les enfants verrouille le panneau de commande pour empêcher que le four soit activé...
-
Page 87: Entretien Et Nettoyage
ENTRETIEN ET NETTOYAGE AVERTISSEMENT : Le four devrait être nettoyé régulièrement et les dépôts d’aliments retirés. Le défaut de maintenir le four propre pourrait mener à une détérioration de sa surface, ce qui aurait un effet négatif sur la durée de vie de l’appareil et possiblement engendrer une situation dangereuse. - Page 88 ENTRETIEN ET NETTOYAGE EXTÉRIEUR DU FOUR Essuyez l’extérieur du four avec un chiffon savonneux; rincez et séchez. N’utilisez pas de produits nettoyants abrasifs. Ils pourraient égratigner la surface. COMPARTIMENT DE LA LAMPE Nettoyez souvent la graisse et la poussière sur le couvercle de la lampe dessous le four à micro-ondes avec de l’eau chaude et un détergent.
- Page 89 ENTRETIEN ET NETTOYAGE Nettoyer les filtres à graisse Pour nettoyer les filtres à graisse, faites tremper et agitezles dans une solution d’eau chaude et de savon. N’utilisez pas d’ammoniac ni de produits contenant de l’ammoniac; ceux- ci assombrissent le métal. Vous pouvez les brosser doucement pour déloger les saletés incrustées.
- Page 90 ENTRETIEN ET NETTOYAGE Remplacer avec une ampoule à DEL de 0,4 watt disponible chez votre vendeur autorisé. Remettez le couvercle de la lampe en place. Replacez la grille d’aération et les 3 vis de montage et fermez la porte. 10 Rebranchez le four à micro-ondes ou rétablissez le courant au panneau de distribution. Remarque : Consultez un revendeur agréé...
-
Page 91: Avant D'appeler Le Service
AVANT D’APPELER LE SERVICE Vérifiez les points suivants pour vous assurer qu’un appel d’entretien est nécessaire : Si aucune partie du four ne fonctionne : Vérifiez si un fusible sauté ou un disjoncteur ouvert a coupé le courant. Vérifiez si le four est branché correctement au circuit électrique de la maison. Vérifiez que les commandes sont réglées correctement. - Page 92 AVANT D’APPELER LE SERVICE Si la nourriture n’est pas assez cuite : Vérifiez la recette et assurez-vous de suivre correctement toutes les directives (quantité, temps et niveau de puissance). Vérifiez la tension électrique fournie par la prise de courant. Essayez de brancher le four dans une prise d’un circuit électrique différent. Assurez-vous que les aliments sont entièrement décongelés avant de les cuire.
-
Page 93: Dépannage
DÉPANNAGE Q : J’ai accidentellement activé mon four à microondes sans aucun aliment à l’intérieur. Est-il endommagé? R : TOUJOURS S’ASSURER QUE LES ALIMENTS SONT PLACÉS DANS LA CAVITÉ MICRO- ONDES AVANT D’UTILISER. Faire fonctionner accidentellement le four pendant quelques secondes sans nourriture ne devrait pas causer de dommages. Cependant, il n’est pas recommandé... - Page 94 DÉPANNAGE Q : Que signifie « temps de repos »? R : « Temps de repos » signifie que la nourriture doit être retirée du four et recouverte pour une période de temps supplémentaire pour lui permettre de terminer sa cuisson. Ceci libère le four pour d’autres besoins de cuisson.
-
Page 95: Guide De Cuisson
GUIDE DE CUISSON GUIDE POUR LES USTENSILES N’utilisez que de la vaisselle et des contenants pouvant aller au four à micro-ondes. Pour faire cuire des aliments au four à micro-ondes, les micro-ondes doivent pouvoir pénétrer les aliments, sans être réfléchies ou absorbées par la vaisselle utilisée. Il faut donc choisir la vaisselle avec soin. - Page 96 GUIDE DE CUISSON COOKWARE SÉCURITAIRE COMMENTAIRES Plastique • Contenant Sûre Particulièrement s’il s’agit de thermoplastique résistant à la chaleur. D’autres types de plastiques peuvent se déformer ou se décolorer aux températures élevées. Ne pas utiliser de mélamine. • Pellicule cellophane Sûre Peut être utilisé...
- Page 97 GUIDE DE CUISSON Le métal, comme celui des attaches avec fil métallique, les agrafes à volaille ou la vaisselle avec bordure dorée, dans le four à micro-ondes. Les papiers recyclés contenant de minuscules pièces métalliques utilisés dans le four à micro-ondes.
- Page 98 GUIDE DE CUISSON Liquides Tous les liquides doivent être brassés avant et pendant le processus de chauffage. L’eau, plus particulièrement, doit être brassée avant et pendant le processus de chauffage, pour éviter une éruption. Ne chauffez pas des liquides qui ont déjà bouilli. NE SURCHAUFFEZ PAS.
- Page 99 GUIDE DE CUISSON Lorsque décongelés, les aliments devraient être frais ou froids, mais ramollis dans toutes ses parties. Si encore un peu glacé, retourner brièvement au four à microondes ou laisser reposer quelques minutes. Après la décongélation, laisser les aliments reposer de 5 à 60 minutes s’il y a des parties encore glacées.
- Page 100 GUIDE DE CUISSON TABLEAU DE CUISSON TEMPS DE NIVEAU DE ARTICLE CUISSON PAR INSTRUCTIONS SPÉCIALES VIANDE PUISSANCE LB / 450 G VIANDE • La viande réfrigérée doit être retirée du • Pièce de boeuf réfrigérateur au moins 30 minutes avant la cuisson. - Saignant PL-8 6 - 8 min.
- Page 101 GUIDE DE CUISSON TEMPS DE ARTICLE QUANTITÉ INSTRUCTIONS SPÉCIALES RÉCHAUFFEMENT Aliments pour 4,5 oz 20 sec. Vider dans un petit bol de service. Bien brasser bébés une ou deux fois durant le réchauffement. Avant de servir, vérifier soigneusement la température. Lait pour bébés 100 ml / 4 fl oz 20 - 30 sec.
- Page 102 GUIDE DE CUISSON LÉGUMES POIDS TEMPS INSTRUCTIONS SPÉCIALES Choux de Bruxelles 0,5 lb / 250 g 3 - 5 min. Ajouter 60 à 76 ml (4 - 5 c. à table) d’eau). Carottes 0,5 lb / 250 g 3 - 5 min. Couper les carottes en tranches de taille égale.
-
Page 103: Pièces Et Accessoires
PIÈCES ET ACCESSOIRES Pour les pièces de rechange, contactez le service client Fisher & Paykel. ARTICLE NUMÉRO DE RÉFERENCE Filtres à charbon 792987 Filtres en aluminium 792988 Éclairage du four 792989 Lampes de table de cuisson 792990... -
Page 104: Garantie Limitée
GARANTIE LIMITÉE GARANTIE LIMITÉE Lorsque vous achetez un nouvel appareil électroménager Fisher & Paykel pour une utilisation ménagère, vous recevez automatiquement une garantie limitée deux ans couvrant les pièces de rechange et la main d’oeuvre pour le service dans les 48 états du continent américain, Hawaï, Washington D.C. - Page 105 GARANTIE LIMITÉE Durée de cette garantie limitée? Notre responsabilité en vertu de cette garantie limitée expire DEUX ANS après la date d’achat du produit par le premier consommateur. Notre responsabilité en vertu de toutes garanties implicites, y compris la garantie implicite de qualité...
- Page 106 GARANTIE LIMITÉE Utilisation commerciale Si vous utilisez le produit dans un environnement commercial (toute autre utilisation que l’utilisation par une unité familiale simple), nous nous engageons à réparer ou remplacer, sans frais de pièces uniquement, les pièces défectueuses. Notre responsabilité eu égard à...
- Page 108 FISHERPAYKEL.COM © Fisher & Paykel Appliances 2019. Tous droits réservés. Les spécifications des produits dans cette brochure s’appliquent aux produits et modèles spécifiques décrits à la date de publication. Dans le cadre de notre politique d’amélioration continue des produits, ces spécifications peuvent changer à...