
Related Manuals for Fisher & Paykel OM25BLSB1


Summary of Contents for Fisher & Paykel OM25BLSB1
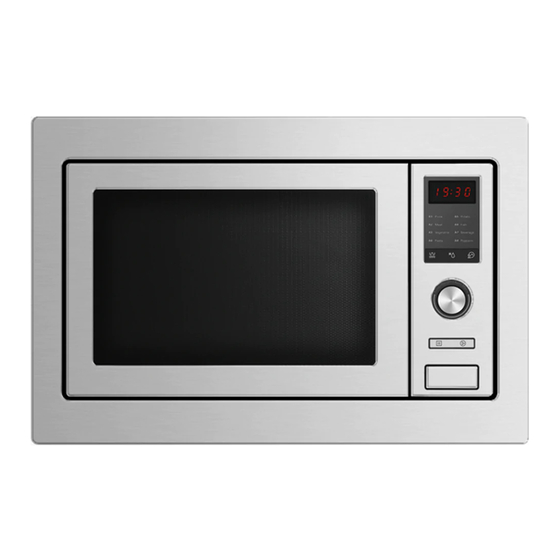
- Page 1 BUILT-IN MICROWAVE OVEN OM25BLSB1, OM25BLSX1 & OM25BLCX1 models INSTALLATION GUIDE / USER GUIDE...
-
Page 3: Table Of Contents
CONTENTS Product specifications Safety and warnings Before installation Installation guide User guide (OM25BLSB1 / OM25BLSX1) User guide (OM25BLCX1) Troubleshooting Service and Warranty IMPORTANT! Registration SAVE THESE INSTRUCTIONS Register your appliance with us so we can The models shown in this user guide provide you with the best service possible. -
Page 5: Product Specifications
25 L Turntable diameter 315mm External dimensions (W) 595 x (H) 460 x (D) 470mm Net weight Approximately 18.5kg Model OM25BLSB1, OM25BLSX1 Rated voltage 240VAC, 50Hz Rated input power (microwave) 1450W Rated output power (microwave) 900W Oven capacity Turntable diameter... -
Page 6: Safety And Warnings
SAFETY AND WARNINGS WARNING! Electric Shock Hazard Read and follow the safety and warnings outlined in this user guide before operating this appliance. Failure to do so can result in death, electric shock, fire or injury to persons. WARNING! Hot Surface Hazard The accessible surface may be hot during operation. - Page 7 SAFETY AND WARNINGS Consult an electrician or a Fisher & Paykel trained and supported service technician ● ● if the grounding instructions are not completely understood, or if you are not sure whether the appliance is properly grounded. If it is necessary to use an extension cord, use only a 3-wire extension cord.
- Page 8 SAFETY AND WARNINGS Disposal/Recycling The packaging materials for this appliance are recyclable. Operation DO NOT operate the oven without glass tray, roller support and shaft in their ● ● proper positions. Do not use the cavity for storage purposes. Do not leave paper products, cooking ●...
- Page 9 SAFETY AND WARNINGS Child Safety Keep the appliance and its cord out of reach of children aged less than 8 years. ● ● Ensure that children (aged 8 years and above) and persons with reduced physical, ● ● sensory or mental capabilities or lack of experience and knowledge can only use the appliance if they are supervised or have been given instruction on how to use the appliance safely and understand the hazards involved.
- Page 10 SAFETY AND WARNINGS Microwave-safe materials Utensils Remarks Browning dish Follow manufacturer’s instructions. The bottom of the browning dish must be at least 5mm above the turntable. Incorrect usage may cause the turntable to break Dinnerware Follow manufacturer’s instructions. Do not use cracked or chipped dishes. microwave-safe Glass jars always remove lid.
-
Page 11: Before Installation
BEFORE INSTALLATION IMPORTANT! Remove the oven and all materials from the carton and oven cavity. ● ● Check the components and accessories are complete. ● ● Oven features and accessories 1 Safety interlock system 7 Turntable shaft 2 Observation window 8 Turntable ring assembly 3 Hub (underside) 9 Door assembly... -
Page 12: Installation Guide
INSTALLATION GUIDE PRODUCT DIMENSIONS OM25BLSB1/OM25BLSX1 OM25BLCX1 Overall height Overall depth Overall width Note: Above dimensions include the pre-installed trim kit. - Page 13 ● ● Do not trap or bend the power cable ● ● Front view Side view CABINETRY DIMENSIONS OM25BLSB1/OM25BLSX1 OM25BLCX1 Overall width of cavity Inside width of cavity min 560 min 560 Inside height of cavity min 380 min 450...
- Page 14 INSTALLATION GUIDE Installing mounting plate in cabinet 10mm 36mm Cabinet base Front edge 280mm 280mm 560mm TOP VIEW Mark a centerline (A) along the base of the cabinet. Measure 357mm from the front edge of the cabinet and mark a line (B) across the centreline.
- Page 15 INSTALLATION GUIDE Installing the oven Place the oven into the cabinet (A). Ensure the back of the oven is locked ● ● by the mounting plate (B). Do not trap or kink the power cord. ● ● Fix the oven to the cabinet: Open the door ●...
-
Page 16: User Guide (Om25Blsb1 / Om25Blsx1)
USER GUIDE (OM25BLSB1 / OM25BLSX1) Control Panel Display screen Displays cooking time, power level, indicators and current time Microwave Kitchen Timer/Clock Programs microwave Sets the clock cooking or selects microwave power level W.T./Time Defrost Defrosts food by either weight or time Selector dial... - Page 17 USER GUIDE (OM25BLSB1 / OM25BLSX1) Quick Start Use this feature to automatically programme the oven to cook food at 100% power. Turn Selector dial left to set cooking time on the Display screen, then press Start/+30Sec./Confirm to start cooking. Press Start/+30Sec./Confirm to start the cooking time. Additional presses of Start/+30Sec./Confirm will increase the cooking time by 30 seconds...
- Page 18 USER GUIDE (OM25BLSB1 / OM25BLSX1) Defrost by Weight Press WT/TIme Defrost once, the oven will display ‘dEF1’. Turn Selector dial to select the weight of food from 100 to 1000g. Press Start/+30Sec./Confirm to start defrosting. Defrost by Time Press WT/TIme Defrost twice, the oven will display ‘dEF2’.
- Page 19 USER GUIDE (OM25BLSB1 / OM25BLSX1) Lookup function When the microwave is in use, you can determine the current cooking power and time. To view the cooking power: Press Microwave, the current power will display for 3 seconds. ● ● To see the current time: Press Kitchen Timer/Clock, the time will display for 3 seconds.
- Page 20 USER GUIDE (OM25BLSB1 / OM25BLSX1) AUTO MENU WEIGHT (GRAMS) DISPLAY Pizza Meat Vegetable 50 (with 450ml cold water) Pasta 100 (with 800ml cold water) Potato Fish 1 (about 120ml) 2 (about 240ml) Beverage 3 (about 360ml) Popcorn...
-
Page 21: User Guide (Om25Blcx1)
USER GUIDE (OM25BLCX1) Control Panel Display screen Displays cooking time, power level, indicators and current time Grill Programs grill cooking Microwave Convection Programs microwave Programs convection cooking cooking or selects microwave power level Micro.+Conv Defrosts food by either Micro.+Grill weight or time Combines microwave W.t./Time Defrost and grill cooking on three... - Page 22 USER GUIDE (OM25BLCX1) Quick Start Use this feature to automatically programme the oven to cook food at 100% power. Turn Selector dial left to set cooking time on the Display screen, then press Start/+30Sec./Confirm to start cooking. Press Start/+30Sec./Confirm to start the cooking time. Additional presses of Start/+30Sec./Confirm will increase the cooking time by 30 seconds up to a maxium of 95 minutes.
- Page 23 USER GUIDE (OM25BLCX1) Defrost by Weight Press WT/TIme Defrost once, the oven will display ‘dEF1’. Turn Selector dial to select the weight of food from 100 to 1000g. Press Start/+30Sec./Confirm to start defrosting. Defrost by Time Press WT/TIme Defrost twice, the oven will display ‘dEF2’. Turn Selector dial to select the Defrost time.
- Page 24 USER GUIDE (OM25BLCX1) Convection cooking Convection cooking enables you to cook the food as with a traditional oven. Microwaves are not used. During convection cooking, hot air is circulated throughout the oven cavity to brown and crisp food items quickly and evenly. This oven can be programmed for ten different cooking temperatures between 140 – 230°C at 10°C increments.
- Page 25 USER GUIDE (OM25BLCX1) Combination cooking Microwave + Grill This feature allows you to combine grill and microwave cooking on three different settings. Press the Micro.+Grill button once (‘G-2’ will show in the display). To adjust the grill power, press the Micro.+Grill button the required number of times (see the table below) or turn the Selector dial until the desired grill level is displayed.
- Page 26 USER GUIDE (OM25BLCX1) Delay start cooking To set the oven for delay start cooking Set the clock first (refer to 'Setting the Clock' on page 16). The clock must be set for the delay start cooking function to work. Select the cooking program. A maximum of two stages can be selected. Note: defrosting should not be included in the delay start cooking function.
- Page 27 USER GUIDE (OM25BLCX1) AUTO MENU WEIGHT (GRAMS) DISPLAY POWER 100% Auto reheat 1 (about 230) 2 (about 460) 100% Potato 3 (about 690) 100% Meat 100% Vegetable Fish 50 (with 450ml water) 100 (with 800ml water) Pasta 150 (with 1200ml water) 100% Soup Preheat at 180°C...
-
Page 28: Troubleshooting
TROUBLESHOOTING NORMAL COMMENT Microwave Radio and TV reception may experience interference when the oven interfering microwave oven is operating. It is similar to the interference TV reception caused by small electrical appliances, eg mixer, vacuum cleaner, and electric fan. Dim oven light During lower power microwave cooking, the oven light may dim. -
Page 29: Service And Warranty
SERVICE AND WARRANTY For details of your manufacturer’s warranty and contacts for servicing, please refer to your separate ‘Service and Warranty’ book provided with your appliance. Complete and keep for safe reference: Model Serial No. Purchase Date Purchaser Dealer City State Country... -
Page 30: Fisherpaykel.com
FISHERPAYKEL.COM © Fisher & Paykel Appliances 2019. All rights reserved. The product specifications in this booklet apply to the specific products and models described at the date of issue. Under our policy of continuous product improvement, these specifications may change at any time. You should therefore check with your Dealer to ensure this booklet correctly describes the product currently available.