Fisher & Paykel OM25BLCX1 User Manual
Hide thumbs
Also See for OM25BLCX1:
- Installation instructions (2 pages) ,
- Installation manual/user manual (30 pages)
Table of Contents
Advertisement
Advertisement
Table of Contents

Related Manuals for Fisher & Paykel OM25BLCX1


Summary of Contents for Fisher & Paykel OM25BLCX1
- Page 1 Microwave oven User guide OM25BLCX1 model NZ AU...
- Page 3 PRECAUTIONS TO AVOID POSSIBLE EXPOSURE TO EXCESSIVE MICROWAVE ENERGY Do not attempt to operate this oven with the door open. Open door operation can result in ■ ■ harmful exposure to microwave energy. It is important not to break or tamper with the safety interlocks.
- Page 4 Model OM25BLCX1 Rated voltage 230 – 240 V ~50Hz Rated input power (microwave) 1450 W Rated output power (microwave) 900 W Rated input power (grill) 1100 W Rated input power (convection) 2300 W Oven capacity 25 L Turntable diameter ø 315 mm...
-
Page 5: Table Of Contents
Contents Safety and warnings Part names Control panel Operating instructions Cleaning and care Troubleshooting Manufacturer’s Warranty Customer Care Important! SAVE THESE INSTRUCTIONS The models shown in this User Guide may not be available in all markets and are subject to change at any time. For current details about model and specification availability in your country, please visit our local website listed on the back cover or contact your local Fisher &... -
Page 6: Safety And Warnings
Safety and warnings WARNING! Electric Shock Hazard Read and follow the IMPORTANT SAFETY INSTRUCTIONS outlined in this User Guide before operating this appliance, pages 4 – 7. Failure to do so can result in death, electric shock, fire or injury to persons. Use this appliance only for its intended purpose as described in this User Guide. - Page 7 Safety and warnings Do not fry food in the oven. Hot oil can damage oven parts and utensils and even result in skin burns. ■ ■ Oil can self ignite and therefore create a fire hazard. Eggs in their shell and whole hard-boiled eggs should not be heated in microwave ovens since ■...
-
Page 8: Radio Interference
Safety and warnings Do not use the oven outdoors. ■ ■ If the supply cord is damaged, it must be replaced by a Fisher & Paykel authorised technician or ■ ■ similarly qualified persons in order to avoid hazard. Electrical This appliance must be grounded. -
Page 9: Utensils Guide
Safety and warnings Turn food items over once during microwaving to speed cooking of such food items as chicken ■ ■ and hamburgers. Large items like roasts must be turned over at least once. Rearrange food items such as meatballs halfway through cooking both from top to bottom and ■... -
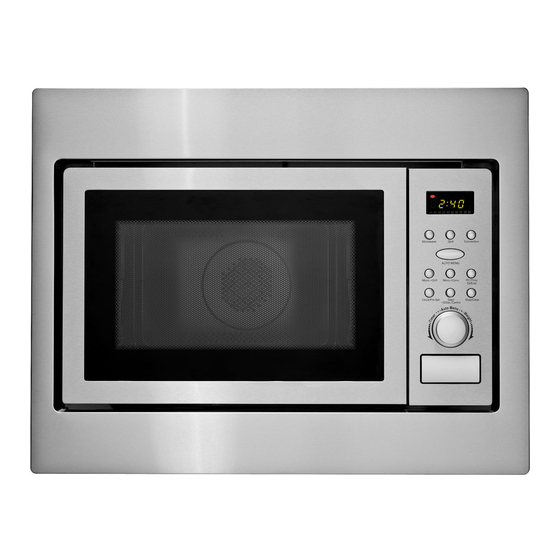
Page 10: Part Names
Part names Fig. 1 Microwave parts Control panel Turntable shaft Turntable ring assembly Glass tray Observation window Door assembly Safety interlock system Grill rack (only for Grill Series) -
Page 11: Control Panel
Control panel DISPLAY SCREEN Displays cooking time, power level, indicators and current time. MICROWAVE Programs microwave cooking; or Selects microwave power level. GRILL Programs grill cooking. CONVECTION Programs convection cooking. AUTO MENU Allows you to cook or reheat food automatically without entering power level or time. -
Page 12: Operating Instructions
Operating instructions Setting the clock Press the CLOCK/PRE-SET button to choose 12-hour or 24-hour. Turn the Selector knob (see Fig. 3) to adjust the hour figures. Press CLOCK/PRE-SET and the minute figures will flash. Turn the Selector knob to adjust the minute figures. Press CLOCK/PRE-SET to finish clock setting ( will flash). -
Page 13: Grill Cooking
Operating instructions Grill cooking Grill cooking is particularly useful for thin slices of meat, steaks, chops, kebabs, sausages and pieces of chicken. It is also suitable for hot sandwiches and au gratin dishes. Press the GRILL button once (G- will show in the display). Turn the Selector knob to select the cooking time (minimum 5 seconds;... -
Page 14: Combination Cooking
Operating instructions Without preheating 0 will flash in the display. This is the temperature Press the CONVECTION button once and setting. To adjust the temperature between 140˚C – 230˚C, press CONVECTION the required number of times or turn the Selector knob until the desired temperature is displayed. Press the START/+30SEC./CONFIRM to confirm the temperature. -
Page 15: Delay Start Cooking
Operating instructions Multi-stage cooking Your oven can be programmed for up to 2 automatic cooking sequences. ■ ■ Defrost should be selected as the first stage of the program. ■ ■ The oven alarm will beep once after each stage and the next stage will begin. ■... -
Page 16: Quick Start Cooking
Operating instructions Quick start cooking Use this feature to programme the oven to cook food at 100% power automatically. Turn the Selector knob anti-clockwise (to the left) to select the cooking time then press the ■ ■ START/+30SEC./CONFIRM button to start. Press the START/+30SEC./CONFIRM button in quick succession to select the cooking time. -
Page 17: Auto Menu
Operating instructions Auto menu Auto menu allows you to cook or reheat food automatically without entering power level or time. Choose the food item and its weight and the oven will automatically cook your food item at the necessary power level for the required amount of time. Press AUTO MENU and A- will show in the display. - Page 18 Operating instructions Menu Weight (g) Display Power 100% Auto reheat (about 230g) 100% (about 460g) Potato (about 690g) A- 3 100% Meat 100% Vegetable A- 5 Fish (with 450 ml water) A- 6 (with 800 ml water) Pasta (with 1200 ml water) A- 7 100% Soup...
-
Page 19: Defrost By Weight
Operating instructions Defrost The maximum defrosting time is 95 minutes. ■ ■ For raw or previously cooked frozen food, it is recommended to allow approximately 2 minutes ■ ■ per 100 grams. Always stop the oven periodically to remove or separate the portions that are defrosted. If the ■... - Page 20 Operating instructions key lock The key lock prevents unsupervised operation by children. To set the key lock Press STOP/CLEAR for 3 seconds until the oven gives a long beep and the indicator light is on in the display. This indicates that the key lock is on and all buttons are disabled. To cancel the key lock Press STOP/CLEAR for 3 seconds until the oven gives a long beep and the indicator light...
-
Page 21: Cleaning And Care
Cleaning and care Interior Turn off the oven and remove the power plug from the wall socket before cleaning. ■ ■ Keep the inside of the oven clean. When food splatters or spilled liquids adhere to oven walls, ■ ■ wipe with a damp cloth. -
Page 22: Troubleshooting
Troubleshooting Problem Possible causes What to do Microwave oven There are a number of causes Refer to ‘Radio interference’ on page 6 for interferes with TV to interference. ways to eliminate or reduce interference. reception. Dim oven light. The oven light may become Check whether low power cooking dim during low power is selected. -
Page 23: Manufacturer's Warranty
Manufacturer’s Warranty You automatically receive a 2 year Manufacturer’s Warranty with the purchase of this Product covering parts and labour for servicing within the country of purchase. Fisher & Paykel undertakes to: Repair or, at its option, replace without cost to the owner either for material or labour any part of the Product, the serial number of which appears on the Product, which is found to be defective within TWO YEARS of the date of purchase. -
Page 24: Customer Care
Customer Care Before you call for service or assistance… Check the things you can do yourself. Refer to your User Guide and check: Your appliance is correctly installed. You are familiar with its normal operation. You have read the problem solving at the back of the book. If after checking these points you still need assistance, please refer to your nearest Fisher &... - Page 28 www.fisherpaykel.co.nz www.fisherpaykel.com.au Copyright © Fisher & Paykel 2011. All rights reserved. The product specifications in this booklet apply to the specific products and models described at the date of issue. Under our policy of continuous product improvement, these specifications may change at any time. You should therefore check with your Dealer to ensure this booklet correctly describes the product currently available.