Polycom SoundPoint IP 500 User Manual
Hide thumbs
Also See for SoundPoint IP 500:
- User manual (31 pages) ,
- Training manual (26 pages) ,
- Quick reference manual (4 pages)

Related Manuals for Polycom SoundPoint IP 500


Summary of Contents for Polycom SoundPoint IP 500
- Page 1 All manuals and user guides at all-guides.com User Guide ® SoundPoint IP 500 for SIP...
-
Page 2: Table Of Contents
All manuals and user guides at all-guides.com Contents Introduction ..........1 Parts List ........... 1 Installing SoundPoint IP 500 SIP....2 ® Connecting Network and Power Source........2 Connecting the Handset and Optional Headset ....3 Attaching the Base..............3 Features ............ 4 Key Descriptions ......... - Page 3 Class B Digital Device or Peripheral........18 Modifications................19 Installation Instructions ............19 Plug Acts as Disconnect Device ..........19 Industry Canada (IC) ............19 CE Mark................19 Polycom Limited Warranty and Limitation Liability ......19 Exclusions ..........20 Warranty Exclusive........20 Service Agreements........20 Limitations of Liability ....... 21 Disclaimer..........
-
Page 4: Introduction
In this User Guide, you will Notices section in this guide before you find everything you need to quickly set set up and use the SoundPoint IP 500 SIP up your new telephone. Be sure to verify telephone. Parts List The following items are included in your you have received each item. -
Page 5: Installing Soundpoint Ip 500 Sip
All manuals and user guides at all-guides.com Installing SoundPoint IP 500 SIP ® This section provides basic installation The SoundPoint IP 500 SIP User Guide instructions and information for obtaining includes regulatory compliance infor- the best performance with the SoundPoint mation that your System Administrator IP 500 SIP telephone. -
Page 6: Connecting The Handset And Optional Headset
2. Connect the headset (optional accessory) to the headset jack on the back of the telephone. For a list of currently supported headsets, go to: http://www.polycom.com HEADSET HANDSET Attaching the Base 1. Place all cords in the recessed area 2. Align the two protrusions on the above the modular jacks as shown. -
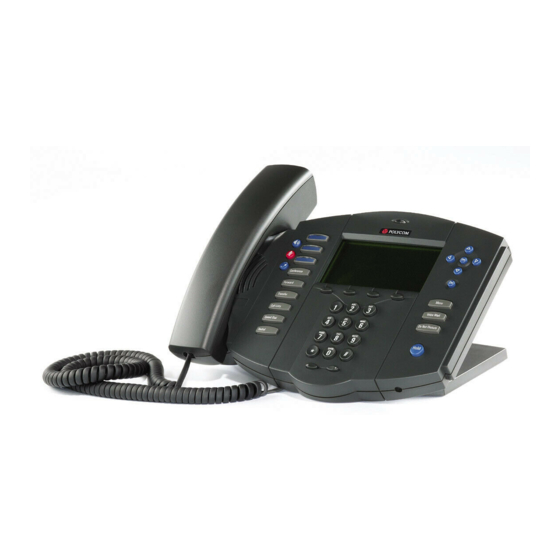
Page 7: Features
All manuals and user guides at all-guides.com Features Line/Speed Dial Keys Use these keys to activate up to three lines or speed dials that can be assigned to your telephone. Display Control Keys Speakerphone Use the arrow keys to scroll through the Microphone Mute displayed information. -
Page 8: Key Descriptions
All manuals and user guides at all-guides.com Key Descriptions Description Line or Speed Dial keys. Directories Access to local directories and call lists. Directories Directories Directories Directories Directories Services Services Access to special services (future implementation). Services Services Services Services Menu Menu Menu... -
Page 9: Using Soundpoint
To obtain the IP address of your telephone, Forward joe@205.173.1.24 press followed by System Status Menu Transfer sip: jane@polycom.com General. The IP address is listed together with Voice Mail other network information. Call Lists Do Not Disturb Speed Dial PQRS... -
Page 10: Answering A Call
All manuals and user guides at all-guides.com Conference Directories Answering a Call Services Menu Using the Handset: Call Lists Incoming calls may be Messages Pick up the handset. ignored by pressing the Buddy Status The active call will appear on the display EndCall soft key or Do Not Disturb showing call duration and destination. -
Page 11: Local Conferencing
All manuals and user guides at all-guides.com Local Conferencing During a call, up to three callers may be placed in conference using the telephone’s local conferencing feature. 3. Dial the telephone number of the 1. Place a call to the first party. third party. -
Page 12: Call Forwarding
PQRS Time and Date is clearly displayed on the WXYZ 2. Press Settings followed by Clock. OPER SoundPoint IP 500 SIP telephone. Accu- 3. Select from Clock Date or Clock racy is maintained through server control. Time. OPER Contact your System Administrator if either 4. -
Page 13: Headset Auto Mode
There are a total of 21 ring types available 3. Using the arrow keys, highlight PQRS WXYZ OPER Redial on the SoundPoint IP 500 telephone. Users the desired ring type. Pressing the Hold Hold Play soft key samples the selected can select different rings to distinguish... -
Page 14: Call Lists
All manuals and user guides at all-guides.com Call Lists Conference Directories For additional choices, press More fol- SoundPoint IP 500 SIP maintains a local list Services lowed by: of calls missed, received, and placed. Menu 4. Info to view information about the... -
Page 15: Speed Dial
All manuals and user guides at all-guides.com Speed Dial Pre-assigned numbers can be associated An additional speed dial key for Jane can be added to the previous example as follows: with line keys for rapid automated dialing. Speed Dial entries are placed consecu- 5. -
Page 16: Multiple Lines
All manuals and user guides at all-guides.com Multiple Lines SoundPoint IP 500 SIP can display up to three lines, each associated with their own line key to the left of the screen. Lines can be config- ured for local Directory Numbers (DNs), such as your main extension and a private line or for Speed Dial shortcuts on outbound dialing. -
Page 17: Voice And Text Messaging
Voice and Text Messaging Services Menu To read text messages: Users can send and receive both Voice Call Lists Text messages on the SoundPoint IP 500 1. Press and select Instant Messages SIP telephone. Received messages will be Messages, Buddy Status... -
Page 18: Distinctive Ringing / Call Treatment
Presence / Status / Buddy Lists PQRS WXYZ OPER OPER The SoundPoint IP 500 SIP telephone Each telephone can “watch” the status OPER combines interactive message services and of up to eight other telephones. Each status monitoring to complement a tradi- telephone can also be “watched”... -
Page 19: Instant Messaging
OPER OPER OPER Individual language display is available on Contact your System Administrator for a the SoundPoint IP 500 SIP telephone. full list of languages supported. To change to a custom language: 1. Press Menu 4. The display will automatically change to the language of your 2. -
Page 20: Troubleshooting
All manuals and user guides at all-guides.com Troubleshooting No Display or Incorrect Display • If using an AC wall adapter make • If the idle display is not similar to sure the DC jack is properly con- that shown on Page 4, try reboot- nected at the rear of the telephone. -
Page 21: Safety And Compliance
Modifications In accordance with Part 15 of the FCC approved by Polycom, Inc. could void the Rules, the user is cautioned that any user’s authority to operate the equipment. changes or modifications not expressly... -
Page 22: Plug Acts As Disconnect Device
Polycom or its Products returned to Polycom must be authorized reseller. sent prepaid and packaged appropriately Polycom’s sole obligation under this ex-... -
Page 23: Exclusions
THER IN FACT OR BY OPERATION OF USE OF ITS PRODUCTS. LAW, STATUTORY OR OTHERWISE, Service Agreements Please contact your Polycom Authorized Reseller for information about service agree- ments applicable to your product. Limitations of Liability LIMITATION OF LIABILITY. TO THE... -
Page 24: Limitations Of Liability
Limited Warranty and Limitation of Polycom, the Polycom logo design, and Liability. SoundPoint are trademarks of Polycom, All rights reserved under International and Inc. - Page 25 Milpitas, CA 95035 ©2003 Polycom, Inc. All Rights Reserved. Polycom®, SoundPoint®, and the Polycom logo design are registered trademarks of Polycom, Inc. in the U.S. and various countries. All other trademarks are the property of their respective compainies. 1725-11519-001 Rev. A...