Powermatic SLR12 Operating Instructions And Parts Manual
Straight line rip saw
Hide thumbs
Also See for SLR12:
- Brochure & specs (4 pages) ,
- Operating instructions and parts manual (32 pages)
Table of Contents
Advertisement
Quick Links
Advertisement
Table of Contents
Troubleshooting

Related Manuals for Powermatic SLR12


Summary of Contents for Powermatic SLR12
- Page 1 This .pdf document is bookmarked Operating Instructions and Parts Manual Straight Line Rip Saw Model SLR12 Powermatic 427 New Sanford Road LaVergne, TN 37086 Part No. M-0460276 Ph.: 800-274-6848 Revision G1 08/2019 www.powermatic.com Copyright © 2014 Powermatic...
-
Page 2: Important Safety Instructions
5. Do not use this rip saw for other than its intended use. If used for other purposes, Powermatic disclaims any real or implied warranty and holds itself harmless from any injury that may result from that use. - Page 3 24. Use the right tool at the correct speed and feed rate. Do not force a tool or attachment to do a job for which it was not designed. The right tool will do the job better and safer. 25. Use recommended accessories; improper accessories may be hazardous. 26.
-
Page 4: Table Of Contents
Table and Stand Assembly – Exploded View ..................26 Parts List: Table and Stand Assembly ....................27 Electrical Control Panel (SLR12-443) – Parts List & Diagram ..............29 Electrical Connections – 3 Phase, 230V, 60Hz ..................30 ... -
Page 5: Introduction
Introduction This manual is provided by Powermatic covering the safe operation and maintenance procedures for a Powermatic Model SLR12 Rip Saw. This manual contains instructions on installation, safety precautions, general operating procedures, maintenance instructions and parts breakdown. This machine has been designed and constructed to provide consistent, long-term operation if used in accordance with instructions set forth in this manual. -
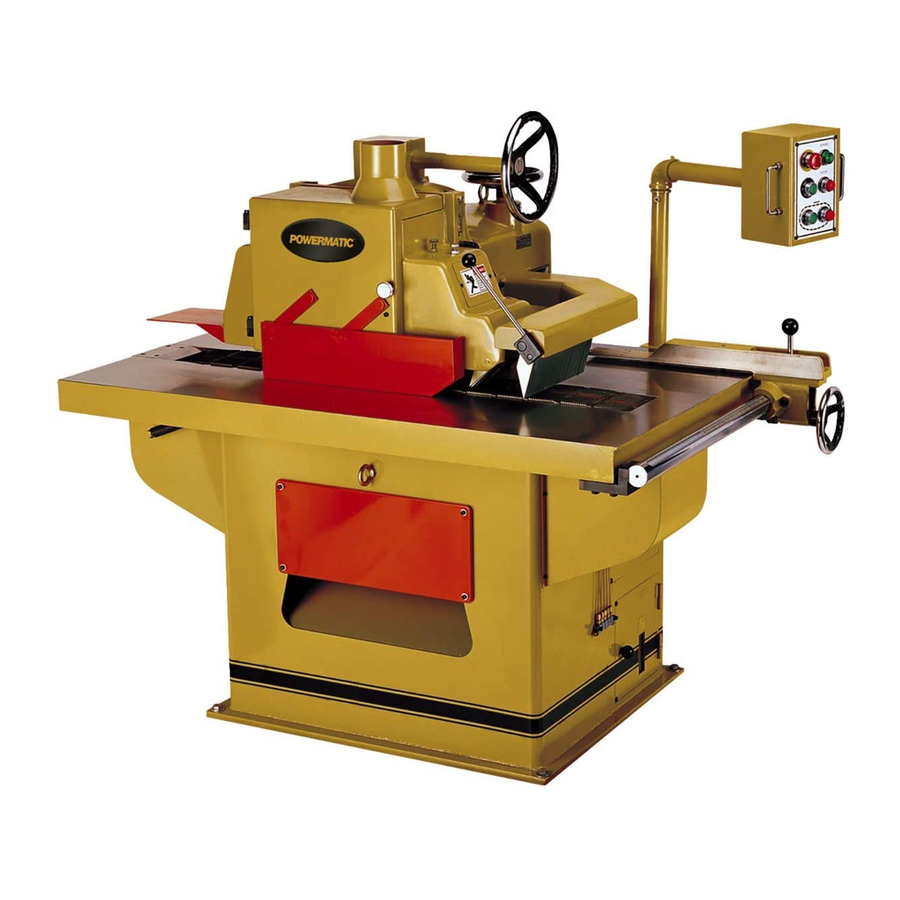
Page 6: Features
Features Figure 1... -
Page 7: Receiving
Receiving Open shipping container and check for shipping damage. Report any damage immediately to your distributor and shipping agent. Do not discard any shipping material until the Rip Saw is installed and running properly. Compare the contents of your container with the following parts list to make sure all parts are intact. -
Page 8: Control Box
The machine must be properly grounded to help prevent electrical shock and possible death. A power plug is not provided with the SLR12. You may either connect one, or "hard-wire" the saw directly to your electrical panel provided there is a disconnect near the machine for the operator. -
Page 9: Operating Controls
460V overload relay (separate purchase, p/n SLR12-611A). Set relay to 5. Replace 230V overload relay for conveyor motor with 460V overload relay (separate purchase SLR12-609AA). Set relay to 3A. 6. If using plug, replace with proper 460V plug. Operating Controls... -
Page 10: Mounting The Fence
8. Close blade guard and tighten knurled knob. Mounting the Fence 1. Slide the fence casting onto the end of the guide bar while pulling back the main lock handle (Figure 9). 2. The fence is moved along the guide bar by rotating the handwheel. -
Page 11: Feed Speed
Feed Speed The feed speed adjuster is found below the gearbox (Figure 13). Feed speed should be adjusted while the machine is running and the caterpillar is in motion. Turn adjuster clockwise to decrease feed speed, counterclockwise to increase. Fence Alignment For accurate cutting, the fence must be parallel to the line of cut: Figure 13... -
Page 12: Oiler Adjustment
Oiler Adjustment 1. Remove plastic cover. 2. Loosen set screw (Figure 17) and rotate knurled dial clockwise to increase oil output; counter-clockwise to decrease oil output. The scale is in cubic centimeters. 3. Retighten set screw, and install plastic cover. Operation 1. -
Page 13: Maintenance
The track of caterpillar chain must be kept compressed air. lubricated at all times by the machine's lubrication system. Optional Accessory Part No. Description SLR12-700 Laser Assembly Troubleshooting (Electrical) Trouble Probable Cause Remedy Power source not functioning. Check three phase power source. -
Page 14: Troubleshooting (Mechanical)
Troubleshooting (Mechanical) Trouble Probable Cause Remedy Saw arbor guard or rear guard not Saw arbor won’t run. Check and close guards. closed. Caterpillar won’t Variable speed belt too loose, or Adjust variable speed belt tension or move. dropped. replace belt. See page 11. Workpiece slips. -
Page 15: Replacement Parts
Serial Number of your machine available when you call will allow us to serve you quickly and accurately. Non-proprietary parts, such as fasteners, can be found at local hardware stores, or may be ordered from Powermatic. Some parts are shown for reference only, and may not be available individually. -
Page 16: Infeed Body Assembly - Exploded View
Infeed Body Assembly – Exploded View... -
Page 17: Infeed Body Assembly - Parts List
....SLR12-300 ....Cover Assembly (Items 1 thru 7) ............. 1 ....SLR12-100 ....Gear Box Assembly (Items 1 thru 10, 33, 36 and 43) ......1 1 ....TS-1502041 ..... Socket Head Cap Screw ........M5x16 ......4 2 .... -
Page 18: Arbor Spindle Assembly - Exploded View
Arbor Spindle Assembly – Exploded View... -
Page 19: Arbor Spindle Assembly - Parts List
Index No. Part No. Description Size ....SLR12-200 ....Arbor Spindle Assembly (Items 1 thru 13) ..........1 1 ....TS-1492041 ..... Hex Cap Screw ............ M12x40 ....... 1 2 ....TS-2361121 ..... Lock Washer ............M12 ......14 3 .... -
Page 20: Motor And Drive Unit Assembly - Exploded View
Motor and Drive Unit Assembly – Exploded View... -
Page 21: Motor And Drive Unit Assembly - Parts List
53 ..... SLR12-530 ....Shaft ....................... 38 54 ..... SLR12-531 ....Retaining Ring ............. C12 ......76 55 ..... SLR12-532 ....Ball Bearing Assembly ......... # UCP205 ....2 56 ..... SLR12-533 ....Shaft ......................1 57 ..... TS-1504051 ..... Socket Head Cap Screw ........M8x25 ......8... -
Page 22: Laser Assembly (Optional Accessory) - Parts List & Exploded View
10 ..... SLR12-706 ....Cord Holder ....................6 11 ..... SLR12-707 ....DC Power Connector (Male) ..............1 ....SLR12-714 ....Transformer Assembly (Items 12 thru 18) ..........2 12 ..... SLR12-708 ....DC Power Connector (Female)..............1 13 ..... -
Page 23: Roller And Frame Assembly - Exploded View
Roller and Frame Assembly – Exploded View... -
Page 24: Roller And Frame Assembly - Parts List
Index No. Part No. Description Size ....SLR12-300 ....Cover Assembly (Items 1 thru 7) ............. 1 1 ....SLR12-301 ....Cover w/ Dust Port ................... 1 2 ....SLR12-302 ....Rotation Shaft ..................2 3 ....SLR12-303 ....Special Screw ..................5 4 .... - Page 25 71 ..... SLR12-344 ....Limit Switch ....................1 72 ..... SLR12-345 ....Bracket ..................... 1 73 ..... SLR12-373 ....Lock Handle Label (Press Roller) ............1 74 ..... SLR12-135 ....Rivet ..............#3x5mm ...... 2 75 ..... 3312341 ....Powermatic Logo ..................1...
- Page 26 Table and Stand Assembly – Exploded View...
-
Page 27: Parts List: Table And Stand Assembly
Index No. Part No. Description Size .... SLR12-400FAN ..Fence Complete Assembly (Index 15, 20-24, 26-31, 52-58, 77, 81-84) .. 1 1 ....SLR12-401 ....Bracket ..................... 1 2 ....TS-1506051 ..... Socket Head Cap Screw ........M12x40 ....... 4 3 .... - Page 28 64 ..... SLR12-438 ....Start Button ....................2 65 ..... SLR12-440 ....Stop Button ....................2 67 ..... SLR12-442 ....Start Button, Power On ................1 68 ..... SLR12-443 ....Electrical Control Assembly ..............1 69 ..... SLR12-444 ....Handle ...................... 2 70 .....
-
Page 29: Electrical Control Panel (Slr12-443) - Parts List & Diagram
10 ..... SLR12-610 ....Switch ....... M1 ......LC1D256 ..... 1 11 ..... SLR12-611 ....Main Motor Overload ..OL1 (230V) ....LR3D22, 16~24A ..1 ....SLR12-611A .... Main Motor Overload ..OL1 (460V) ....LR3D16, 9~13A ..1 12 ..... -
Page 30: Electrical Connections - 3 Phase, 230V, 60Hz
Electrical Connections – 3 Phase, 230V, 60Hz... -
Page 31: Electrical Connections - 3 Phase, 460V, 60Hz
Electrical Connections – 3 Phase, 460V, 60Hz... -
Page 32: Preventive Maintenance
Preventive Maintenance Checklist for Model SLR12 Straight Line Rip Saw Work area around machine marked off clearly. Non-skid floor strips in area where operator normally stands. Inspect entire machine for loose bolts, nuts, screws. Tighten and replace as necessary. Clean table area, removing sawdust and chips with a soft bristle brush. Remove gum and pitch with oven cleaner. -
Page 33: Warranty And Service
Warranty and Service Powermatic warrants every product it sells against manufacturers’ defects. If one of our tools needs service or repair, please contact Technical Service by calling 1-800-274-6846, 8AM to 5PM CST, Monday through Friday. Warranty Period The general warranty lasts for the time period specified in the literature included with your product or on the official Powermatic branded website. - Page 34 This page intentionally left blank.
- Page 35 This page intentionally left blank.
- Page 36 427 New Sanford Road LaVergne, TN 37086 Phone: 800-274-6848 www.powermatic.com...